Medivisor India Treatment Logo
+91 83682 47758
info@medivisorhealth.com
  • Home
    • About Us
    • Our Services
    • Our Team
    • Our Safety Measures
    • Loading treatments...
    • Loading hospitals...
    • Loading doctors...
    • Treatment Cost
    • Treatment Process
    • Visa Process
    • Travel Guide
    • FAQs
    • Why Medivisor
    • Success Stories
    • Patient Activities
    • Social Activities
    • News Coverage
    • Blog
  • Become a Partner

Medivisor India Treatment is a trusted New Delhi–based medical travel company assisting international patients with advanced, affordable, and seamless treatment in India.

  • Medivisor House 359, Sector 1, Vaishali, Ghaziabad, (Delhi/NCR) India
  • +91 8368 247 758
  • info@medivisorhealth.com

About Us

  • About Us
  • Our Services
  • Our Team
  • Our Medical Advisors
  • Our Safety Measures
  • Join Our Network
  • Contact Us

India Treatment

  • Hospitals
  • Treatments
  • Treatment Cost
  • Treatment Process
  • Visa Process
  • Travel Guide
  • FAQs
  • Why Medivisor

Gallery

  • Patient Testimonials
  • Patient Activities
  • News Coverage
  • Blog

Get in Touch

© 2026 Medivisor India Treatment. All rights reserved.

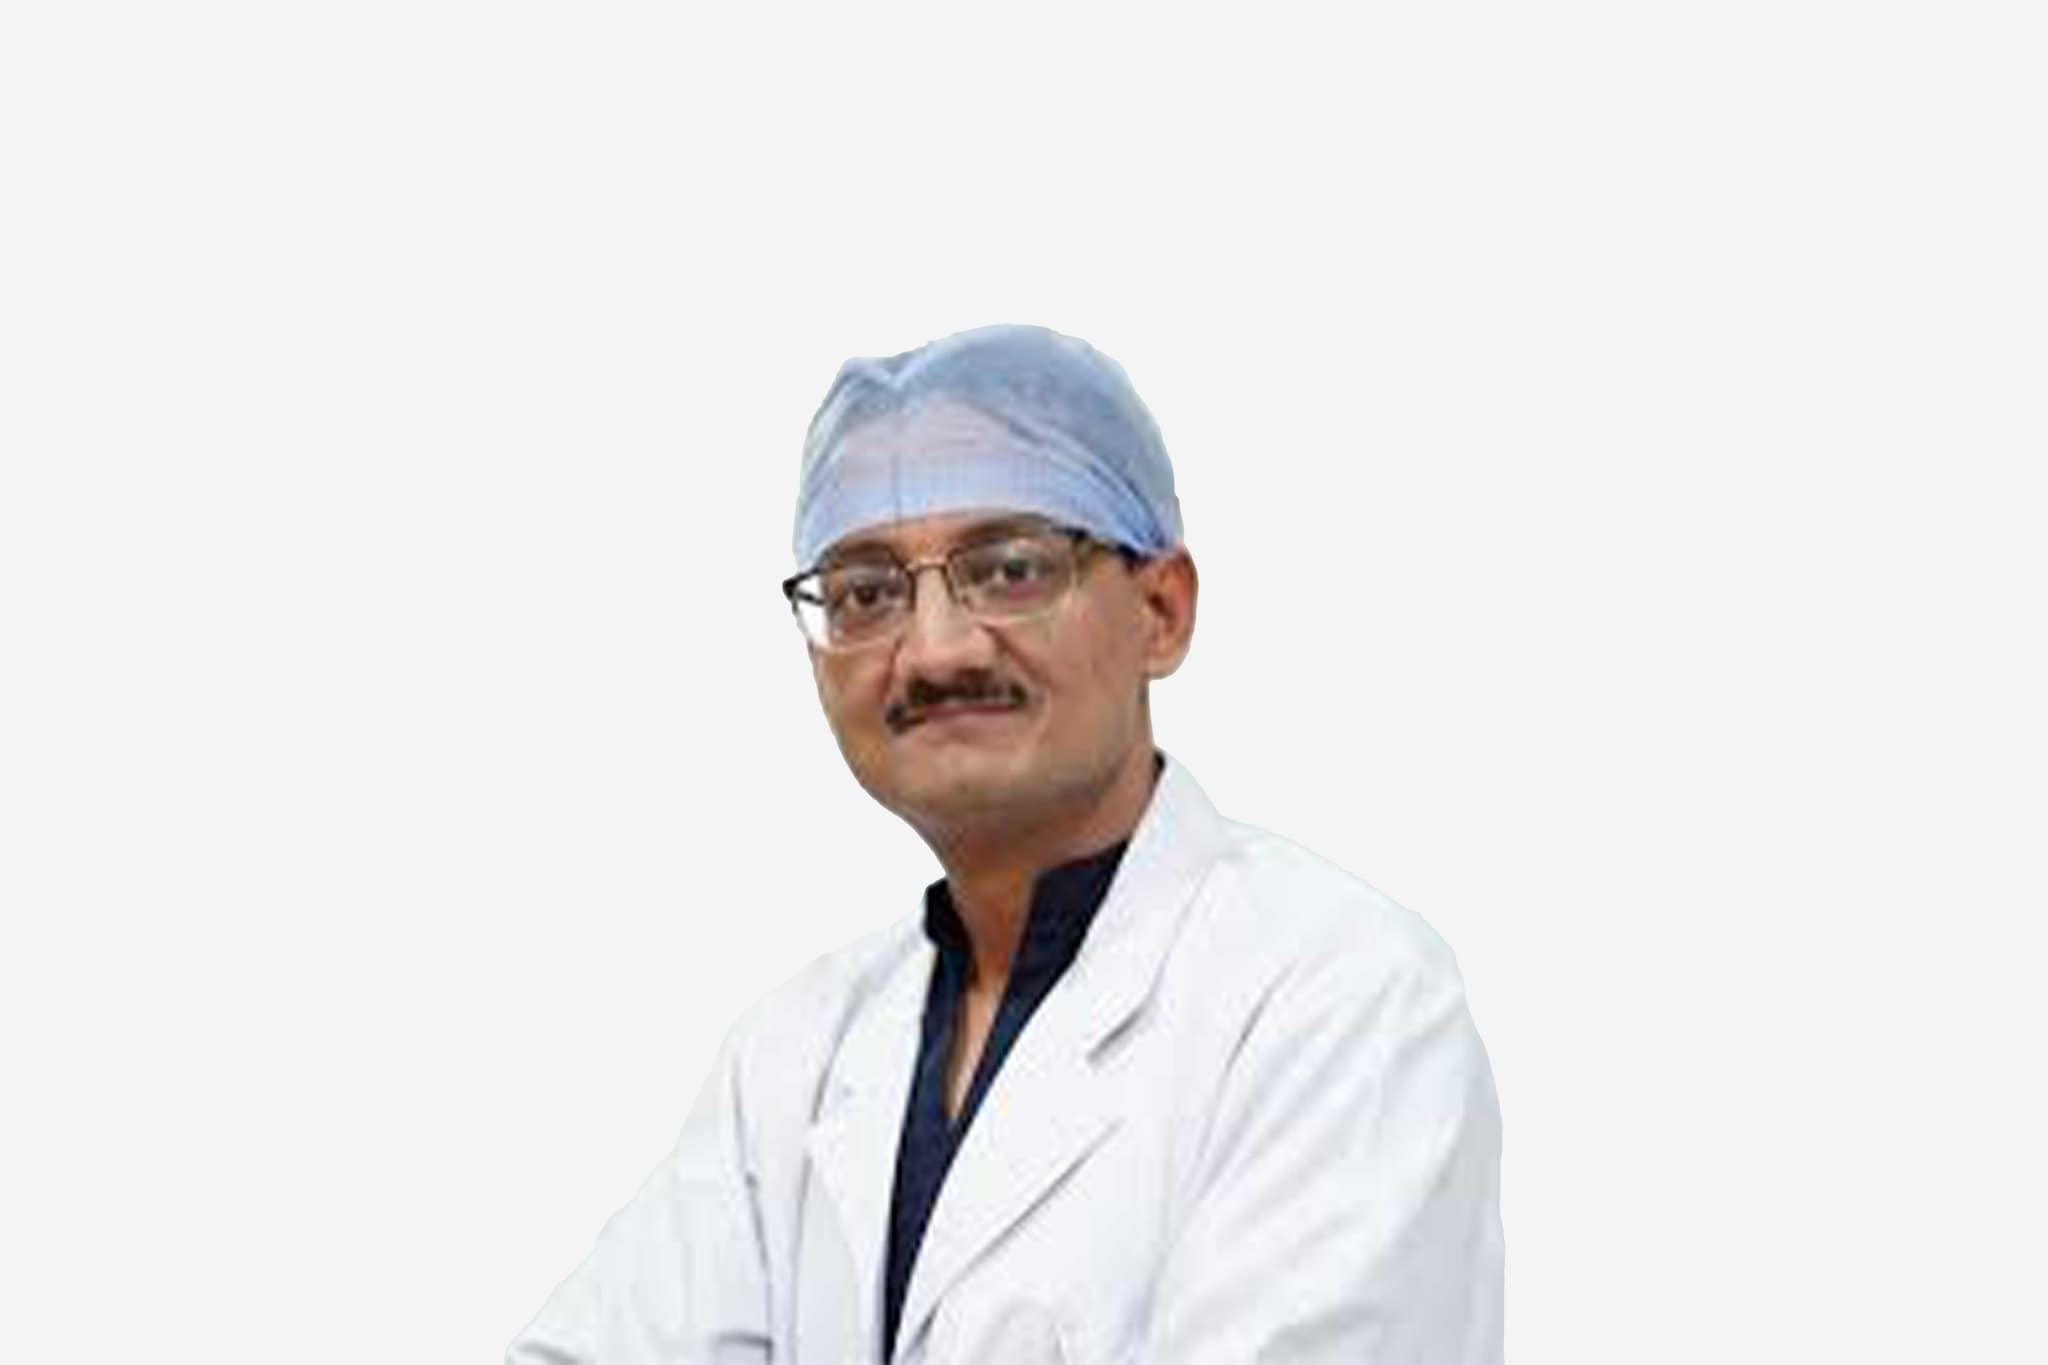
Dr Vikram Shah

Director – Joint Replacement Surgery

Shalby Multispecialty Hospital, Ahmedabad

Joint Replacement Surgeon

30+ years experience

Dr Vikram Shah, Director – Joint Replacement Surgery at Shalby Multispecialty Hospital, Ahmedabad - Shalby Hospitals
  1. Home
  2. Doctors
  3. Dr Vikram Shah

About Dr Vikram Shah

Dr. Vikram I. Shah is a world-renowned joint replacement surgeon and the Founder, Chairman, and Managing Director of Shalby Hospitals, headquartered in Ahmedabad, Gujarat. He completed his MS in Orthopedics followed by advanced surgical qualifications from the UK, Switzerland, and Germany. Returning to India in 1993, he revolutionized total knee replacement surgery by introducing the "OS Needle" and inventing the famous "Zero Technique." This innovation optimized surgical efficiency, slashing operation times to 8–10 minutes and drastically reducing hospital stays from 15 days to just 3–4 days.

Orthopedic Leadership and Institutional Scale

Under his leadership, Shalby Hospitals has grown from a humble six-bed clinic in 1994 into a major publicly listed healthcare chain (BSE/NSE) with 16 hospitals across 13 Indian cities and a capacity of over 2,000 beds. Today, it stands as the largest joint replacement center in the world, having performed more than 150,000 joint replacements. Dr. Shah also pioneered medical tourism in Gujarat, expanding high-quality tertiary healthcare access into tier-II and tier-III cities.

Dr. Vikram I. Shah at a Glance

  • Founder, Chairman, and Managing Director of Shalby Hospitals.

  • Completed MS in Orthopedics with advanced surgical fellowships in the UK, Germany, and Switzerland.

  • Invented the "OS Needle" and developed the revolutionary "Zero Technique."

  • Reduced total knee replacement surgery times down to just 8–10 minutes.

  • Cut post-operative hospital recovery stays down from 15 days to 3–4 days.

  • Expanded a six-bed clinic into a 16-hospital chain with over 2,000 beds.

  • Leads the largest joint replacement center globally with over 150,000 surgeries performed.

  • Set a personal world record in 2008 by performing 3,000 joint replacements in one year.

  • Pioneered medical tourism in Gujarat, expanding healthcare into tier-II and tier-III cities.

MS - Orthopedics, Honorary PhD
Board Certified in Joint Replacement Surgeon
Rajiv Gandhi National Quality Award 2010
FICCI Quality Award 2011
GIHED award 2011
ICICI emerging India award, Life Sciences 2012
ICICI emerging India award, Tech Savvy 2012
Yes Bank Business Today- Best SME 2013
Achieved Hercules Award for Innovation by Gujarat Innovation Society in April 2014
IMA Med Achievers Award 2014
Frost
Sullivan Award: Comprehensive Orthopedic Service Provider of the Year 2014
‘SKOCH ORDER OF MERIT’ for ‘SHALBY HOME CARE’ 2014
Received Dr. B.C. Roy International Award for joint replacement surgery in
Award from Johnson
Johnson for the invention of the OS needle
Award for outstanding work in the medical field by the Ahmedabad Medical Association during its 103 rd annual meeting in Ahmedabad, India
Vikram Shah was awarded the “Healthcare Entrepreneur of the Year” by Hurun, a United Kingdom headquartered organization. He has been awarded alongside some of the most respected entrepreneurs in the country.
Vikram Shah was awarded the prestigious ‘Healthcare Personality of the Year Award 2023’ by the Federation of Indian Chambers of Commerce
Industry (FICCI) at the 15th Edition of the FICCI Healthcare Excellence Awards ceremony held on October 26, 2023, at New Delhi.
Affiliated Hospitals

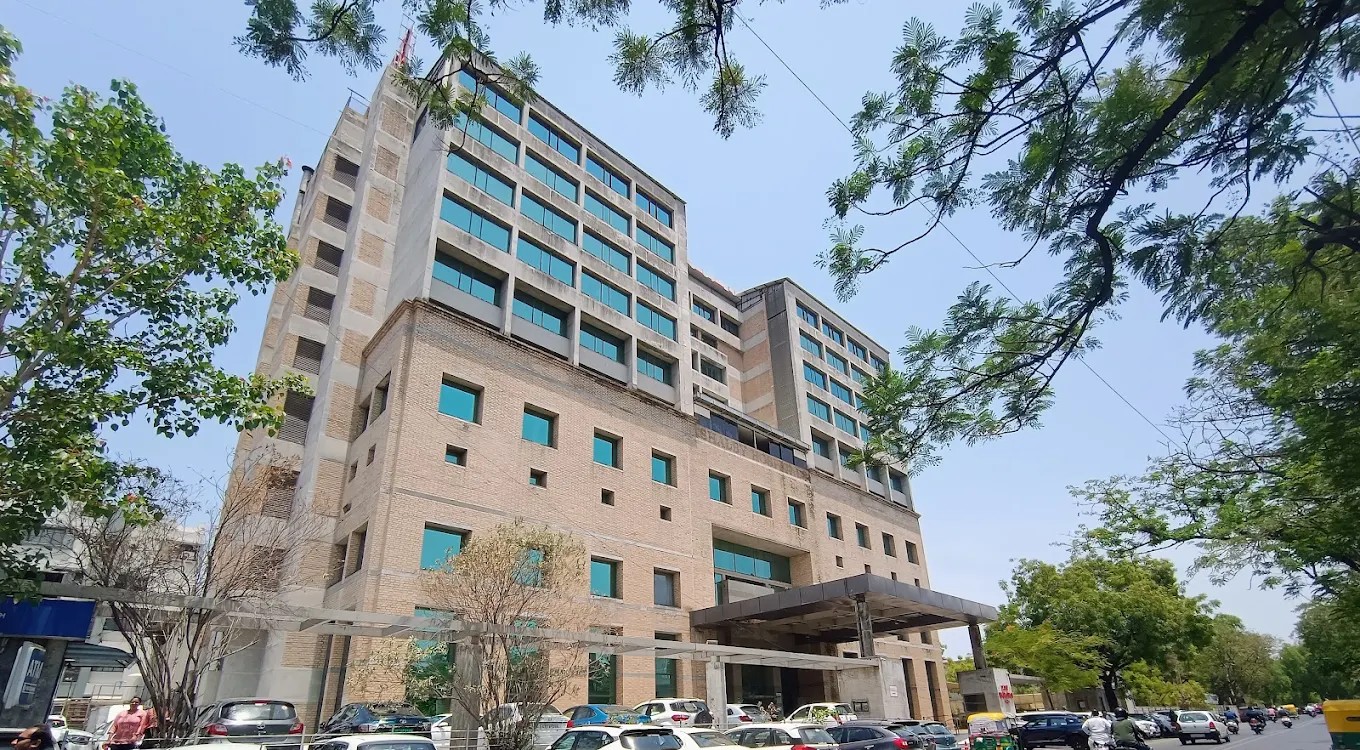
Shalby Multispecialty Hospital, Ahmedabad

Multi Specialty

Ahmedabad, Gujarat

2007

Estd.

200+

Beds

75+

Doctors

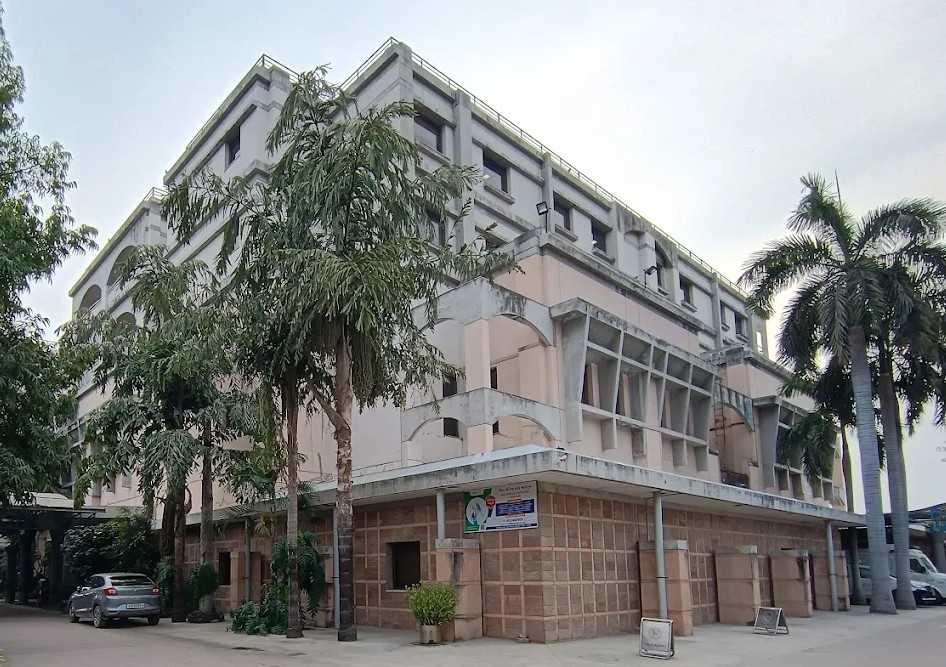
Krishna Shalby Hospital, Ghuma, Ahmedabad

Multi Specialty

Ahmedabad, Gujarat

2000

Estd.

220+

Beds

45+

Doctors

May we help you?

Enter digits only (6-15 digits). We'll add your country code.

Related Treatments

Total Knee Replacement (TKR)

Total Knee Replacement (TKR), also known as Total Knee Arthroplasty, is a major surgical procedure to resurface a damaged, arthritic, or diseased knee joint with artificial components (prostheses). It is most commonly performed for end-stage osteoarthritis where conservative treatments have failed.

When You Should Consider Total Knee Replacement

  • Severe knee pain or stiffness that limits everyday activities, such as walking or climbing stairs.

  • Moderate or severe knee pain while resting, either day or night.

  • Chronic knee inflammation and swelling that does not improve with rest or medications.

  • Knee deformity, such as a bowing in or out of the knee (knock-knees or bowlegs).

  • Failure to substantially improve with other treatments such as anti-inflammatory medications, cortisone injections, or physical therapy.

Methods of Total Knee Replacement

  • Standard TKR: The traditional surgical approach involving an 8- to 10-inch incision to resurface the entire joint.

  • Robotic-Assisted TKR: Utilizing advanced systems for ultra-precise bone cuts and ligament balancing to achieve a more "natural" joint feel.

  • Cemented Fixation: Using specialized bone cement (polymethylmethacrylate) to secure the metal components to the bone.

  • Cementless (Press-fit) Fixation: Relying on new bone growing into the surface of the implant, typically preferred for younger or more active patients.

  • Patellar Resurfacing: A specific technique where the undersurface of the kneecap is replaced with a plastic button.

How Total Knee Replacement Is Performed

  • Bone Preparation: Damaged cartilage and a small amount of underlying bone are removed from the ends of the femur and tibia.

  • Implant Positioning: A metal femoral shell and a metal tibial plate are precisely fixed to the prepared bone surfaces.

  • Spacer Insertion: A medical-grade plastic (polyethylene) insert is placed between the metal components to ensure a smooth gliding surface.

  • Ligament Balancing: The surgeon adjusts the surrounding ligaments to ensure the knee joint moves with proper tension and stability.

  • Closure: The incision is closed with sutures or surgical staples, and a sterile dressing is applied to the front of the knee.

Pre-Procedure Preparation

  • Comprehensive medical evaluation, including weight-bearing X-rays and blood work.

  • Pre-habilitation exercises focused on strengthening the quadriceps and hamstrings to speed up recovery.

  • Cardiac clearance for patients with a history of heart conditions to ensure safety under anesthesia.

  • Fasting (NPO) and stopping certain medications, such as blood thinners, several days prior to surgery.

Tests Before Total Knee Replacement

  • Weight-Bearing X-rays: The primary imaging used to assess the extent of joint damage and bone alignment.

  • MRI Scan: Occasionally performed to provide a more detailed view of the soft tissues and bone condition.

  • Electrocardiogram (ECG): To evaluate heart rhythm and function before administering anesthesia.

  • Blood Panels: To check for anemia, infection risk, and to ensure proper kidney and liver function.

Life After Total Knee Replacement

  • Patients typically stand and take a few steps with a walker within 4 to 6 hours of surgery to prevent blood clots.

  • Hospital stays range from same-day discharge to 3 days, followed by 6–12 weeks of intensive physical therapy.

  • Achievement of 0° extension (straight leg) and at least 120° flexion (bend) is the primary goal of rehabilitation.

  • Use of blood thinners for 3–6 weeks is required to prevent Deep Vein Thrombosis (DVT).

  • High-impact sports like running are generally discouraged, but walking, swimming, and cycling are highly recommended.

Benefits of Total Knee Replacement

  • Significant pain relief and improved joint mobility in over 90% of patients.

  • Correction of knee deformities and restoration of proper leg alignment.

  • High durability, with modern implants lasting 15 to 20 years in the vast majority of cases.

  • Substantial improvement in the ability to perform daily tasks and overall quality of life.

Bilateral Total Knee Replacement

Bilateral Total Knee Replacement (BTKR) involves the surgical replacement of both knee joints with advanced prosthetic implants during a single clinical episode or a closely staged sequence. This procedure is optimized through robotic-assisted mapping and "Single-Stage" simultaneous protocols, allowing patients with severe bilateral arthritis to achieve symmetrical alignment and a faster, consolidated return to an active lifestyle.

When You Should Consider BTKR

  • Severe pain in both knees that interferes with daily activities like walking or climbing stairs.

  • Persistent joint stiffness in both legs, especially after waking up or sitting for long periods.

  • Visible bowing or "knock-knee" deformity affecting both legs.

  • Inadequate relief from non-surgical treatments like injections, physical therapy, or NSAIDs.

  • Chronic inflammation and swelling that does not improve with rest or medication.

  • A significant decline in quality of life due to the inability to bear weight on either leg.

Conditions That Require Specialized Care

  • Advanced Bilateral Osteoarthritis resulting in "bone-on-bone" contact in both joints.

  • Severe Rheumatoid Arthritis causing systemic joint destruction.

  • Post-traumatic arthritis affecting both knees following prior injuries.

  • Complex joint deformities that require simultaneous correction for proper gait alignment.

  • Chronic end-stage joint disease in patients who prefer a single anesthesia and recovery event.

How Bilateral Knee Replacement Is Performed

  • 3D CT mapping or robotic software is used to create a digital blueprint of both knee joints.

  • Simultaneous or Sequential surgery is performed under a single general or spinal anesthetic.

  • Damaged bone and cartilage are precisely removed from the femur, tibia, and patella.

  • High-grade metal and plastic prosthetic components are securely fixed to the bone surfaces.

  • Real-time balancing is conducted to ensure both knees have symmetrical tension and range.

  • Immediate post-operative mobilization begins within 24 hours to promote blood flow.

Types of BTKR Surgical Approaches

  • Simultaneous Bilateral TKR Both knees are replaced during a single surgery, offering the convenience of one hospital stay and one rehab period.

  • Staged Bilateral TKR Two separate surgeries performed at least 90 days apart, reducing initial cardiovascular strain and allowing one leg to heal first.

  • Sequential Same-Day TKR Both knees are replaced one after the other on the same day during a single hospital admission.

  • Robotic-Assisted BTKR The use of robotic arms (like Mako or ROSA) to achieve millimeter-level precision in implant alignment for both legs.

  • Patient-Specific Implants (Conformis) Custom-made implants designed from a patient’s CT scan to fit their unique anatomy perfectly.

  • Minimally Invasive Quad-Sparing Surgery Techniques designed to bypass the major thigh muscles, potentially reducing early post-operative pain.

Pre-Surgery Preparation

  • Strengthen the upper body to prepare for using a walker or crutches without a "strong" leg for support.

  • Optimize cardiovascular and renal health, as simultaneous BTKR is physically demanding.

  • Arrange for a 2–3 week stay at a rehabilitation facility or intensive home-care support.

  • Modify your home environment by removing rugs and installing grab bars or a raised toilet seat.

  • Stock up on prepared meals and ensure a dedicated caregiver is available for the first few weeks.

Pre-Surgery Tests

  • Standing Weight-Bearing X-rays to assess the full extent of joint narrowing and misalignment.

  • 3D CT Scan for robotic planning or customized implant manufacturing.

  • Electrocardiogram (EKG) and Cardiac Clearance to ensure the heart can handle a longer surgery.

  • Complete Blood Count (CBC) and Metabolic Panel to screen for anemia or underlying infections.

  • Nasal swab screening for MRSA to implement pre-emptive infection control protocols.

Why BTKR Is Highly Effective

  • Eliminates the risk of a "bad" leg hindering the recovery of a "new" leg, ensuring symmetrical healing.

  • Reduces overall healthcare costs by 18% to 36% compared to two separate staged surgeries.

  • Accelerates the total return to normal life by approximately 3 months through a single rehab cycle.

  • Corrects bilateral deformities simultaneously, resulting in a more natural and balanced gait.

  • Features a high patient satisfaction rate for those who meet the 2026 strict "ideal candidate" criteria.

Recovery After Treatment

  • Early mobilization in the hospital using a walker, focusing on achieving a 70–90° knee bend.

  • Intensive inpatient or outpatient physical therapy to manage pain and prevent joint stiffness.

  • Use of ice machines and elevation "above the heart" for 40 minutes each hour to control swelling.

  • Gradual transition from a walker to a cane, typically occurring between weeks 3 and 6.

  • Monitoring for signs of blood clots (DVT) through compression stockings and prescribed blood thinners.

Life After Bilateral Knee Replacement

  • Resumption of low-impact activities like swimming, cycling, or golfing within 3 to 6 months.

  • Significant reduction in chronic pain and a dramatic increase in walking distance and mobility.

  • Requirement for a lifelong commitment to low-impact exercise to maintain muscle strength and joint health.

  • Annual follow-up appointments with the orthopedic team to monitor the wear of the implants.

  • Notification of security personnel at airports, as metal implants will likely trigger detectors.

Revision Knee Replacement

Revision Total Knee Replacement (RTKR) is a complex surgical procedure to replace a previously implanted artificial knee joint that has failed, worn out, or become infected. It is technically more demanding than a primary replacement because there is often less healthy bone remaining, requiring specialized components and techniques.

When You Should Consider Revision Total Knee Replacement

  • Increased pain or a "giving way" sensation in a previously replaced knee.

  • New onset of swelling, redness, or warmth, which may indicate a late-stage infection.

  • Noticeable instability or a feeling that the knee joint is loose during movement.

  • Aseptic loosening, where the bond between the metal and bone has broken down.

  • Mechanical wear of the original plastic spacer, leading to bone-on-metal contact.

Methods of Revision Total Knee Replacement

  • Single-Stage Revision: The removal of old components and placement of new ones during a single operation, typically for non-infected failures.

  • Two-Stage Revision: The gold standard for infection, involving the temporary placement of an antibiotic spacer followed by a second surgery weeks later.

  • Augmentation: Using metal pieces (augments) or "cones" to fill holes or voids where bone has been lost.

  • Bone Grafting: Utilizing donor bone (allograft) to rebuild the platform for the new implant.

  • Stemmed Fixation: Using revision implants with long stems that reach deep into the femur and tibia for added stability.

How Revision Total Knee Replacement Is Performed

  • Component Removal: The surgeon delicately removes the original metal and plastic parts while preserving as much healthy bone as possible.

  • Debridement: Removal of scar tissue and any infected tissue or "biofilm" found within the joint space.

  • Structural Rebuilding: Reconstructing the bone platform using grafts or metal augments to ensure a level surface for the new joint.

  • Constrained Implant Placement: Installing a new joint mechanism that is more rigid to compensate for weakened or damaged ligaments.

  • Fixation: Securing the new, longer-stemmed components using specialized bone cement or press-fit technology.

Pre-Procedure Preparation

  • Extensive diagnostic testing, including specialized X-rays, CT scans, or MRIs to assess bone loss.

  • Mandatory blood tests (CRP and ESR) and joint fluid aspiration to rule out hidden infections.

  • Surgical planning that may involve 3D-printed models of the patient's specific bone structure.

  • Medical optimization, including heavy sedation or general anesthesia, to prepare for a longer surgery (2 to 4 hours).

Tests Before Revision Total Knee Replacement

  • Joint Fluid Aspiration: Drawing fluid from the knee to check for bacteria or high white blood cell counts.

  • CT and MRI Scans: To provide a detailed map of bone voids and the integrity of the surrounding soft tissue.

  • ESR and CRP Blood Tests: Markers used to detect systemic inflammation or localized infection.

  • Specialized Revision X-rays: To evaluate the alignment and stability of the existing implants before removal.

Life After Revision Total Knee Replacement

  • Hospital stays are typically longer than primary replacements, ranging from 3 to 5 days.

  • Weight-bearing may be restricted to "partial" status with crutches or a walker for 6 to 12 weeks.

  • Physical therapy is more intensive and slower-paced due to the presence of significant scar tissue.

  • Revision implants typically have a lifespan of 10 to 15 years, slightly shorter than primary implants.

  • While 80–90% of patients achieve good results, the range of motion may be slightly less than after the first surgery.

Benefits of Revision Total Knee Replacement

  • Successfully restores mobility and relieves chronic pain caused by a failed primary implant.

  • Addresses life-threatening or joint-threatening infections through the two-stage process.

  • Provides a stable joint for patients who have suffered significant bone loss or ligament damage.

  • Utilizes advanced stemmed technology to ensure the new joint remains secure within the bone.

Partial Knee Replacement

A Partial Knee Replacement (PKR), also known as Unicompartmental Knee Arthroplasty, is a surgical procedure where only the damaged part of the knee is replaced with metal and plastic components. Unlike a Total Knee Replacement, this surgery preserves the healthy bone, cartilage, and ligaments in the rest of the knee.

When You Should Consider Partial Knee Replacement

  • Arthritis that is strictly confined to only one "compartment" of the knee (typically the inner side).

  • Persistent knee pain that has not responded to non-surgical treatments like physical therapy or injections.

  • Maintenance of intact and healthy ligaments, specifically the ACL and PCL.

  • Desire for a more "natural" feeling joint and a faster return to daily activities.

  • Absence of inflammatory conditions like Rheumatoid arthritis or significant joint stiffness.

Methods of Partial Knee Replacement

  • Medial Unicompartmental Arthroplasty: Replacing the inner compartment of the knee, which is the most common PKR site.

  • Lateral Unicompartmental Arthroplasty: Replacing the outer compartment of the knee joint.

  • Patellofemoral Arthroplasty: Replacing only the "track" under the kneecap (patella).

  • Robotic-Assisted PKR: Utilizing robotic guidance to ensure the precise removal of bone and accurate implant alignment.

  • Cemented Fixation: Securing the metal femoral and tibial components using high-strength bone cement.

How Partial Knee Replacement Is Performed

  • Bone Preparation: The surgeon removes a thin layer of damaged bone and cartilage only from the diseased area of the femur and tibia.

  • Implant Fitting: A small metal cap is placed on the end of the thigh bone, and a small metal tray is fixed to the shin bone.

  • Spacer Insertion: A medical-grade plastic (polyethylene) insert is snapped into the tibial tray to create a smooth gliding surface.

  • Ligament Preservation: The surgeon carefully works around the natural ligaments to ensure they remain functional and intact.

  • Closure: The small incision is closed with sutures or surgical glue, typically resulting in less scarring than a total replacement.

Pre-Procedure Preparation

  • Comprehensive evaluation using weight-bearing X-rays and sometimes MRI to confirm the other two compartments are healthy.

  • Discussion regarding the potential "conversion" to a Total Knee Replacement if more widespread damage is found during surgery.

  • Fasting (NPO) and preoperative medical clearance for either spinal or general anesthesia.

  • Identifying the specific compartment (medial, lateral, or patellofemoral) targeted for resurfacing.

Tests Before Partial Knee Replacement

  • Weight-Bearing X-rays: The primary imaging used to assess the location and severity of arthritis.

  • MRI Scan: Used to ensure the ligaments (ACL/PCL) are healthy and that the non-diseased compartments have intact cartilage.

  • Physical Range-of-Motion Test: To check for significant knee stiffness that might make a total replacement a better option.

  • Blood Panels: Routine testing to check for infection risk and general surgical readiness.

Life After Partial Knee Replacement

  • Often performed as an outpatient procedure, allowing patients to return home the same day.

  • Mobilization begins quickly, with patients often walking with a cane or walker within 2–4 hours.

  • Recovery is typically faster than TKR, with most patients regaining a full range of motion in 2–4 weeks.

  • Physical therapy is essential but generally less intense due to the preservation of natural knee structures.

  • Long-term monitoring is required to ensure arthritis does not develop in the untreated sections of the knee.

Benefits of Partial Knee Replacement

  • The knee often has a more "natural" feel because the original ligaments are preserved.

  • Generally results in a better "bend" (flexion) and range of motion compared to a total replacement.

  • Smaller incisions lead to significantly less post-operative pain, swelling, and blood loss.

  • Modern implants are highly durable, often lasting 15 to 20 years in appropriately selected patients.

Total Hip Replacement (THR)

Total Hip Replacement (THR), also known as Total Hip Arthroplasty, is a major surgical procedure where a damaged or diseased hip joint is replaced with an artificial joint (prosthesis). It is most commonly performed to treat advanced osteoarthritis, rheumatoid arthritis, or hip fractures.

When You Should Consider Total Hip Replacement

  • Hip pain that keeps you awake at night or limits daily activities like walking or bending.

  • Stiffness in the hip that limits the ability to move or lift the leg.

  • Inadequate pain relief from anti-inflammatory drugs, physical therapy, or walking supports.

  • Advanced joint damage or "bone-on-bone" contact visible on X-ray imaging.

  • Difficulty performing simple tasks such as putting on shoes and socks.

Methods of Total Hip Replacement

  • Posterior Approach (Back): The traditional method providing excellent visibility; involves a slightly higher risk of post-operative dislocation.

  • Anterior Approach (Front): A technique that parts the muscles rather than cutting them, often leading to less initial pain and a faster recovery.

  • Lateral Approach (Side): A balanced approach providing stable access to the joint, though it may cause temporary muscle irritation.

  • Cemented Fixation: Using specialized bone glue to secure the prosthesis, often used for older patients with thinner bone.

  • Press-fit (Cementless) Fixation: Featuring a porous metal surface that allows natural bone to grow into the implant over time.

How Total Hip Replacement Is Performed

  • Femoral Head Removal: The surgeon removes the damaged "ball" of the thigh bone to prepare for the new prosthesis.

  • Acetabular Preparation: The "socket" in the pelvic bone is hollowed out to fit the new artificial cup.

  • Cup and Liner Placement: A metal cup is pressed or screwed into the socket, and a plastic, ceramic, or metal liner is snapped inside.

  • Stem Insertion: A metal stem is inserted into the hollow center of the femur to provide a stable foundation.

  • Ball Attachment: A metal or ceramic ball is attached to the top of the stem to complete the new "ball-and-socket" joint.

Pre-Procedure Preparation

  • Comprehensive evaluation including X-rays to measure the exact "cup" and "ball" sizes for the implants.

  • "Pre-hab" exercises to strengthen the gluteal muscles, which are critical for supporting the new joint.

  • Medical clearance from specialists for patients with existing heart or lung conditions.

  • Fasting (NPO) and stopping specific medications, such as blood thinners, as directed by the surgical team.

Tests Before Total Hip Replacement

  • Hip X-rays: The primary tool used for surgical templating and assessing the severity of joint degradation.

  • Blood Panels: To ensure the patient is fit for surgery and to check for markers of systemic health.

  • Electrocardiogram (ECG): To evaluate heart function before the administration of spinal or general anesthesia.

  • Physical Assessment: To check current leg length and range of motion for post-operative comparison.

Life After Total Hip Replacement

  • Patients are typically required to stand and walk with a walker within 4 to 6 hours of surgery to prevent blood clots.

  • Hospital stays are generally 1 to 2 days, with some healthy patients eligible for same-day discharge.

  • Strict "hip precautions" are followed for 6–12 weeks, such as avoiding bending the hip past 90 degrees or crossing legs.

  • Mandatory use of blood thinners (Aspirin or Xarelto) for 3–6 weeks to prevent Deep Vein Thrombosis (DVT).

  • Most patients return to low-impact activities like walking, swimming, and cycling after the initial healing phase.

Benefits of Total Hip Replacement

  • Over 95% of patients report a total loss of hip pain and a significant increase in mobility.

  • Provides a highly durable solution, with modern implants expected to last 20 to 25 years.

  • Restores the ability to perform daily tasks that were previously impossible due to joint stiffness.

  • Corrects physical deformities and helps normalize gait and leg alignment.

Hip Replacement (Cemented/Uncemented)

Total hip replacements are classified by how the artificial components are secured to the bone. While both methods are highly successful, the choice depends on the patient's bone quality, age, and activity level.

When You Should Consider Each Method

  • Cemented: Preferred for patients over 70 or those with osteoporosis whose bone may be too porous to grow into an implant.

  • Uncemented: Ideal for younger, active patients (typically under 65) with strong, healthy bone density.

  • Hybrid Approach: In some cases, a surgeon may use a cemented stem in the femur and an uncemented cup in the socket.

  • Revision Surgery: Often utilizes specialized versions of either method depending on the amount of remaining healthy bone.

Methods of Fixation

  • Cemented Fixation: Utilizing surgical-grade polymethylmethacrylate (PMMA) to create a tight mechanical interlock between the metal and the bone.

  • Uncemented (Press-fit) Fixation: Relying on a high-precision friction fit followed by natural bone growth into a porous metal surface.

  • Biological Fixation: The process where natural bone cells migrate into the "beaded" coating of an uncemented implant over 6 to 12 weeks.

  • Antibiotic-Loaded Cement: A variation where cement is pre-mixed with antibiotics to provide localized protection against infection.

How the Procedures Are Performed

  • Bone Preparation: The surgeon clears the arthritic bone and prepares the hollow center of the femur and the acetabular socket.

  • Grout Injection (Cemented): Wet PMMA is injected into the bone cavity immediately before the components are pressed into place.

  • Precision Carving (Uncemented): The bone is carved to be slightly smaller than the implant to ensure an extremely tight fit when hammered into position.

  • Impacting the Component: For cementless types, the metal components are impacted until they achieve a stable "friction fit" against the healthy bone.

  • Curing: For cemented types, the surgeon holds the implant perfectly still for 10 to 12 minutes while the cement hardens completely.

Pre-Procedure Preparation

  • Bone density scanning (DEXA) may be performed to determine if the bone is strong enough for an uncemented implant.

  • Pre-operative templating using X-rays to ensure the high-precision tools match the size of the selected uncemented components.

  • Evaluation of allergy history, specifically regarding the components of surgical bone cement or specific metals like Titanium.

  • Fasting (NPO) and standard surgical clearance for general or spinal anesthesia.

Tests Before Fixation Selection

  • Weight-Bearing X-rays: To assess the "fit and fill" of the femoral canal and the quality of the pelvic bone.

  • DEXA Scan: To provide a definitive measure of bone mineral density in the hip region.

  • Blood Panels: To ensure the patient is a candidate for surgery and to check for systemic inflammation.

  • Cardiac Clearance: Particularly for cemented procedures, to ensure the heart can tolerate potential pressure changes during cement implantation.

Life After the Procedure

  • Cemented Recovery: Patients can usually put full weight on the leg within hours, as the bond reaches maximum strength almost instantly.

  • Uncemented Recovery: Some surgeons require 4–6 weeks of "partial weight-bearing" with crutches to allow the bone to grow into the metal.

  • Long-term Monitoring: Uncemented implants are designed to become a permanent part of the skeleton, while cement may eventually degrade after 20–25 years.

  • Activity Levels: Uncemented implants are specifically designed to withstand the higher mechanical stresses of a more active lifestyle.

Benefits of Each Approach

  • Cemented Benefits: Provides an immediate, rock-solid foundation and allows for the localized delivery of antibiotics.

  • Uncemented Benefits: Preserves more natural bone and offers the potential for a longer-lasting, biological bond that does not "wear out" like cement.

  • Reduced Failure Rates: Both methods reduce the failure rate of hip replacements to very low levels compared to historical techniques.

  • Customization: Surgeons can tailor the fixation method to the specific anatomy and bone health of each individual patient.

Revision Hip Replacement

Revision Hip Replacement is a complex surgical procedure performed to replace a previously implanted artificial hip joint that has failed due to wear, infection, or injury. It is significantly more challenging than primary hip surgery because it involves working with compromised bone, scar tissue, and often significant bone loss.

When You Should Consider Revision Hip Replacement

  • Persistent or new pain in a hip that was previously replaced.

  • A "clunking" or "giving way" sensation during movement or walking.

  • Redness, warmth, or drainage around the old surgical scar, which may indicate infection.

  • Recurrent dislocations where the ball pops out of the socket repeatedly.

  • A fall or injury resulting in a fracture of the bone surrounding the existing implant.

Methods of Revision Hip Replacement

  • Single-Stage Revision: The removal of failed components and the immediate implantation of new ones in one operation.

  • Two-Stage Revision: The gold standard for treating deep infections; involves the temporary use of an antibiotic spacer followed by a later permanent replacement.

  • Modular Stem Implantation: Using specialized implants with long, adjustable stems that reach deep into the femur for stability.

  • Acetabular Reconstruction: Using metal augments, tantalum cones, or specialized "cages" to rebuild a damaged hip socket.

  • Bone Grafting: Utilizing donor bone (allograft) to fill "voids" or holes in the patient's natural bone.

How Revision Hip Replacement Is Performed

  • Component Extraction: The surgeon carefully removes the old metal and plastic parts, ensuring the surrounding healthy bone is preserved.

  • Cement Removal: If the original implant was cemented, the hardened "glue" is meticulously cleared out of the bone canal.

  • Joint Debridement: Cleaning out scar tissue, inflammatory debris (osteolysis), or infected material from the joint space.

  • Structural Rebuilding: Reconstructing the hip foundation using metal augments or bone grafts to ensure a secure fit for the new joint.

  • Re-Implantation: Installing new components with longer stems and specialized liners to compensate for weakened bone and tissue.

Pre-Procedure Preparation

  • Extensive diagnostic imaging, including specialized X-rays and CT scans, to map out existing bone loss.

  • Laboratory testing (CRP and ESR) and joint fluid aspiration to rule out or identify hidden infections.

  • Medical optimization to ensure the patient can tolerate a longer surgery (typically 2 to 4+ hours).

  • Discussion of potential leg length discrepancy and the intensive rehabilitation timeline.

Tests Before Revision Hip Replacement

  • Joint Fluid Aspiration: Drawing a sample from the hip to test for bacteria and determine the appropriate antibiotic treatment.

  • CT and MRI Scans: To provide a 3D view of the bone "defects" and the condition of the surrounding soft tissues.

  • Inflammatory Markers: Blood tests used to detect systemic signs of infection or reaction to implant wear particles.

  • Specialized Revision X-rays: High-resolution images to evaluate the stability and alignment of the failing components.

Life After Revision Hip Replacement

  • Hospital stays are generally longer than primary replacements, typically ranging from 3 to 7 days.

  • Weight-bearing may be restricted to "partial" status with a walker or crutches for 6 to 12 weeks to protect bone grafts.

  • Strict "hip precautions" (no crossing legs or bending past 90 degrees) are enforced for at least 6 weeks post-op.

  • Physical therapy is critical and may continue for up to a year to rebuild muscles weakened by multiple surgeries.

  • Full recovery typically takes 6 to 12 months, and patients may notice a permanent but slight difference in leg length.

Benefits of Revision Hip Replacement

  • Effectively relieves chronic, debilitating pain caused by a failed or loose primary implant.

  • Restores the ability to walk and perform daily activities by stabilizing the hip joint.

  • Clears deep-seated infections that cannot be treated with antibiotics alone.

  • Rebuilds the structural integrity of the pelvis and femur following significant bone loss or fractures.

Hip Resurfacing
Hip Resurfacing

Hip Resurfacing is an alternative to total hip replacement designed to preserve more of the patient's natural bone. Instead of removing the entire head of the thigh bone (femur), the damaged surface is trimmed and capped with a smooth metal covering, maintaining the original anatomy of the femoral neck.

When You Should Consider Hip Resurfacing

  • Younger, active patients (typically under 60) who wish to return to high-impact activities.

  • Patients with strong bone density, particularly in the femoral neck region.

  • Desire for a joint that has a lower risk of dislocation due to the larger size of the artificial "ball."

  • When bone preservation is a priority to make potential future revision surgeries easier.

  • Advanced hip arthritis that has not responded to conservative management.

Methods of Hip Resurfacing

  • Metal-on-Metal Bearing: A specialized technique where a metal femoral cap moves directly against a metal pelvic socket.

  • Cemented Capping: Securing the mushroom-shaped metal cap to the shaped femoral head using a small amount of bone cement.

  • Press-Fit Acetabular Fixation: Placing a metal cup into the pelvic socket without cement, allowing the bone to grow into the implant.

  • Computer-Assisted Navigation: Utilizing digital mapping to ensure the precise alignment of the cap and socket during the procedure.

How Hip Resurfacing Is Performed

  • Socket Resurfacing: The arthritic surface of the pelvic socket (acetabulum) is removed and replaced with a durable metal cup.

  • Femoral Reaming: The surgeon shapes the existing "ball" of the femur into a cylinder rather than cutting it off entirely.

  • Cap Placement: A hollow metal cap is placed over the newly shaped femoral head to provide a smooth, new joint surface.

  • Alignment Verification: The surgeon ensures the metal-on-metal components are perfectly positioned to minimize friction and wear.

  • Closure: The incision is closed with sutures or surgical glue, following a path similar to a standard hip replacement.

Pre-Procedure Preparation

  • Precise X-rays and DEXA scans (bone density tests) to confirm the femoral neck can support the metal cap.

  • Screening for metal allergies, specifically to nickel, cobalt, or chromium.

  • Fasting (NPO) and standard medical clearance for either general or spinal anesthesia.

  • Discussion of gender-specific outcomes, as the procedure is most often indicated for male patients due to bone size and density requirements.

Tests Before Hip Resurfacing

  • DEXA Scan: The mandatory "gold standard" test to ensure the bone mineral density is high enough to prevent post-op fractures.

  • Template X-rays: High-resolution imaging used to determine the exact size of the cap and socket required.

  • Metal Ion Baseline: Sometimes performed to check pre-operative levels of cobalt and chromium in the blood.

  • Kidney Function Test: To ensure the body can effectively filter any microscopic metal ions released by the joint over time.

Life After Hip Resurfacing

  • Hospital stays are typically brief, ranging from 1 to 2 days.

  • Immediate weight-bearing is usually allowed with a walker or crutches.

  • Heavy impact activities, such as running or jumping, are restricted for 6 to 12 months while the bone strengthens.

  • Blood thinners (Aspirin or Xarelto) are required for 4–6 weeks to prevent Deep Vein Thrombosis (DVT).

  • Intensive physical therapy focuses on the abductor muscles to ensure a stable and natural walking pattern.

Benefits of Hip Resurfacing

  • Preserves the femoral head and neck, making future "standard" hip replacements much easier to perform.

  • Offers a significantly lower risk of dislocation because the artificial ball is nearly the same size as the natural one.

  • Allows for a safe return to high-impact sports and heavy lifting that might damage a standard hip replacement.

  • Provides a more "natural" range of motion and stable joint feel for younger, active individuals.

Total Shoulder Replacement

Shoulder replacement surgery, or shoulder arthroplasty, is a specialized procedure to replace the damaged "ball and socket" joint of the shoulder with high-performance artificial components. This procedure increasingly utilizes "Mixed Reality" navigation and Reverse Total Shoulder Replacement. By utilizing 3D-printed guides and digital mapping, this surgery restores pain-free motion and function for patients with advanced arthritis or complex rotator cuff failures.

When You Should Consider Shoulder Replacement

  • Chronic Shoulder Pain: Persistent pain that interferes with basic daily tasks like reaching into a cabinet, washing your hair, or getting dressed.

  • Severe Joint Stiffness: A loss of range of motion that prevents you from lifting your arm sideways or reaching behind your back.

  • Resting Pain: Shoulder pain that persists even while you are sitting or lying down and frequently interrupts your sleep.

  • Mechanical Symptoms: A noticeable "grinding," "clicking," or "popping" sensation within the joint during arm movement.

  • Functional Weakness: Significant weakness in the arm that makes it difficult to lift even light objects or perform overhead activities.

  • Treatment Failure: Inadequate relief from conservative measures such as physical therapy, cortisone injections, or anti-inflammatory medications.

Conditions That Require Specialized Care

  • Advanced Osteoarthritis: The "wear and tear" of the joint causing a total loss of the shoulder's protective cartilage.

  • Rotator Cuff Tear Arthropathy: A specific type of arthritis where a long-term, massive tendon tear leads to the destruction of the joint surface.

  • Complex Fractures: Severe proximal humerus (upper arm) fractures that cannot be reliably repaired with standard plates and screws.

  • Avascular Necrosis (Osteonecrosis): A condition affecting the blood supply to the bone of the humeral head, causing it to collapse.

  • Failed Prior Surgeries: Previous shoulder repairs or older replacements that have loosened or worn out, requiring a complex revision.

Types of Shoulder Replacement Procedures

  • Anatomic Total Shoulder Replacement: Replaces the joint while maintaining the natural "ball-on-top, socket-on-bottom" anatomy; ideal for patients with healthy, intact rotator cuffs.

  • Reverse Total Shoulder Replacement: Switches the position of the ball and socket to allow the deltoid muscle to lift the arm when the rotator cuff is missing or damaged.

  • Hemiarthroplasty: A partial replacement where only the "ball" (humeral head) of the joint is replaced, often used in specific trauma or fracture cases.

  • Stemless Shoulder Replacement: A bone-preserving technique that uses a smaller, bone-sparing anchor for the humeral head rather than a long stem inside the arm bone.

  • Outpatient Shoulder Arthroplasty: A modern protocol allowing healthy candidates to return home the same day as their procedure through advanced pain management.

[Image comparing an anatomic shoulder replacement vs. a reverse shoulder replacement]

How Is Performed

  • Digital Mapping: A pre-operative CT scan is converted into a 3D digital model to plan the exact size and placement of the implants.

  • Mixed Reality (MR) Navigation: During surgery, the surgeon may use a headset to project a holographic "GPS" map onto the patient's bone for extreme precision.

  • Humeral Preparation: The damaged "ball" (humeral head) is removed and replaced with a polished metal component.

  • Glenoid Resurfacing: The "socket" (glenoid) is cleaned of arthritis and fitted with a high-durability, medical-grade plastic liner.

  • Alignment Verification: 3D-printed "Patient-Specific Instrumentation" (PSI) guides are often used to ensure the components are aligned perfectly with the patient's unique anatomy.

  • Soft Tissue Balancing: The surgeon meticulously adjusts the tension of the surrounding muscles and ligaments to ensure the new joint is stable and mobile.

Pre-Procedure Preparation

  • "Pre-hab" Exercises: Strengthening the muscles around the scapula (shoulder blade) and forearm to assist with recovery.

  • One-Arm Practice: Practice performing daily tasks, such as eating or using a phone, with only your non-operated arm.

  • Home Modification: Set up a "recovery station" with easy-access clothing, pump-style soap, and pre-prepared meals.

  • Wardrobe Adjustments: Secure loose-fitting shirts or front-buttoning clothes that can easily accommodate a post-operative sling and bulky dressing.

  • Support System: Arrange for a support person to assist with household chores, pet care, and driving for the first 4 to 6 weeks.

Tests Before Shoulder Replacement

  • High-Resolution CT Scan: Essential for 3D reconstruction and the creation of surgical navigation plans and custom guides.

  • Shoulder MRI: Used to evaluate the health and integrity of the rotator cuff tendons, which determines the type of replacement needed.

  • X-rays (Multiple Views): Standard imaging to assess the degree of bone loss, joint deformity, and the "bone-on-bone" status.

  • General Health Screening: Complete Blood Count (CBC) and Metabolic Panel to ensure the body is ready for the procedure.

  • Cardiac Clearance: An EKG and physical exam to confirm the heart is fit for the chosen anesthesia (general or regional nerve blocks).

Recovery After Treatment

  • Sling Protection: The arm is kept in a protective sling for 4 to 6 weeks to protect the healing soft tissues and allow the implant to stabilize.

  • Passive Motion Therapy: Physical therapy usually begins within days, focusing on "passive" movements where a therapist or your other arm moves the operated limb.

  • Active Strengthening: Strengthening exercises are introduced gradually, typically around the 3-month mark, once the bone has successfully integrated with the implant.

  • Swelling Management: Utilizing specialized ice machines and sleeping in a semi-upright position (such as a recliner) to manage early post-operative discomfort.

  • Functional Milestone: While initial recovery is fast, most patients achieve their maximum strength and range of motion within 6 to 12 months.

Benefits of Specialized Shoulder Replacement

  • High Success Rate: Boasts a success rate exceeding 90% for significant, long-term pain relief and improved quality of life.

  • Navigation Accuracy: Uses advanced technology to eliminate the guesswork in "blind" socket placement, reducing the risk of early implant failure.

  • Restored Function: Enables patients with previously "inoperable" conditions to regain the ability to reach overhead and perform daily activities independently.

  • Implant Longevity: Utilizes advanced materials designed to resist wear for 15 to 20 years or more in most patients.

  • Active Lifestyle: Successfully restores the ability to participate in low-impact activities such as swimming, golf, doubles tennis, and yoga.

Reverse Shoulder Replacement

Reverse Total Shoulder Arthroplasty (RTSA) is a specialized surgery where the positions of the "ball" and "socket" in the shoulder joint are switched. It is primarily used when the rotator cuff muscles are severely damaged or non-functional, as the "reverse" design allows the larger deltoid muscle to take over the work of lifting the arm.

When You Should Consider Reverse Total Shoulder Arthroplasty

  • Rotator Cuff Tear Arthropathy: Severe arthritis combined with a massive, unrepairable rotator cuff tear.

  • Complex Fractures: Severe shoulder fractures where the bone is too damaged for a standard repair.

  • Failed Prior Replacements: When a standard shoulder replacement has failed or dislocated.

  • Pseudoparalysis: The inability to lift the arm despite having no nerve damage, usually due to massive cuff tears.

  • Chronic Pain: Shoulder pain that limits daily tasks and has not responded to injections or physical therapy.

Methods of Reverse Total Shoulder Arthroplasty

  • Standard RTSA: The traditional approach using a metal glenosphere on the shoulder blade and a socket on the humerus.

  • Revision RTSA: A more complex version performed to replace a failing or infected prior shoulder implant.

  • Computer-Navigated RTSA: Using 3D mapping during surgery to ensure the precise placement of screws in the thin shoulder blade bone.

  • Patient-Specific Instrumentation (PSI): Utilizing 3D-printed guides created from the patient's CT scan for highly accurate bone preparation.

  • Bony Increased Offset (BIO-RSA): A specialized technique using a bone graft behind the glenosphere to improve the range of motion.

How Reverse Total Shoulder Arthroplasty Is Performed

  • Bone Resurfacing: The surgeon removes the damaged surfaces of the humerus and the flat socket of the shoulder blade (glenoid).

  • Glenosphere Fixation: A metal ball is secured into the old socket using a baseplate and long surgical screws.

  • Humeral Socket Placement: A metal stem is inserted into the arm bone, topped with a plastic-lined socket where the natural ball used to be.

  • Deltoid Tensioning: The surgeon adjusts the height of the components to ensure the deltoid muscle is tight enough to lift the arm.

  • Verification: The joint is moved through a range of motion to ensure it remains stable and does not "pop out" or dislocate.

Pre-Procedure Preparation

  • Assessment of the deltoid muscle strength, as this muscle must be functional for the surgery to succeed.

  • Imaging via X-rays and MRI or CT scans to evaluate the quality of the remaining shoulder blade bone.

  • Fasting (NPO) and stopping blood-thinning medications several days before the procedure.

  • Receiving a regional nerve block in addition to general anesthesia to manage pain for the first 12–24 hours post-op.

Tests Before Reverse Total Shoulder Arthroplasty

  • CT Scan with 3D Reconstruction: Often considered the gold standard for measuring bone volume in the shoulder blade.

  • Electromyography (EMG): Occasionally performed to ensure the nerves supplying the deltoid muscle are healthy.

  • Shoulder X-rays: To visualize the "high-riding" humerus often seen in patients with massive rotator cuff tears.

  • Blood Panels: Routine screens to ensure the patient is fit for surgery and to check for markers of systemic health.

Life After Reverse Total Shoulder Arthroplasty

  • Hospital stays are typically brief, ranging from 1 to 2 days for monitoring.

  • A specialized shoulder immobilizer or sling must be worn 24/7 for the first 4 to 6 weeks.

  • Early "pendulum" exercises are encouraged, but active lifting of the arm usually does not begin until week 6.

  • Most patients regain the ability to lift their arm to shoulder level, though reaching behind the back remains a common limitation.

  • Patients are typically advised to observe a lifelong weight-lifting limit of 5 to 10 kg to protect the implant.

Benefits of Reverse Total Shoulder Arthroplasty

  • Provides a dramatic reduction in chronic shoulder pain for over 90% of patients.

  • Restores the ability to perform essential daily tasks, such as eating, grooming, and dressing.

  • Offers a reliable solution for patients who were previously told their shoulder condition was "unfixable."

  • Modern designs and precise surgical navigation have significantly increased the long-term durability of the joint.

Realted Specialist

Dr Amite Pankaj Aggarwal
Orthopedic Surgeon, Joint Replacement Surgeon
Fortis Hospital, Shalimar Bagh, New Delhi
27+years experience
View Profile
Dr Anil Arora
Dr Anil Arora
Orthopedic Surgeon, Joint Replacement Surgeon
Max Super Specialty Hospital, Patparganj
38+years experience
View Profile
Dr Anindansu Basu
Dr Anindansu Basu
Orthopedic Surgeon, Joint Replacement Surgeon
Fortis Hospital, Anandpur, Kolkata
17+years experience
View Profile
Dr Arun Kannan
Dr Arun Kannan
Orthopedic Surgeon, Joint Replacement Surgeon
Apollo Hospital, Greams Road, Chennai
16+years experience
View Profile
Dr Ashish Sao
Dr Ashish Sao
Orthopedic Surgeon, Joint Replacement Surgeon
Max Super Specialty Hospital, Vaishali
21+years experience
View Profile
Dr Ashok Rajgopal
Dr Ashok Rajgopal
Orthopedic Surgeon, Joint Replacement Surgeon
Medanta - The Medicity, Gurugram
50+years experience
View Profile
Dr Bhushan Nariani
Dr Bhushan Nariani
Spine Surgeon, Orthopedic Surgeon, Joint Replacement Surgeon
BLK-Max Super Specialty Hospital, Delhi
25+years experience
View Profile
Dr Chandrashekar P
Dr Chandrashekar P
Orthopedic Surgeon, Joint Replacement Surgeon
Sakra World Hospital
25+years experience
View Profile
Dr Dinshaw Pardiwala
Orthopedic Surgeon, Joint Replacement Surgeon
Kokilaben Dhirubhai Ambani Hospital
27+years experience
View Profile
Dr Govindaraj AB
Dr Govindaraj AB
Orthopedic Surgeon, Joint Replacement Surgeon
MGM Healthcare, Chennai
35+years experience
View Profile
Dr Harshavardhan Hegde
Spine Surgeon, Orthopedic Surgeon, Joint Replacement Surgeon
Max Smart Super Specialty Hospital, Saket
40+years experience
View Profile
Dr Hemant K Kalyan
Dr Hemant K Kalyan
Orthopedic Surgeon, Joint Replacement Surgeon
Apollo Speciality Hospital, Jayanagar
39+years experience
View Profile
Dr IPS Oberoi
Dr IPS Oberoi
Orthopedic Surgeon, Joint Replacement Surgeon
Artemis Hospital, Gurugram
35+years experience
View Profile
Dr Manasi Shah
Dr Manasi Shah
Hemato-Oncologist, Medical Oncologist
Shalby Multispecialty Hospital, Ahmedabad
17+years experience
View Profile
Dr Manoj Miglani
Dr Manoj Miglani
Spine Surgeon, Orthopedic Surgeon, Joint Replacement Surgeon
Fortis Flt. Lt. Rajan Dhall Hospital, Vasant Kunj
20+years experience
View Profile
Dr Naveen Kumar L V
Dr Naveen Kumar L V
Orthopedic Surgeon, Joint Replacement Surgeon
Manipal Hospital, Sarjapur Road
27+years experience
View Profile
Dr Soham Mandal
Dr Soham Mandal
Orthopedic Surgeon, Joint Replacement Surgeon
Manipal Hospital, Broadway
12+years experience
View Profile
Dr Sunil G Kini
Dr Sunil G Kini
Orthopedic Surgeon, Joint Replacement Surgeon
Manipal Hospital, Old Airport Road
25+years experience
View Profile
Dr Thadi Mohan
Dr Thadi Mohan
Orthopedic Surgeon, Joint Replacement Surgeon
Amrita Hospital, Kochi
28+years experience
View Profile
Dr Yash Gulati
Dr Yash Gulati
Spine Surgeon, Orthopedic Surgeon, Joint Replacement Surgeon
Indraprastha Apollo Hospital, Delhi
35+years experience
View Profile

May we help you?

Enter digits only (6-15 digits). We'll add your country code.