Medivisor India Treatment Logo
  • Home
  • About Us
    • About Us
    • Our Services
    • Our Team
    • Our Medical Advisors
    • Our Safety Measures
  • Treatment
    • Loading treatments...
  • Hospitals
    • Loading hospitals...
  • Patient Guide
    • Treatment Cost
    • Treatment Process
    • Visa Process
    • Travel Guide
    • FAQs
    • Why Medivisor
  • Gallery
    • Success Stories
    • Patient Activities
    • Social Activities
    • News Coverage
    • Blog
  • Become a Partner

+91 83407 80250

Medivisor Logo

Medivisor India Treatment is a trusted New Delhi–based medical travel partner connecting global patients to advanced, affordable, high-quality healthcare in India.

  • Medivisor House 359, Sector 1, Vaishali, Ghaziabad, (Delhi/NCR) India
  • +91 8340 780 250
  • info@medivisorhealth.com

About Us

  • About Us
  • Our Services
  • Our Team
  • Our Medical Advisors
  • Our Safety Measures
  • Join Our Network
  • Contact Us

India Treatment

  • Hospitals
  • Treatments
  • Treatment Cost
  • Treatment Process
  • Visa Process
  • Travel Guide
  • FAQs
  • Why Medivisor

Gallery

  • Patient Testimonials
  • Patient Activities
  • News Coverage
  • Blog

Get in Touch

© 2026 Medivisor India Treatment. All rights reserved.

Ophthalmology hospital

Ophthalmology

  1. Home
  2. Departments
  3. Ophthalmology

Ophthalmology Department (Eye Care)

The Ophthalmology Department is a globally recognized center of excellence where advanced microsurgery meets the pinnacle of diagnostic science. Because the human eye is a delicate organ only 24mm wide, our department utilizes miniaturized technology to treat it with sub-micron precision. For international patients, we offer a specialized "Center for Sight" that focuses on preserving and restoring the complex biological camera that connects you to the world.

A Multidisciplinary Circle of Vision Experts

Our team is strategically divided into sub-specialties to manage every delicate layer of the eye:

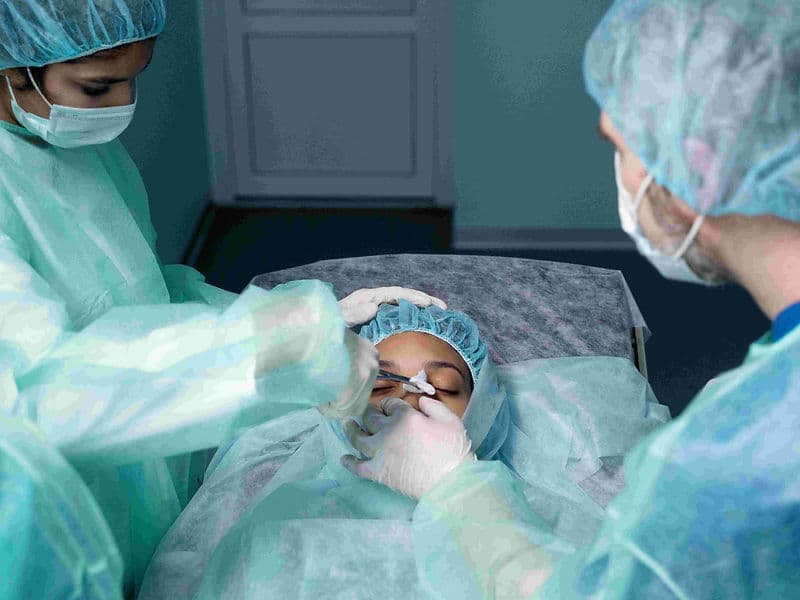
  • Primary Ophthalmologists: Expert surgeons who lead "blade-free" vision correction and advanced cataract procedures.

  • Vitreoretinal Specialists: Highly trained surgeons focusing on the back of the eye, treating retinal detachments and diabetic complications.

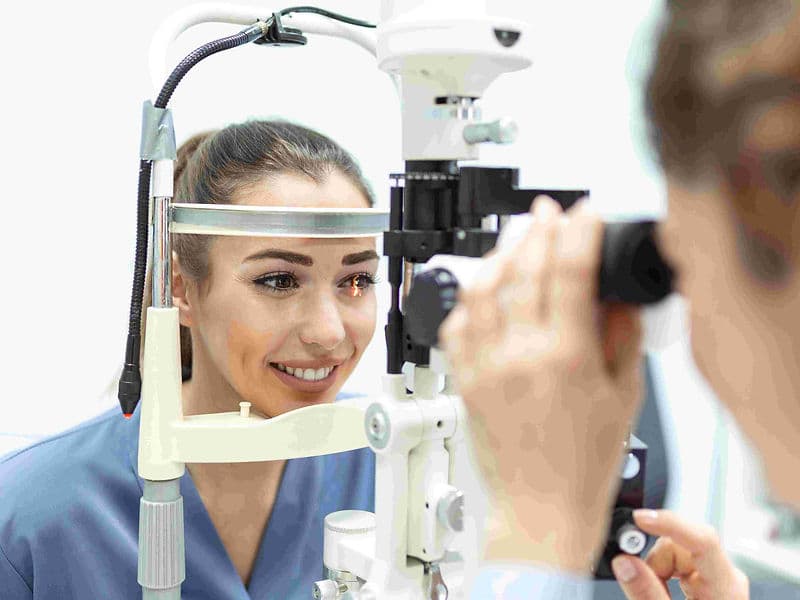
  • Cornea & Refractive Experts: Dedicated to the clear front window of the eye, managing corneal transplants and LASIK.

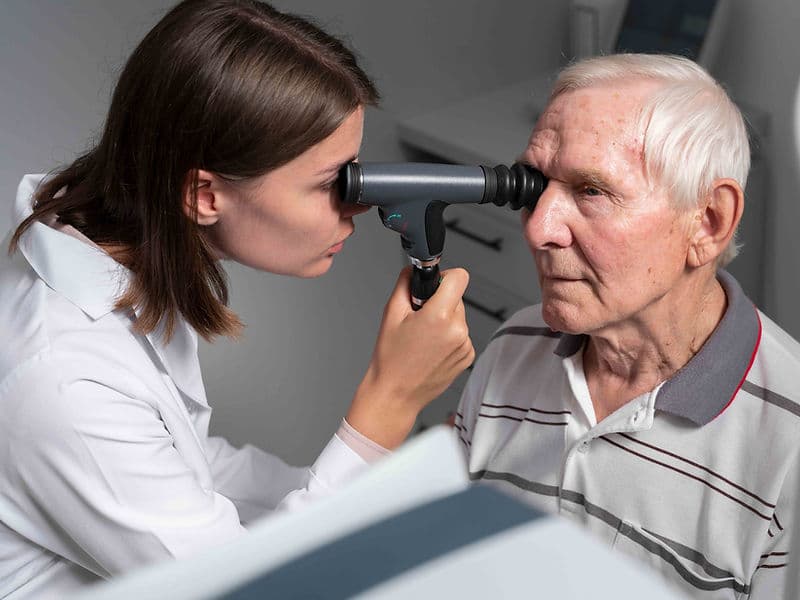
  • Glaucoma Specialists: Focused on preserving the optic nerve through advanced pressure-management technologies.

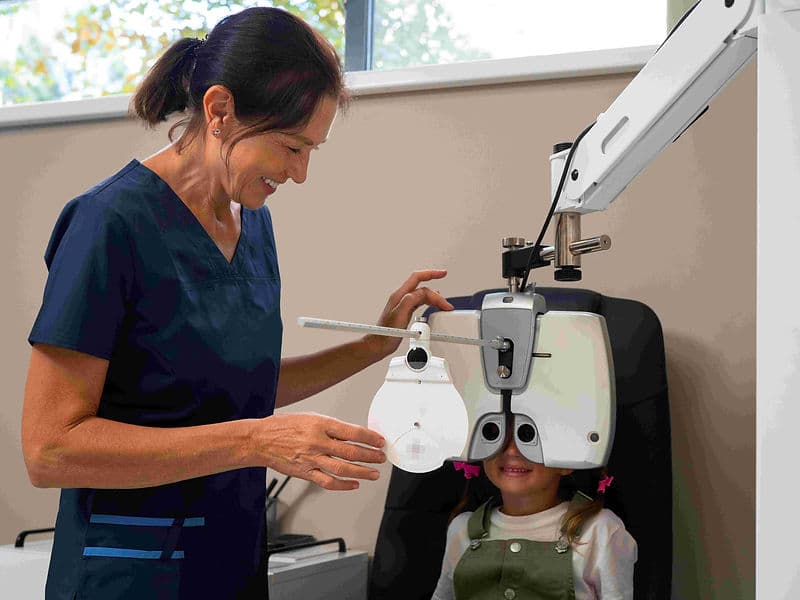
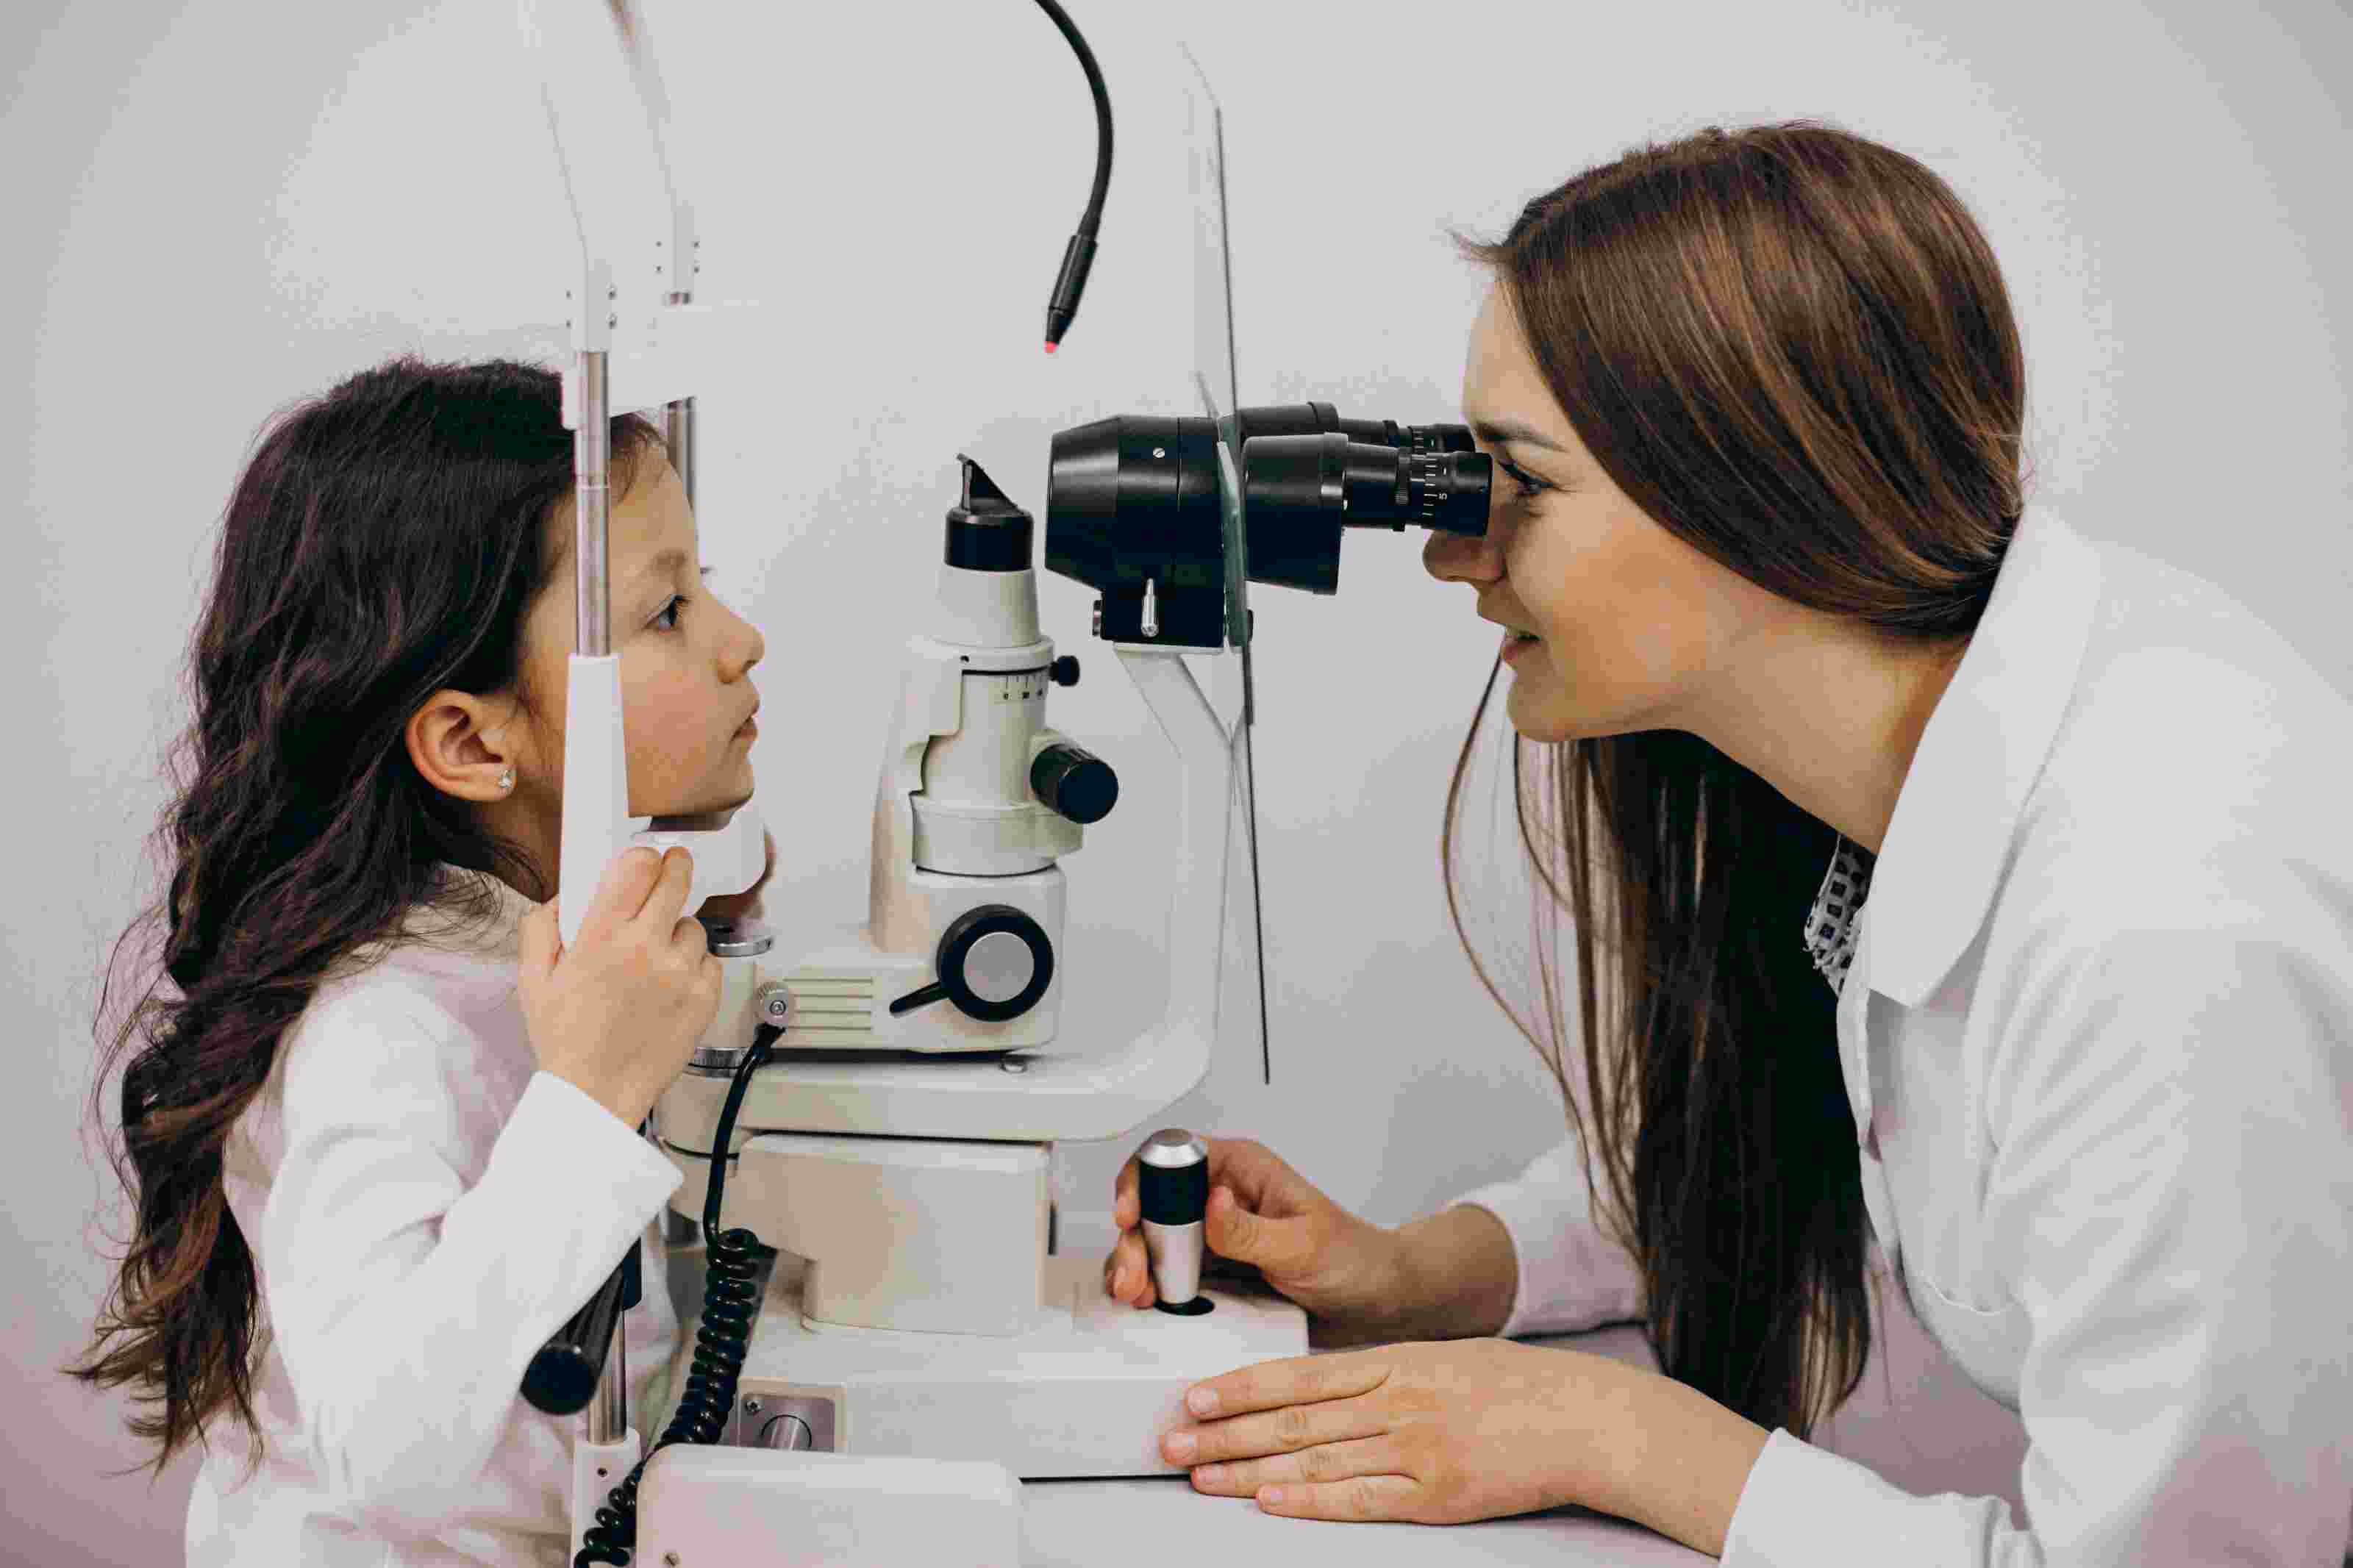
  • Paediatric Ophthalmologists: Providing gentle, specialized care for children's vision, including squint and lazy eye correction.

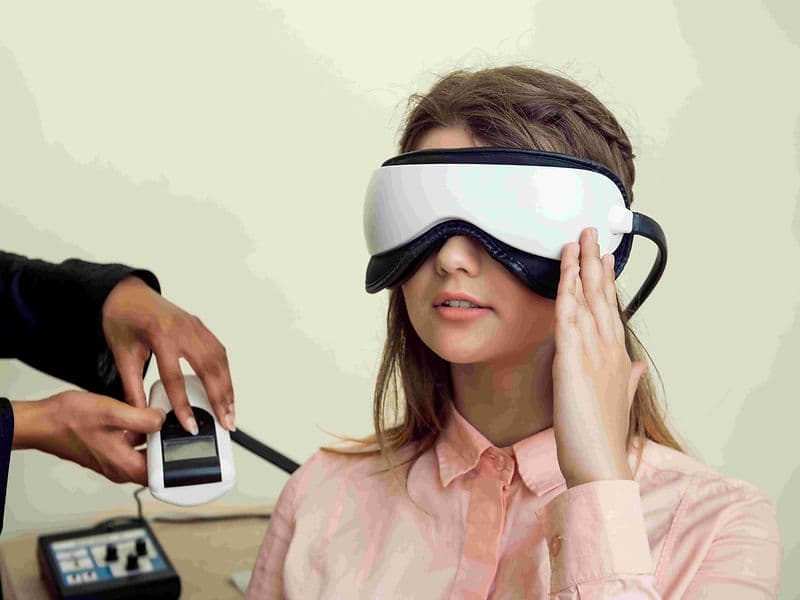
  • Ocularists & Optometrists: Professionals dedicated to custom prosthetic fitting and comprehensive visual acuity mapping.

Advanced Technology for Precision Care

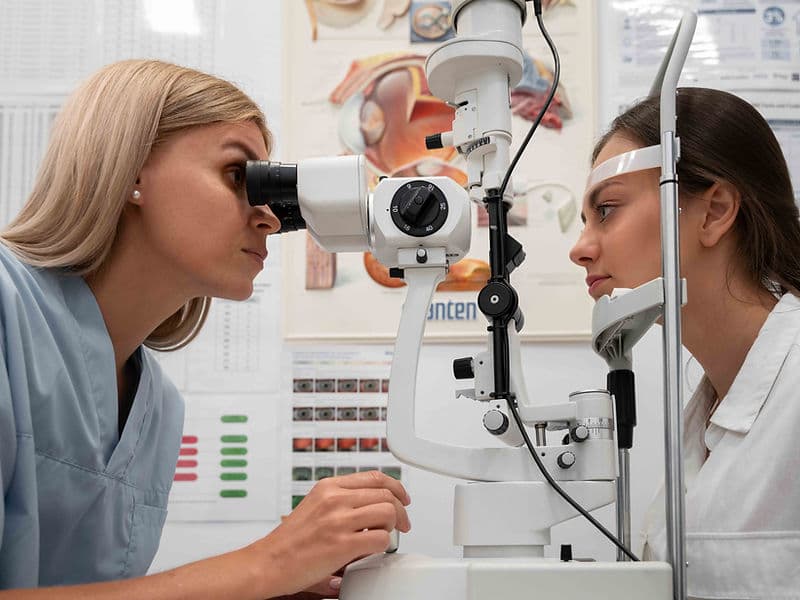
To ensure the safest outcomes, the department utilizes world-class laser systems and high-power magnification:

  • "Blade-Free" Laser Systems: Utilizing Excimer and Femtosecond lasers to reshape the cornea with accuracy impossible for the human hand.

  • Phacoemulsification (Phaco): Advanced ultrasonic technology that dissolves cataracts through a tiny 2mm opening for stitch-free healing.

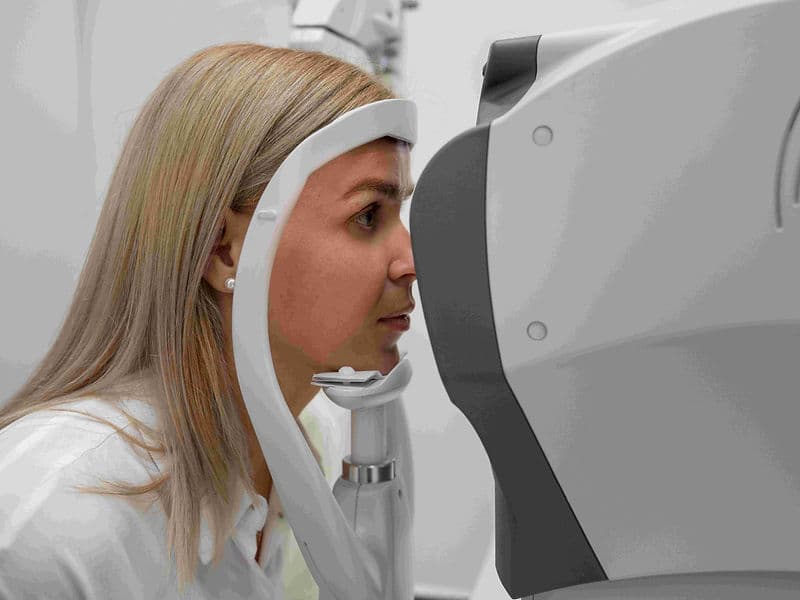
  • OCT (Optical Coherence Tomography): An "ultrasound with light" that provides high-resolution 3D cross-sections of the retina to catch issues early.

  • Next-Gen Intraocular Lenses (IOLs): Premium, foldable lenses that replace the eye’s natural lens to restore clear, multifocal vision.

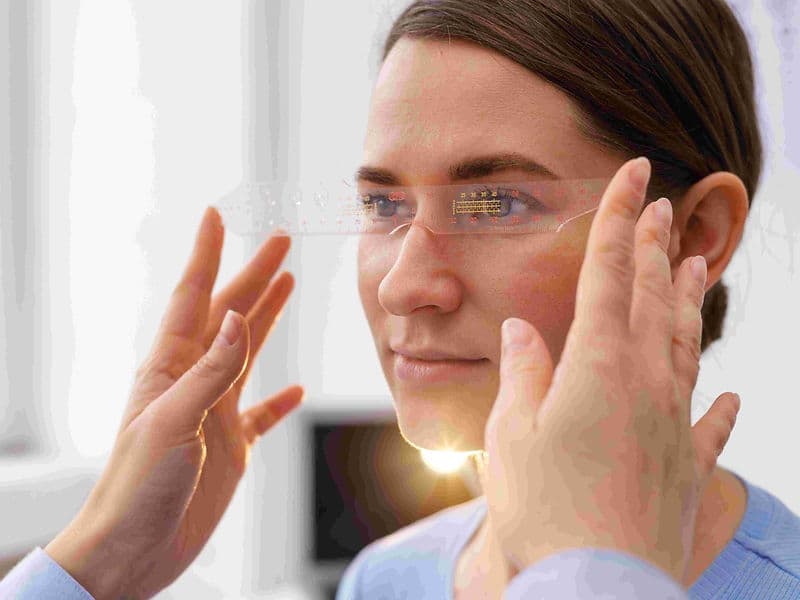
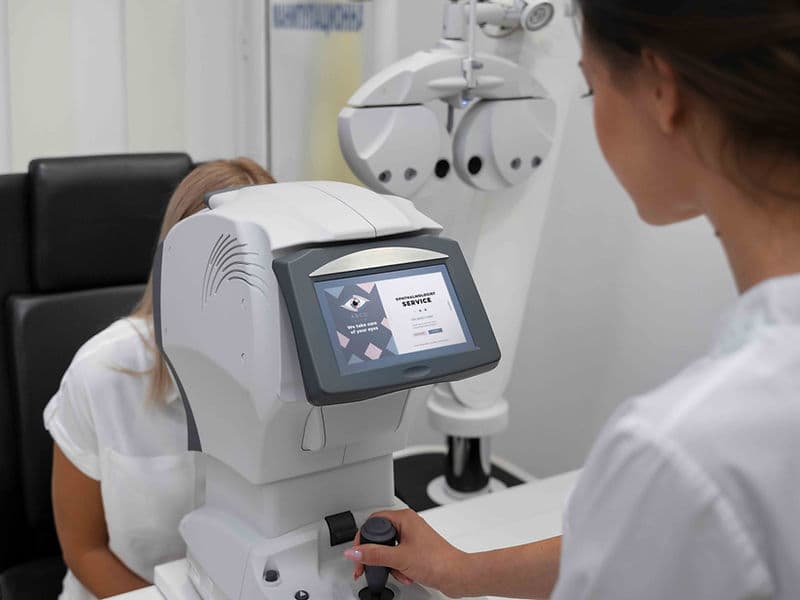
  • Digital Fundus Mapping: High-speed wide-angle cameras that create a permanent "map" of your retina for long-term monitoring.

Specialized Functional and Diagnostic Units

Our department functions as a self-contained hub for all vision-related needs:

  • The Sterile Injection Suite: A dedicated environment for administering advanced therapies for macular degeneration and retinal swelling.

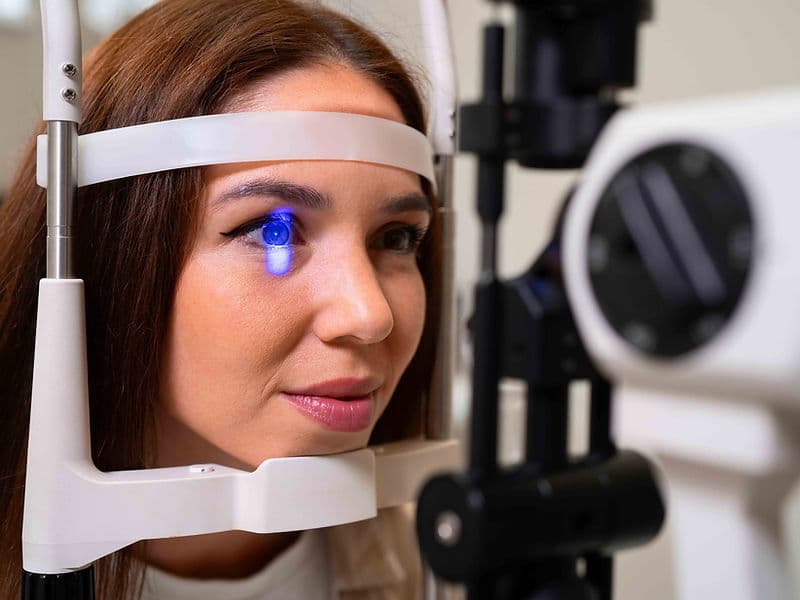
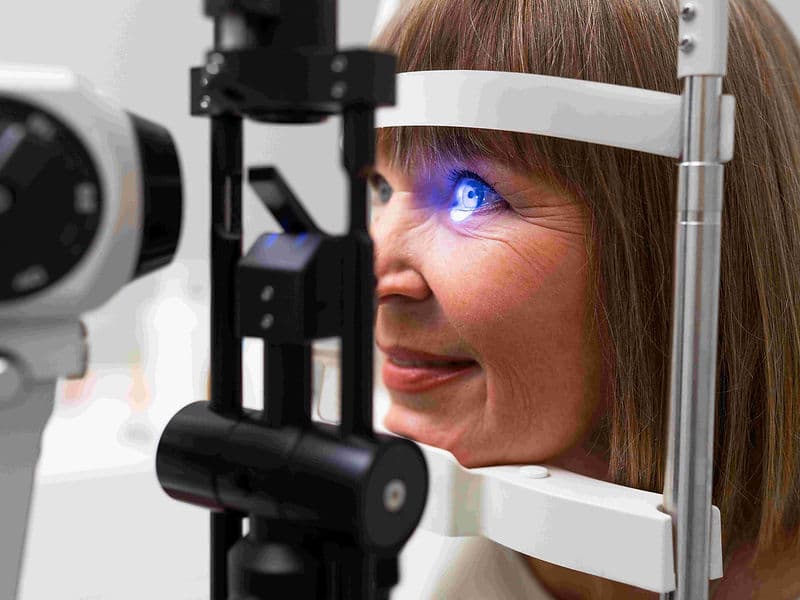
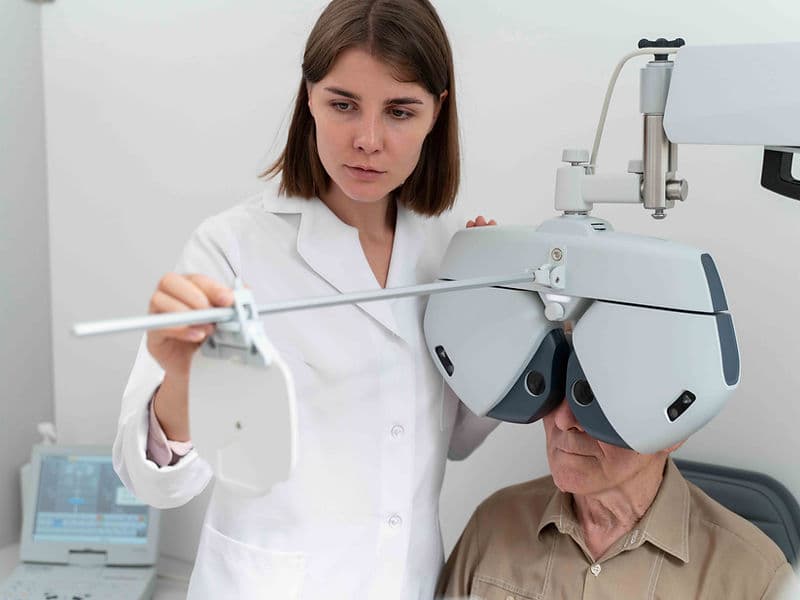
  • Advanced Refraction Rooms: Specialized dark rooms designed for precise mapping of visual acuity and prescriptions.

  • High-Tech Laser Wing: Housing YAG and Argon lasers for non-invasive treatments of cloudy capsules and diabetic eye disease.

  • Contact Lens & Scleral Clinic: A dedicated station for fitting specialized lenses for irregular corneal conditions like Keratoconus.

  • International Patient Support Lounge: A private space for global families to manage insurance, medical records, and travel logistics in comfort.

A Commitment to Rapid Recovery and Visual Clarity

The modern patient journey is designed for safety, comfort, and immediate results:

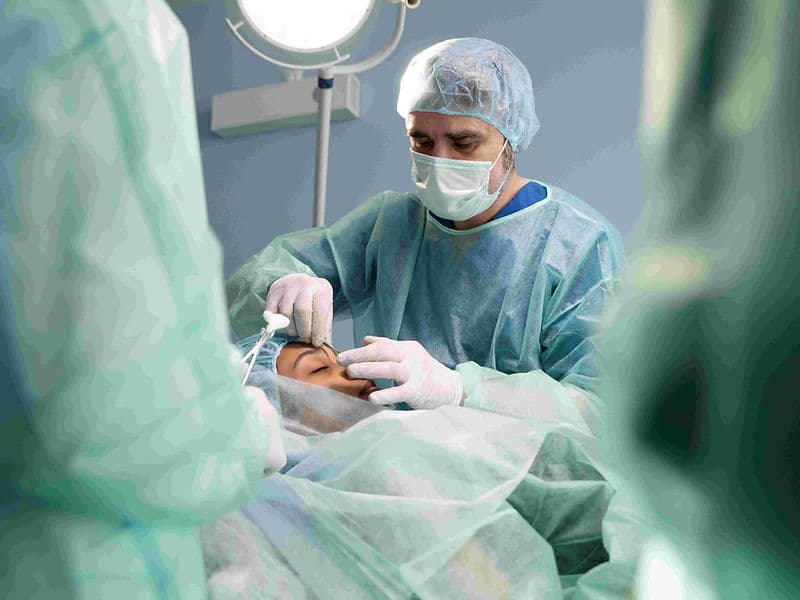
  • Micro-Incisional Surgery: Most procedures are "stitch-free," allowing natural healing and a return to daily activities within days.

  • No-Stitch Cataract Solutions: Modern IOLs can correct for both distance and reading, often providing the best vision of a patient's life.

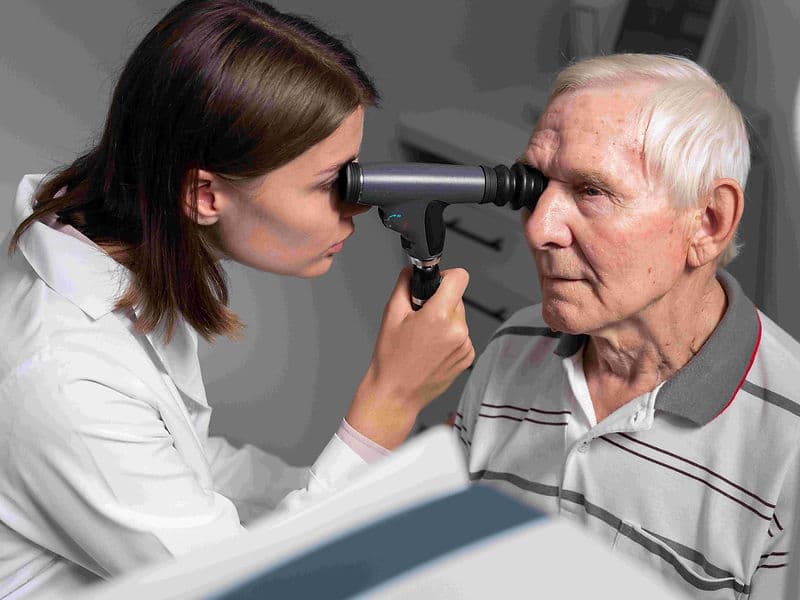
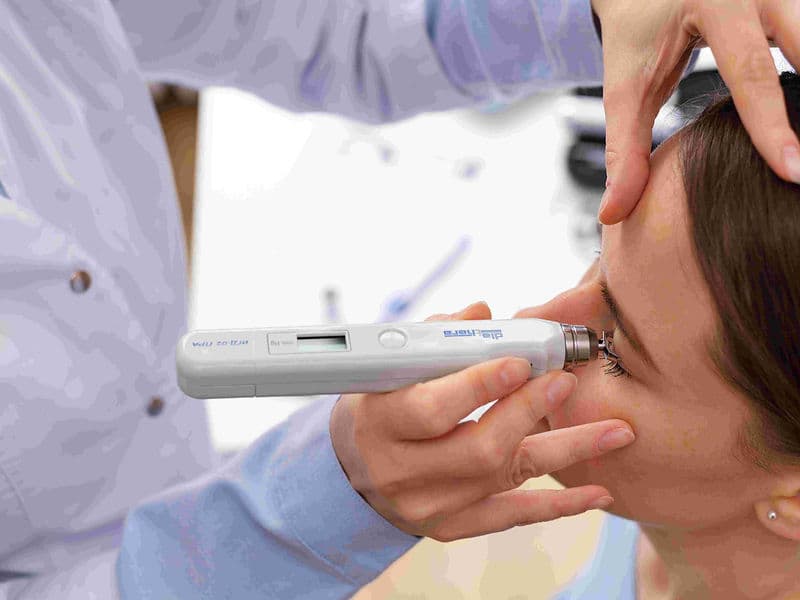
  • Early Detection Framework: Utilizing OCT and Tonometer technology to identify silent eye diseases years before symptoms appear.

  • Global Safety Protocols: Strict adherence to international standards for medication schedules and protective care ensures a successful post-operative journey.

May we help you?

Enter digits only (6-15 digits). We'll add your country code.

Ophthalmology Treatments

Corneal Collagen Cross-linking

Corneal Collagen Cross-linking

Corneal Collagen Cross-linking (CXL) is a specialized medical treatment designed to stop the progression of Keratoconus and other corneal thinning disorders. Unlike most laser eye surgeries, its goal is not to improve vision, but to strengthen and stabilize the cornea's structure. By creating new chemical bonds between corneal fibers, CXL acts as a support system to prevent the eye from bulging further.

When You Should Consider CXL

  • Progressive Keratoconus: When regular eye exams show that the cornea is continuing to thin or the "cone" shape is becoming more pronounced.

  • Post-LASIK Ectasia: A rare condition where the cornea becomes unstable and begins to thin following previous refractive surgery.

  • Pellucid Marginal Degeneration: A specific type of corneal thinning that typically affects the lower portion of the cornea.

  • Rapidly Changing Vision: When your eyeglass or contact lens prescription is shifting frequently due to structural changes in the eye.

  • Early Diagnosis: It is most effective when performed early to "lock" the cornea in place before significant vision loss occurs.

How Is Performed

  • Numbing: Anesthetic eye drops are applied so the patient remains comfortable and feels no pain throughout the process.

  • Epithelium Management:
    Epi-off Method: The thin outer layer (epithelium) is gently removed to allow the riboflavin medicine to penetrate the deeper layers more effectively.
    Epi-on (Trans-epithelial): The outer layer is left intact, which may lead to less post-operative discomfort but sometimes slower saturation.

  • Riboflavin Loading: Vitamin B2 (riboflavin) drops are applied every few minutes for about 30 minutes until the cornea is fully saturated.

  • UVA Activation: The eye is exposed to a precise, controlled beam of Ultraviolet-A light.

  • The Cross-linking: The UV light reacts with the riboflavin to create new "cross-links" (chemical bonds) between the collagen fibers, making the cornea stiffer.

  • Protection: A clear, soft bandage contact lens is placed on the eye to protect the surface while the epithelium regrows.

  • Duration: The entire treatment typically takes between 30 and 60 minutes.

Pre-Procedure Preparation

  • Baseline Mapping: Detailed 3D scans (topography) are taken to document the current shape and thickness of the cornea.

  • Contact Lens Holiday: Patients must stop wearing hard or gas-permeable contact lenses for several weeks before the procedure to ensure the cornea is in its natural state.

  • Medication Audit: Reviewing any history of slow healing, dry eyes, or chronic eye infections with the surgical team.

  • Transportation Planning: Arranging for a ride home, as the eye will be sensitive to light and vision may be blurry immediately following the UV exposure.

Tests Before CXL

  • Pachymetry: To measure the thickness of the cornea at its thinnest point; a safe minimum thickness is required for the UV light phase.

  • Corneal Topography/Tomography: To identify the "apex" of the cone and track the exact rate of disease progression over time.

  • Slit-Lamp Examination: A microscopic check for any pre-existing corneal scarring or inflammation that might impact the outcome.

  • Visual Acuity Test: Establishing the current level of corrected vision to monitor stability after the procedure.

Life After CXL

  • Initial Discomfort: Especially in "Epi-off" cases, the eye may feel sore, gritty, or highly light-sensitive for the first 3–5 days.

  • Vision Fluctuations: It is normal for vision to be "hazy" or slightly worse than before surgery for a few weeks while the surface heals.

  • Medication Regimen: Patients must strictly follow the schedule for prescribed antibiotic and steroid drops for several weeks.

  • Stabilization Timeline: While the surface heals within a week, the full strengthening effect and final vision stabilization can take 3 to 6 months.

  • Follow-up Care: Regular checkups are essential to monitor "corneal haze" (temporary cloudiness) and confirm the epithelium has fully regrown.

Why Specialized Treatment Is Highly Effective

  • Stops Disease Progression: CXL is highly successful at preventing the cornea from bulging further and worsening the condition.

  • Prevents Major Surgery: By stabilizing the cornea early, most patients can avoid the need for a full corneal transplant later in life.

  • Permanent Strengthening: The new chemical bonds provide a long-term increase in corneal rigidity and structural integrity.

  • Preserves Vision Quality: While it may not eliminate the need for glasses, it "locks" the vision in place and prevents further loss of sight.

  • Minimally Invasive: It is an outpatient procedure that requires no incisions into the inner eye and no stitches.

Corneal Transplant (Keratoplasty)

Corneal Transplant (Keratoplasty)

Corneal transplant surgery, or keratoplasty, is a specialized procedure to replace damaged or diseased corneal tissue with healthy tissue from a human donor. Modern surgical techniques allow for "component surgery," where surgeons replace only the specific damaged layers of the eye, significantly improving success rates and recovery times.

When You Should Consider Corneal Transplant Surgery

  • Keratoconus: When progressive thinning causes the cornea to bulge into a cone shape and specialty lenses no longer restore vision.

  • Fuchs’ Dystrophy: If you experience persistent swelling or cloudiness due to the deterioration of the innermost cell layers.

  • Corneal Scarring: To restore vision lost to physical trauma, chemical burns, or severe infections like herpes keratitis.

  • Graft Failure: When a previous donor transplant has been rejected by the body or has stopped functioning.

  • Advanced Thinning: When medical treatments like cross-linking can no longer provide structural integrity or relieve chronic eye pain.

How Is Performed

  • Anesthesia: Typically performed as an outpatient procedure under either local or general anesthesia, depending on the complexity.

  • Tissue Removal: The surgeon uses high-precision tools to carefully remove the diseased or damaged layers of the patient's cornea.

  • Methods of Transplant:
    Penetrating Keratoplasty (PKP): A full-thickness transplant where the entire central cornea is replaced and secured with microscopic sutures.
    Deep Anterior Lamellar Keratoplasty (DALK): Replaces the front and middle layers while preserving the patient's own healthy inner lining.
    Endothelial Keratoplasty (DMEK/DSAEK): Minimally invasive procedures to replace only the innermost layer (endothelium).

  • Securing the Graft: In full-thickness surgeries, fine sutures are used. In endothelial transplants, a specialized Air Bubble Tamponade is used to hold the new tissue in place against the eye.

  • Duration: The surgical procedure typically lasts between 1 to 2 hours.

Pre-Procedure Preparation

  • Comprehensive Eye Examination: To determine exactly which layers of the cornea need replacement (full-thickness vs. lamellar).

  • Graft Matching: Sourcing high-quality donor tissue from an eye bank and reviewing success rates, which often exceed 90%.

  • Recovery Planning: Preparing for post-operative requirements, such as strict face-up positioning for several days.

  • Medication Review: Discussing the necessity of long-term or life-long steroid eye drops to inhibit immune rejection.

  • Anesthesia Assessment: Evaluating overall health to determine the safest sedation method for the patient.

Tests Before Corneal Transplant Surgery

  • Pachymetry: To measure corneal thickness and identify specific areas of extreme thinning or fluid buildup (edema).

  • Specular Microscopy: A detailed evaluation of the health and density of the endothelial cell layer.

  • Corneal Topography: Creating a 3D map of the curvature and surface irregularities of the diseased cornea.

  • Visual Acuity Test: Establishing a clear baseline of current vision impairment to measure post-surgical improvement.

Life After Corneal Transplant Surgery

  • Positioning Requirements: For DMEK or DSAEK, patients must maintain a face-up position for several days to allow the air bubble to support the graft.

  • Steroid Regimen: A committed long-term schedule of steroid eye drops is required to prevent the immune system from attacking the new tissue.

  • Rejection Monitoring: Patients must immediately report "RSVP" symptoms: Redness, Sensitivity to light, Vision blurriness, or Pain.

  • Recovery Timeline: Healing varies by procedure—weeks for endothelial transplants (DMEK) and 6 to 12 months for full-thickness (PKP) procedures.

  • Follow-up Care: Regular appointments are necessary to manage the sutures and monitor for potential risks like glaucoma or astigmatism.

Why Specialized Treatment Is Highly Effective

  • Restores Transparency: Effectively clears vision by replacing opaque or scarred tissue with crystal-clear donor tissue.

  • Reduced Rejection Risk: Modern "component" surgery (DALK/DMEK) leaves more of the patient's own tissue intact, lowering the chance of an immune response.

  • Last-Resort Solutions: For patients who cannot receive human donor tissue, an Artificial Cornea (Keratoprosthesis) offers a high-tech synthetic alternative.

  • Eliminates Chronic Pain: Resolves the significant discomfort associated with corneal surface diseases and recurring erosions.

  • Proven Success: Keratoplasty remains the most common and successful type of human organ transplant worldwide.

Cross-linking (for Keratoconus)

Cross-linking (for Keratoconus)

Corneal Collagen Cross-linking (CXL) is a specialized medical procedure used to treat Keratoconus, a progressive condition where the cornea thins and bulges into a cone shape. Unlike LASIK or SMILE, which are designed to correct vision, the primary goal of CXL is to strengthen the corneal tissue to stop the disease from worsening and prevent future vision loss.

When You Should Consider CXL

  • Progressive Keratoconus: When repeat eye exams show that the cornea is continuing to thin or the "cone" shape is becoming more pronounced.

  • Post-LASIK Ectasia: A rare complication where the cornea becomes unstable and thins following refractive surgery.

  • Pellucid Marginal Degeneration: A similar corneal thinning condition that affects the lower part of the cornea.

  • Fluctuating Vision: When your eyeglass or contact lens prescription is changing rapidly due to corneal instability.

  • Early Diagnosis: It is highly effective when performed early to stabilize the cornea before significant vision loss occurs.

How Is Performed

  • Numbing: Anesthetic eye drops are applied so the patient remains comfortable and feels no pain during the process.

  • Epithelium Management:
    Epi-off Method: The thin outer layer (epithelium) is gently removed to allow the medication to saturate the deeper layers more effectively.
    Epi-on (Trans-epithelial): The outer layer is left intact, which may reduce post-operative discomfort.

  • Riboflavin Saturation: Vitamin B2 (riboflavin) drops are applied to the eye every few minutes for about 30 minutes until the cornea is fully saturated.

  • UV Light Exposure: The eye is exposed to a controlled amount of Ultraviolet A (UVA) light for several minutes.

  • The Chemical Reaction: The interaction between the Riboflavin and UV light creates new "cross-links" (chemical bonds) between the collagen fibers, making the cornea stiffer and more stable.

  • Bandage Lens: A clear, soft contact lens is placed on the eye to protect the surface while it heals.

  • Duration: The entire treatment typically takes 30 to 60 minutes.

Pre-Procedure Preparation

  • Corneal Mapping: Detailed scans (topography) are taken to document the current shape and thickness of the cornea as a baseline.

  • Contact Lens Holiday: Patients must stop wearing hard or gas-permeable contact lenses for several weeks before the procedure to allow the cornea to settle.

  • Medication Review: Discussing any history of slow healing or eye infections with your specialist.

  • Transportation: Arranging for a ride home, as the eye may be sensitive to light and vision may be blurry immediately after the UV exposure.

Tests Before CXL

  • Pachymetry: To measure the thinnest point of the cornea; a minimum thickness is often required to safely perform the UV light stage.

  • Corneal Topography/Tomography: To identify the "apex" of the cone and track the rate of disease progression.

  • Slit-Lamp Examination: To check for any pre-existing corneal scarring that might affect the treatment outcome.

  • Visual Acuity: Establishing the current level of corrected and uncorrected vision.

Life After CXL

  • Initial Discomfort: Especially in "Epi-off" cases, the eye may feel sore, gritty, or highly light-sensitive for the first 3–5 days.

  • Vision Fluctuations: It is normal for vision to be slightly "foggy" or worse immediately after the procedure before it stabilizes over several weeks.

  • Medication Regimen: Patients must use prescribed antibiotic and steroid drops for several weeks to prevent infection and manage inflammation.

  • Healing Timeline: While the surface heals within a week, the full strengthening effect of the cross-linking takes 3 to 6 months to reach maximum stability.

  • Follow-up Care: Regular checkups are essential to monitor the "haze" (temporary cloudiness) and ensure the epithelium has regrown properly.

Why Specialized Treatment Is Highly Effective

  • Prevents Disease Progression: CXL has a success rate of over 90% in stopping Keratoconus from getting worse.

  • Avoids Major Surgery: By stabilizing the cornea early, the vast majority of patients can avoid the need for a full corneal transplant later in life.

  • Long-Term Stability: The new chemical bonds created between collagen fibers provide a permanent increase in corneal rigidity.

  • Preserves Vision: While it does not eliminate the need for glasses, it "locks" the vision in place and prevents further deterioration.

  • Minimally Invasive: It is an outpatient procedure that does not require stitches or a long hospital stay.

DCR (Tear Duct Surgery)

DCR (Tear Duct Surgery)

Tear duct surgery, most commonly known as Dacryocystorhinostomy (DCR), is a specialized procedure performed to create a new drainage pathway for tears between the eye and the nose. It is the primary treatment for a blocked tear duct (nasolacrimal duct obstruction), which causes symptoms like constant watering, sticky discharge, and recurrent eye infections. By bypassing the obstruction, DCR restores the natural flow of tears and eliminates chronic irritation.

When You Should Consider Tear Duct Surgery

  • Chronic Watering (Epiphora): When tears constantly overflow onto your cheeks, affecting your vision and daily comfort.

  • Recurrent Infections: If you experience frequent bouts of dacryocystitis (infection of the tear sac) characterized by pain, redness, and swelling near the nose.

  • Sticky Discharge: Persistent mucus or pus-like discharge that causes the eyelids to stick together, especially upon waking.

  • Painful Swelling: A visible, tender lump in the inner corner of the eye caused by fluid backup in the lacrimal sac.

  • Failed Conservative Treatment: When massage, antibiotics, or simple "probing" of the duct have failed to clear the obstruction.

How Is Performed

  • Anesthesia: The procedure is typically performed as an outpatient surgery under either local anesthesia with sedation or general anesthesia.

  • Surgical Approaches:
    External DCR: The surgeon makes a small incision (10–12 mm) on the side of the nose. A small piece of bone is removed to connect the lacrimal sac directly to the nasal cavity. It is considered the "gold standard" with a 90% to 95% success rate.
    Endoscopic (Endonasal) DCR: Performed through the nostrils using a thin camera (endoscope), leaving no external scar. This minimally invasive approach typically results in less postoperative bruising.

  • Stent Placement: In many cases, a tiny, flexible silicone stent is temporarily placed in the new opening to keep it from closing while the tissue heals.

  • Duration: The surgical process typically takes between 30 and 60 minutes.

Pre-Procedure Preparation

  • Nasal Examination: An evaluation of the nasal passages to ensure there are no structural issues, like a deviated septum, that might interfere with drainage.

  • Medication Audit: Discussing any blood thinners (like aspirin or warfarin) that must be paused to prevent excessive nosebleeds during or after surgery.

  • Infection Control: Ensuring any active tear sac infections are treated with antibiotics before the day of the procedure.

  • Transportation: Arranging for a ride home, as your vision may be slightly blurred and you may feel drowsy from the anesthesia.

  • Fasting: Following "nothing by mouth" instructions if general anesthesia is planned.

Tests Before Tear Duct Surgery

  • Lacrimal Syringing and Probing: A diagnostic test where saline is flushed through the tear ducts to confirm the exact location of the blockage.

  • Dacryocystography (DCG): A specialized X-ray using contrast dye to visualize the shape and size of the tear sac and the obstruction.

  • Nasal Endoscopy: Using a small camera to look inside the nose for polyps or inflammation that could affect the surgical outcome.

  • Visual Acuity Test: Establishing a baseline of your vision to monitor eye health following the procedure.

Life After Tear Duct Surgery

  • Initial Recovery: Healing of the surface tissues takes about 1 to 2 weeks. Expect mild bruising and swelling, which usually resolves within 10–15 days.

  • Stent Removal: Any placed silicone stents are typically removed during a brief office visit 4 to 12 weeks after surgery.

  • Nasal Care: Patients must strictly avoid blowing their nose for at least one week to prevent air pressure from disrupting the new drainage channel.

  • Activity Restrictions: Strenuous exercise, heavy lifting, and swimming are typically restricted for at least 2 weeks.

  • Elevation: Sleep with your head elevated for the first few days to significantly reduce postoperative swelling.

Why Specialized Treatment Is Highly Effective

  • Superior Success Rates: External DCR provides a highly reliable solution, successfully resolving blockages in the vast majority of patients.

  • No Visible Scarring (Endoscopic): The endonasal approach offers a scarless alternative with a faster initial recovery time.

  • Eliminates Chronic Infections: By restoring drainage, the procedure permanently removes the stagnant fluid where bacteria typically grow.

  • Rapid Symptom Relief: Most patients notice a significant reduction in eye watering and stickiness almost immediately after the procedure.

  • Same-Day Discharge: As an outpatient procedure, patients can recover in the comfort of their own home on the same day as the surgery.

Eyelid Reconstruction

Eyelid Reconstruction

Eyelid reconstruction is a complex surgical process used to repair defects caused by skin cancer removal (such as Mohs surgery), trauma, or congenital anomalies. Because the eyelid is essential for protecting the eye and maintaining moisture, the primary goal is to restore these functions while achieving an aesthetically natural and symmetrical appearance.

When You Should Consider Eyelid Reconstruction

  • Skin Cancer Removal: Following the excision of a basal cell or squamous cell carcinoma that has left a gap in the eyelid tissue.

  • Traumatic Injury: To repair deep lacerations, avulsions, or "dog bite" injuries that have damaged the eyelid structure.

  • Congenital Coloboma: For children born with a missing piece of the eyelid that leaves the cornea exposed.

  • Severe Scarring: To correct "cicatricial" changes where previous injuries have pulled the eyelid out of its natural position.

  • Functional Deficits: When an existing defect prevents the eye from closing properly, leading to chronic pain or corneal ulcers.

How Is Performed

  • Anesthesia: Depending on the complexity, the procedure is performed under local anesthesia with sedation or general anesthesia.

  • The Bilamellar Principle: Surgeons treat the eyelid as a two-layered structure that must be rebuilt separately:
    Anterior Lamella: The outer layer consisting of the skin and the orbicularis oculi muscle.
    Posterior Lamella: The inner layer made up of the conjunctiva (lining) and the tarsal plate (the structural "skeleton" of the lid).

  • Vascularity Rule: At least one reconstructed layer must have its own blood supply (usually a flap) to support the other if a graft is used.

  • Surgical Techniques:
    Direct Closure: For small defects (less than 33% of the lid width), the edges are sewn together directly.
    Tenzel Semicircular Flap: A semicircular flap of skin is rotated from the side of the eye to fill moderate gaps (33%–50%).
    Hughes Flap (Lower Lid): A two-stage procedure for large defects where part of the upper lid's inner lining is stretched down. The eye remains temporarily closed for 2–4 weeks before a second surgery separates them.
    Cutler-Beard Flap (Upper Lid): Uses full-thickness tissue from the lower lid to rebuild a large upper lid defect in a staged approach.

  • Duration: Procedures can range from 1 to 3 hours depending on the size of the defect.

Pre-Procedure Preparation

  • Defect Assessment: A detailed measurement of the missing tissue once the "clear margins" (in cancer cases) have been established.

  • Donor Site Selection: Identifying areas for potential skin grafts, often from the opposite eyelid, behind the ear, or the collarbone.

  • Staging Discussion: Understanding if the repair will require one surgery or two separate procedures (staged flaps) separated by several weeks.

  • Medication Audit: Reviewing blood thinners and supplements that could increase bruising or jeopardize the survival of a skin flap.

  • Eye Protection Planning: Preparing for a period where the eye may be patched or temporarily sewn shut to allow the new tissue to "take."

Tests Before Eyelid Reconstruction

  • Snap-Back Test: Checking the "laxity" (looseness) of the surrounding eyelid tissue to see how much can be shifted into the defect.

  • Corneal Sensitivity: Ensuring the eye's surface is healthy and can tolerate a period of reduced protection during healing.

  • Tear Film Evaluation: Assessing baseline moisture levels, as reconstruction can temporarily affect tear distribution.

  • Photographic Mapping: Taking high-resolution images to plan the flap geometry and track the maturation of scars.

Life After Eyelid Reconstruction

  • Immediate Post-Op: Expect significant bruising and swelling that typically peaks in the first 48–72 hours.

  • Healing Timeline: Most patients feel "public ready" within 10 to 14 days, though full tissue settling and scar maturation can take 3 to 6 months.

  • The "Opening" Procedure: If a staged flap (like a Hughes flap) was used, a brief second procedure is required 2–4 weeks later to safely "open" the eye.

  • Lubrication: Intensive use of ointments and drops is necessary while the new eyelid learns to blink and spread tears effectively.

  • Activity Limits: Avoid heavy lifting or any activity that increases blood pressure to the face for the first 1–2 weeks to protect the new blood supply.

Why Specialized Treatment Is Highly Effective

  • Restores Essential Protection: Rebuilding the eyelid ensures the cornea is covered during sleep and blinking, preventing permanent blindness.

  • Advanced Flap Technology: Using the patient's own vascularized tissue (flaps) provides the highest success rate for "living" repairs.

  • Microsurgical Precision: Expert surgeons can hide incisions within natural creases, making even large reconstructions nearly invisible once healed.

  • Dual-Layer Integrity: By reconstructing both the skeleton and the skin, the eyelid maintains the necessary stiffness to sweep away debris.

  • Lifelong Stability: Once the final "settling" occurs at 6 months, the reconstructed eyelid typically functions reliably for the rest of the patient's life.

Femtosecond Laser Cataract Surgery

Femtosecond Laser Cataract Surgery

Femtosecond Laser-Assisted Cataract Surgery (FLACS) is a modern, high-precision version of cataract surgery that uses a computer-guided laser to perform several critical steps traditionally done by hand. Often referred to as "robotic" cataract surgery, it relies on advanced 3D imaging and automated laser pulses to ensure unparalleled accuracy and safety.

When You Should Consider FLACS

  • Premium Lens Selection: If you are choosing multifocal, trifocal, or toric IOLs, where perfect lens centration is critical for optimal vision.

  • Pre-existing Astigmatism: When you wish to correct corneal astigmatism during the same procedure to reduce dependence on glasses.

  • Vulnerable Corneas: For patients with conditions like Fuchs' dystrophy, where reducing surgical energy is vital to protecting the cornea.

  • Advanced Cataracts: When the lens is particularly dense, the laser can pre-soften the cataract, making removal safer.

  • Desire for Precision: When seeking the highest level of computer-guided accuracy to minimize manual variability.

How Is Performed

  • Imaging & Mapping: The surgeon uses Optical Coherence Tomography (OCT) to create a detailed 3D map of the eye's unique internal anatomy.

  • Corneal Incisions: Based on the 3D map, the laser creates ultra-precise, self-sealing incisions for surgical entry.

  • Capsulotomy: The laser creates a perfectly circular opening in the thin membrane (capsule) that holds the lens.

  • Lens Fragmentation: The laser vibrates at high speeds to soften and break the cataract into tiny pieces before any tools enter the eye.

  • Lens Removal: The pre-softened fragments are gently suctioned out using an ultrasonic probe with significantly reduced energy.

  • IOL Implantation: A permanent artificial intraocular lens (IOL) is inserted to restore clear focus.

  • Duration: The entire outpatient process typically takes between 15 and 30 minutes per eye.

Pre-Procedure Preparation

  • Detailed Biometry: Advanced laser measurements of the eye's length and curvature to select the most appropriate IOL.

  • 3D Surgical Planning: Using the OCT data to program the laser for the exact depth and location of all incisions.

  • Medication Audit: Starting antibiotic or anti-inflammatory eye drops a few days before the procedure as prescribed.

  • Fasting: Following clinical instructions regarding food and water intake on the morning of the surgery.

  • Logistics: Arranging for a companion to assist with the return home, as vision may be temporarily blurry.

Tests Before FLACS

  • Optical Coherence Tomography (OCT): To visualize the different layers of the eye and ensure the macula is healthy.

  • Topography: Mapping the surface of the cornea to plan for astigmatism correction.

  • Endothelial Cell Count: Checking the health of the inner corneal layer, especially for patients with pre-existing corneal issues.

  • Visual Field Testing: To confirm that the cataract is the primary cause of vision loss and rule out other underlying conditions.

Life After FLACS

  • Initial Vision: Many patients report clearer vision within 24 to 48 hours due to reduced intraoperative inflammation.

  • Medication: Strict adherence to antibiotic and anti-inflammatory eye drops for several weeks is necessary for healing.

  • Eye Protection: Wearing a protective shield while sleeping for the first week to prevent accidental pressure or rubbing.

  • Activity Restrictions: Patients should avoid heavy lifting, bending over, or getting water/dust in the eye for the first 2–3 weeks.

  • Long-Term Healing: While initial improvement is rapid, full stabilization of the eye typically takes 4 to 6 weeks.

Why Specialized Treatment Is Highly Effective

  • Enhanced Precision: Laser-guided steps are accurate to within a hundredth of a millimeter, significantly reducing manual variability.

  • Reduced Stress on the Eye: Because the laser pre-softens the lens, much less ultrasound energy is required, leading to faster corneal recovery.

  • Perfect Centration: The automated capsulotomy ensures the artificial lens is perfectly centered, which is vital for the performance of premium lenses.

  • Customized Correction: The laser can reshape the cornea to treat minor astigmatism with a level of accuracy difficult to achieve by hand.

  • Consistent Outcomes: The integration of real-time 3D imaging allows for a highly predictable and standardized surgical experience.

Glaucoma Drainage Device Implant

Glaucoma Drainage Device Implant

A Glaucoma Drainage Device (GDD) implant, also known as a tube shunt or aqueous shunt, is a specialized medical device used to lower intraocular pressure (IOP). This procedure is typically reserved for cases where conventional treatments, such as eye drops, laser therapy, or trabeculectomy, have been insufficient or are likely to fail.

When You Should Consider a GDD Implant

  • Refractory Glaucoma: When previous glaucoma surgeries, like a trabeculectomy, have failed or are high-risk due to scarring.

  • Neovascular Glaucoma: If abnormal blood vessel growth in the eye is blocking the natural drainage angles.

  • Uveitic Glaucoma: For managing high pressure caused by chronic internal eye inflammation.

  • Traumatic Glaucoma: When physical injury to the eye has permanently damaged the natural drainage meshwork.

  • Congenital Glaucoma: In pediatric cases where the eye's drainage system did not develop correctly.

How Is Performed

  • Anesthesia: The procedure is usually performed as an outpatient surgery under local anesthesia with sedation and takes about one hour.

  • Incision: A small pocket is created under the conjunctiva (the clear membrane covering the white of the eye).

  • Plate Fixation: A thin, curved silicone plate is sutured to the sclera (the white part of the eye), usually tucked high under the upper eyelid.

  • Tube Insertion: A microscopic, flexible tube is trimmed and inserted into the front chamber of the eye to create a new drainage channel.

  • Patch Graft: A small piece of donor tissue (sclera or cornea) is often placed over the tube to protect it and prevent it from eroding through the eye's surface.

  • Fluid Flow: Excess fluid (aqueous humor) flows through the tube to the plate, where it forms a reservoir (bleb) and is naturally absorbed by the body.

Common Implant Models

  • Valved Implants (e.g., Ahmed Valve): These feature a pressure-sensitive valve that limits fluid flow until a specific pressure is reached, helping to prevent the eye pressure from dropping too low (hypotony) immediately after surgery.

  • Non-Valved Implants (e.g., Baerveldt or Molteno): These lack a valve and offer a larger surface area for drainage. The surgeon often temporarily ties off the tube during surgery to allow a protective capsule to form before drainage begins.

Pre-Procedure Preparation

  • Surgical Planning: A detailed evaluation to choose between a valved or non-valved device based on your specific pressure goals.

  • Medication Review: Discussing current glaucoma drops; some may need to be adjusted to manage inflammation before the implant.

  • Donor Tissue Coordination: Ensuring the necessary patch graft material is available for the day of surgery.

  • Transportation: Arranging for a companion to drive you home, as the eye will be patched and vision will be temporarily blurry.

  • Physical Readiness: Confirming you are comfortable lying still for approximately one hour during the micro-surgical steps.

Tests Before GDD Surgery

  • Gonioscopy: A specialized exam to view the internal drainage angle and determine the safest placement for the tube.

  • Visual Field Test: Establishing a baseline of peripheral vision to monitor the long-term success of the pressure control.

  • Endothelial Cell Count: Checking the health of the inner cornea, as the tube's position must not interfere with these delicate cells.

  • Intraocular Pressure (IOP) Profile: Tracking your pressure fluctuations to confirm the need for a surgical shunt.

Life After a GDD Implant

  • Initial Vision: Vision may be blurry for several days to a few weeks as the eye adjusts to the new drainage system.

  • Activity Restrictions: Patients must avoid bending over, straining, or lifting objects heavier than 5 kg for several weeks to prevent pressure spikes or tube movement.

  • Medication Use: Most patients will still need to continue some glaucoma medications even after the implant is fully functional.

  • Monitoring: Regular checkups are essential to ensure the tube is in the correct position and the plate is draining fluid effectively.

  • Safety Watch: Monitor for rare signs of complications, such as double vision (if the plate affects eye muscles) or redness at the patch graft site.

Why Specialized Treatment Is Highly Effective

  • Robust Pressure Control: Offers a reliable long-term solution for eyes that do not respond to other forms of glaucoma treatment.

  • Bypasses Scarred Tissue: Because the tube is inserted directly into the eye, it bypasses damaged or scarred natural drainage channels.

  • Standard of Care for Complex Cases: Successfully manages pressure in high-risk conditions like neovascular or inflammatory glaucoma.

  • Durable Design: The silicone materials used are highly biocompatible and designed to remain functional inside the eye for many years.

  • Predictable Outcomes: Modern surgical techniques and a variety of implant sizes allow surgeons to tailor the treatment to the specific volume of the patient's eye.

Intravitreal Injections

Intravitreal Injections

Intravitreal injection is a specialized medical procedure used to deliver medications directly into the vitreous—the jelly-like substance in the back of the eye. This remains the most effective method for treating various retinal diseases, as it bypasses the blood-ocular barrier that often prevents oral or intravenous medications from reaching the retina in sufficient concentrations.

When You Should Consider Intravitreal Injection

  • "Wet" Age-Related Macular Degeneration (AMD): To stop the growth of abnormal, leaky blood vessels that cause rapid vision loss.

  • Diabetic Macular Edema (DME): If you need to reduce retinal swelling caused by fluid leakage from blood vessels damaged by diabetes.

  • Retinal Vein Occlusion (RVO): To manage fluid backup following a "stroke" in the eye’s vascular system.

  • Uveitis: Delivering potent anti-inflammatory steroids directly to the back of the eye to treat chronic inflammation.

  • Endophthalmitis: In emergency cases to deliver immediate antibiotic or antifungal treatment for severe internal infections.

How Is Performed

  • Numbing: The eye is thoroughly anesthetized using specialized drops or a gel to ensure patient comfort.

  • Sterilization: The eye and eyelids are cleaned with a povidone-iodine solution to prevent bacterial infection.

  • Stabilization: A small device (speculum) is used to keep the eyelids open and prevent blinking during the procedure.

  • Injection: A very fine needle is used to deliver medication through the Pars Plana—the "white part" of the eye—in a process that lasts only a few seconds.

  • Post-Check: The surgeon checks the eye for immediate pressure changes and may provide artificial tears for comfort.

  • Duration: The entire clinical process typically takes less than 10 to 15 minutes.

Methods of Injection

  • Anti-VEGF Therapy: The use of agents that block proteins promoting leaky vessel growth; modern agents often allow for extended treatment intervals of 3–4 months.

  • Corticosteroid Delivery: Direct injection of steroids to manage chronic internal eye inflammation and swelling.

  • Antibiotic/Antifungal Administration: Targeted delivery of antimicrobial agents for severe internal infections.

  • OCT-Guided Treatment: Using high-resolution imaging to determine the precise frequency of injections needed for each patient.

Pre-Procedure Preparation

  • Baseline Consultation: A detailed exam to identify leaking blood vessels or the specific areas of retinal swelling.

  • Medical History: Discussing current medications and any history of iodine allergies or recent eye infections.

  • Visual Expectations: Preparing for the temporary appearance of "floaters" or "bubbles" in your vision immediately following the procedure.

  • Transportation: Arranging for a ride home, as your vision may be temporarily blurry from dilating drops.

  • Treatment Planning: Reviewing the long-term schedule, including whether you will receive long-acting medications.

Tests Before Intravitreal Injection

  • Optical Coherence Tomography (OCT): A high-resolution scan used to measure retinal thickness and track fluid accumulation over time.

  • Fluorescein Angiography: A diagnostic test used to map out the exact location of leaking blood vessels in the retina.

  • Visual Acuity Test: Establishing a clear baseline of vision quality to monitor the effectiveness of the medication.

  • Intraocular Pressure (IOP) Check: Ensuring the internal pressure of the eye is within a safe range before the injection.

Life After Intravitreal Injection

  • Vision Settling: Expect "floaters" or "bubbles" in your vision to disappear within 24–48 hours as the medication distributes.

  • Hygiene: Avoid rubbing your eyes or exposing them to swimming pools, hot tubs, or dusty environments for 2 to 3 days.

  • Injection Site: Monitor for a subconjunctival hemorrhage (a harmless red spot at the needle entry point), which typically resolves within a week.

  • Safety Monitoring: Watch for rare signs of complication, such as increasing pain, severe redness, or a sudden "curtain" falling over your vision.

  • Follow-up: Adhering to regular appointments for OCT imaging is essential to ensure the treatment is successfully stabilizing your vision.

Why Specialized Treatment Is Highly Effective

  • Systemic Safety: Minimizes side effects compared to oral or intravenous medications because the drug stays localized within the eye.

  • Bypasses Barriers: Delivers high concentrations of medication directly to the retina that other delivery methods cannot reach.

  • Rapid Results: Offers a quick, outpatient experience with minimal downtime and a fast return to daily activities.

  • Vision Preservation: Significantly improves or stabilizes vision in patients with conditions that were previously considered untreatable.

  • Minimal Discomfort: The fine-needle technique is generally described as a sensation of pressure rather than sharp pain.

Laser Iridotomy

Laser Iridotomy

Laser Iridotomy, or Laser Peripheral Iridotomy (LPI), is a quick outpatient procedure used primarily to treat or prevent angle-closure glaucoma. By creating a microscopic hole in the outer edge of the iris, the procedure allows fluid to flow more freely between the back and front of the eye. This bypass balances internal pressure and prevents sudden, sight-threatening pressure spikes.

When You Should Consider Laser Iridotomy

  • Narrow-Angle Suspects: If a routine eye exam reveals that your drainage angles are naturally narrow, putting you at high risk for a sudden glaucoma "attack."

  • Acute Angle-Closure: Used as an emergency intervention during a sudden, painful spike in eye pressure to save vision.

  • Chronic Angle-Closure: For patients whose drainage system is permanently narrowed or partially blocked by the iris.

  • Preventative Care: If you have had an angle-closure attack in one eye, LPI is typically performed on the other eye as a preventative measure.

  • Anatomical Narrowing: When the iris is physically "bowed" forward, preventing the natural drainage of aqueous humor.

How Is Performed

  • Preparation: The eye is numbed with anesthetic drops. Specialized drops (like pilocarpine) are used to constrict the pupil, which thins the iris and makes it easier for the laser to penetrate.

  • Positioning: You sit at a slit-lamp machine—similar to a standard eye exam microscope—with your chin and forehead in a steady rest.

  • Focusing: A specialized contact lens is placed on the eye to focus the laser beam and keep your eyelids open during the pulses.

  • Laser Application: The surgeon uses a focused laser (commonly a YAG or Argon laser) to create a tiny opening in the outer edge of the iris, usually hidden under the upper eyelid.

  • Monitoring: You will remain at the clinic for 30 minutes to 2 hours post-procedure so the specialist can check for any immediate spikes in eye pressure.

  • Duration: The procedure is typically completed in 5 to 15 minutes per eye.

Pre-Procedure Preparation

  • Gonioscopy: A specialized diagnostic exam to view the drainage angle and confirm that the iris is causing the obstruction.

  • Medication Review: Discussing any blood thinners or history of eye inflammation (uveitis) with your surgeon.

  • Pupil Preparation: Being aware that the constricting drops used before surgery may cause a temporary brow ache or dim vision.

  • Transportation: Arranging for a ride home, as your vision may be temporarily blurred from the specialized lenses and laser light.

Tests Before Laser Iridotomy

  • Intraocular Pressure (IOP) Check: Establishing a baseline pressure to compare against post-laser readings.

  • Anterior Segment OCT: A high-resolution scan that provides a cross-sectional view of the drainage angle and iris position.

  • Visual Acuity: Measuring your current vision to ensure the laser treatment does not affect your baseline sight.

  • Slit-Lamp Examination: A microscopic check of the iris thickness and the health of the cornea before the laser application.

Life After Laser Iridotomy

  • Initial Recovery: Most patients return to normal activities within 24 to 48 hours.

  • Common Symptoms: Temporary blurred vision, mild headache, light sensitivity, or a "gritty" feeling in the eye are normal for a day or two.

  • Medication: You will be prescribed anti-inflammatory (steroid) eye drops to use for about a week to ensure the microscopic hole stays open and heals.

  • Activity Restrictions: Avoid strenuous exercise, heavy lifting, or rubbing the eyes for the first 2–3 days.

  • Follow-up: A pressure check and gonioscopy are usually performed 1 to 2 weeks later to confirm the angle has successfully opened.

Why Specialized Treatment Is Highly Effective

  • Prevents Blindness: It is the primary defense against acute angle-closure glaucoma, which can cause permanent blindness in hours if untreated.

  • Minimally Invasive: Requires no surgical incisions, no stitches, and is performed entirely in an office setting.

  • Permanent Solution: Once the microscopic hole is created and healed, it typically provides a life-long pathway for fluid flow.

  • Rapid Results: The internal pressure often begins to stabilize immediately after the bypass is created.

  • High Safety Profile: Complications are uncommon, and the procedure is considered the global standard of care for narrow-angle conditions.

Laser Photocoagulation

Laser Photocoagulation

Laser photocoagulation is a specialized medical procedure that utilizes a precise, high-energy beam of light to treat various retinal disorders. By creating microscopic thermal burns in targeted areas of the retina, the laser induces the formation of scar tissue. This tissue is used to seal leaking blood vessels, shrink abnormal ones, or "weld" retinal tears to the underlying tissue to prevent detachment.

When You Should Consider Laser Photocoagulation

  • Diabetic Macular Edema (DME): To seal specific leaking blood vessels that cause swelling in the central vision (macula).

  • Proliferative Diabetic Retinopathy (PDR): If you need to shrink abnormal, fragile blood vessels to prevent severe internal bleeding or vision loss.

  • Retinal Tears or Holes: To repair structural breaks in the retina before they progress into a full retinal detachment.

  • Vision Stabilization: When seeking to stop the progression of retinal diseases and prevent further deterioration of your sight.

  • Reducing Oxygen Demand: In advanced disease, to protect the overall health of the eye by treating peripheral areas.

How Is Performed

  • Dilation: The pupil is dilated with drops to provide the specialist a clear, wide-angle view of the retina.

  • Numbing: Anesthetic drops are applied to the surface of the eye to ensure the procedure is generally painless.

  • Positioning: The patient sits at a slit-lamp microscope—similar to a standard eye exam—with their chin and forehead held steady in a rest.

  • Application: A specialized contact lens is placed on the eye to focus the high-energy laser pulses exactly where they are needed.

  • Duration: The clinical session typically lasts between 15 and 30 minutes, depending on the number of laser spots required.

Methods of Laser Treatment

  • Focal Laser Treatment: Aiming small, individual laser spots directly at specific leaking vessels to reduce swelling in the macula.

  • Pan-Retinal Photocoagulation (PRP): Applying hundreds to thousands of laser burns to the peripheral retina to shrink abnormal vessels in advanced diabetic disease.

  • Laser Retinopexy: Creating a protective "wall" of scar tissue around a retinal break to prevent fluid from passing underneath it.

  • Thermal Coagulation: The process of converting high-energy light into localized heat to achieve targeted tissue sealing.

Pre-Procedure Preparation

  • Retinal Roadmap: A detailed examination to identify the specific areas of leakage or tearing that require treatment.

  • Goal Setting: Discussing the primary goal of the treatment, which is typically to stabilize current vision rather than restore sight already lost to disease.

  • Transportation: Arranging for a driver to take you home, as your vision will be temporarily dazzled and blurred from the dilation and laser light.

  • Vision Awareness: Reviewing potential impacts on peripheral or night vision, especially if you are undergoing extensive Pan-Retinal Photocoagulation (PRP).

  • Physical Comfort: Ensuring you are comfortable sitting still for up to 30 minutes with your head in a fixed position.

Tests Before Laser Photocoagulation

  • Optical Coherence Tomography (OCT): A high-resolution scan used to measure retinal swelling and pinpoint leaking vessels for focal treatment.

  • Fluorescein Angiography: A diagnostic map that uses a special dye to highlight areas of abnormal blood vessel growth and active leakage.

  • Visual Acuity Test: Establishing a precise baseline of your current vision quality before the procedure.

  • Slit-Lamp Examination: Providing the surgeon with a high-magnification view of the back of the eye to plan the laser application.

Life After Laser Photocoagulation

  • Recovery Window: Expect blurred or "dazzled" vision for the first 24 hours due to the combined effects of the laser pulses and pupil dilation.

  • Activity Resumption: Most normal activities can be resumed within a few hours, though you should avoid strenuous exercise for 1 to 2 weeks if treated for a retinal tear.

  • Healing Timeline: Monitor for the shrinkage of abnormal vessels, a process that can take approximately 2 to 3 months to complete.

  • Follow-up Care: Regular appointments are necessary for several months to ensure the retina is healing correctly and no new leaks have developed.

  • Visual Artifacts: Be aware that you may notice small, permanent blind spots or floaters in the peripheral areas treated by the laser.

Why Specialized Treatment Is Highly Effective

  • Significant Risk Reduction: Reduces the risk of severe, permanent vision loss by over 50% in advanced diabetic cases.

  • Non-Invasive Solution: Provides a targeted, outpatient solution for life-altering conditions without the need for traditional surgery.

  • Prevents Major Detachments: Effectively "welds" retinal tissue in place, often preventing the need for much more complex surgical interventions.

  • Fragile Vessel Control: Shrinks dangerous, abnormal blood vessels to prevent sudden and severe vitreous hemorrhages (bleeding inside the eye).

  • Precision Focus: Utilizes a highly targeted approach that focuses energy only on diseased tissue while sparing as much healthy retina as possible.

LASIK / Femto-LASIK

LASIK / Femto-LASIK

LASIK and Femto-LASIK are refractive surgeries designed to correct vision problems like nearsightedness (myopia), farsightedness (hyperopia), and astigmatism by reshaping the cornea. While both follow the same basic restorative principles, the primary difference lies in how the initial corneal flap is created, with Femto-LASIK offering a completely "bladeless" experience.

When You Should Consider LASIK

  • Nearsightedness (Myopia): When nearby objects are clear, but distant objects appear blurry.

  • Farsightedness (Hyperopia): When you can see distant objects clearly, but close-up tasks cause eye strain or blur.

  • Astigmatism: When the cornea is shaped more like a football than a basketball, causing overall distorted vision.

  • Dependence on Corrective Lenses: When you wish to eliminate or significantly reduce the need for glasses or contact lenses for daily activities.

  • Stable Vision: When your eye prescription has remained unchanged for at least one to two years.

How Is Performed

  • Step 1: Numbing: Anesthetic eye drops are applied so you remain awake and comfortable throughout the procedure.

  • Step 2: Flap Creation: A thin, hinged flap is created on the outer layer of the cornea and folded back to access the underlying tissue.
    Traditional LASIK: Uses a mechanical handheld blade called a microkeratome.
    Femto-LASIK: Uses a high-precision femtosecond laser to create the flap, making it "bladeless."

  • Step 3: Reshaping: An excimer laser is used to remove microscopic amounts of tissue from the inner cornea to improve how light focuses on the retina.

  • Step 4: Repositioning: The corneal flap is folded back into its original position, where it bonds naturally and begins healing immediately without the need for stitches.

  • Duration: The entire outpatient process typically takes about 10 to 20 minutes for both eyes.

Pre-Procedure Preparation

  • Contact Lens Holiday: You must stop wearing contact lenses (usually 1–3 weeks before) to allow the cornea to return to its natural shape.

  • Corneal Mapping: Detailed 3D scans are taken of the eye's surface to program the laser for your specific correction needs.

  • Medication Audit: Discussing any history of dry eyes or autoimmune conditions with your surgeon that might affect healing.

  • Transportation: Arranging for a ride home after the procedure, as your vision will be foggy and you may experience light sensitivity.

Tests Before LASIK

  • Corneal Topography: A specialized map that measures the curvature and thickness of the cornea to ensure it is healthy enough for surgery.

  • Pachymetry: Measuring corneal thickness; Femto-LASIK is often preferred for patients with thinner corneas.

  • Dry Eye Assessment: Checking tear production to determine if post-operative dryness needs to be managed proactively.

  • Wavefront Analysis: A highly detailed "fingerprint" of your vision that detects subtle imperfections to guide a customized laser treatment.

Life After LASIK

  • Initial Vision: Most patients see clearly within 24 to 48 hours, though vision may fluctuate slightly for the first few days.

  • Post-Op Symptoms: Temporary grittiness, dryness, or light sensitivity is normal immediately following the surgery.

  • Prescribed Drops: You must strictly follow the schedule for antibiotic and anti-inflammatory eye drops to prevent infection.

  • Eye Protection: Wearing protective sunglasses or shields is recommended, especially while sleeping, to prevent accidental rubbing.

  • Activity Restrictions: For the first week, avoid wearing eye makeup, swimming, or participating in contact sports.

Why Specialized Treatment Is Highly Effective

  • Higher Precision: Femto-LASIK allows for customizable flap dimensions, ensuring a safer and more predictable surgical outcome.

  • Expanded Eligibility: Bladeless technology makes refractive surgery an option for patients who were previously told their corneas were too thin for a blade.

  • Reduced Complications: The use of a computer-guided laser minimizes risks such as irregular flap creation or flap dislocation.

  • Rapid Results: Most patients return to work and light daily activities within 24 hours of the procedure.

  • Permanent Vision Correction: By physically reshaping the cornea, the procedure provides a long-term solution for refractive errors.

MIGS (Minimally Invasive Glaucoma Surgery)

MIGS (Minimally Invasive Glaucoma Surgery)

Minimally Invasive Glaucoma Surgery (MIGS) is a group of modern surgical techniques designed to lower eye pressure with significantly less trauma than traditional glaucoma surgeries. These procedures use microscopic incisions and specialized devices to improve fluid drainage, typically for patients with mild-to-moderate open-angle glaucoma who wish to reduce their dependence on daily eye drops.

When You Should Consider MIGS

  • Mild-to-Moderate Glaucoma: When your eye pressure is not adequately controlled by one or two types of eye drops.

  • Concurrent Cataract Surgery: MIGS is frequently performed alongside cataract removal, as it uses the same tiny incision and adds only minutes to the total procedure time.

  • Intolerance to Medications: If you experience severe dry eye, redness, or allergies caused by long-term use of glaucoma eye drops.

  • Desire for Faster Recovery: When you require a pressure-lowering procedure but cannot afford the long downtime associated with traditional surgery.

  • Preserving Future Options: Because MIGS is "micro-invasive," it preserves the outer layers of the eye (conjunctiva) in case more intensive surgery is needed later in life.

How Is Performed

  • Micro-Incision: The surgeon enters the eye through a microscopic incision (often only 1–2 mm) in the clear cornea.

  • Ab Interno Approach: The procedure is performed from the inside of the eye, allowing the surgeon to view the internal drainage angle directly through a specialized lens.

  • Methods of Treatment:
    Trabecular Bypass (Stents): Tiny implants like the iStent or Hydrus Microstent are placed into the eye's natural drainage canal to bypass blockages.
    Tissue Excision: Tools like the Kahook Dual Blade (KDB) are used to remove a small strip of the blocked meshwork to let fluid flow freely.
    Subconjunctival Filtration: A flexible gelatin tube, such as the Xen Gel Stent, creates a tiny tunnel to redirect fluid to a reservoir under the eye's outer membrane.
    Ciliary Body Ablation: A laser probe (ECP) is used inside the eye to treat the tissue that produces fluid, reducing the overall "inflow" of pressure.

  • Duration: When performed alone, MIGS typically takes 10 to 15 minutes; when combined with cataract surgery, it adds approximately 5 to 10 minutes.

Pre-Procedure Preparation

  • Gonioscopy: A detailed exam using a mirrored lens to view your internal drainage angle and ensure it is "open" enough for MIGS.

  • Visual Field Mapping: Documenting your current peripheral vision to establish a baseline for long-term stability.

  • Medication Audit: Reviewing your current eye drops; your surgeon will determine if you should continue or stop them immediately after the procedure.

  • Transportation: Arranging for a ride home, as your vision may be temporarily blurry from the surgical microscope and dilating drops.

Tests Before MIGS

  • Optical Coherence Tomography (OCT): To measure the thickness of the optic nerve fibers and assess the severity of glaucoma.

  • Intraocular Pressure (IOP) Tracking: Recording your pressure at different times of the day to determine your "target pressure."

  • Pachymetry: Measuring the thickness of your cornea to ensure the most accurate eye pressure readings.

  • Endothelial Cell Count: Checking the health of the inner cornea, especially if a permanent stent is being considered.

Life After MIGS

  • Rapid Recovery: Most patients return to normal daily activities within 3 to 7 days, which is much faster than traditional glaucoma surgery.

  • Medication Regimen: You will need to use antibiotic and anti-inflammatory eye drops for several weeks to ensure proper healing.

  • Pressure Monitoring: Temporary "pressure spikes" can occur in the first few days, requiring close follow-up with your surgeon.

  • Activity Restrictions: Avoid heavy lifting, swimming, or rubbing the treated eye for at least 2 to 4 weeks.

  • Reduced Drop Burden: Many patients are able to significantly reduce or even stop their daily glaucoma eye drops once the drainage device is fully functional.

Why Specialized Treatment Is Highly Effective

  • High Safety Profile: Carries a much lower risk of serious complications like hypotony (dangerously low pressure) or severe bleeding.

  • Versatile Pathways: Surgeons can target multiple drainage pathways (trabecular, uveoscleral, or subconjunctival) depending on your eye's unique anatomy.

  • Standardized Precision: The use of microscopic stents and blades ensures a predictable result with minimal damage to healthy tissue.

  • Sustained Control: Unlike eye drops, which can be forgotten or difficult to administer, a MIGS implant provides 24/7 pressure management.

  • Synergy with Cataract Care: Offers a "two-for-one" opportunity to improve vision clarity and lower eye pressure in a single, efficient session.

Orbital Tumor Removal

Orbital Tumor Removal

Orbital tumor removal is a highly specialized surgery to excise growths within the eye socket (orbit). Because the orbit is a compact space containing the optic nerve, eye muscles, and critical blood vessels, these procedures often require a multidisciplinary team of oculoplastic surgeons and neurosurgeons to ensure the tumor is removed while preserving vision and eye function.

When You Should Consider Orbital Tumor Removal

  • Proptosis (Bulging Eye): When a growth pushes the eyeball forward, causing it to appear more prominent than the other eye.

  • Vision Loss: If a tumor is compressing the optic nerve, leading to dimmed vision, loss of color perception, or blind spots.

  • Double Vision (Diplopia): When a tumor interferes with the muscles that move the eye, causing the eyes to become misaligned.

  • Persistent Pain: Deep-seated aching or pressure within the eye socket that does not resolve with medication.

  • Palpable Mass: A noticeable lump that can be felt through the eyelid or in the corner of the eye socket.

How Is Performed

  • Anesthesia: Most orbital surgeries are performed under general anesthesia to ensure patient stability and comfort during delicate maneuvers.

  • Surgical Approaches:
    Anterior Orbitotomy: Used for tumors in the front two-thirds of the socket. Access is gained through the eyelid crease or the conjunctiva, often leaving no visible scar.
    Lateral Orbitotomy: The standard approach for deep tumors on the outer side of the eye. This may involve temporarily removing a small piece of the side orbital bone, which is replaced and secured at the end of surgery.
    Endoscopic Endonasal Approach: A minimally invasive technique where the surgeon reaches tumors near the nose or the back of the socket through the nostrils using a thin camera.
    Transcranial Orbitotomy: Reserved for tumors at the very back (orbital apex) or those extending toward the brain, requiring a neurosurgical approach through the skull.

  • Reconstruction: If the tumor has affected surrounding structures, the surgeon may reconstruct the area using the patient's own tissue or synthetic materials like titanium plates.

  • Duration: Surgery can last anywhere from 2 to 8 hours depending on the complexity and location of the growth.

Pre-Procedure Preparation

  • Advanced Imaging: High-resolution MRI or CT scans are used to create a precise 3D map of the tumor’s position relative to the optic nerve.

  • Multidisciplinary Consultation: Meeting with both oculoplastic and neurosurgical teams if the tumor is located near the brain or orbital apex.

  • Vision Baseline: A comprehensive eye exam to document your current sight, color vision, and eye movements.

  • Medication Audit: Reviewing blood thinners and supplements that must be managed to prevent internal bleeding within the tight orbital space.

  • Hospital Planning: Preparing for an inpatient stay, as most patients are monitored for at least one night following the procedure.

Tests Before Orbital Tumor Removal

  • Visual Field Test: To map out any existing blind spots caused by pressure on the optic nerve.

  • Orbital Ultrasound: A non-invasive way to determine if a mass is solid or cystic (fluid-filled).

  • Forced Ductions: A clinical test to see if the eye's movement is physically restricted by the tumor or a trapped muscle.

  • Biopsy: In some cases, a small needle sample may be taken before the main surgery to determine if the tumor is benign or malignant.

Life After Orbital Tumor Removal

  • Hospital Stay: Patients typically remain in the hospital for 1 to 7 days for close observation of their vision and neurological status.

  • Immediate Symptoms: Significant swelling, bruising, and a sense of pressure are normal and peak within the first 48–72 hours.

  • Activity Restrictions: You must strictly avoid heavy lifting, bending over, or blowing your nose for at least 2 weeks to prevent pressure-related bleeding.

  • Vision Recovery: Temporary blurring or double vision is common as the eye muscles and nerves heal; full internal recovery can take up to 6 months.

  • Monitoring: Regular follow-up imaging (MRI or CT) is essential to ensure there is no recurrence of the tumor.

Why Specialized Treatment Is Highly Effective

  • Preserves Sight: Expert surgeons prioritize the "safe corridor" approach to reach the tumor without damaging the delicate optic nerve.

  • Minimally Invasive Options: Techniques like endoscopic endonasal surgery allow for tumor removal with no external facial incisions.

  • Comprehensive Reconstruction: Modern materials like titanium and porous polyethylene allow for the restoration of the eye socket's natural shape.

  • Multidisciplinary Expertise: Combining the skills of eye and brain specialists provides the highest level of safety for complex, deep-seated tumors.

  • Definitive Diagnosis: Full excision allows for a complete pathological analysis, ensuring the most accurate long-term treatment plan.

Pediatric Cataract Surgery

Pediatric Cataract Surgery

Pediatric cataract surgery is a specialized procedure to remove a clouded lens in infants or children. Unlike adult surgery, a child’s eye is still growing and is significantly more prone to inflammation and scarring. This requires different surgical techniques, absorbable sutures, and intensive long-term follow-up to ensure the brain develops clear vision.

When You Should Consider Pediatric Cataract Surgery

  • Congenital Cataracts: When a baby is born with a clouded lens that blocks light from reaching the retina.

  • Developmental Cataracts: If a cataract develops during early childhood, affecting school performance or physical coordination.

  • Leukocoria (White Pupil): When a white reflection is noticed in the child’s pupil in photos or under bright light.

  • Nystagmus: If the child's eyes begin to shake or wander because they cannot focus on objects clearly.

  • Strabismus (Squint): When an eye begins to turn inward or outward because the cataract is preventing the eyes from working together.

How Is Performed

  • Anesthesia: The surgery is performed under general anesthesia to ensure the child remains perfectly still and comfortable.

  • Incision: A microscopic incision is made in the cornea or the white part of the eye (sclera).

  • Lensectomy: Because a child’s lens is naturally soft, it is usually aspirated (gently suctioned out) rather than broken up with ultrasound energy.

  • Primary Posterior Capsulotomy (PPC): In children (especially under age 5), the back part of the lens capsule is intentionally opened to prevent a "secondary cataract" from forming.

  • Anterior Vitrectomy: A small amount of the vitreous gel is removed from the front of the eye to keep the visual axis clear for light to pass through.

  • IOL Implantation: * Children (over 1–2 years): An artificial Intraocular Lens (IOL) is usually implanted.
    Infants: Surgeons may leave the eye "aphakic" (no lens) and use specialized contact lenses or glasses until the eye grows larger.

  • Suturing: Unlike adult surgery, the incisions must be stitched with absorbable sutures to ensure the wound is strong enough for an active child.

  • Duration: The procedure typically takes between 45 and 90 minutes.

Pre-Procedure Preparation

  • Pediatric Assessment: A comprehensive eye exam, often done under light sedation for younger children, to measure the eye's length and curvature.

  • IOL Calculation: Using specialized formulas to predict how the eye will grow and what lens power will be needed for the future.

  • Fasting: Following strict "nothing by mouth" instructions for the hours leading up to general anesthesia.

  • Amblyopia Plan: Discussing the likelihood of needing Patching Therapy after surgery to treat "lazy eye."

  • Logistics: Preparing for a day-care hospital stay and ensuring the child is healthy (no coughs or colds) on the day of surgery.

Tests Before Pediatric Cataract Surgery

  • A-Scan Biometry: To measure the length of the eye and calculate the appropriate lens power.

  • B-Scan Ultrasound: To ensure the retina is healthy and attached behind the clouded lens.

  • Red Reflex Test: A simple but vital check to see how much light is actually being blocked by the cataract.

  • Retinoscopy: To assess the refractive error and prepare for the high-power glasses or contacts needed post-op.

Life After Pediatric Cataract Surgery

  • Intensive Medication: Antibiotic and steroid eye drops are required for 4 to 8 weeks to manage the child's strong immune response.

  • Eye Protection: The child must wear a protective shield or specialized "arm restraints" (for infants) to prevent them from rubbing or poking the eye.

  • Vision Correction: Almost all children will need high-power glasses or contact lenses immediately to help the brain learn to see.

  • Patching Therapy: The "good" eye may be covered for several hours a day to force the brain to use the eye that had surgery.

  • Long-Term Monitoring: Frequent check-ups are required to watch for Glaucoma or "Visual Axis Opacification" (where the capsule tries to grow back shut).

Why Specialized Treatment Is Highly Effective

  • Prevents Permanent Blindness: Removing the cataract early allows light to stimulate the brain during the critical period of visual development.

  • Reduces Secondary Cataracts: Techniques like PPC and vitrectomy significantly lower the risk of the vision clouding over again.

  • Customized for Growth: The surgical approach is tailored to the child's age, whether they need an immediate IOL or temporary contact lenses.

  • Stronger Wound Closure: The use of absorbable sutures provides the necessary structural integrity for a child's active lifestyle.

  • Comprehensive Care: Combines surgery with orthoptic therapy (patching) to ensure the highest possible quality of long-term vision.

Phacoemulsifacation

Phacoemulsifacation

Phacoemulsification, commonly referred to as "phaco," is the modern gold standard for cataract surgery. This procedure uses ultrasonic energy to fragment a clouded natural lens (cataract), allowing it to be removed through a microscopic, often stitchless incision. It is then replaced with a permanent artificial intraocular lens (IOL) to restore clear vision.

When You Should Consider Phacoemulsification

  • Cloudy or Blurry Vision: When daily activities like reading or driving become difficult due to a "foggy" lens.

  • Glare and Halos: Increased sensitivity to light, especially during night driving.

  • Fading Colors: When vibrant colors appear yellowed, dull, or faded.

  • Frequent Prescription Changes: Rapid changes in eyeglass or contact lens strength.

  • Double Vision: Experiencing multiple images in a single eye.

How Is Performed

  • Anesthesia: Numbing eye drops (topical anesthesia) or a local injection are used so the patient remains awake but feels no pain.

  • The Incision: A microscopic, self-sealing incision (typically 2.2 to 2.8 mm) is made at the edge of the cornea.

  • Capsulorhexis: A precise circular opening is created in the thin membrane (capsule) that surrounds the lens.

  • Phacoemulsification: A specialized probe emitting ultrasonic waves vibrates at high frequencies to fragment the cataract into tiny pieces.

  • Aspiration: The fragmented pieces are gently suctioned out of the eye using the same high-tech probe.

  • IOL Implantation: A foldable artificial lens is inserted through the tiny incision; it unfolds naturally inside the lens capsule to restore focus.

  • Closure: Because of the precise shape of the incision, stitches are usually unnecessary.

Pre-Procedure Preparation

  • Eye Measurement (Biometry): Precise ultrasound or laser measurements are taken to determine the correct power of the artificial lens (IOL).

  • Medication Audit: Patients may be asked to start antibiotic or anti-inflammatory drops a few days before the procedure.

  • Fasting: Following specific instructions regarding food and drink intake on the morning of the surgery.

  • Transportation: Arranging for a family member or friend to drive you home, as vision will be blurry immediately after the procedure.

Tests Before Cataract Surgery

  • Visual Acuity Test: To measure exactly how much the cataract is affecting your sight.

  • Slit-Lamp Examination: A detailed microscopic look at the front structures of the eye, including the lens.

  • Retinal Exam: Checking the back of the eye to ensure the retina is healthy and capable of good vision after surgery.

  • Keratometry: Measuring the curvature of the cornea to help select the most appropriate artificial lens.

Life After Phacoemulsification

  • Initial Vision: Vision may be blurry for the first 24–48 hours but typically improves rapidly as the eye heals.

  • Medication: Patients must use prescribed antibiotic and anti-inflammatory eye drops for several weeks to prevent infection.

  • Eye Protection: A plastic shield is often worn while sleeping for the first week to prevent accidental rubbing or pressure.

  • Activity Restrictions: Avoid heavy lifting, bending over, or getting water/soap in the eye for at least the first 2–3 weeks.

  • Follow-up: Regular checkups ensure the IOL is perfectly positioned and the eye pressure remains stable.

Why Specialized Treatment Is Highly Effective

  • Rapid Recovery: Most patients return to light daily activities within one to two days.

  • Micro-Incision Precision: Smaller incisions significantly reduce the risk of surgically induced astigmatism.

  • Customized Vision: Modern IOLs can correct pre-existing nearsightedness, farsightedness, or even presbyopia (reading vision).

  • Minimal Complications: Advanced technology has lowered the risks of infection, bleeding, and inflammation compared to older methods.

  • Permanent Solution: Once the clouded lens is removed and replaced, a cataract cannot grow back on the artificial lens.

Ptosis Surgery/Blepharoplasty

Ptosis Surgery/Blepharoplasty

Ptosis surgery, also known as blepharoplasty for ptosis or ptosis repair, is a specialized procedure performed to lift a drooping upper eyelid. Unlike standard cosmetic surgery, this procedure focuses on the levator muscle, which is responsible for raising the lid. The goal is to restore a full field of vision and achieve a symmetrical, alert appearance.

When You Should Consider Ptosis Surgery

  • Obstructed Vision: When the eyelid droops low enough to block the pupil or restrict your superior (upper) field of vision.

  • Congenital Ptosis: If a child is born with a drooping lid that may interfere with their visual development or cause a "lazy eye."

  • Acquired Ptosis: When the eyelid muscle stretches or detaches due to aging, long-term contact lens wear, or eye trauma.

  • Eye Strain: If you find yourself constantly arching your eyebrows or tilting your head back to see clearly.

  • Asymmetry: To correct a noticeable difference in the height or contour of the two eyelids for a more balanced appearance.

How Is Performed

  • Anesthesia: The surgery is usually an outpatient procedure performed under local anesthesia with sedation for adults, or general anesthesia for children.

  • Incision: The surgeon typically makes a precise incision within the natural crease of the upper eyelid to ensure any future scarring remains hidden.

  • Muscle Adjustment Techniques:
    Levator Resection: The levator muscle is shortened and reattached to the eyelid to make it "tighter" and stronger.
    Levator Advancement: The muscle is detached and moved forward to a higher position on the eyelid to improve its leverage.
    Müller Muscle Resection: For mild drooping, a small muscle on the underside of the lid is tightened; this often involves no external skin incision.
    Frontalis Sling: If the eyelid muscle is extremely weak, the lid is attached to the forehead (brow) muscles using a medical-grade "sling," allowing the patient to lift their lid by raising their eyebrows.

  • Real-Time Adjustment: In adults, the surgeon may ask the patient to sit up during the procedure to check the lid height and ensure both eyes are perfectly symmetrical.

  • Closure: The incision is closed with very fine, often dissolvable, sutures.

  • Duration: The procedure typically takes between 45 and 90 minutes.

Pre-Procedure Preparation

  • Visual Field Testing: To document how much the drooping eyelid is physically blocking your upper range of vision.

  • Levator Function Test: Measuring how many millimeters the eyelid moves when you look from down to up to determine the best surgical technique.

  • Dry Eye Screening: Assessing your tear production, as lifting the lid will expose more of the eye's surface to the air.

  • Medication Audit: Discussing any blood thinners or herbal supplements that may increase bruising or swelling after surgery.

  • Transportation: Arranging for a ride home, as your vision may be blurry from antibiotic ointment and local swelling.

Tests Before Ptosis Surgery

  • Margin Reflex Distance (MRD): A precise measurement of the distance between the light reflex on the pupil and the edge of the upper eyelid.

  • Hering’s Law Test: Checking if lifting one eyelid causes the other to drop, which helps the surgeon plan for bilateral (both eyes) surgery.

  • Phenylephrine Test: Using specialized drops to see if the eyelid responds to stimulation of the Müller muscle, indicating if a "no-incision" approach is possible.

  • Eyelid Photography: Taking standardized photos to map the lid contour and provide a baseline for post-operative symmetry.

Life After Ptosis Surgery

  • Initial Recovery: Swelling, bruising, and a "tight" feeling in the lids are normal for the first 1 to 2 weeks.

  • Eye Closure: It is common to have difficulty closing the eye completely for the first few days. Using prescribed lubricating ointments and drops is essential to prevent the eye from drying out.

  • Cold Compresses: Frequent use of cold packs for the first 48 hours is highly recommended to minimize bruising and swelling.

  • Stitch Removal: If non-dissolvable stitches were used, they are typically removed in the office after 5 to 7 days.

  • Activity Limits: Avoid heavy lifting, strenuous exercise, or wearing eye makeup for at least 1 to 2 weeks to allow the delicate incisions to heal.

Why Specialized Treatment Is Highly Effective

  • Restores Full Vision: Effectively clears the visual axis, eliminating the "tunnel vision" effect caused by a sagging lid.

  • Achieves Symmetry: Advanced adjustment techniques allow the surgeon to match the curve and height of both eyelids with high precision.

  • Minimally Invasive: Modern eyelid surgery uses tiny incisions and hidden sutures, resulting in a rapid recovery and natural-looking results.

  • Functional and Aesthetic: Simultaneously improves your ability to see while eliminating a "tired" or "sleepy" facial expression.

  • Long-Lasting Results: For most adults, a single ptosis repair provides a permanent solution that lasts for many years without the need for a "touch-up."

Retinal Detachment Surgery

Retinal Detachment Surgery

Retinal detachment surgery is an emergency procedure used to reattach the light-sensitive layer (the retina) to the back of the eye. If the retina remains detached from its underlying layer of blood vessels, it is starved of oxygen, leading to permanent vision loss. Immediate intervention is critical to "weld" the retina back into its functional position.

When You Should Consider Surgery

  • Sudden Floaters: A dramatic increase in the number of spots, strings, or "cobwebs" drifting in your field of vision.

  • Flashes of Light: Seeing brief streaks or bursts of light (photopsia) in one or both eyes.

  • Shadow or Curtain: A dark shadow or "curtain" moving across your peripheral or central field of vision.

  • Blurred Vision: A sudden drop in visual clarity that cannot be corrected with glasses.

  • Diagnosed Retinal Tear: When an eye exam reveals a hole or tear that puts the retina at high risk of peeling away.

How Is Performed

  • Vitrectomy: The most common method where the surgeon removes the vitreous gel and replaces it with a gas bubble or silicone oil to push the retina back against the eye wall.

  • Scleral Buckle: A small silicone band is sewn to the white of the eye (sclera), "buckling" the eye wall inward to relieve the pull on the retina.

  • Pneumatic Retinopexy: A gas bubble is injected directly into the eye to press the retina against the tear; this requires strict head positioning to be effective.

  • Laser (Photocoagulation): During the procedure, a medical laser is used to create tiny "welds" (scars) around the retinal tear to secure it.

  • Cryotherapy: An alternative to laser where extreme cold is used to freeze the area around the tear, creating a secure seal.

Pre-Procedure Preparation

  • Dilated Fundus Exam: A comprehensive evaluation to map the exact location and extent of the detachment or tears.

  • Positioning Instructions: Reviewing the potential need for 24-hour-a-day face-down positioning following the surgery.

  • Travel Audit: Confirming that the patient has no upcoming flights or trips to high altitudes, as these are strictly prohibited with a gas bubble.

  • Anesthesia Choice: Determining if the emergency procedure will be performed under local sedation or general anesthesia.

  • Fasting: Adhering to "nothing by mouth" instructions if general anesthesia is required for complex repairs.

Tests Before Retinal Surgery

  • B-Scan Ultrasound: Essential if there is blood in the eye (vitreous hemorrhage) that prevents the surgeon from seeing the retina directly.

  • Optical Coherence Tomography (OCT): To check if the "macula" (the center of vision) is still attached or has been affected.

  • Visual Field Testing: To document the extent of the peripheral vision loss caused by the detachment.

  • Intraocular Pressure (IOP): Checking the internal pressure of the eye to ensure it is stable for surgical entry.

Life After Retinal Surgery

  • Face-Down Positioning: If a gas bubble was used, you may need to keep your head in a specific position for 1 to 2 weeks to keep the bubble against the tear.

  • Altitude Restrictions: You cannot fly or travel to high altitudes until the gas bubble is fully absorbed (usually 3 to 8 weeks) to prevent dangerous pressure changes.

  • Medication: Using prescribed antibiotic and anti-inflammatory eye drops to prevent infection and manage swelling.

  • Vision Recovery: Vision is typically very blurry initially; improvement occurs over weeks to months, though full vision may not return in severe cases.

  • Activity Limits: Avoid heavy lifting, strenuous exercise, and bending over until cleared by the retina specialist.

Why Specialized Treatment Is Highly Effective

  • Prevents Total Blindness: Without surgery, a detached retina will almost always lead to complete loss of sight in the affected eye.

  • High Reattachment Success: Modern techniques successfully reattach the retina in the majority of cases, especially when treated early.

  • Microsurgical Precision: Sutureless vitrectomy and high-tech lasers allow for internal repairs with minimal trauma to the eye.

  • Stabilizes the Eye: Procedures like the scleral buckle provide long-term structural support to prevent future detachments.

  • Customized Approaches: Surgeons can combine techniques (e.g., vitrectomy with laser) to address complex, multi-tear detachments in a single session.

SICS (Small Incision Cataract Surgery)

SICS (Small Incision Cataract Surgery)

Manual Small Incision Cataract Surgery (MSICS or SICS) is a surgical technique where the clouded lens is manually removed through a specialized, self-sealing tunnel. It is primarily used as a cost-effective, high-volume alternative for treating advanced cataracts, especially in resource-limited settings. This procedure is a vital bridge in global eye care, offering outcomes comparable to more expensive technologies.

When You Should Consider MSICS

  • Mature or "Hard" Cataracts: When the cataract is very dense (black or brown) and may be difficult to break apart using ultrasound energy.

  • Cost-Effective Treatment: When seeking a high-quality surgical outcome at a lower price point compared to laser or ultrasonic methods.

  • Limited Infrastructure: Ideal for settings where consistent electricity or expensive high-tech maintenance is unavailable.

  • Complex Eye Conditions: Useful for patients with small pupils, weak fibers holding the lens (zonules), or a history of eye trauma.

  • Advanced Vision Loss: When the cataract has progressed to the point of "white" or "hypermature" stages, making other techniques riskier.

How Is Performed

  • Preparation: The eye is numbed using local or peribulbar anesthesia and sterilized with povidone-iodine.

  • Sclerocorneal Tunnel Construction: The surgeon creates a 5.5 mm to 7 mm triplanar tunnel in the sclera (the white of the eye) that extends into the cornea.

  • Capsulotomy: An opening is made in the lens capsule—the "bag" holding the lens—to access the cataract.

  • Hydrodissection: Fluid is injected to gently loosen the lens from its surrounding capsule.

  • Nucleus Delivery: The hard central part of the lens (nucleus) is manually expressed through the tunnel using specialized tools like an irrigating vectis or via hydrostatic pressure.

  • IOL Implantation: A permanent artificial intraocular lens (IOL) is inserted into the capsule to restore clear focus.

  • Closure: The tunnel's specific internal shape makes it self-sealing, meaning it stays closed due to natural eye pressure and usually does not require stitches.

Pre-Procedure Preparation

  • Biometry: Precise measurements of the eye's length and corneal curvature to determine the correct power for the artificial lens.

  • Infection Screen: Ensuring the eyelids and surrounding skin are free of infection or inflammation before the incision.

  • Medication Audit: Discussing current medications with the surgeon, particularly blood thinners or prostate medications that can affect the iris.

  • Fasting: Following clinical instructions regarding food and water intake on the day of the procedure.

Tests Before MSICS

  • Visual Acuity: Measuring the baseline level of vision impairment caused by the cataract.

  • Slit-Lamp Exam: A microscopic evaluation of the cataract's density and the health of the cornea and iris.

  • Intraocular Pressure (IOP): Checking the pressure inside the eye to ensure it is within a safe range for surgery.

  • B-Scan Ultrasound: Performed if the cataract is so dense that the surgeon cannot see the back of the eye, to ensure the retina is healthy.

Life After MSICS

  • Initial Vision: Vision often improves within 24 to 48 hours, though full stabilization and final healing typically take 4 to 6 weeks.

  • Medications: Patients must strictly use prescribed antibiotic and anti-inflammatory eye drops for several weeks.

  • Eye Protection: Wearing a protective shield or glasses to prevent accidental rubbing, especially while sleeping.

  • Activity Restrictions: Avoid heavy lifting, bending over, or getting water, soap, or dust in the eye for the first 1–2 weeks.

  • Follow-up: Attending scheduled appointments to monitor the healing of the self-sealing tunnel and check for any inflammation.

Why Specialized Treatment Is Highly Effective

  • Superior for Dense Cataracts: Allows for the safe removal of very hard lenses that might cause complications with other methods.

  • Rapid Visual Recovery: Provides a quick return to functional vision, which is essential for patients in high-volume settings.

  • Durability: The self-sealing tunnel is structurally strong and resistant to accidental trauma during the healing phase.

  • Accessibility: Eliminates the need for phacoemulsification machines, making life-changing surgery available in rural and remote areas.

  • Excellent Outcomes: When performed by skilled surgeons, the visual results and safety profile are excellent and long-lasting.

SMILE Surgery (Small Incision Lenticule Extraction)

SMILE Surgery (Small Incision Lenticule Extraction)

SMILE (Small Incision Lenticule Extraction) is the latest advancement in laser vision correction. It is a flapless, minimally invasive procedure used to treat nearsightedness (myopia) and astigmatism. Unlike LASIK, which requires creating a large circular flap, SMILE utilizes a single high-precision laser to perform the entire correction through a microscopic opening.

When You Should Consider SMILE

  • Active Lifestyles: Ideal for individuals involved in contact sports, professional athletics, or high-intensity professions where a corneal flap displacement risk must be zero.

  • Dry Eye Concerns: For patients prone to dry eyes, as the procedure preserves more corneal nerves than traditional refractive surgeries.

  • Nearsightedness (Myopia): Specifically designed for patients with high degrees of myopia who have adequate corneal thickness.

  • Astigmatism: Effective for correcting blurred vision caused by an irregularly shaped cornea.

  • Structural Preference: For those who prefer a procedure that maintains the maximum structural integrity of the upper corneal layers.

How Is Performed

  • Numbing: Anesthetic drops are applied to the eye so the patient remains awake and comfortable, feeling no pain during the process.

  • Lenticule Creation: Using the VisuMax femtosecond laser, the surgeon creates a thin, contact-lens-shaped layer of tissue (a lenticule) inside the intact cornea.

  • Small Incision: The same laser creates a microscopic incision—typically less than 4 mm—on the corneal surface.

  • Extraction: The surgeon manually removes the lenticule through this tiny incision, which reshapes the cornea and allows light to focus correctly on the retina.

  • Quiet & Odourless: The laser operates silently, and unlike other methods, there is no "burning" smell during the correction.

  • Duration: The entire process usually takes about 10–15 minutes for both eyes.

Pre-Procedure Preparation

  • Corneal Topography: Detailed mapping of the eye's surface to ensure the curvature is suitable for the lenticule extraction method.

  • Contact Lens Holiday: Patients must stop wearing contact lenses for a specified period (usually 1–2 weeks) to allow the cornea to reach its natural shape.

  • Tear Film Analysis: Assessing the quality of the tear film to establish a baseline for post-operative comfort.

  • Fasting: Following clinical instructions regarding food and water intake on the morning of the procedure.

  • Logistics: Arranging for a ride home, as vision may be "foggy" immediately following the laser application.

Tests Before SMILE

  • Pachymetry: Measuring corneal thickness to confirm there is enough tissue to safely create and remove the lenticule.

  • Refraction Test: A precise measurement of your prescription to program the laser for the exact correction needed.

  • Slit-Lamp Exam: A microscopic evaluation to ensure the cornea is clear and free of any underlying structural issues or infections.

  • Pupillometry: Measuring pupil size in different lighting conditions to optimize the treatment zone and prevent night vision issues.

Life After SMILE

  • Vision Restoration: Most patients see clearly within 24 hours, though full stabilization of the vision may take a few days.

  • Medication: Use of prescribed antibiotic and lubricating eye drops for several weeks is necessary to ensure smooth healing.

  • Fast Return to Activity: You can typically return to sports, swimming, and wearing makeup much sooner—often within 3–5 days—than with traditional methods.

  • Post-Op Symptoms: Some temporary light sensitivity or a "halo" effect around lights at night may occur during the first few weeks of healing.

  • Follow-up: Scheduled checkups allow the surgeon to monitor the microscopic incision site and confirm the new corneal shape is focusing light correctly.

Why Specialized Treatment Is Highly Effective

  • No Flap Complications: Since no flap is created, there is zero risk of flap displacement, "folds," or epithelial ingrowth.

  • Superior Stability: Leaves the strongest, outermost layers of the cornea mostly untouched, preserving more of the eye's natural biomechanical strength.

  • Reduced Dry Eye Risk: Because fewer corneal nerves are severed during the small incision, the risk and severity of post-operative dry eye syndrome are significantly lower.

  • High Precision: The use of a single, highly advanced femtosecond laser reduces the number of steps and specialized tools required for the correction.

  • Minimally Invasive: The tiny incision heals very quickly, often resulting in less discomfort and a faster return to a high-intensity lifestyle.

Squint Correction Surgery

Squint Correction Surgery

Squint correction surgery, or strabismus surgery, is a specialized procedure performed to align the eyes by adjusting the tension of the external eye muscles. This procedure can be performed on both children and adults to improve eye coordination, eliminate double vision, and enhance the physical appearance of the eyes.

When You Should Consider Squint Correction

  • Misaligned Eyes: When one or both eyes turn inward (esotropia), outward (exotropia), upward, or downward.

  • Double Vision (Diplopia): If the misalignment causes you to see two images of a single object, affecting your daily activities.

  • Loss of Depth Perception: When the eyes do not work together (binocular vision), making it difficult to judge distances accurately.

  • Eye Strain and Headaches: When significant effort is required to keep the eyes focused and aligned, leading to chronic discomfort.

  • Aesthetic Concerns: To improve the symmetry and appearance of the eyes, which can significantly boost self-confidence.

How Is Performed

  • Anesthesia: The surgery is typically an outpatient procedure performed under general anesthesia for children and either general or local anesthesia for adults.

  • Accessing the Muscles: The surgeon makes a small incision in the conjunctiva—the clear membrane covering the white of the eye—to reach the six muscles that control movement. The eyeball itself is never removed or cut into.

  • Muscle Adjustment:
    Recession (Weakening): The muscle is detached and reattached further back on the eye to reduce its pull and "relax" the eye's position.
    Resection (Strengthening): A small section of the muscle is removed to make it shorter and "tighter," increasing its pull to bring the eye into alignment.

  • Adjustable Sutures (Adults): In some adult cases, temporary knots are used. Once the patient is awake, the alignment is checked and fine-tuned for the best result before being permanently tied.

  • Closure: The incisions are closed with absorbable stitches that dissolve on their own over 2–4 weeks.

  • Duration: The procedure typically takes between 30 and 60 minutes.

Pre-Procedure Preparation

  • Orthoptic Assessment: A detailed measurement of the squint in all directions of gaze to plan exactly which muscles need adjustment.

  • Refraction Test: Checking if glasses can partially or fully correct the squint before proceeding with surgery.

  • Binocular Vision Testing: Assessing how well the brain is currently using both eyes together.

  • Fasting: Following "nothing by mouth" instructions if general anesthesia is planned for the procedure.

  • Transportation: Arranging for a ride home, as your vision and coordination may be temporarily affected by the anesthesia and eye adjustments.

Tests Before Squint Surgery

  • Prism Cover Test: Using specialized prisms to measure the degree of deviation (the "angle" of the squint).

  • Motility Exam: Checking the range of motion for all six muscles in each eye to identify any overactive or underactive muscles.

  • Stereopsis Test: Measuring your level of depth perception to determine the potential for functional improvement.

  • Slit-Lamp Examination: Ensuring the surface of the eye is healthy and free of inflammation before making the conjunctival incisions.

Life After Squint Surgery

  • Initial Symptoms: The white of the eye will look very red (similar to a bruise) for 2–3 weeks. The eyes may feel "gritty" or sore for the first few days.

  • Vision Adjustment: Double vision is common for the first few days as the brain adapts to the new eye position.

  • Medication: You must use prescribed antibiotic and steroid eye drops for 2 to 4 weeks to prevent infection and swelling.

  • Activity Restrictions: No swimming for 4 weeks and no contact sports for 2–4 weeks. Most patients return to work or school within one week.

  • Follow-up: Regular appointments with an orthoptist or surgeon are necessary to monitor the final alignment as the muscles heal.

Why Specialized Treatment Is Highly Effective

  • Restores Binocularity: By aligning the eyes, the procedure helps the brain use both eyes together, significantly improving depth perception.

  • Eliminates Diplopia: Successfully resolves the misalignment that causes confusing and disorienting double vision.

  • Customized Precision: The use of adjustable sutures in adults allows for "real-time" fine-tuning of the eye position for a more accurate outcome.

  • Reduces Fatigue: Eases the constant muscular effort previously required to keep the eyes focused, reducing strain and headaches.

  • High Success Rates: Modern surgical techniques provide predictable results, often achieving excellent alignment in a single session.

Trabeculectomy Surgery

Trabeculectomy Surgery

Trabeculectomy is a specialized surgical procedure used to treat glaucoma by creating a new drainage pathway to lower the internal pressure of the eye (IOP). It is typically recommended when eye drops or laser treatments are no longer effective at preventing progressive optic nerve damage and vision loss.

When You Should Consider Trabeculectomy

  • Uncontrolled Glaucoma: When your intraocular pressure remains high despite the maximum use of eye drops or oral medications.

  • Progressive Vision Loss: If visual field tests show that your peripheral vision is continuing to deteriorate.

  • Optic Nerve Damage: When clinical examinations show worsening "cupping" or thinning of the optic nerve fibers.

  • Inadequate Laser Results: If previous procedures like Selective Laser Trabeculoplasty (SLT) have failed to maintain a safe pressure level.

  • Advanced Disease: In cases of severe glaucoma where a very low "target pressure" is required to preserve the remaining sight.

How Is Performed

  • Anesthesia: The surgery is usually performed as an outpatient procedure under local anesthesia and takes about 45 to 60 minutes.

  • Creating the Flap: The surgeon creates a microscopic "trapdoor" (flap) in the sclera—the white part of the eye—usually hidden under the upper eyelid.

  • Removing Tissue: A tiny piece of the eye's blocked drainage meshwork is removed from under the flap to create a new opening.

  • The "Bleb": The flap is loosely stitched back in place, allowing fluid (aqueous humor) to bypass the blocked natural drains and flow into a small reservoir called a Filtering Bleb.

  • Fluid Absorption: The fluid in the bleb is naturally reabsorbed by the surrounding blood vessels, effectively lowering the pressure inside the eye.

  • Anti-Scarring Medication: Medications like Mitomycin-C (MMC) are applied during surgery to prevent the new drainage hole from scarring shut.

Pre-Procedure Preparation

  • Pressure Mapping: Recording several pressure readings to establish the baseline and determine the "target pressure" needed for safety.

  • Medication Audit: Reviewing current glaucoma drops; some may need to be stopped or adjusted before surgery to reduce inflammation.

  • Infection Screen: Ensuring the eyelids and tear ducts are healthy and free of infection before the procedure.

  • Transportation: Arranging for a ride home, as the eye will be patched and vision will be temporarily blurry.

  • Anesthesia Discussion: Confirming the type of sedation or local numbing that will be used for your comfort.

Tests Before Trabeculectomy

  • Visual Field Test: To document the current extent of peripheral vision loss and provide a baseline for post-operative monitoring.

  • Optical Coherence Tomography (OCT): To measure the thickness of the retinal nerve fiber layer around the optic nerve.

  • Gonioscopy: A specialized exam using a mirrored lens to view the drainage angle and plan the surgical entry point.

  • Pachymetry: Measuring corneal thickness, which can influence how eye pressure readings are interpreted.

Life After Trabeculectomy

  • Initial Vision: Vision is usually blurry for the first 2 to 4 weeks as the eye pressure stabilizes and the internal fluid levels adjust.

  • Frequent Check-ups: Close monitoring is required in the first few weeks to allow the surgeon to adjust stitches or manage the flow of fluid.

  • Medication Regimen: Patients must strictly use prescribed antibiotic and steroid eye drops for several weeks to prevent infection and control inflammation.

  • Activity Restrictions: Avoid heavy lifting, bending over, or strenuous exercise for about one month to prevent dangerous pressure spikes.

  • Long-Term Monitoring: Because there is a permanent "hole" in the eye, patients must watch for signs of Blebitis (infection of the bleb), such as sudden redness or pain.

Why Specialized Treatment Is Highly Effective

  • Significant Pressure Reduction: It is one of the most powerful tools available for achieving the very low pressures needed in advanced glaucoma.

  • Protects Remaining Sight: By reaching the target pressure, the procedure stops the ongoing "mechanical" damage to the optic nerve.

  • Outpatient Experience: Allows for major internal eye reconstruction with minimal downtime and a return to home on the same day.

  • Customizable Flow: The use of adjustable or "removable" sutures allows the surgeon to fine-tune the eye pressure in the office after the surgery.

  • Long-Lasting Results: When the bleb heals correctly and remains functional, it can provide years of stable pressure control without the need for additional drops.

Vitrectomy

Vitrectomy

Vitrectomy is a major eye surgery that involves the removal and replacement of the vitreous humor—the clear, jelly-like substance in the center of the eyeball. Retina specialists utilize this procedure to treat vision-threatening conditions and to gain direct access to the back of the eye for complex repairs.

When You Should Consider Vitrectomy

  • Retinal Detachment: To repair the retina by removing the pulling force (traction) of the vitreous on the retinal tissue.

  • Diabetic Retinopathy: If you have persistent bleeding (vitreous hemorrhage) or scar tissue that is pulling on or distorting your vision.

  • Macular Hole or Pucker: To treat these conditions by peeling fine, microscopic membranes off the center of the retina (the macula).

  • Eye Trauma: In cases of severe injury to remove blood, debris, or foreign objects from the center of the eye.

  • Endophthalmitis: To manage and clear severe internal eye infections that do not respond to medication injections alone.

How Is Performed

  • Anesthesia: Performed as an outpatient procedure under either local or general anesthesia, depending on the complexity of the case.

  • Micro-Incisions: The surgeon makes tiny, sutureless incisions in the white part of the eye (sclera).

  • Gel Removal: A specialized micro-cutting tool called a vitrector uses suction to safely remove the vitreous gel.

  • Internal Repair: Depending on the condition, the surgeon may perform Membrane Peeling with fine forceps or Laser Retinopexy to seal retinal tears.

  • Filling (Tamponade): The eye is filled with a substitute—such as sterile saline, a gas bubble, or silicone oil—to maintain its shape and hold the retina in place during healing.

  • Duration: The surgical process typically takes between 1 to 2 hours.

Pre-Procedure Preparation

  • Comprehensive Examination: A detailed eye exam to determine the exact extent of retinal damage or vitreous clouding.

  • Positioning Education: Discussion of post-operative requirements, especially the potential need for strict face-down positioning.

  • Travel Planning: Patients receiving a gas bubble must plan to avoid flying or traveling to high altitudes until the bubble is absorbed.

  • Cataract Discussion: Reviewing the high likelihood of developing a cataract post-surgery if the natural lens is still present.

  • Fasting: Following clinical instructions regarding food and medication adjustments for anesthesia safety.

Tests Before Vitrectomy

  • Optical Coherence Tomography (OCT): To provide high-resolution, cross-sectional images of the macula and retinal layers.

  • B-Scan Ultrasound: Used to visualize the back of the eye if the vitreous is too cloudy (due to blood or infection) for a standard exam.

  • Fundus Photography: To document the current state of the retina and provide a baseline for tracking progress.

  • Pressure Tests: Measuring intraocular pressure to ensure the eye is stable before making surgical incisions.

Life After Vitrectomy

  • Strict Positioning: If a gas or oil bubble was used, you may need to maintain a face-down or side-facing position for 1 to 2 weeks.

  • Travel Restrictions: You must avoid flying or diving until the gas bubble is fully absorbed, which can take 3 to 8 weeks.

  • Medication Regimen: Using prescribed antibiotic and anti-inflammatory eye drops to prevent infection and manage pressure.

  • Vision Recovery: Expect vision to be blurry initially; gradual improvement typically occurs over 4 to 6 weeks as the eye heals.

  • Monitoring: Watching for rare complications such as sudden pain, increased redness, or a "curtain" falling over your vision.

Why Specialized Treatment Is Highly Effective

  • Direct Access: Provides the only way to perform complex repairs on the retina and macula from the inside of the eye.

  • Clears the Visual Path: Instantly removes blood, debris, or clouded gel that prevents light from reaching the retina.

  • Prevents Blindness: Successfully reattaches the retina in over 90% of cases, preserving sight that would otherwise be lost.

  • Restores Sharpness: By removing membranes that cause puckering, it can significantly improve central vision for reading and detail work.

  • Definitive Infection Control: Physically removes the source of infection in cases of endophthalmitis, allowing for more effective treatment.

May we help you?

Enter digits only (6-15 digits). We'll add your country code.

Get Treated

Join thousands of patients who trust us with their health. Get started today and experience world-class medical care at your fingertips.

Trusted by 2,500+ patients worldwide 🌍