Medivisor India Treatment Logo
+91 83682 47758
info@medivisorhealth.com
  • Home
    • About Us
    • Our Services
    • Our Team
    • Our Safety Measures
    • Loading treatments...
    • Loading hospitals...
    • Loading doctors...
    • Treatment Cost
    • Treatment Process
    • Visa Process
    • Travel Guide
    • FAQs
    • Why Medivisor
    • Success Stories
    • Patient Activities
    • Social Activities
    • News Coverage
    • Blog
  • Become a Partner

Medivisor India Treatment is a trusted New Delhi–based medical travel company assisting international patients with advanced, affordable, and seamless treatment in India.

  • Medivisor House 359, Sector 1, Vaishali, Ghaziabad, (Delhi/NCR) India
  • +91 8368 247 758
  • info@medivisorhealth.com

About Us

  • About Us
  • Our Services
  • Our Team
  • Our Medical Advisors
  • Our Safety Measures
  • Join Our Network
  • Contact Us

India Treatment

  • Hospitals
  • Treatments
  • Treatment Cost
  • Treatment Process
  • Visa Process
  • Travel Guide
  • FAQs
  • Why Medivisor

Gallery

  • Patient Testimonials
  • Patient Activities
  • News Coverage
  • Blog

Get in Touch

© 2026 Medivisor India Treatment. All rights reserved.

Dr Shailesh Hadgaonkar

Head - Spine & Neuroscience

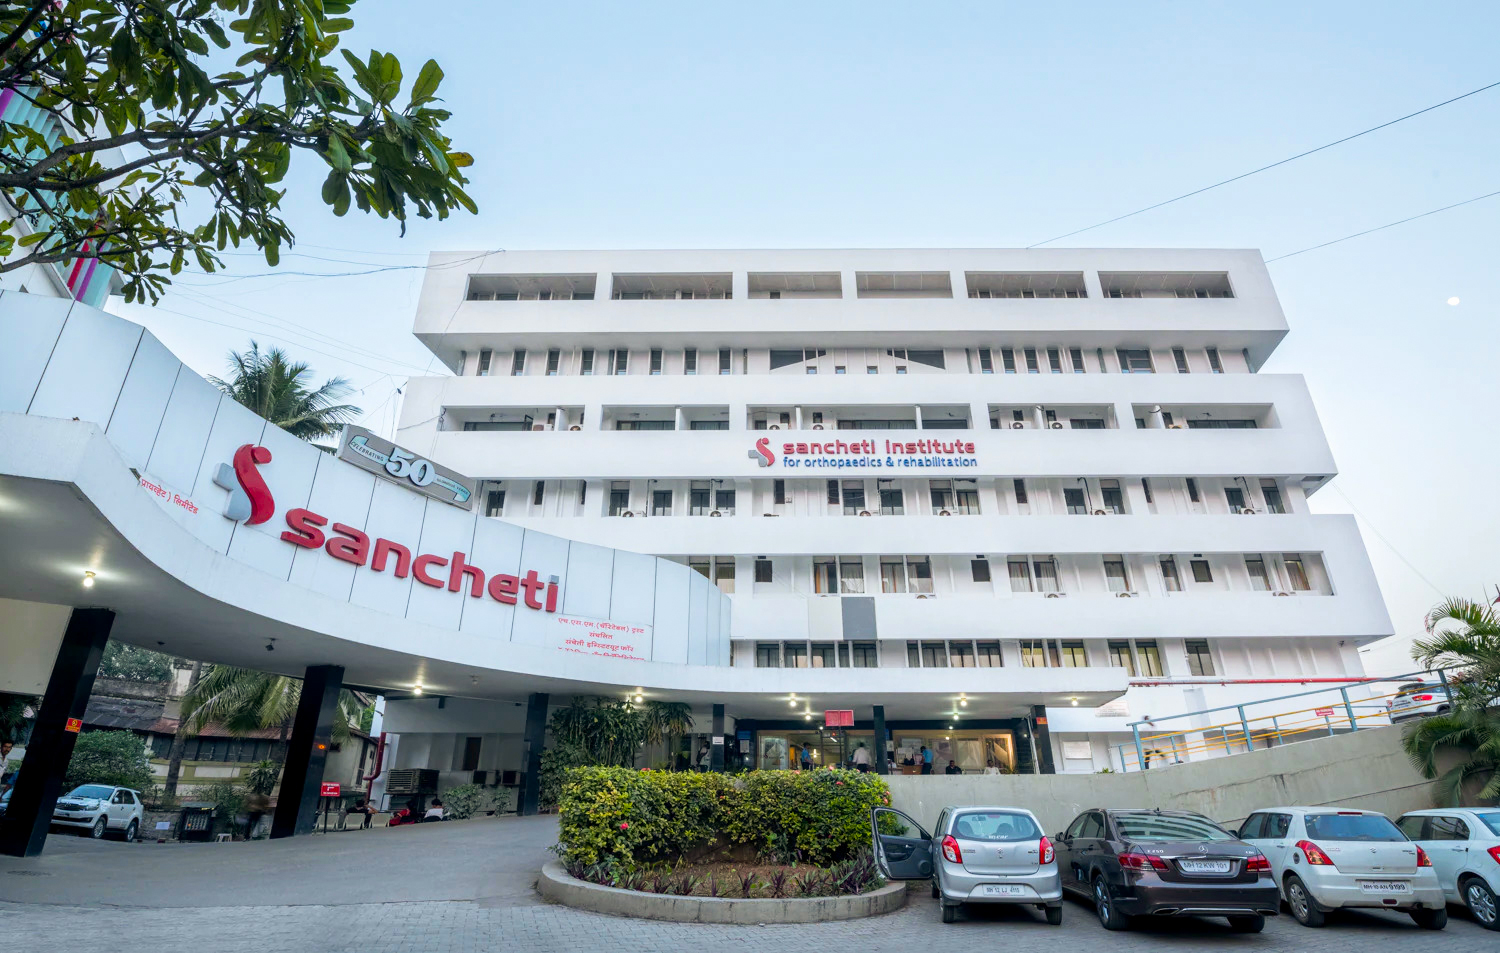
Sancheti Hospital, Pune

Spine SurgeonOrthopedic Surgeon

17+ years experience

Dr Shailesh Hadgaonkar, Head - Spine & Neuroscience at Sancheti Hospital, Pune - Sancheti Hospital, Pune
  1. Home
  2. Doctors
  3. Dr Shailesh Hadgaonkar

About Dr Shailesh Hadgaonkar

Dr. Shailesh Hadgaonkar is a prominent orthopedic spine surgeon in Pune with over 17 years of experience. He serves as the Head of the Spine & Neuroscience Unit at Sancheti Hospital and is the founder of the Asian Ortho Spine Clinic, specializing in minimally invasive spine surgery (MISS), complex spinal reconstructions, and advanced interventional spinal therapies.

Minimally Invasive Spine Surgery and Deformity Correction

He specializes in the advanced evaluation, architectural mapping, and surgical correction of degenerative, traumatic, and pediatric spinal conditions. Utilizing extensive sub-specialized training from India and the United Kingdom, his clinical practice executes high-precision interventions for disk herniations, spinal stenosis, and complex scoliosis deformities, ensuring minimal soft-tissue trauma and accelerated patient recovery timelines.

Interventional Spine and Complex Revision Care

Dr. Hadgaonkar possesses profound expertise in implementing state-of-the-art protocols for complex revision spine surgeries and spinal oncology. His detail-driven clinical framework targets high-risk structural instability, incorporating advanced interventional procedures and precision tumor resections to maximize spinal column stability while strictly preserving critical neurological pathways.

Academic Distinction and Global Research Recognition

A proud recipient of the "Global Outreach Scholar" award from the prestigious Scoliosis Research Society (SRS), USA, and an active EuroSpine Diploma holder, Dr. Hadgaonkar combines modern neuro-spinal innovations with a dedication to medical education. He remains a trusted authority in the region, actively driving clinical research, spine fellowship training, and community outreach programs for underserved populations.

Dr. Shailesh Hadgaonkar at a Glance

  • Specialist in Orthopedic Spine Surgery, Minimally Invasive Spine Surgery (MISS), and Deformity Correction.

  • Head of the Spine & Neuroscience Unit delivering elite institutional leadership at Sancheti Hospital, Pune.

  • Founder and Director of the specialized Asian Ortho Spine Clinic in Aundh, Pune.

  • Completed advanced spinal surgical fellowships in the United Kingdom and Singapore.

  • Honored as a Global Outreach Scholar by the prestigious Scoliosis Research Society, USA.

  • Promotes evidence-based treatment pathways, clinical research, and humanitarian medical outreach.

M.B.B.S
M.S - Orthopedics
D.N.B - Orthopedics
Fellowship In ( F.C.P.S) Orthopedics
Board Certified in Spine Surgeon

No awards & achievements available
Affiliated Hospitals

Sancheti Hospital, Pune

Ortho Specialty

Pune, Maharashtra

1965

Estd.

300+

Beds

55+

Doctors

May we help you?

Enter digits only (6-15 digits). We'll add your country code.

Related Treatments

Slip Disc (Lumbar Discectomy)

Lumbar Discectomy is a surgical procedure to remove the fragmented or protruding portion of a herniated disc (slip disc) that is compressing a spinal nerve. It is most commonly performed in the lower back (lumbar spine) to relieve radiating leg pain, known as sciatica, by decompressing the affected nerve root.

When You Should Consider Lumbar Discectomy

  • Failed Conservative Treatment: When 6–12 weeks of physical therapy, NSAIDs, or steroid injections fail to provide relief.

  • Radiculopathy (Sciatica): Severe, radiating pain, numbness, or weakness that travels down the leg and into the foot.

  • Neurological Deficit: Progressive muscle weakness or a "foot drop" caused by sustained nerve compression.

  • Cauda Equina Syndrome: An emergency condition involving loss of bowel or bladder control or "saddle anesthesia" (numbness in the groin).

  • Significant Functional Impairment: When back and leg pain prevents the performance of basic daily activities or work.

Methods of Lumbar Discectomy

  • Microdiscectomy (Gold Standard): Using a high-powered operating microscope to minimize the incision size and improve visualization of the nerve.

  • Endoscopic Discectomy: An ultra-minimally invasive technique using a tiny camera and specialized tools inserted through a small tube.

  • Laminotomy/Laminectomy: Removing a small portion of the vertebral bone (lamina) to create a window to access the spinal canal.

  • Tubular Retractor Discectomy: Using a series of dilating tubes to part the muscles rather than cutting them, reducing post-operative soreness.

  • Sequestrectomy: Removing only the free-floating disc fragment without entering the main disc space, which may reduce the risk of future collapse.

How Lumbar Discectomy Is Performed

  • Positioning: The patient is placed face down on a specialized surgical frame that opens the spaces between the vertebrae.

  • Incision: A small 2–3 cm midline incision is made in the lower back directly over the level of the herniation (most commonly L4-L5 or L5-S1).

  • Exposure: The surgeon moves the spinal muscles aside and removes a small amount of ligament and bone to view the spinal canal.

  • Nerve Protection: The compressed nerve root is gently retracted to one side to expose the herniated disc material underneath.

  • Fragment Removal: The surgeon identifies the "jelly-like" protrusion and removes it. The healthy portion of the disc is left intact to serve as a shock absorber.

  • Closure: The muscles return to their original position, and the skin is closed with dissolvable stitches and surgical glue.

Pre-Procedure Preparation

  • Confirmation of the herniation level via MRI to ensure the surgical site matches the patient's clinical symptoms.

  • Smoking cessation is mandatory for several weeks prior, as nicotine restricts blood flow to the spine and significantly hinders healing.

  • Fasting (NPO) for 8–12 hours before the procedure to ensure safety during general anesthesia.

  • Discussion of the "BLT" (Bending, Lifting, Twisting) restrictions that will be required immediately following the surgery.

Tests Before Lumbar Discectomy

  • Lumbar MRI: The primary diagnostic tool used to visualize the disc herniation and its relationship to the nerve roots.

  • X-ray (Flexion/Extension): Performed to ensure there is no underlying spinal instability or "slipped" vertebrae (spondylolisthesis).

  • Electromyography (EMG): Occasionally used to confirm which specific nerve is being damaged and to assess the severity of the nerve injury.

  • Blood Panels: Routine screens to ensure the patient is fit for anesthesia and has no signs of active infection.

Life After Lumbar Discectomy

  • Most procedures are performed as same-day (outpatient) surgeries or require only a single overnight stay.

  • Patients are encouraged to stand and walk within 4 hours of waking up to promote circulation and prevent stiffness.

  • The "BLT" Rule: For the first 6 weeks, you must strictly avoid Bending at the waist, Lifting anything over 2kg, and Twisting the spine.

  • Incisions must be kept dry for the first 3–5 days; stitches are usually dissolvable and do not require removal.

  • Physical therapy typically begins around the 6-week mark to strengthen the core and multifidus muscles that support the spine.

Benefits of Lumbar Discectomy

  • Over 90% of patients report immediate and dramatic relief from radiating leg pain (sciatica).

  • Minimally invasive techniques allow for smaller scars, less muscle damage, and a faster return to daily life.

  • Prevents permanent nerve damage by removing the source of chronic compression and inflammation.

  • Restores the ability to perform physical activities, work, and exercise without the limitation of debilitating leg pain.

Cervical Discectomy
Cervical Discectomy

Cervical Discectomy is a surgical procedure to remove a herniated or degenerative disc in the neck (cervical spine). It is performed to relieve pressure on the spinal cord or nerve roots, which typically causes neck pain, radiating arm pain (brachialgia), or weakness. By removing the damaged disc, the surgeon creates more space for the neural structures to function properly.

When You Should Consider Cervical Discectomy

  • Radiculopathy: Persistent arm pain, numbness, or "electric shock" sensations that have not improved with 6–12 weeks of conservative therapy.

  • Cervical Myelopathy: Urgent signs of spinal cord compression, such as clumsiness in the hands, loss of fine motor skills, or difficulty walking/balance issues.

  • Failed Conservative Care: When physical therapy, activity modification, and anti-inflammatory medications fail to provide adequate relief.

  • Progressive Weakness: Measurable loss of strength in the arms, shoulders, or grip due to sustained nerve compression.

  • Disc Degeneration: Severe wear and tear that leads to spinal instability or significant narrowing of the spinal canal (stenosis).

Methods of Cervical Discectomy

  • Anterior Cervical Discectomy and Fusion (ACDF): The most common method, reaching the disc from the front of the neck and fusing the vertebrae together for stability.

  • Cervical Disc Replacement (Arthroplasty): Inserting a mechanical artificial disc to maintain neck motion and potentially protect the surrounding discs from extra wear.

  • Posterior Cervical Discectomy: Approaching the disc from the back of the neck, typically used for specific types of "lateral" herniations that do not require a fusion.

  • Minimally Invasive Discectomy: Using specialized retractors and microscopes to minimize tissue damage and speed up recovery time.

  • Hybrid Surgery: A combination of fusion at one level and disc replacement at another for multi-level cervical disease.

How Cervical Discectomy Is Performed

  • Approach: For the common anterior (front) approach, a 2–3 cm horizontal incision is made in a skin fold on the front of the neck.

  • Pathway: The surgeon gently moves the windpipe (trachea) and esophagus to the side to gain a direct view of the front of the spine.

  • Discectomy: The entire damaged disc is removed, and the surgeon uses a microscope to ensure all bone spurs or fragments are cleared from the nerves.

  • Stabilization (ACDF): A bone graft or synthetic cage is placed into the empty disc space. A small titanium plate and screws are usually attached to hold the bones steady.

  • Stabilization (Replacement): A specialized metal and plastic joint is secured into the space to allow for continued flexion, extension, and rotation.

  • Closure: The internal tissues return to their natural positions, and the skin is closed with dissolvable sutures or surgical glue.

Pre-Procedure Preparation

  • Confirmation of the specific disc level (most commonly C5-C6 or C6-C7) using high-resolution MRI and X-ray imaging.

  • Smoking cessation is mandatory for 4–6 weeks prior to surgery; nicotine significantly prevents the bone from fusing and increases the risk of complications.

  • Fasting (NPO) for at least 8 hours prior to the procedure to ensure safety under general anesthesia.

  • Pre-operative screening to ensure the patient can safely tolerate the retraction of the esophagus and neck tissues.

Tests Before Cervical Discectomy

  • Cervical MRI: The gold standard for identifying disc herniations and the degree of spinal cord or nerve root compression.

  • X-rays (Static and Dynamic): Used to assess overall spinal alignment and check for any abnormal movement (instability) between vertebrae.

  • CT Scan: Sometimes required to better visualize "hard" bone spurs (osteophytes) that may be contributing to the compression.

  • Electromyography (EMG): Performed to confirm that the arm symptoms are originating from the neck and not from other sites like the elbow or wrist.

Life After Cervical Discectomy

  • Many patients undergo the procedure as a same-day surgery or require only a single overnight stay for observation.

  • Depending on the surgeon’s preference and the complexity of the case, a soft or hard neck brace may be worn for 2 to 6 weeks.

  • Walking is encouraged immediately after surgery; however, lifting is strictly limited to less than 2–3 kg for the first 6 weeks.

  • Temporary hoarseness or a "lump in the throat" sensation when swallowing is common and usually fades within 2–4 weeks.

  • Driving is typically restricted for 2 weeks or until the patient can comfortably turn their head to check blind spots without pain.

Benefits of Cervical Discectomy

  • Extremely high success rates (over 90–95%) for the permanent relief of radiating arm pain and "electric shock" sensations.

  • Prevents the progression of permanent spinal cord damage and neurological deficits in patients with myelopathy.

  • Restores the ability to perform daily tasks, such as writing, buttoning clothes, and walking, by decompressing the neural pathways.

  • Provides significant stabilization to the neck, reducing the chronic "deep" ache associated with degenerative disc disease.

Spinal Decompression Surgery

Spinal Decompression Surgery is a general term for various procedures performed to relieve pressure on the spinal cord or nerve roots. It is most commonly used to treat Spinal Stenosis (narrowing of the spinal canal) caused by bone spurs, thickened ligaments, or bulging discs, allowing the neural structures to function without compression.

When You Should Consider Spinal Decompression Surgery

  • Neurogenic Claudication: Leg pain, heaviness, or cramping that occurs when walking or standing and is relieved by sitting or leaning forward.

  • Radiculopathy: Shooting pain, numbness, or "pins and needles" that radiates into the arms or legs due to a pinched nerve.

  • Failed Conservative Care: When physical therapy, activity modification, and epidural steroid injections fail to improve quality of life after 3–6 months.

  • Progressive Weakness: Measurable loss of motor function, such as a weakened grip or a "foot drop," indicating severe nerve compromise.

  • Spinal Stenosis: Diagnostic confirmation of a narrowed spinal canal that correlates with the patient's physical limitations and pain patterns.

Methods of Spinal Decompression

  • Laminectomy: The "gold standard" procedure where the entire bony arch (lamina) at the back of the vertebra is removed to create significant room for the spinal cord.

  • Laminotomy: A less invasive approach where only a small portion of the lamina is removed, creating a "window" to access a specific pinched nerve.

  • Foraminotomy: Enlarging the "exit holes" (foramina) where the nerve roots leave the spinal canal to relieve localized compression.

  • Discectomy: Removing the specific portion of a herniated disc that is pressing directly against a spinal nerve.

  • Corpectomy: An extensive procedure where a portion of the vertebral body and adjacent discs are removed to decompress the spinal cord across a larger area.

How Spinal Decompression Surgery Is Performed

  • Positioning: The patient is placed face down (prone) on a specialized surgical frame that minimizes pressure on the abdomen and helps open the spinal spaces.

  • Incision: A midline incision is made over the affected area of the spine. The length of the incision depends on how many levels of the spine require decompression.

  • Muscle Retraction: The spinal muscles are gently moved aside to expose the bony elements of the vertebrae.

  • Bone and Ligament Removal: The surgeon carefully removes the bone spurs (osteophytes), thickened ligaments, or portions of the lamina that are encroaching on the spinal canal.

  • Nerve Inspection: The surgeon uses magnification to ensure the nerve roots are completely free and "floating" within the newly enlarged space.

  • Closure: The muscles are allowed to return to their natural position, and the incision is closed with sutures, staples, or surgical glue.

Pre-Procedure Preparation

  • Confirmation of the degree of narrowing via high-resolution MRI or CT Myelogram to plan the exact surgical levels.

  • Smoking cessation is mandatory for at least 4 weeks prior to surgery, as nicotine significantly hinders bone and tissue healing and increases the risk of infection.

  • Fasting (NPO) for 8–12 hours before the procedure to ensure safety under general anesthesia.

  • Evaluation of spinal stability via X-rays to determine if a fusion might be necessary in addition to the decompression.

Tests Before Spinal Decompression Surgery

  • Lumbar or Cervical MRI: The primary diagnostic tool used to visualize the soft tissues, nerves, and the extent of the canal narrowing.

  • X-rays (Flexion/Extension): Used to check for spinal instability, such as one vertebra sliding over another (spondylolisthesis).

  • CT Scan: Provides detailed images of the bony structures, which is helpful for mapping out dense bone spurs or ligament calcification.

  • Electrodiagnostic Studies (EMG/NCS): Performed to confirm that the symptoms are caused by spinal compression rather than peripheral nerve issues like diabetes or carpal tunnel.

Life After Spinal Decompression Surgery

  • Hospital stays vary from same-day discharge for simple procedures to 2–4 days for multi-level laminectomies.

  • Patients are encouraged to stand and walk within 4–6 hours of surgery to promote circulation and prevent complications like blood clots or pneumonia.

  • The "BLT" Restrictions: For the first 6 weeks, patients must strictly avoid Bending at the waist, Lifting anything over 3-5kg, and Twisting the spine.

  • Physical therapy typically begins 4–6 weeks post-operatively to strengthen the core and back muscles that support the spine.

  • While leg or arm pain often improves dramatically and quickly, the surgical site may remain sore for several weeks during the healing process.

Benefits of Spinal Decompression Surgery

  • Over 80% of patients experience a significant reduction in radiating limb pain and an improved ability to walk longer distances.

  • Effectively halts the progression of neurological damage, such as permanent numbness or muscle wasting.

  • Restores the ability to engage in daily activities, hobbies, and work that were previously limited by spinal stenosis symptoms.

  • Provides a durable, long-term solution for mechanical compression that does not respond to non-surgical interventions.

Laminectomy
Laminectomy

Laminectomy, often called "decompression surgery," is a major spinal procedure used to relieve pressure on the spinal cord or nerve roots by removing the lamina—the bony arch that forms the back of the spinal canal. By removing this bone and any associated thickened tissue, the surgeon creates significantly more room for the nerves to function without compression.

When You Should Consider Laminectomy

  • Spinal Stenosis: Narrowing of the spinal canal that leads to persistent leg pain, numbness, or a "heavy" feeling in the limbs.

  • Neurogenic Claudication: Difficulty walking or standing for long periods due to leg cramping and weakness that is relieved by sitting or leaning forward.

  • Failed Conservative Management: When symptoms persist despite months of physical therapy, medication, or steroid injections.

  • Nerve Root Compression: Significant pinching of the nerves by bone spurs or thickened ligaments that interferes with daily activity.

  • Progressive Neurological Symptoms: Measurable loss of muscle strength or sensory function in the legs or feet.

Methods of Laminectomy

  • Open Laminectomy: The traditional approach, providing the surgeon with a wide view to decompress multiple levels of the spine.

  • Micro-Laminectomy: A minimally invasive version using smaller incisions and an operating microscope to reduce tissue trauma.

  • Hemilaminectomy: Removing only one side of the lamina to relieve pressure on a specific side while preserving more of the natural bone structure.

  • Laminotomy: Removing only a small portion of the lamina to create a window, rather than removing the entire bony arch.

  • Laminectomy with Fusion: Performing decompression alongside a spinal fusion if there is underlying instability or "slippage" of the vertebrae.

How Laminectomy Is Performed

  • Positioning: The patient is placed face-down (prone) on a specialized surgical frame to allow the spine to flex and open the spaces between vertebrae.

  • Incision: A midline incision (usually 2–5 inches long) is made over the affected area of the spine.

  • Exposure: The surgeon detaches the back muscles from the bone to access the posterior elements of the vertebrae.

  • Bone Removal: Using specialized tools like rongeurs or high-speed drills, the surgeon removes the lamina and the spinous process (the bony bump on the back).

  • Decompression: Thickened ligaments (ligamentum flavum) and bone spurs are removed to ensure the spinal cord and nerves can "breathe" within the enlarged canal.

  • Closure: The muscles are sewn back into place, and the skin is closed with stitches, staples, or surgical glue.

Pre-Procedure Preparation

  • Diagnostic mapping via MRI to identify the exact levels of compression (e.g., L3-L4, L4-L5) and X-rays to assess spinal stability.

  • Blood thinners (like aspirin or clopidogrel) must be stopped 5–7 days prior to surgery to prevent the risk of bleeding in the spinal canal.

  • Fasting (NPO) for 8–12 hours before the procedure to ensure safety under general anesthesia.

  • Discussion of the recovery phase and the specialized "No BLT" movement restrictions that will be required.

Tests Before Laminectomy

  • Lumbar or Cervical MRI: The primary test to visualize the nerves and determine the exact location and severity of the narrowing.

  • X-rays (Flexion/Extension): Used to check if the spine is "wobbly" or if one bone is sliding over another (spondylolisthesis).

  • CT Myelogram: Sometimes used if an MRI is not possible, providing a detailed look at the space around the spinal cord using contrast dye.

  • Electrodiagnostic Studies (EMG): Performed to confirm that the leg or arm symptoms are caused by the spinal blockage rather than other nerve issues.

Life After Laminectomy

  • Hospital stays typically range from 1 to 3 days, though micro-procedures may be performed on a same-day basis.

  • Patients are required to stand and walk within 4–6 hours of surgery to promote circulation and prevent blood clots.

  • The "No BLT" Rule: For 6 weeks post-op, you must strictly avoid Bending at the waist, Lifting anything over 3kg, and Twisting the spine.

  • Stitches or staples are usually removed at 10–14 days, and the incision must be kept dry for the first 5 days.

  • Physical therapy usually begins at the 4–6 week mark to rebuild "core" strength and stabilize the back muscles.

Benefits of Laminectomy

  • Over 80% of patients report immediate and significant relief from radiating leg pain and cramping.

  • Dramatically increases walking distance and the ability to stand comfortably for longer periods.

  • Halts the progression of nerve damage that could otherwise lead to permanent weakness or muscle wasting.

  • Restores the ability to engage in daily activities and hobbies that were previously hindered by spinal stenosis.

Spinal Fusion Surgery

Spinal Fusion is a major surgical procedure designed to permanently connect two or more vertebrae, eliminating painful motion between them. The procedure is characterized by Minimally Invasive Spine Surgery (MISS) and robotic assistance, utilizing bone grafts and high-precision hardware to create a solid bone mass. This approach aims to stabilize the structural integrity of the spine while protecting the surrounding nerves and musculature.

When You Should Consider Spinal Fusion

  • Chronic Pain: Debilitating back or neck pain that has not responded to physical therapy, medications, or injections.

  • Neurological Symptoms: Persistent numbness, tingling, or weakness in the arms or legs caused by sustained nerve compression.

  • Mechanical Instability: Significant pain that worsens with specific movements, such as bending, twisting, or lifting.

  • Spinal Deformity: Visible curvature or a sensation of the spine "slipping," often associated with structural instability.

  • Functional Limitation: Difficulty standing or walking for extended periods due to structural spinal narrowing or collapse.

  • Trauma or Tumor: Severe pain or instability following a spinal fracture or the surgical removal of a spinal tumor.

Conditions That Require Specialized Care

  • Degenerative Disc Disease: Where worn-out discs cause painful friction and micro-motion between vertebrae.

  • Spondylolisthesis: A condition where one vertebra slips forward over the one below it, potentially pinching nerves.

  • Spinal Stenosis: Resulting in the narrowing of the spinal canal and significant nerve pressure.

  • Scoliosis or Kyphosis: Involving abnormal curvatures of the spine that require corrective alignment and stabilization.

  • Pseudoarthrosis: A condition where a previous fusion attempt failed to heal into a solid bone mass.

Methods of Spinal Fusion

  • Minimally Invasive Spine Surgery (MISS): Techniques that use tubular retractors to spread muscles rather than cutting them, reducing blood loss and recovery time.

  • Robotic-Assisted Fusion: The use of advanced guidance systems to ensure screws and rods are placed with sub-millimeter accuracy.

  • Anterior Lumbar Interbody Fusion (ALIF): Accessing the spine through the abdomen to provide a large surface area for the fusion cage.

  • Lateral Interbody Fusion (XLIF/LLIF): A side-access approach that avoids major back muscles and the spinal canal, often allowing for faster mobilization.

  • Posterior Lumbar Interbody Fusion (PLIF): The traditional approach from the back, offering the most direct access to compressed nerves and the spinal canal.

  • Transforaminal Lumbar Interbody Fusion (TLIF): An evolution of the posterior approach that accesses the disc space from a more lateral angle to reduce nerve retraction.

How Spinal Fusion Is Performed

  • Surgical Mapping: Digital mapping or Augmented Reality (AR) is used to project the patient's internal anatomy for the surgeon.

  • Access: Minimally invasive incisions are made to reach the spine from the most appropriate clinical angle (front, back, or side).

  • Disc Removal: The intervertebral disc or damaged bone is removed to decompress nerves and create space for the fusion.

  • Cage Insertion: A "cage" or spacer filled with bone graft material is inserted between the vertebrae to stimulate bone growth.

  • Hardware Stabilization: Robotic arms often assist in the precise placement of pedicle screws and rods to hold the vertebrae steady while they fuse.

  • Biological Stimulation: Bone Morphogenetic Proteins (BMP) or specialized bone grafts are applied to accelerate the natural bone-healing process.

Pre-Procedure Preparation

  • Smoking Cessation: Patients must commit to a strict no-nicotine program, as smoking significantly increases the risk of fusion failure (non-union).

  • Pre-habilitation: Strengthening "core" stabilizer muscles through directed physical therapy to support the spine post-operatively.

  • Home Setup: Coordinate a "home recovery station" to avoid the need for bending, lifting, or twisting during the initial healing phase.

  • Bone Health Optimization: Undergo a bone density scan (DEXA) to ensure the vertebrae are strong enough to support surgical hardware.

  • Bracing Consultation: Discuss the use of a post-operative back brace with the surgical team to ensure proper fitting and sizing.

Tests Before Spinal Fusion Surgery

  • Standing X-rays and MRI: Used to identify the exact source of nerve compression and the degree of mechanical instability.

  • High-resolution CT Scan: Essential for 3D surgical planning and robotic navigation mapping.

  • Electrocardiogram (EKG): Along with comprehensive blood panels to confirm cardiovascular readiness for a major procedure.

  • Neurological Baseline Testing: Measuring nerve conduction and muscle strength to provide a comparison for post-operative recovery.

  • DEXA Scan: To evaluate the quality of the "host bone" for successful graft integration and hardware stability.

Life After Spinal Fusion Surgery

  • Immediate Recovery: Hospital stays typically last 1 to 3 days, with an emphasis on early, assisted walking to prevent blood clots.

  • The "No BLT" Rule: For the first 3 to 6 months, patients must strictly avoid Bending at the waist, Lifting over 3kg, and Twisting the spine.

  • Bracing: Wear a customized back brace as prescribed to maintain spinal alignment during the critical fusion window.

  • Phased Physical Therapy: Focusing on core stabilization and safe movement patterns once the initial bone healing is confirmed.

  • Long-term Monitoring: Routine follow-up imaging (X-rays or CT) is required to confirm the success of the bone bridge across the joint.

  • Activity Resumption: Gradual return to a more active lifestyle once the vertebrae have fused into a single, solid, and stable bone mass.

Benefits of Spinal Fusion Surgery

  • Significant Pain Reduction: Achieves a 70% to 90% success rate for patients with chronic instability-related pain.

  • Enhanced Precision: Utilizes AR and robotic technology to make surgery safer and more accurate than traditional "freehand" methods.

  • Neurological Protection: Stabilizes the spine to prevent further nerve injury or progressive physical deformity.

  • Accelerated Healing: Stimulates the body's natural recovery using bio-engineered proteins for faster bone growth.

  • Permanent Stability: Eliminates the painful micro-motion that causes chronic inflammation and structural wear.

Minimally Invasive Spine Surgery (MISS)

Minimally Invasive Spine Surgery (MISS) is an advanced surgical approach used to treat spinal conditions—such as herniated discs or spinal stenosis—through significantly smaller incisions than traditional "open" surgery. The primary objective is to achieve the same clinical results while minimizing trauma to the surrounding muscles and tissues, leading to faster recovery and less post-operative pain.

When You Should Consider Minimally Invasive Spine Surgery

  • Herniated Discs: For procedures like a lumbar discectomy to relieve nerve pressure.

  • Spinal Stenosis: When a laminotomy or foraminotomy is required to enlarge the spinal canal or nerve exit points.

  • Spinal Instability: For spinal fusions (such as TLIF or XLIF) that require hardware stabilization.

  • Failed Conservative Care: When months of physical therapy and injections have failed to resolve chronic radiating pain.

  • Desire for Faster Recovery: For patients who wish to return to work and daily activities more quickly with less reliance on heavy pain medication.

Methods of Minimally Invasive Spine Surgery

  • Tubular Retraction: Using a series of dilating tubes to stretch muscle fibers apart rather than cutting them from the bone.

  • Endoscopic Spine Surgery: Utilizing a tiny camera (endoscope) through a "keyhole" incision to visualize the spinal anatomy on a high-definition monitor.

  • Microscopic MISS: Operating through a tubular retractor using a high-powered surgical microscope for enhanced lighting and 3D depth perception.

  • Percutaneous Hardware Placement: Inserting screws and rods through small skin punctures using real-time X-ray (fluoroscopy) or robotic guidance.

  • Lateral Access (XLIF/LLIF): Reaching the spine through the side of the body to avoid the major back muscles and the spinal canal.

How Minimally Invasive Spine Surgery Is Performed

  • Precision Mapping: Surgeons use pre-operative MRI or CT scans to create a precise "map" for the entry point, as the view during surgery is focused on a small area.

  • Keyhole Incision: Instead of a long midline incision, one or more small (1–2 cm) incisions are made over the target area.

  • Muscle Dilation: A thin guide wire is inserted, followed by progressively larger "tubular retractors" that gently push muscle fibers aside to create a tunnel to the spine.

  • Decompression or Repair: Using specialized long-handled miniature tools, the surgeon removes bone spurs or disc fragments through the tube.

  • Hardware Insertion (if needed): If a fusion is being performed, screws and rods are guided into place using robotic navigation or fluoroscopy through the same small ports.

  • Tube Removal: Once the repair is complete, the tube is withdrawn, and the muscle fibers naturally fall back into their original position.

  • Closure: The tiny skin incisions are closed with a single stitch or surgical glue, requiring only a small bandage.

Pre-Procedure Preparation

  • Diagnostic confirmation via MRI or CT scan to ensure the surgical plan is tailored to the specific nerve compression site.

  • Fasting (NPO) for 8–12 hours prior to the procedure to ensure safety under anesthesia.

  • Smoking cessation is critical, particularly if a fusion is planned, as nicotine restricts blood flow and prevents the bone from growing and healing.

  • Pre-operative physical assessment to ensure the patient is a candidate for a same-day or outpatient surgical procedure.

Tests Before Minimally Invasive Spine Surgery

  • High-Resolution MRI: To provide a detailed view of the soft tissues and the exact location of the disc herniation or stenosis.

  • CT Scan with 3D Reconstruction: Often used for surgical planning, especially when robotic navigation is being utilized for hardware placement.

  • X-ray (Flexion/Extension): To assess for any underlying spinal instability that might require a fusion instead of a simple decompression.

  • Blood Panels: To check for clotting factors and overall health markers before undergoing general anesthesia.

Life After Minimally Invasive Spine Surgery

  • Hospital Stay: Frequently performed as an outpatient (same-day) procedure; patients often go home within 3–4 hours of waking up.

  • Pain Management: Patients typically experience significantly less muscle soreness and have a lower requirement for opioid painkillers than open surgery.

  • Mobilization: Walking is encouraged almost immediately—often within 2 hours of the procedure—to promote circulation.

  • Recovery Timeline: Most patients return to desk work within 1–2 weeks and can begin light exercise by 4–6 weeks post-op.

  • Wound Care: The small incisions must be kept dry for the first few days, but they generally heal very quickly with minimal scarring.

Benefits of Minimally Invasive Spine Surgery

  • Reduced Tissue Trauma: By stretching rather than cutting muscles, the body heals much faster with less internal scarring.

  • Lower Infection Rates: Smaller incisions and less exposure of internal tissues to the environment significantly reduce the risk of post-operative infection.

  • Minimal Blood Loss: Many procedures result in less than a tablespoon of blood loss, virtually eliminating the need for transfusions.

  • Equal Clinical Outcomes: Long-term studies show that MISS is just as effective as traditional open surgery for pain relief and functional improvement.

Spine Fracture Fixation

Spinal Fracture Fixation is a major surgical procedure used to stabilize a broken vertebra (backbone) to protect the spinal cord and prevent deformity. It is primarily performed for "unstable" fractures caused by high-impact trauma, such as car accidents or falls, or for "pathological" fractures resulting from osteoporosis or cancer. By utilizing metal hardware or medical-grade cement, the procedure aims to restore the structural integrity of the spinal column.

When You Should Consider Spinal Fracture Fixation

  • Unstable Fractures: When the break is severe enough that the spine can no longer support the body's weight or maintain alignment.

  • Neurological Threat: If bone fragments are pressing on or have entered the spinal canal, risking damage to the spinal cord or nerve roots.

  • Progressive Deformity: To correct or prevent a "hunchback" deformity (kyphosis) caused by a collapsing vertebra.

  • Intractable Pain: When a compression fracture causes debilitating pain that does not respond to bracing or medication.

  • Pathological Risk: To stabilize a vertebra weakened by tumors or severe osteoporosis before a complete collapse occurs.

Methods of Spinal Fracture Fixation

  • Open Reduction and Internal Fixation (ORIF): The traditional approach where an incision is made to manually realign the bones and secure them with screws and rods.

  • Kyphoplasty: A minimally invasive procedure where a balloon is inflated inside a compressed vertebra to restore height before injecting bone cement.

  • Vertebroplasty: Injecting medical-grade bone cement directly into a fractured vertebra to "glue" the cracks and provide immediate stability.

  • Percutaneous Pedicle Screw Fixation: A minimally invasive technique where screws are inserted through small skin punctures using robotic or X-ray guidance.

  • Decompression and Fusion: Removing bone fragments that are pinching the spinal cord (decompression) and then joining the vertebrae together (fusion).

How Spinal Fracture Fixation Is Performed

  • Real-Time Imaging: The surgeon uses Fluoroscopy (live X-ray) or 3D navigation to visualize the fracture and plan the exact placement of hardware.

  • Hardware Placement: For trauma cases, titanium pedicle screws are drilled into the healthy vertebrae above and below the break.

  • Internal Splinting: Two metal rods are contoured and connected to the screws, acting as a permanent internal splint to hold the spine rigid.

  • Bone Grafting: Small pieces of bone (graft) are placed over the stabilized area to stimulate the vertebrae to grow together into one solid mass.

  • Cement Injection (for Compression): In kyphoplasty or vertebroplasty, a needle is guided into the bone, and polymethylmethacrylate (PMMA) cement is injected to stabilize the fracture.

  • Neuromonitoring: Throughout the procedure, electrical signals in the limbs are monitored to ensure the spinal cord remains safe while hardware is being installed.

Pre-Procedure Preparation

  • Stabilization: Trauma patients often remain on "log-roll" precautions (moving the body as a single unit) and wear a rigid brace until the moment of surgery.

  • Diagnostic Mapping: Extensive imaging via CT Scan (to see bone fragments) and MRI (to assess ligament and spinal cord health).

  • Fasting (NPO): No food or drink for 8–12 hours prior to the procedure to ensure safety under general anesthesia.

  • Surgical Fitting: Measurement for a custom-fitted TLSO (hard plastic brace) that will be required immediately after the surgery.

Tests Before Spinal Fracture Fixation

  • CT Scan: Provides the most detailed 3D view of the bony architecture and the specific pattern of the break.

  • MRI Scan: Essential for checking the "soft tissues," including the spinal cord, discs, and the ligaments that hold the spine together.

  • Dynamic X-rays: Taken in different positions to check if the fracture site moves or "slides" when the patient shifts weight.

  • Blood Panels: Routine screens to assess for blood loss, infection, and readiness for a potentially long surgical procedure.

Life After Spinal Fracture Fixation

  • Hospital Stay: Typically ranges from 3 to 7 days, depending on the severity of the trauma and the patient's mobility.

  • Early Mobilization: Walking with assistance is encouraged within 24 hours to prevent blood clots and keep the lungs clear.

  • Bracing Requirements: Many patients must wear a custom-fitted TLSO brace whenever they are out of bed for 6 to 12 weeks.

  • The "No BLT" Rule: Strict avoidance of Bending, Lifting (over 2kg), and Twisting for at least 3 months to allow the bone to heal.

  • Healing Timeline: It takes 3 to 6 months for the bone graft to fully "knit" the vertebrae together into a solid fusion.

Benefits of Spinal Fracture Fixation

  • Prevents Paralysis: Stabilizing the spine immediately protects the spinal cord from further injury caused by moving bone fragments.

  • Pain Reduction: Provides a solid internal structure that eliminates the "grinding" and mechanical pain associated with a broken vertebra.

  • Deformity Correction: Restores the natural alignment of the spine, preventing a permanent "hunchback" posture.

  • Early Return to Mobility: Hardware provides enough immediate stability to allow patients to sit up and walk much sooner than traditional bed rest would allow.

  • Long-Term Durability: Titanium hardware is intended to be permanent, providing a lifelong scaffold for the stabilized spinal segment.

Pedicle Screw Fixation

Pedicle Screw Fixation is a major surgical procedure used to stabilize the spine by inserting specialized screws into the pedicles—the strongest, thickest parts of the vertebral bone. These screws act as permanent "anchor points" for metal rods that hold the spine in a fixed position, providing the necessary stability for a successful spinal fusion.

When You Should Consider Pedicle Screw Fixation

  • Spinal Instability: When vertebrae move excessively or abnormally, causing chronic pain or risk of nerve damage.

  • Severe Fractures: To stabilize a broken vertebra and protect the spinal cord while the bone heals.

  • Scoliosis or Kyphosis: To provide the mechanical leverage needed to straighten and hold the spine in a corrective alignment.

  • Spondylolisthesis: When one vertebra has slipped forward over another, requiring the bones to be pulled back into place and locked.

  • Multi-Level Fusion: For extensive degenerative disease where multiple segments of the spine need to be joined into a single, solid unit.

Methods of Pedicle Screw Fixation

  • Open Fixation: The traditional approach involving a midline incision, giving the surgeon a direct and wide view of the bony anatomy.

  • Minimally Invasive (Percutaneous) Fixation: Inserting screws through small "keyhole" skin punctures using specialized guidance, which reduces muscle trauma.

  • Robotic-Assisted Fixation: Utilizing a robotic arm to guide the drill and screw into the pedicle with sub-millimeter precision based on a pre-operative CT map.

  • Computer-Navigated Fixation: Using real-time 3D "GPS-like" technology to track surgical instruments in relation to the patient's anatomy.

  • Fluoroscopic Guidance: Using continuous, real-time X-ray imaging during the procedure to verify the angle and depth of each screw.

How Pedicle Screw Fixation Is Performed

  • Identification: Using real-time imaging or robotic navigation, the surgeon identifies the "entry point" on the pedicle, the narrow bridge of bone connecting the front and back of the vertebra.

  • Drilling & Tapping: A small pilot hole is drilled through the pedicle and into the vertebral body. The hole is then "tapped" (threaded) to ensure the screw fits securely.

  • Screw Insertion: Permanent titanium or stainless steel screws are driven deep into the bone. Typically, two screws are placed in each vertebra (one on each side).

  • Rod Placement: Once all levels are instrumented, a metal rod is contoured and dropped into the "heads" of the screws.

  • Final Locking: "Set screws" are tightened into the screw heads to lock the rod in place, creating a rigid internal scaffold.

  • Bone Grafting: Small pieces of bone are packed around the hardware to stimulate the growth of a permanent bone bridge (fusion).

Pre-Procedure Preparation

  • Precision Mapping: Mandatory high-resolution CT scans or 3D X-rays are used to measure the exact width and angle of the pedicles, which vary significantly between patients.

  • Medication Adjustment: Blood thinners (such as aspirin or clopidogrel) must be stopped 5–7 days prior to prevent bleeding in the spinal canal.

  • Fasting (NPO): No food or drink for 8–12 hours before the procedure to ensure safety under general anesthesia.

  • Neuromonitoring Setup: Preparation for intra-operative electrical monitoring of the nerves in the legs to ensure safety during screw placement.

Tests Before Pedicle Screw Fixation

  • Thin-Cut CT Scan: Provides the most accurate measurement of the "pedicle diameter" to help the surgeon select the correct screw size.

  • MRI Scan: Used to visualize the proximity of the spinal cord and nerve roots to the planned screw path.

  • Bone Density Scan (DEXA): To ensure the bone is strong enough to hold the screws; in patients with osteoporosis, the screws may require specialized cement "augmentation."

  • Blood Panels: Routine screens to assess kidney function and clotting factors before a major surgical intervention.

Life After Pedicle Screw Fixation

  • Hospital Stay: Typically ranges from 2 to 5 days, depending on the complexity of the fusion.

  • Early Mobilization: Patients are encouraged to stand and take a few steps within 24 hours to prevent blood clots and promote recovery.

  • The "No BLT" Rule: For 3 to 6 months, you must strictly avoid Bending at the waist, Lifting anything over 2–4kg, and Twisting the spine.

  • Bracing: Many patients are required to wear a TLSO (hard plastic brace) for 6–12 weeks whenever they are out of bed to protect the hardware.

  • Hardware Status: The screws and rods are intended to stay in the body forever and are rarely removed unless they cause irritation or become infected.

Benefits of Pedicle Screw Fixation

  • Immediate Internal Stability: Provides a rigid structure that allows patients to move and walk much sooner than bone grafting alone would permit.

  • High Fusion Success Rate: Fixation achieves a solid bone bridge in over 90% of cases by preventing any micro-motion at the surgical site.

  • Corrective Power: Allows surgeons to mechanically realign a curved or slipped spine, restoring a more natural posture.

  • Neurological Protection: By locking the spine in place, it prevents the "shifting" that can lead to chronic nerve pinching or spinal cord injury.

  • Durable Support: Provides a lifelong permanent scaffold for the stabilized spinal segments.

Vertebroplasty / Kyphoplasty

Vertebroplasty and kyphoplasty are minimally invasive image-guided procedures used primarily to treat painful vertebral compression fractures. These fractures are most commonly caused by osteoporosis, but can also result from spinal tumors or trauma. Left untreated, these fractures can lead to chronic pain, height loss, and a hunched posture known as kyphosis.

When You Should Consider Vertebral Augmentation

  • Persistent Pain: Severe back pain caused by a vertebral compression fracture that does not respond to conservative management.

  • Limited Mobility: Difficulty performing daily activities or walking due to spinal instability and pain.

  • Height Loss: Noticeable decrease in stature or the development of a hunched back (kyphosis) following a fracture.

  • Osteoporosis Complications: Fractures occurring in patients with low bone density who require immediate stabilization.

  • Spinal Tumors: Compression fractures resulting from certain types of cancer or benign spinal lesions.

  • Trauma Impact: Acute fractures caused by a fall or injury that compromise the structural integrity of the spine.

Methods of Vertebral Repair

  • Vertebroplasty: A procedure where a thin needle is guided via X-ray into the fractured vertebra to inject medical-grade bone cement directly for stabilization.

  • Kyphoplasty: A technique where a small balloon is inflated inside the vertebra to create a cavity and help restore lost height before injecting cement.

  • Synthetic Patching: Use of specialized bone cement (PMMA) to act as an internal cast and seal the fracture.

  • Device Occlusion: Deployment of balloons or needles to stabilize the bone without the need for major open surgery.

How Vertebroplasty and Kyphoplasty Are Performed

  • Diagnostic Synchronization: Utilization of X-ray (fluoroscopy) to guide the needle or balloon precisely into the fractured level.

  • Cavity Creation: In kyphoplasty cases, a balloon is expanded to create space and lift the compressed bone.

  • Cement Deployment: Medical-grade bone cement is injected into the fracture or the newly formed space to seal it permanently.

  • Monitoring: Real-time imaging ensures the cement is perfectly positioned and contained within the vertebra before finishing.

  • Short Procedure Time: These treatments typically take 30 to 60 minutes per vertebral level.

Technological Innovations

  • Fluoroscopic Guidance: Real-time X-ray mapping to ensure robotic-like precision during needle placement.

  • Balloon Inflation Systems: Advanced technology used in kyphoplasty to specifically target height restoration in collapsed vertebrae.

  • High-Viscosity Cements: Modern materials designed to reduce the risk of leakage and provide immediate structural support.

  • Minimally Invasive Access: Use of small puncture sites rather than traditional incisions, leading to faster healing and less scarring.

Tests Before Vertebral Procedures

  • MRI or CT Scan: Detailed 3D mapping to confirm the age, location, and severity of the compression fracture.

  • Bone Density Test (DEXA): To evaluate the underlying health of the skeleton and the risk of future fractures.

  • Physical Examination: Assessment of localized tenderness and neurological function.

  • X-Ray Imaging: To determine the degree of vertebral collapse and spinal alignment.

Benefits of Vertebral Augmentation

  • Rapid Pain Relief: Approximately 70–90% of patients report significant improvement, often within 24 to 48 hours.

  • Improved Mobility: Restores the ability to walk and perform daily routines on the same day as the procedure.

  • Internal Stability: The hardened cement prevents the painful movement of bone fragments.

  • Reduced Mortality: Helps prevent complications related to prolonged immobility and bed rest.

  • Long-Term Cure: Provides a permanent stabilization of the fractured bone with high technical success rates.

Life After Vertebroplasty and Kyphoplasty

  • Short Hospital Stay: Often performed as an outpatient procedure, allowing patients to return home the same day.

  • Activity Restrictions: Strenuous exertion and heavy lifting should be avoided for a few weeks to ensure proper healing.

  • Bone Health Management: Regular follow-ups often include bone-strengthening medications and nutritional supplements like Calcium and Vitamin D.

  • Immediate Improvement: Patients typically experience a swift return to light activity and significant reduction in chronic pain.

Spinal Tumor Removal

Spinal Tumor Removal is a complex procedure to remove abnormal growths from the spinal canal or the vertebrae. The primary goals are to decompress the spinal cord, stabilize the spine, and obtain a tissue sample (biopsy) to determine if the tumor is benign or malignant. By removing or debulking the mass, the surgeon aims to preserve neurological function and restore the structural integrity of the spinal column.

When You Should Consider Spinal Tumor Removal

  • Spinal Cord Compression: When a tumor is pressing on the cord, causing progressive weakness, numbness, or loss of coordination.

  • Intractable Pain: Severe, localized back pain that does not respond to medication and often worsens at night or when lying down.

  • Neurological Deficits: Loss of bladder or bowel control, difficulty walking, or radiating pain in the arms or legs.

  • Pathological Fracture Risk: When a tumor has eaten away enough of the vertebral bone to make the spine unstable or prone to collapse.

  • Need for Diagnosis: To obtain a tissue sample to guide further cancer treatments like targeted radiation or chemotherapy.

Classifications of Spinal Tumors

  • Intradural-Intramedullary: Tumors that grow inside the actual tissue of the spinal cord (e.g., astrocytomas or ependymomas).

  • Intradural-Extramedullary: Tumors that grow inside the protective sac (dura) but outside the spinal cord itself (e.g., meningiomas or schwannomas).

  • Extradural: Tumors located outside the dura, usually within the bones of the vertebrae (most common in metastatic cancers).

How Spinal Tumor Removal Is Performed

  • Microsurgical Access: A midline incision is made over the tumor site, and a laminectomy (removing the back of the vertebrae) is performed to reach the spinal canal.

  • Durotomy: If the tumor is inside the protective sac, the surgeon uses an operating microscope to make a precise incision in the dura mater.

  • Ultrasonic Aspiration: Surgeons often use a CUSA (Cavitron Ultrasonic Surgical Aspirator), which uses sound waves to fragment and vacuum out the tumor without pulling on delicate nerves.

  • Tumor Resection: * Benign Tumors: The goal is usually "gross total resection" (complete removal).
    Malignant Tumors: If the tumor is wrapped around vital nerves, a "subtotal resection" (partial removal) may be performed to avoid causing paralysis.

  • Stabilization: If the tumor or the surgery has destroyed significant bone, pedicle screws and rods are installed to prevent the spine from collapsing.

  • Neuromonitoring: Throughout the surgery, electrical signals (SSEP/MEP) are monitored in the limbs to ensure the spinal cord remains safe.

[Image showing microscopic resection of an intradural tumor]

Pre-Procedure Preparation

  • High-Dose Steroids: Patients often receive Dexamethasone for 24–48 hours before surgery to reduce spinal cord swelling and inflammation.

  • Diagnostic Mapping: High-resolution MRI with Contrast is used to visualize the tumor’s relationship to nerve roots and the spinal cord.

  • Systemic Screening: PET or CT scans may be used to determine if the spinal tumor has spread from a primary site elsewhere in the body.

  • Fasting (NPO): No food or drink for 8–12 hours prior to the procedure to ensure safety under general anesthesia.

Tests Before Spinal Tumor Removal

  • MRI with Contrast: The gold standard for seeing the exact borders of the tumor and its vascularity.

  • CT Scan: Best for assessing how much of the vertebral bone has been destroyed or weakened by the growth.

  • PET Scan: Used to check for other tumor sites in the body if the spinal mass is suspected to be metastatic.

  • Neurological Baseline: A comprehensive exam to document muscle strength and sensation before surgery for post-operative comparison.

Life After Spinal Tumor Removal

  • Hospital Stay: Typically 3 to 7 days; patients often spend the first 24 hours in a Neuro-ICU for close monitoring.

  • Immediate Recovery: Mobilization depends on the patient's neurological status, but sitting up and walking with assistance is encouraged as soon as possible.

  • Pain Management: A combination of patient-controlled analgesia (PCA) and specialized nerve pain medications (like Gabapentin) is common.

  • Follow-up Adjuvant Therapy: If the tumor was malignant, radiation or chemotherapy typically begins 4 to 6 weeks after the surgical wound has fully healed.

  • Long-Term Surveillance: Regular MRI scans (every 3–6 months initially) are mandatory to ensure the tumor does not return.

Benefits of Spinal Tumor Removal

  • Preserves Mobility: Decompressing the spinal cord can prevent permanent paralysis and restore the ability to walk.

  • Significant Pain Relief: Removing the mass that is stretching the dura or compressing nerves provides major relief from localized and radiating pain.

  • Structural Stability: Fusion and hardware placement restore the spine's ability to support weight and maintain alignment.

  • Information for Treatment: Provides a definitive diagnosis, allowing oncologists to tailor the best possible follow-up cancer therapies.

Intradural Tumor Surgery

Intradural Tumor Surgery is a highly delicate neurosurgical procedure to remove tumors located inside the dura mater (the tough outer membrane protecting the spinal cord). These tumors are classified as Extramedullary (outside the cord but inside the membrane, like meningiomas) or Intramedullary (growing inside the spinal cord tissue itself). The surgery focuses on preserving neurological function while removing as much of the abnormal growth as possible.

When You Should Consider Intradural Tumor Surgery

  • Spinal Cord Compression: When the tumor’s growth begins to pinch the spinal cord, leading to a loss of coordination or "heaviness" in the limbs.

  • Progressive Weakness: Measurable loss of muscle strength in the arms or legs, or a change in your ability to walk.

  • Sensory Disturbances: Persistent numbness, tingling, or "electric shock" sensations that correlate with a mass seen on imaging.

  • Autonomic Dysfunction: New or worsening issues with bowel or bladder control, which may indicate urgent spinal cord pressure.

  • Radicular Pain: Severe, radiating pain that follows the path of a specific nerve root being compressed by the tumor.

Methods of Intradural Tumor Surgery

  • Microsurgical Resection: The primary method, using a high-powered operating microscope to distinguish between the tumor and the delicate spinal cord tissue.

  • Laminectomy/Laminoplasty: Creating an opening in the back of the spinal column to provide the surgeon access to the dural sac.

  • Myelotomy: A specialized technique for intramedullary tumors where a precise incision is made in the back of the spinal cord to reach the growth inside.

  • Ultrasonic Aspiration (CUSA): Using sound waves to fragment and remove tumor tissue without the physical pulling or tugging associated with traditional tools.

  • Endoscopic-Assisted Surgery: Utilizing tiny cameras in certain cases to provide a better view of the tumor’s "hidden" edges.

[Image showing a microsurgical dural incision and tumor exposure]

How Intradural Tumor Surgery Is Performed

  • Accessing the Dura: A midline incision is made over the tumor site, and a portion of the vertebral bone (lamina) is removed to expose the protective dural membrane.

  • Durotomy: The surgeon carefully opens the dura mater under high magnification to reveal the spinal cord and the tumor.

  • Micro-Dissection: Using specialized micro-instruments, the surgeon gently peels the tumor away from the spinal cord (for extramedullary tumors) or removes it from within the cord (for intramedullary tumors).

  • Neuromonitoring: Throughout the procedure, electrical signals (SSEP and MEP) are monitored to ensure the nerves are not being stressed or injured.

  • Dural Closure: The dura is stitched shut with extremely fine, water-tight sutures. A synthetic patch or surgical "fibrin glue" is often used to prevent any leaks of spinal fluid.

  • Final Closure: The spinal muscles are returned to their natural position, and the skin is closed with sutures or surgical glue.

Pre-Procedure Preparation

  • Diagnostic Imaging: High-resolution MRI both with and without Gadolinium contrast is mandatory to differentiate the tumor from healthy nerve tissue.

  • Anti-Inflammatory Steroids: Patients are often started on Dexamethasone 24–48 hours before surgery to reduce spinal cord swelling and optimize safety.

  • Neuromonitoring Setup: Coordination with a specialized neuro-monitoring team to place electrodes for real-time tracking of nerve signals during the operation.

  • Fasting (NPO): No food or drink for 8–12 hours prior to the procedure to ensure safety under general anesthesia.

Tests Before Intradural Tumor Surgery

  • Contrast-Enhanced MRI: The most critical test to map the tumor’s size, location, and its relationship to the spinal cord.

  • CT Scan: Used to evaluate the bony anatomy and ensure the laminectomy can be performed safely without causing instability.

  • Pre-operative Baseline Neurological Exam: A detailed assessment of motor and sensory function to serve as a benchmark for recovery.

  • Blood Panels: Standard screens to check kidney function (for contrast processing) and ensure proper blood clotting.

Life After Intradural Tumor Surgery

  • Hospital Stay: Typically 3 to 7 days; the first 24 hours are usually spent in a Neuro-ICU for hourly neurological checks.

  • Flat Bed Rest: Depending on the strength of the dural seal, you may be required to lie perfectly flat for 24 to 48 hours to prevent a spinal fluid leak.

  • Rehabilitation: Most patients require 3–6 months of physical therapy. Nerve recovery is a slow process, and strength improvements can continue for up to a year.

  • Sensory Changes: It is common to experience temporary "altered sensation" (tingling or coldness) as the spinal cord adapts to the removal of the pressure.

  • Surveillance: Annual follow-up MRIs are mandatory for several years to ensure the tumor does not recur.

Benefits of Intradural Tumor Surgery

  • Halts Neurological Decline: Effectively stops the progression of paralysis or sensory loss caused by tumor growth.

  • High Cure Rate for Benign Growths: Many intradural tumors, such as schwannomas or meningiomas, can be cured with complete surgical removal.

  • Neurological Recovery: Removing the pressure often allows the spinal cord to heal, restoring strength and coordination over several months.

  • Definitive Diagnosis: Provides the tissue sample needed to determine if further treatments, such as radiation or targeted therapy, are necessary.

Clubfoot Correction
Clubfoot Correction

Clubfoot correction via surgery is typically reserved for severe cases or when non-surgical methods, such as the Ponseti method (casting), fail. The surgery aims to realign the foot by releasing or lengthening tight tissues to allow for a functional, pain-free position. While the procedure is highly effective, the affected foot and calf may remain slightly smaller than the unaffected side throughout the child's life.

When You Should Consider Surgery

  • Severe Deformity: For cases where the foot is rigidly fixed in an abnormal position.

  • Failed Casting: When traditional serial casting (Ponseti method) does not achieve the necessary correction.

  • Relapsed Clubfoot: If the deformity returns after initial successful non-surgical treatment.

  • Late Diagnosis: In older children where the bones and tissues are less flexible and require structural realignment.

How Is Performed

  • Anesthesia: Most clubfoot surgeries are performed under general anesthesia to ensure the child is comfortable.

  • Incision & Release: The surgeon makes one or two incisions, usually on the back and inside of the foot, to access tight structures.

  • Tissue Lengthening: Surgeons meticulously lengthen tight tendons, such as the Achilles, and release tight ligaments around the joints.

  • Stabilization: In complex cases, small metal pins, screws, or plates may be inserted to hold bones in their new, correct positions during healing.

  • Duration: The surgical procedure typically takes between 2 and 3 hours to complete.

Pre-Procedure Preparation

  • Medical Evaluation: The healthcare provider performs a physical exam, reviews medical history, and orders X-rays of the foot.

  • Blood Tests: Standard tests, including a complete blood count (CBC) and checks for clotting factors, are required.

  • Medication Audit: Parents are typically instructed to stop giving the child blood-thinning medications, such as ibuprofen, roughly 10 days before the operation.

  • Fasting (NPO): The child must not eat or drink anything for 4 to 6 hours before surgery to minimize anesthesia risks.

  • Hygiene: Bathe the child with antiseptic soap the night before or the morning of the surgery to reduce infection risks.

Tests Before Clubfoot Surgery

  • Foot X-rays: To visualize the alignment of the tarsal bones and plan the surgical correction.

  • Physical Assessment: To document the range of motion and the flexibility of the foot structures.

  • Complete Blood Count (CBC): To ensure there are no underlying infections or issues with blood cell levels.

  • Clotting Profile: To confirm the blood can clot properly during and after the surgical incisions.

Life After Clubfoot Surgery

  • Hospital Stay: Depending on complexity, the child may stay in the hospital for 1 to 3 days for monitoring.

  • Casting Phase: A long-leg cast is applied initially; these are changed every few weeks for a total of 6 to 12 weeks.

  • Pin Removal: If metal pins were used for stabilization, they are typically removed in the office 4 to 6 weeks after surgery.

  • Bracing Phase: Once the final cast is removed, a brace (orthosis) is required to prevent the foot from returning to the clubfoot position.

  • Physical Therapy: A therapist guides the family through exercises to strengthen the repaired foot and improve its range of motion.

Why Specialized Treatment Is Highly Effective

  • Structural Realignment: Directly addresses the tight ligaments and tendons that prevent the foot from sitting flat.

  • Long-Term Function: Most children achieve a functional foot and can lead active, athletic lives.

  • Customized Bracing: Post-operative bracing plans are tailored to the child's growth to maintain the correction.

  • Comprehensive Care: Involves a multidisciplinary team of surgeons and therapists to manage healing and strength

Limb Lengthening Surgery

Limb lengthening is a multi-phase orthopedic process that utilizes distraction osteogenesis—the body's ability to grow new bone in response to mechanical tension. This procedure is used to treat limb length discrepancies or to increase stature by surgically lengthening the femur or tibia.

When You Should Consider Limb Lengthening

  • Limb Length Discrepancy: When one leg is significantly shorter than the other due to congenital conditions, previous injuries, or bone infections.

  • Stature Concerns: For individuals with certain types of dwarfism or constitutional short stature who seek to increase their height.

  • Post-Traumatic Deformity: To correct bones that have healed improperly or shortened following a severe fracture.

  • Congenital Bone Defects: For conditions like fibular hemimelia where part of a bone is missing or underdeveloped.

How Is Performed

  • Osteotomy (The Bone Cut): Under general anesthesia, the surgeon makes a precise, low-energy cut through the bone while carefully preserving the nutrient-rich outer membrane (periosteum) and blood supply.

  • Internal Device Installation: A motorized telescopic rod is inserted into the bone's marrow canal and secured with screws.

  • External Device Installation: A metal frame (such as an Ilizarov fixator) is attached to the bone segments via pins and wires that pass through the skin.

  • Hospitalization: Patients typically remain in the hospital for 3 to 7 days for monitoring, pain management, and initial mobility training.

The Three Healing Phases

  • Latency Phase (5–10 Days): After surgery, the bone is left to rest to allow a hematoma and soft repair tissue (callus) to develop at the site.

  • Distraction Phase (Lengthening): The device is adjusted to pull the bone segments apart, typically at a rate of 1 mm per day, often split into four increments.
    Internal devices are adjusted using an External Remote Controller (ERC) with magnets.
    External fixators are manually adjusted by turning a knob or "clicker".

  • Consolidation Phase (Hardening): Once the target length is reached, the device is locked. The soft tissue gradually mineralizes into hard, weight-bearing bone, typically taking double the time of the distraction phase.

Pre-Procedure Preparation

  • Physical Evaluation: A thorough assessment of joint range of motion and muscle strength in the affected limb.

  • Imaging Workup: Full-length X-rays (teleoroentgenograms) to precisely measure existing bone lengths and alignment.

  • Psychological Screening: Ensuring the patient and family are prepared for the intensive, months-long commitment to the lengthening and rehab process.

  • Tobacco Cessation: Patients must stop smoking as nicotine significantly impairs bone healing and increases the risk of nonunion.

  • Nutritional Optimization: Ensuring adequate intake of Vitamin D and Calcium to support the rapid growth of new bone tissue.

Tests During Limb Lengthening

  • Frequent X-rays: Performed weekly during the distraction phase to monitor the "regenerate" (new bone) and ensure the lengthening rate is appropriate.

  • Nerve Conduction Checks: Regular clinical exams to ensure the stretching of nerves isn't causing numbness or weakness.

  • Bone Density Scans: Used during the consolidation phase to determine when the new bone is strong enough for full weight-bearing.

  • Infection Monitoring: Continuous visual checks of pin sites (for external frames) and blood tests if a deep infection is suspected.

Life During Limb Lengthening

  • Physical Therapy: Mandatory sessions 2 to 5 times per week to prevent joint stiffness and muscle contractures as the bone grows.

  • Weight-Bearing: Patients start with partial weight-bearing using crutches; full weight-bearing is only permitted after X-rays confirm sufficient bone density.

  • Daily Device Management: Patients or caregivers must perform the scheduled adjustments (distractions) and clean pin sites meticulously.

  • Hardware Removal: Internal rods are typically removed via a minor surgery 1 to 2 years after the initial procedure.

Why Specialized Treatment Is Highly Effective

  • Natural Bone Growth: Uses the body's own regenerative power to create real, permanent bone tissue.

  • High Precision: Modern motorized internal rods allow for extremely accurate lengthening with minimal discomfort.

  • Simultaneous Correction: Can often correct bone rotations or angular deformities (like bow-legs) at the same time as lengthening.

  • Restored Symmetry: Provides a permanent solution to limb length discrepancies, improving gait and preventing long-term back or hip pain.

Osteotomy
Osteotomy

An osteotomy is a surgical procedure where a bone is precisely cut, reshaped, or removed to change its alignment or length. In the context of limb lengthening, it is the foundational step that allows for new bone growth. This specialized intervention triggers the body's natural healing mechanisms to bridge gaps or correct structural deformities.

Types of Osteotomy

  • Closing Wedge: A wedge of bone is removed to straighten a tilted bone, a technique commonly used in "knock-knee" corrections.

  • Opening Wedge: A cut is made and the bone is pulled open to create a gap, which is then filled with a bone graft or allowed to grow new bone.

  • Rotational: The bone is cut and turned to correct a twist or "torsion" within the limb.

  • Corticotomy: A specific type used in lengthening where only the hard outer shell (cortex) is cut, preserving the inner marrow and blood supply to speed up healing.

How Is Performed

  • Incision: The surgeon makes a small skin incision to access the target bone, usually the femur or tibia.

  • Protection: Surrounding nerves, blood vessels, and muscles are retracted and shielded using specialized tools during the procedure.

  • The Cut: Using a surgical saw, drill, or osteotome (a chisel-like tool), the surgeon performs a "low-energy" cut to minimize heat damage to the bone cells.

  • Hardware Fixation: Once the bone is cut, an internal rod (intramedullary nail) or an external fixator (pins and frames) is attached to hold the segments in the new position.

Biological Healing (The "Glow")

The primary goal of an osteotomy in lengthening is to trigger Distraction Osteogenesis:

  • Hematoma Formation: Immediately after the cut, blood fills the gap, creating a "scaffold" for the healing process.

  • Callus Formation: Within days, the body sends "osteoblasts" (bone-building cells) to create a soft, cartilage-like bridge called a callus.

  • Tension-Stress Effect: By slowly pulling the two cut pieces apart (distraction), the body is "tricked" into continuously creating more callus, which eventually hardens into solid bone.

Pre-Procedure Preparation

  • Imaging Workup: Detailed X-rays or CT scans are required to plan the exact angle and location of the bone cut.

  • Vascular Assessment: Ensuring healthy blood flow to the limb is critical, as the bone depends on this supply to grow new tissue.

  • Medication Audit: Patients must pause anti-inflammatory drugs (NSAIDs) or blood thinners that could interfere with hematoma formation and bone healing.

  • Smoking Cessation: Nicotine must be avoided entirely, as it constricts blood vessels and significantly increases the risk of the bone failing to knit back together.

Tests Before Osteotomy

  • Weight-Bearing X-rays: To assess the overall mechanical axis of the leg and determine the degree of correction needed.

  • Blood Panels: Checking calcium, Vitamin D, and alkaline phosphatase levels to ensure the body has the mineral resources for bone growth.

  • CT Scan (3D Reconstruction): Provides a precise anatomical map for complex rotational or multi-planar corrections.

  • Nerve Conduction Study: May be performed if there is a pre-existing nerve issue to establish a baseline before the bone is realigned.

Life After Osteotomy

  • Nerve/Vessel Monitoring: Surgeons monitor the limb post-op for "compartment syndrome" or nerve compression because the bone has been physically severed.

  • Pain Management: The first 48–72 hours involve the most acute pain as the bone ends and surrounding tissue settle.

  • Weight-Bearing Restrictions: Weight-bearing is strictly limited until X-rays show "bridging" (new bone crossing the gap) to prevent hardware failure or bone shifting.

  • Physical Therapy: Early motion of the joints above and below the osteotomy is encouraged to prevent stiffness while the bone heals.

Why Specialized Treatment Is Highly Effective

  • Permanent Realignment: Corrects the root cause of joint pain and uneven wear by shifting the load to healthy areas of the bone.

  • Bone Preservation: Modern "low-energy" techniques preserve the biological vitality of the bone, leading to faster consolidation.

  • Customized Hardware: 2026-standard internal nails and external frames allow for microscopic adjustments to ensure a perfect final alignment.

  • Prevents Arthritis: By correcting a tilted or twisted bone early, an osteotomy can often delay or eliminate the need for a joint replacement later in life.

Angular Deformity Correction

Angular deformity correction is a surgical process used to straighten bones that are abnormally bowed or twisted, such as knock-knees (genu valgum) or bow-legs (genu varum). When performed alongside limb lengthening, it ensures the mechanical axis of the leg is correctly aligned as the bone grows. This procedure is critical for distributing weight-bearing forces evenly across the joints to prevent long-term wear and arthritis.

When You Should Consider Correction

  • Genu Varum (Bow-legs): When the knees stay wide apart even when the feet and ankles are touching.

  • Genu Valgum (Knock-knees): When the knees touch but the ankles remain far apart.

  • Mechanical Axis Deviation: When a full-length X-ray shows the weight-bearing line from the hip to the ankle passes outside the center of the knee.

  • Joint Pain: Persistent discomfort in the hip, knee, or ankle caused by uneven loading of the joint surfaces.

  • Combined Deformity: When a limb requires both straightening and lengthening to restore symmetry.

How Is Performed

  • Deformity Analysis: Surgeons identify the Center of Rotation of Angulation (CORA), the precise "apex" where the bone is bent.

  • The Osteotomy: A precise bone cut is made, ideally at the CORA, to allow for realignment without shifting the bone segments sideways.

  • Acute Correction: The bone is cut and immediately moved into a straight position during surgery, then secured with internal plates and screws.

  • Gradual Correction: Used for larger deformities, an external fixator slowly adjusts the angle by roughly 1 degree per day.

  • Fixation: Advanced systems like the Taylor Spatial Frame use adjustable struts to correct angulation, rotation, and length simultaneously based on a computer-generated "prescription."

Correction Approaches

  • Opening Wedge Osteotomy: A single cut is made and "pried open" to create a gap that corrects the angle; this gap eventually fills with new bone.

  • Closing Wedge Osteotomy: A triangular wedge of bone is removed and the remaining ends are brought together, providing high stability.

  • Dome Osteotomy: A curved, circular cut allows the bone to rotate like a ball-and-socket joint to the correct angle without changing length.

  • Fixator-Assisted Nailing (FAN): A hybrid technique where a temporary external fixator achieves alignment during surgery before an internal rod is inserted to lock the position.

Pre-Procedure Preparation

  • Long-Film Radiography: Surgeons use full-length X-rays to calculate the mechanical axis and identify the exact CORA for planning.

  • Software Simulation: Entering bone measurements into computer programs to map out the daily adjustments required for hexapod fixators.

  • Joint Assessment: Evaluating the range of motion and stability of the hip and ankle to ensure they can accommodate the new alignment.

  • Hardware Selection: Determining whether internal plates, specialized nails, or external frames are best suited for the specific deformity.

Tests Before Deformity Correction

  • Full-Length Standing X-rays: The primary tool for measuring the deviation of the mechanical axis from the center of the knee.

  • CT Scan with Rotational Profile: Used to measure "torsion" or twisting in the bone that may not be fully visible on standard X-rays.

  • Gait Analysis: To document how the deformity affects walking patterns and joint loading before the intervention.

  • Bone Quality Assessment: Ensuring the bone is healthy enough to support the hardware and the healing process.

Life After Correction

  • Unloading the Joint: Bow-leg correction typically unloads the inner (medial) knee, while knock-knee correction unloads the outer (lateral) knee.

  • Daily Adjustments: For gradual correction, patients must follow a strict schedule of turning fixator struts to move the bone into alignment.

  • Physical Therapy: Crucial for maintaining joint flexibility as the surrounding muscles and ligaments adapt to the new leg structure.

  • Hardware Removal: Internal plates or rods may be removed in a minor procedure once the bone has fully consolidated in its new position.

Why Specialized Treatment Is Highly Effective

  • Precise Realignment: Using CORA planning ensures the bone is straightened with mathematical accuracy.

  • Prevents Degeneration: By restoring the mechanical axis, surgery protects the knee cartilage from premature wear and arthritis.

  • Multi-Planar Correction: Modern hexapod frames can fix bowing, twisting, and shortening all at once.

  • Stable Fixation: Modern internal and external systems allow for early mobility while the bone heals in the corrected position.

Knee Arthroscopy Surgery

Knee Arthroscopy is a minimally invasive surgical procedure used to diagnose and treat problems in the knee joint through tiny incisions using a camera. This specialized "keyhole" approach allows surgeons to view and repair joint structures without the need for a large open incision.

When You Should Consider Knee Arthroscopy

  • Persistent knee pain that has not responded to rest, physical therapy, or injections.

  • Mechanical symptoms such as the knee "locking," "catching," or "giving way" during movement.

  • Swelling and stiffness caused by loose fragments of bone or cartilage within the joint.

  • Confirmed soft tissue injuries, such as a meniscus tear or a ligament injury (ACL/PCL).

  • Chronic inflammation of the joint lining (synovium) that requires surgical removal.

Methods of Knee Arthroscopy

  • Diagnostic Arthroscopy: A procedure focused on exploring the joint to identify the source of unexplained pain or instability.

  • Meniscectomy: Trimming away the damaged or frayed edges of a torn meniscus.

  • Meniscal Repair: Suturing a torn meniscus back together to preserve the natural cushioning of the knee.

  • Chondroplasty: Smoothing out damaged or irregular articular cartilage to improve joint glide.

  • Loose Body Removal: Extracting floating bits of bone or cartilage that cause painful mechanical interference.

How Knee Arthroscopy Is Performed

  • Portal Creation: The surgeon makes two or three tiny incisions, or portals (about 0.5 cm each), around the kneecap.

  • Saline Insufflation: The joint is expanded with sterile saline to stretch the capsule, providing a clear view and space for the tools.

  • Visualization: A high-definition fiber-optic camera (arthroscope) is inserted through one portal to project live images onto a monitor.

  • Surgical Intervention: Miniature specialized tools, such as shavers or probes, are used to repair, trim, or remove damaged tissue.

  • Closure: After the saline is drained, the tiny portals are closed with a single stitch or sterile tape (Steri-Strips).

Pre-Procedure Preparation

  • Fasting (NPO) for 6–8 hours prior to the surgery to ensure safety during anesthesia.

  • Evaluation of current medications; blood thinners are typically only stopped if significant bleeding is anticipated.

  • Choosing the most appropriate anesthesia option, which may include general, spinal, or a regional nerve block.

  • Diagnostic confirmation through physical stability tests and imaging to map out the internal damage.

Tests Before Knee Arthroscopy

  • MRI Scan: The primary imaging tool used to visualize soft tissues like ligaments, tendons, and cartilage.

  • X-rays: Used to rule out significant bone-on-bone arthritis or fractures that may not be treatable via arthroscopy.

  • Physical Stability Exams: Specialized maneuvers (like the Lachman or McMurray tests) to assess ligament and meniscus integrity.

  • Blood Panels: Routine screens to ensure general health and fitness for an outpatient surgical procedure.

Life After Knee Arthroscopy

  • Almost always an outpatient procedure, with most patients returning home 2–3 hours after waking up.

  • Adherence to the R.I.C.E. protocol (Rest, Ice, Compression, Elevation) is critical for the first 48–72 hours.

  • Weight-bearing status depends on the procedure: simple trimming allows walking in days, while repairs may require crutches for 4–6 weeks.

  • Driving is typically restricted for 1–2 weeks, particularly if the surgery was on the right leg or the patient drives a manual vehicle.

  • Physical therapy focuses on restoring range of motion and strengthening the muscles surrounding the knee joint.

Benefits of Knee Arthroscopy

  • Minimally invasive nature results in significantly less post-operative pain and swelling than open surgery.

  • Tiny incisions lead to faster wound healing and minimal surgical scarring.

  • High success rates for resolving mechanical issues like joint locking or catching.

  • Reduced risk of infection and lower blood loss compared to traditional joint procedures.

External Fixator Application

External Fixator (ExFix) Application is a surgical treatment used to stabilize severe bone fractures by using a metal frame located outside the body. The frame is connected to the bone via high-strength pins or wires that pass through the skin, providing stable alignment while allowing doctors to treat surrounding soft tissue injuries.

When You Should Consider External Fixator Application

  • Open Fractures: Cases where the bone has broken through the skin, requiring the wound to remain accessible for cleaning and dressing.

  • Polytrauma (Damage Control): Used as a rapid, temporary stabilizer for patients with multiple life-threatening injuries until they are stable enough for permanent surgery.

  • Comminuted Fractures: Severe breaks where the bone is shattered into many small pieces that are difficult to fix with internal plates.

  • Infected Fractures: When an internal implant cannot be used because of an active infection in the bone or tissue.

  • Bone Lengthening or Deformity Correction: Specialized circular frames used to slowly pull bone apart or straighten a limb over several months.

Methods of External Fixation

  • Uniplanar Fixation: A simple arrangement where rods are placed along one side of the limb, commonly used for rapid stabilization of the femur or tibia.

  • Bilateral Fixation: Rods are placed on both sides of the limb for increased stability in high-stress areas.

  • Circular Fixation (Ilizarov): Rings that completely surround the limb, connected by wires and rods; these are the gold standard for complex limb reconstructions.

  • Multiplanar Fixation: Using multiple rods in different directions to stabilize complex fractures near joints like the wrist or ankle.

  • Hybrid Fixation: A combination of a circular frame near a joint and a uniplanar rod along the bone shaft.

How External Fixator Application Is Performed

  • Site Selection: The surgeon identifies "safe zones" in the limb where pins can be inserted without hitting major nerves or blood vessels.

  • Pin Insertion: Small incisions are made, and threaded steel or titanium pins (Schanz screws) are drilled through the skin and into the healthy bone above and below the fracture.

  • Fracture Reduction: Under real-time X-ray (C-arm) guidance, the surgeon manually pulls and aligns the bone fragments into the correct position.

  • Frame Assembly: External rods and clamps are attached to the protruding pins, creating a rigid bridge across the break.

  • Tightening and Locking: Once alignment is confirmed, the clamps are tightened to "lock" the bone in place, and the surgical wounds are dressed.

Pre-Procedure Preparation

  • Standard X-rays to map the fracture; the surgeon must also perform a detailed neurovascular exam to ensure pins avoid critical structures.

  • Thorough "debridement" (surgical cleaning) of any open wounds to remove dirt, debris, and dead tissue.

  • Fasting (NPO) and medical clearance for general anesthesia or a regional nerve block.

  • Discussion of the "temporary vs. definitive" plan—determining if the frame will stay on for weeks or months.

Tests Before External Fixator Application

  • High-Resolution X-rays: The primary tool for assessing the fracture pattern and selecting the correct frame size.

  • CT Scan: Often used for complex fractures involving joints to understand the three-dimensional layout of the bone fragments.

  • Doppler Ultrasound: Occasionally used to verify the location of major arteries if the injury involves significant soft tissue swelling.

  • Blood Panels: Routine screens to check for inflammatory markers and ensure the patient is fit for anesthesia.

Life After External Fixator Application

  • Hospital stays vary from 2 days to a week, depending on the severity of associated soft tissue wounds.

  • Daily pin-site cleaning with saline or Chlorhexidine is mandatory to prevent "crust" buildup and infection.

  • Most patients remain Non-Weight-Bearing or "Touch-Down" only, as the frame is a bridge and does not replace the bone's strength.

  • Modified clothing, such as tear-away pants or wide-leg shorts, is necessary to fit over the bulky external hardware.

  • Removal is typically performed in a clinic setting using local anesthesia or light sedation; the pins are unscrewed once X-rays show the bone is stable.

Benefits of External Fixator Application

  • Provides immediate, rigid stabilization with minimal additional trauma to the injured soft tissues.

  • Allows for constant monitoring and specialized care of open wounds or skin grafts during the bone-healing process.

  • Offers a "damage control" solution that saves lives and limbs in complex trauma cases.

  • Highly adjustable; the surgeon can fine-tune the bone alignment even after the surgery is finished by adjusting the external clamps.

Pelvic Fracture Fixation

Pelvic Fracture Fixation is a critical surgical procedure used to stabilize the pelvic ring, typically following high-impact trauma such as motor vehicle accidents or significant falls. Because the pelvis protects major internal organs and a complex network of blood vessels, stabilizing these fractures is often a life-saving measure to control internal bleeding and restore structural integrity.

When You Should Consider Pelvic Fracture Fixation

  • Unstable Pelvic Ring: Injuries where the structural "circle" of the pelvis is broken in two or more places, making it unable to support the weight of the body.

  • Open Book Fractures: A severe injury where the front of the pelvis (pubic symphysis) is pulled apart, leading to a significant risk of internal hemorrhage.

  • Vertical Shear Fractures: When one side of the pelvis is pushed upward, often after a fall from a height, requiring mechanical realignment.

  • Persistent Pain and Malalignment: Fractures that have not healed correctly (malunion) or cause chronic instability and gait issues.

  • Emergency Hemorrhage Control: Use of an external frame as a rapid intervention to decrease pelvic volume and stop life-threatening bleeding.

Methods of Pelvic Fracture Fixation

  • External Fixation: A rapid "damage control" method using metal pins drilled into the hip bones and connected to an external carbon fiber frame.

  • Anterior ORIF: Placing surgical plates and screws across the front of the pelvis, such as the pubic symphysis.

  • Posterior ORIF: Internal stabilization of the back of the pelvic ring using heavy-duty plates for sacroiliac (SI) joint injuries.

  • Percutaneous Cannulated Screws: A minimally invasive technique where long screws are inserted through tiny "stab" incisions into the sacrum under real-time X-ray guidance.

  • Pelvic C-Clamp: An emergency external device used specifically to compress the back of the pelvis in cases of severe posterior instability and bleeding.

How Pelvic Fracture Fixation Is Performed

  • Resuscitation and Alignment: In emergencies, the patient is stabilized with a pelvic binder or sheet to control bleeding before entering the operating room.

  • Reduction: For internal surgery, the surgeon makes an incision to manually pull and maneuver the pelvic bones back into their anatomically correct "ring" shape.

  • Plate and Screw Fixation: High-strength titanium or stainless steel plates are contoured to the curve of the pelvic bone and secured with multiple screws.

  • Iliosacral Screw Insertion: For posterior injuries, long screws are driven from the side of the hip bone directly into the sacrum to lock the back of the pelvis.

  • Fluoroscopic Verification: Throughout the procedure, the surgeon uses a C-arm (mobile X-ray) to ensure hardware is not impinging on nerves or blood vessels.

  • Wound Closure: Given the complexity of pelvic anatomy, deep sutures and sometimes surgical drains are used to prevent fluid or blood buildup.

Pre-Procedure Preparation

  • Emergency stabilization using a pelvic binder to minimize internal volume and promote blood clotting.

  • Diagnostic imaging including AP, inlet, and outlet X-rays, alongside CT scans with 3D reconstruction to map the fracture.

  • Aggressive resuscitation with IV fluids and blood transfusions to achieve hemodynamic stability.

  • Detailed neurological and urological exams to document any nerve or bladder damage existing prior to surgery.

Tests Before Pelvic Fracture Fixation

  • CT Scan with 3D Reconstruction: The gold standard for understanding complex pelvic displacement and planning hardware placement.

  • Retrograde Cystourethrogram: A specialized imaging test to check for injuries to the bladder or urethra, which are common with pelvic breaks.

  • Angiography: Occasionally performed if there is persistent bleeding to identify and "plug" (embolize) damaged arteries.

  • Blood Panels: Frequent monitoring of hemoglobin and hematocrit levels due to the high risk of blood loss associated with pelvic trauma.

Life After Pelvic Fracture Fixation

  • Hospital stays are often extended, ranging from several days to several weeks depending on other trauma.

  • This is the most restrictive recovery phase; patients are typically Non-Weight-Bearing or "toe-touch" only for 6 to 12 weeks to protect the hardware.

  • Mandatory use of blood thinners (anticoagulants) for 2–6 weeks is required to prevent life-threatening blood clots (DVT).

  • Many patients require a transition to a specialized rehabilitation facility to regain the ability to sit, stand, and eventually walk.

  • Full biological union of the bone typically occurs within 3 to 4 months, but full strength recovery can take up to a year.

Benefits of Pelvic Fracture Fixation

  • Provides immediate mechanical stability to the core of the body, allowing for earlier mobilization and seated upright positions.

  • Dramatically reduces the risk of death from internal hemorrhage by "closing" the pelvic space.

  • Restores the anatomical symmetry of the hips, preventing long-term leg-length discrepancies and chronic back pain.

  • Protects the long-term function of the pelvic organs by providing a stable "house" for the bladder, rectum, and reproductive systems.

Wrist / Ankle Fracture Surgery

Wrist and ankle fractures that require surgery are almost always treated using ORIF. This involves making an incision to manually realign the bones (reduction) and securing them with metal hardware (fixation) to ensure they heal in the correct anatomical position.

When You Should Consider Wrist or Ankle ORIF

  • Displaced Fractures: The bone fragments have moved so far out of place that they cannot be held together by a cast alone.

  • Intra-articular Involvement: The break extends into the joint surface (the wrist or the ankle mortise), where even minor misalignment can cause permanent loss of motion.

  • Unstable Twisting Injuries: Ankle fractures involving multiple "malleoli" (the bony bumps on the sides) or torn ligaments (syndesmosis).

  • Open Fractures: Injuries where the bone has pierced the skin, requiring immediate surgical cleaning and stabilization.

  • Falling on an Outstretched Hand (FOOSH): A common cause of Colles' fractures in the wrist that often require a volar locking plate.

Methods of Wrist and Ankle Fixation

  • Volar Locking Plate: A titanium plate contoured specifically for the palm side of the wrist, providing rigid support for distal radius fractures.

  • Lateral Malleolar Plating: A narrow plate used to bridge and stabilize a fracture of the fibula (outer ankle).

  • Medial Malleolar Screws: Two long, parallel screws typically used to fix the inner ankle bone (tibia).

  • Syndesmotic "Tight-Rope": A high-strength cord used instead of a screw to stabilize the connection between the tibia and fibula while allowing for natural micro-movements.

  • Fragment-Specific Fixation: Using tiny, individual plates or pins for complex breaks involving multiple small bone pieces.

How Wrist and Ankle ORIF Is Performed

  • Incision and Exposure: The surgeon makes a 3–5 cm incision (on the palm side for the wrist or the sides for the ankle) to access the broken bone.

  • Manual Reduction: Using specialized tools, the surgeon maneuvers the bone fragments back into their anatomically correct position, restoring "radial tilt" in the wrist or the "ankle mortise" hinge.

  • Hardware Application: A metal plate is laid across the break and secured with specialized screws that "lock" into the plate for maximum stability.

  • Fluoroscopic Guidance: Real-time X-rays are used during the surgery to verify that the screws are the correct length and the joint surfaces are perfectly smooth.

  • Wound Closure: The skin is closed with stitches or staples. Because ankle skin is thin, surgeons take extra care to ensure a tension-free closure to prevent wound breakdown.

Pre-Procedure Preparation

  • Diagnostic confirmation through high-resolution X-rays and occasionally a CT scan to map complex fragment patterns.

  • Fasting (NPO) for at least 8 hours prior to the surgery.

  • For ankle surgery, a delay of 7–10 days may be necessary if the skin is too swollen or blistered to close safely.

  • Coordination of a regional nerve block (at the collarbone for the wrist or behind the knee for the ankle) to manage pain for the first 24 hours.

Tests Before Wrist and Ankle ORIF

  • X-ray Series: AP, lateral, and oblique views to determine the "length" and "tilt" of the fracture.

  • CT Scan: Often used for "pilon" ankle fractures or complex wrist breaks to see exactly how much of the joint surface is involved.

  • Physical Exam: Checking for "tenting" of the skin (where bone pushes against skin) and assessing nerve function in the fingers or toes.

  • Blood Panels: Routine testing to ensure the patient is a healthy candidate for anesthesia.

Life After Wrist and Ankle ORIF

  • These are typically outpatient procedures, though complex ankle repairs may require an overnight stay for elevation.

  • Wrist Recovery: A heavy splint is worn for 10–14 days. Early finger wiggling is encouraged within 24 hours, but lifting is restricted to "coffee cup" weight for 6–8 weeks.

  • Ankle Recovery: Strict Non-Weight-Bearing (NWB) is required for 6 to 8 weeks. Patients must keep the foot "toes above nose" for the first week to manage extreme swelling.

  • Physical therapy is essential to regain forearm rotation (wrist) or the "hinge" movement (ankle) once the initial splint is removed.

  • In the ankle, about 20–30% of patients choose to have hardware removed a year later if the plates "catch" on boots or feel uncomfortable under the skin.

Benefits of Wrist and Ankle ORIF

  • Restores the perfect alignment of the joint surface, which is the most effective way to prevent rapid-onset arthritis.

  • Allows for much earlier movement of the fingers and toes compared to a traditional long-arm or long-leg cast.

  • Provides the internal stability needed to ensure the bone heals at its original length, preventing permanent deformity.

  • Significantly improves the chances of regaining full range of motion and returning to previous activity levels.

Flow Diverter Placement

Flow Diverter Placement is a highly specialized endovascular procedure used to treat complex, large, or wide-necked brain aneurysms. Unlike coiling, which fills the "bulge" itself, a flow diverter is a high-density mesh stent placed in the main artery. It redirects blood flow away from the aneurysm, causing the blood inside the bulge to stagnate, clot, and eventually be absorbed by the body.

When You Should Consider Flow Diverter Placement

  • Giant Aneurysms: Bulges larger than 25mm that are difficult or dangerous to treat with traditional coils.

  • Fusiform Aneurysms: Cases where the entire circumference of the artery is bulging rather than just a single "berry" shape.

  • Wide-Necked Aneurysms: When the opening of the aneurysm is so broad that coils would not remain securely inside.

  • Recurrent Aneurysms: Aneurysms that have failed previous coiling treatments or have started to regrow.

  • Complex Locations: When an aneurysm is located at a segment of the artery where surgical clipping or standard coiling carries a high risk of complication.

Methods of Flow Diversion

  • Single-Device Placement: Deploying a single high-density mesh tube across the neck of the aneurysm to disrupt blood flow.

  • Telescoping Technique: Using two or more flow diverters overlapped to increase the density of the mesh in specific areas or to cover a longer segment of the artery.

  • Surface-Modified Diverters: Newer devices with specialized coatings (like phosphorylcholine) designed to reduce the risk of blood clots and the need for heavy blood thinners.

  • Distal Access Navigation: Using highly flexible microcatheters to reach aneurysms in the smaller, more distant branches of the brain's vascular tree.

How Flow Diverter Placement Is Performed

  • Vascular Access: A catheter is inserted through the femoral artery (groin) or radial artery (wrist) and navigated up to the brain.

  • Precise Positioning: Under high-definition fluoroscopy (X-ray), the surgeon positions a microcatheter across the segment of the artery where the aneurysm is located.

  • Device Deployment: The flow diverter, a tightly woven tube made of cobalt-chromium or nickel-titanium, is slowly unsheathed and expanded against the artery walls.

  • Wall Apposition: The surgeon meticulously ensures the device is snug (apposed) against the artery wall so that blood cannot leak behind the mesh.

  • Stasis Verification: Contrast dye is injected to confirm that the blood flow into the aneurysm has slowed significantly, a sign that the "diversion" is working.

  • Access Closure: The microcatheter is removed, and the initial puncture site in the groin or wrist is sealed.

[Image showing the "stasis effect" of blood clotting inside an aneurysm after flow diversion]

Pre-Procedure Preparation

  • Dual Antiplatelet Therapy (DAPT): Patients must take Aspirin and Clopidogrel (Plavix) for at least 5–7 days prior to prevent clots from forming on the dense mesh.

  • P2Y12 Blood Test: A mandatory test to ensure the body is properly responding to the blood-thinning medication.

  • 3D Rotational Angiography: A detailed mapping of the artery to determine the exact diameter and length needed for the flow diverter.

  • Fasting (NPO): No food or drink for 8–12 hours prior to the procedure, which is performed under general anesthesia.

Tests Before Flow Diverter Placement

  • Digital Subtraction Angiography (DSA): The gold standard imaging used to map the precise architecture of the aneurysm and nearby side branches.

  • CT or MRI Scan: To assess the brain for any existing damage or conditions that may influence the surgical plan.

  • Kidney Function Screen: Checking the patient's ability to process the contrast dye used during the imaging phases.

  • Neurological Baseline Exam: A comprehensive assessment of speech, vision, and motor skills to monitor during and after recovery.

Life After Flow Diverter Placement

  • The Healing Process: Unlike coiling, which works instantly, a flow diverter takes 6 to 12 months to completely cure the aneurysm as the natural artery lining grows over the mesh.

  • Hospital Stay: Usually 24 to 48 hours in a Neuro-ICU for close monitoring of neurological status.

  • Strict Medication Adherence: This is the most critical part of the treatment; patients cannot miss even one dose of blood thinners for the first 6–12 months without risking a major stroke.

  • Activity Restrictions: Most patients can return to normal desk work within 1 week, though heavy lifting is restricted for the first few days while the incision site heals.

  • Long-Term Follow-up: Mandatory Angiography or MRA at 6 and 12 months to verify the aneurysm has shrunk and the artery has healed.

Benefits of Flow Diverter Placement

  • Higher Success Rates: Provides a complete "occlusion" (closure) rate of 75–90% at one year for complex aneurysms that were previously untreatable.

  • Artery Remodeling: Promotes the growth of a new, healthy artery lining (endothelium) across the neck of the aneurysm, permanently sealing it.

  • Minimally Invasive: Avoids the risks associated with open brain surgery and large craniotomy incisions.

  • Protects Side Branches: The mesh is designed to allow enough blood to reach small "side-branch" arteries while still blocking flow into the aneurysm.

Realted Specialist

Dr Bhushan Nariani
Dr Bhushan Nariani
Spine Surgeon, Orthopedic Surgeon, Joint Replacement Surgeon
BLK-Max Super Specialty Hospital, Delhi
25+years experience
View Profile
Dr Gautam Zaveri
Dr Gautam Zaveri
Spine Surgeon, Orthopedic Surgeon
Sir H N Reliance Foundation Hospital and Research Centre
30+years experience
View Profile
Dr Harshavardhan Hegde
Spine Surgeon, Orthopedic Surgeon, Joint Replacement Surgeon
Max Smart Super Specialty Hospital, Saket
40+years experience
View Profile
Dr Manoj Miglani
Dr Manoj Miglani
Spine Surgeon, Orthopedic Surgeon, Joint Replacement Surgeon
Fortis Flt. Lt. Rajan Dhall Hospital, Vasant Kunj
20+years experience
View Profile
Dr Mihir Bapat
Dr Mihir Bapat
Spine Surgeon, Orthopedic Surgeon
Nanavati-Max Super Specialty Hospital, Mumbai
25+years experience
View Profile
Dr Parag Sancheti
Dr Parag Sancheti
Orthopedic Surgeon, Joint Replacement Surgeon
Sancheti Hospital, Pune
34+years experience
View Profile
Dr Shekhar Bhojraj
Dr Shekhar Bhojraj
Spine Surgeon, Orthopedic Surgeon
Breach Candy Hospital
40+years experience
View Profile
Dr Ujjwal Kanti Debnath
Spine Surgeon, Orthopedic Surgeon
Manipal Hospital, Dhakuria, Kolkata
36+years experience
View Profile
Dr Yash Gulati
Dr Yash Gulati
Spine Surgeon, Orthopedic Surgeon, Joint Replacement Surgeon
Indraprastha Apollo Hospital, Delhi
35+years experience
View Profile
Dr A Navaladi Shankar
Orthopedic Surgeon
Apollo Hospital, Greams Road, Chennai
22+years experience
View Profile
Dr Abhaya Kumar
Dr Abhaya Kumar
Spine Surgeon, Neurosurgeon
Kokilaben Dhirubhai Ambani Hospital
20+years experience
View Profile
Dr Amite Pankaj Aggarwal
Orthopedic Surgeon, Joint Replacement Surgeon
Fortis Hospital, Shalimar Bagh, New Delhi
27+years experience
View Profile
Dr Anil Arora
Dr Anil Arora
Orthopedic Surgeon, Joint Replacement Surgeon
Max Super Specialty Hospital, Patparganj
38+years experience
View Profile
Dr Anindansu Basu
Dr Anindansu Basu
Orthopedic Surgeon, Joint Replacement Surgeon
Fortis Hospital, Anandpur, Kolkata
17+years experience
View Profile
Dr Arun Kannan
Dr Arun Kannan
Orthopedic Surgeon, Joint Replacement Surgeon
Apollo Hospital, Greams Road, Chennai
16+years experience
View Profile
Dr Ashish Arbat
Dr Ashish Arbat
Orthopedic Surgeon
Manipal Hospital, Baner, Pune
22+years experience
View Profile
Dr Sunil Dachepalli
Dr Sunil Dachepalli
Orthopedic Surgeon
Yashoda Hospital, Somajiguda
28+years experience
View Profile
Dr Sunil G Kini
Dr Sunil G Kini
Orthopedic Surgeon, Joint Replacement Surgeon
Manipal Hospital, Old Airport Road
25+years experience
View Profile
Dr Thadi Mohan
Dr Thadi Mohan
Orthopedic Surgeon, Joint Replacement Surgeon
Amrita Hospital, Kochi
28+years experience
View Profile
Dr Umesh Srikantha
Dr Umesh Srikantha
Spine Surgeon, Neurosurgeon
Fortis Hospital, BG Road, Bengaluru
20+years experience
View Profile

May we help you?

Enter digits only (6-15 digits). We'll add your country code.