+91 83682 47758
info@medivisorhealth.com
Medivisor India Treatment Logo
  • Home
    • About Us
    • Our Services
    • Our Team
    • Our Safety Measures
    • Loading treatments...
    • Loading hospitals...
    • Loading doctors...
    • Treatment Cost
    • Treatment Process
    • Visa Process
    • Travel Guide
    • FAQs
    • Why Medivisor
    • Success Stories
    • Patient Activities
    • Social Activities
    • News Coverage
    • Blog
  • Become a Partner

Medivisor India Treatment is a trusted New Delhi-based medical travel company assisting international patients with advanced, affordable, and seamless treatment in India.

  • Medivisor House 359, Sector 1, Vaishali, Ghaziabad, (Delhi/NCR) India
  • +91 8368 247 758
  • info@medivisorhealth.com

About Us

  • About Us
  • Our Services
  • Our Team
  • Our Medical Advisors
  • Our Safety Measures
  • Join Our Network
  • Contact Us

India Treatment

  • Hospitals
  • Treatments
  • Treatment Cost
  • Treatment Process
  • Visa Process
  • Travel Guide
  • FAQs
  • Why Medivisor

Gallery

  • Patient Testimonials
  • Patient Activities
  • News Coverage
  • Blog

Get in Touch

© 2026 Medivisor India Treatment. All rights reserved.

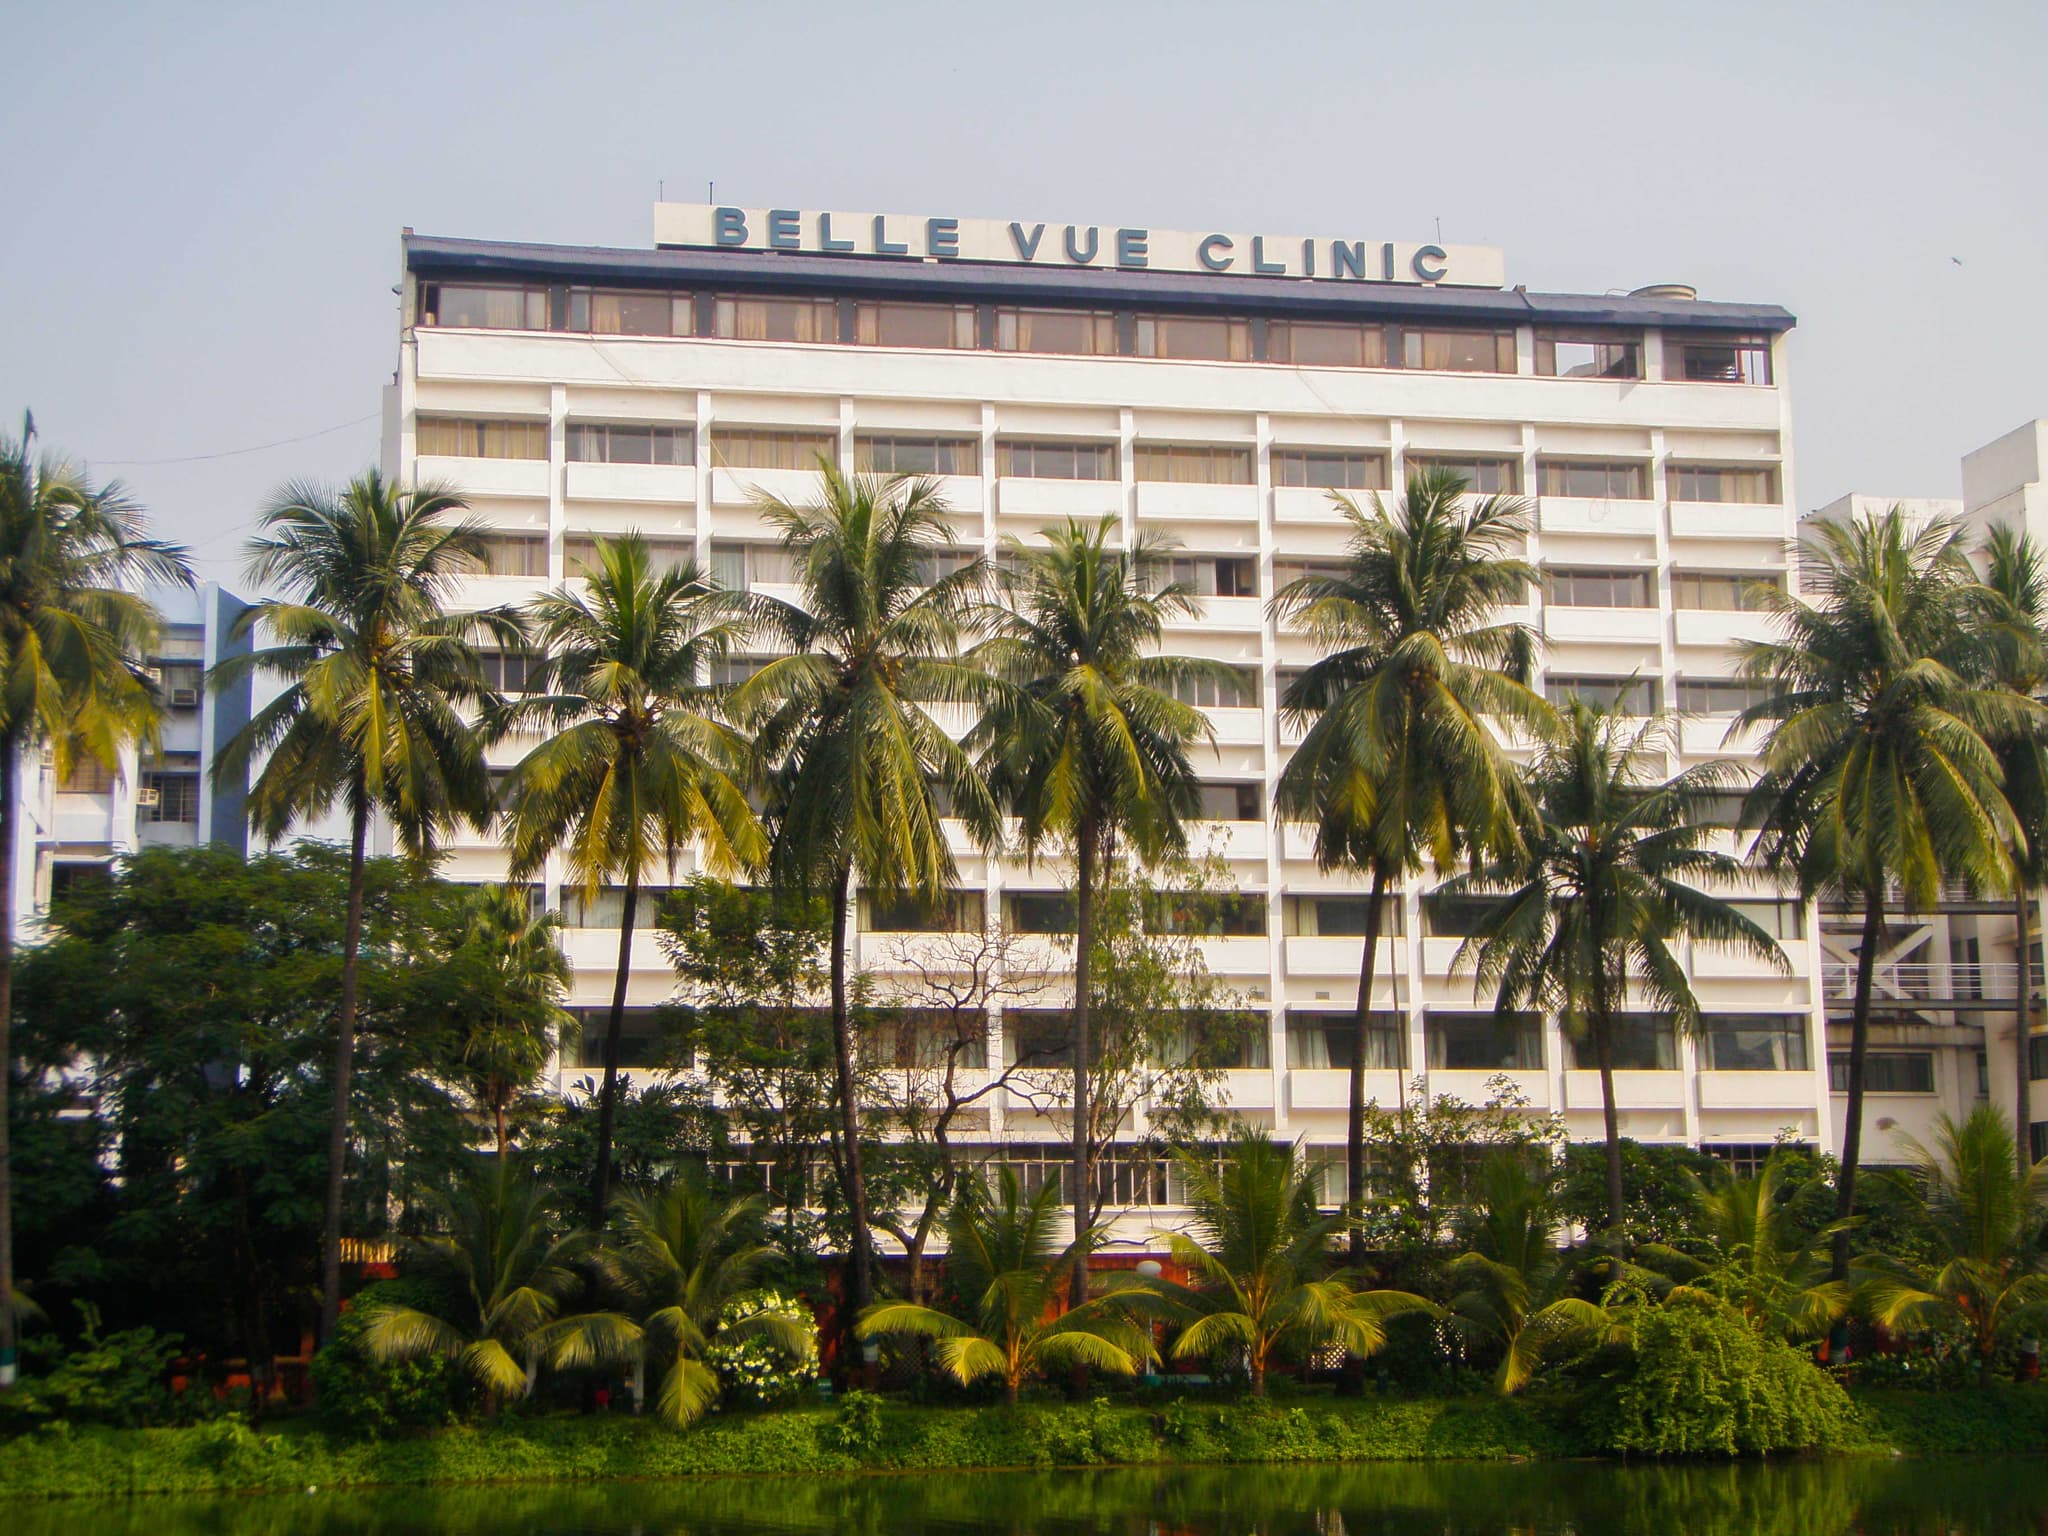
Belle Vue Clinic Hospital

Belle Vue Clinic Hospital

9, Dr. U. N. Brahmachari Street (Formerly Loudon Street), Kolkata – 700 017, West Bengal, India

  1. Home
  2. Hospitals
  3. Belle Vue Clinic Hospital

Quick Overview

1967

Established

Multi

Speciality

300

Beds

100

Doctors

Belle Vue Clinic Hospital - Top Multispeciality Hospital in Kolkata, India

Kolkata’s premier medical care institution which has established a name for excellence across the country, Belle Vue Clinic was a dream come true for its founders, the late Shri M.P Birla and his wife, Late Smt. Priyamvada Birla. They desired that the Clinic be like a “temple and people must get that feeling when they enter it” with standards that match those of any world-class clinic. With its commitment to excellence in patient care, service, diagnosis as well as prognosis, the Clinic, since its inception in 1967, has lived up to that desire.

Advanced Medical Care in Kolkata, India

Equipped with the finest resources of medical science, the Clinic’s emphasis is on relief, reassurance, recovery and rehabilitation. At Belle Vue Clinic, a patient is not just a number but is considered a member of the family within a scrupulously clean and homely ambience. The institution operates as a multi-speciality facility providing comprehensive and affordable care, making concerted efforts across all teams to not only treat diseases but also prevent them, including providing home care like facilities for chronic or terminally ill patients.

Belle Vue Clinic Hospital at a Glance

  • Established in 1967 as a premier medical care institution in Kolkata founded by the late Shri M.P Birla and Late Smt. Priyamvada Birla.

  • Recognized as a pioneer and trendsetter in healthcare across Eastern India with a long history of clinical milestones.

  • Introduced the first ICCU in the private sector in 1971 and stands as the first centre to start renal transplants in the region.

  • Functions as a leading multi-speciality facility offering advanced management across diverse medical and surgical fields.

  • Provides comprehensive medical care with an emphasis on relief, reassurance, recovery, and rehabilitation.
May we help you?

Enter digits only (6-15 digits). We'll add your country code.

Belle Vue Clinic Hospital

Pericardiocentesis
Pericardiocentesis

Pericardiectomy is a surgical procedure to remove part or all of the pericardium, the thin sac surrounding the heart. This surgery is performed to allow the heart to move and pump freely when the sac has become diseased, scarred, or restrictive.

  • Persistent fatigue or weakness during physical exertion

  • Significant swelling in the legs, ankles, or abdomen (edema)

  • Shortness of breath, especially when lying down or exercising

  • Chronic chest pain that does not improve with medication

  • Signs of heart failure caused by a restrictive or stiff heart sac

  • Constrictive Pericarditis: The sac becomes stiff, thick, or calcified, preventing heart expansion.

  • Recurrent Pericarditis: Chronic inflammation that fails to respond to standard medical treatments.

  • Persistent Pericardial Effusion: Frequent or dangerous buildup of fluid around the heart.

  • Partial Agenesis: A rare congenital defect where part of the pericardium is missing.

  • Post-Viral Scarring: Long-term thickening of the sac following a severe viral infection.

  • Anesthesia: The surgery is performed under general anesthesia and typically takes 2 to 3 hours.

  • Approach: Surgeons usually use a median sternotomy (breastbone incision) to access the heart.

  • Support: A heart-lung bypass machine is often used to maintain circulation during the surgery.

  • Removal: The surgeon carefully removes the damaged or scarred pericardial tissue.

  • Closing: Once the heart is free to expand fully, the incision is closed with sutures or staples.

  • Hospital Stay: Patients typically remain in the hospital for 5 to 7 days for close monitoring.

  • Monitoring: The medical team tracks heart rhythm, fluid levels, and lung function post-surgery.

  • Initial Healing: Pain management and respiratory therapy are prioritized during the first week.

  • Full Recovery: It generally takes 6 to 8 weeks to return to normal daily activities and work.

  • Activity: Gradual walking and light movement are encouraged to prevent blood clots.

  • Surgical Cure: This is often a definitive cure for constrictive pericarditis.

  • Survival Rate: Long-term survival is approximately 80% at 5 years, depending on the cause.

  • Potential Risks: Includes standard heart surgery risks like infection, bleeding, or blood clots.

  • Arrhythmias: Some patients may experience temporary abnormal heart rhythms during recovery.

  • Success Factor: Outcomes are generally excellent when the surgery is performed before heart damage occurs.

  • Restores the heart's ability to fill with blood and expand normally

  • Immediate relief from the restrictive pressure causing heart failure symptoms

  • Significant reduction in fluid retention and swelling throughout the body

  • Improved physical stamina and the ability to return to an active lifestyle

  • Eliminates the need for long-term anti-inflammatory medications in chronic cases

Knee Arthroscopy Surgery

Knee Arthroscopy is a minimally invasive surgical procedure used to diagnose and treat problems in the knee joint through tiny incisions using a camera. This specialized "keyhole" approach allows surgeons to view and repair joint structures without the need for a large open incision.

  • Persistent knee pain that has not responded to rest, physical therapy, or injections.

  • Mechanical symptoms such as the knee "locking," "catching," or "giving way" during movement.

  • Swelling and stiffness caused by loose fragments of bone or cartilage within the joint.

  • Confirmed soft tissue injuries, such as a meniscus tear or a ligament injury (ACL/PCL).

  • Chronic inflammation of the joint lining (synovium) that requires surgical removal.

  • Diagnostic Arthroscopy: A procedure focused on exploring the joint to identify the source of unexplained pain or instability.

  • Meniscectomy: Trimming away the damaged or frayed edges of a torn meniscus.

  • Meniscal Repair: Suturing a torn meniscus back together to preserve the natural cushioning of the knee.

  • Chondroplasty: Smoothing out damaged or irregular articular cartilage to improve joint glide.

  • Loose Body Removal: Extracting floating bits of bone or cartilage that cause painful mechanical interference.

  • Portal Creation: The surgeon makes two or three tiny incisions, or portals (about 0.5 cm each), around the kneecap.

  • Saline Insufflation: The joint is expanded with sterile saline to stretch the capsule, providing a clear view and space for the tools.

  • Visualization: A high-definition fiber-optic camera (arthroscope) is inserted through one portal to project live images onto a monitor.

  • Surgical Intervention: Miniature specialized tools, such as shavers or probes, are used to repair, trim, or remove damaged tissue.

  • Closure: After the saline is drained, the tiny portals are closed with a single stitch or sterile tape (Steri-Strips).

  • Fasting (NPO) for 6–8 hours prior to the surgery to ensure safety during anesthesia.

  • Evaluation of current medications; blood thinners are typically only stopped if significant bleeding is anticipated.

  • Choosing the most appropriate anesthesia option, which may include general, spinal, or a regional nerve block.

  • Diagnostic confirmation through physical stability tests and imaging to map out the internal damage.

  • MRI Scan: The primary imaging tool used to visualize soft tissues like ligaments, tendons, and cartilage.

  • X-rays: Used to rule out significant bone-on-bone arthritis or fractures that may not be treatable via arthroscopy.

  • Physical Stability Exams: Specialized maneuvers (like the Lachman or McMurray tests) to assess ligament and meniscus integrity.

  • Blood Panels: Routine screens to ensure general health and fitness for an outpatient surgical procedure.

  • Almost always an outpatient procedure, with most patients returning home 2–3 hours after waking up.

  • Adherence to the R.I.C.E. protocol (Rest, Ice, Compression, Elevation) is critical for the first 48–72 hours.

  • Weight-bearing status depends on the procedure: simple trimming allows walking in days, while repairs may require crutches for 4–6 weeks.

  • Driving is typically restricted for 1–2 weeks, particularly if the surgery was on the right leg or the patient drives a manual vehicle.

  • Physical therapy focuses on restoring range of motion and strengthening the muscles surrounding the knee joint.

  • Minimally invasive nature results in significantly less post-operative pain and swelling than open surgery.

  • Tiny incisions lead to faster wound healing and minimal surgical scarring.

  • High success rates for resolving mechanical issues like joint locking or catching.

  • Reduced risk of infection and lower blood loss compared to traditional joint procedures.

ACL Reconstruction Surgery

ACL Reconstruction is a specialized surgical procedure to replace a torn Anterior Cruciate Ligament with a high-strength tissue graft to restore stability and rotation to the knee. The clinical focus is on "anatomic reconstruction" and biologic augmentation, utilizing sub-millimeter robotic precision and internal bracing to return athletes to peak performance while minimizing the risk of future joint degeneration.

  • Audible Trauma: A loud "pop" sensation in the knee followed by immediate, severe swelling.

  • Instability: A feeling of the knee "giving way" or extreme instability during pivoting movements.

  • Functional Limitation: Inability to continue playing sports or perform physical labor after a twisting injury.

  • Persistent Pain: Knee pain and a limited range of motion that hinders daily activities.

  • Mechanical Buckling: Recurrent episodes of the knee buckling during simple tasks like walking or climbing stairs.

  • Therapy Failure: Failure of conservative physical therapy to provide the stability required for your desired activity level.

  • High-Grade Tears: Complete or high-grade partial ACL tears identified via MRI.

  • Multi-Ligament Injuries: Complex cases involving the ACL along with the MCL, PCL, or meniscus.

  • Chronic Deficiency: Long-term ACL instability leading to secondary meniscus tears or cartilage damage.

  • High-Pivot Athletes: Individuals in sports like soccer, basketball, or skiing who require maximum rotational stability.

  • Revision Surgery: Failed primary ACL reconstruction requiring a complex revision with specialized graft placement.

  • Quadriceps Tendon Autograft: A modern gold standard offering robust thickness and excellent stability with lower donor-site pain.

  • Patellar Tendon Autograft (BTB): A high-strength option often preferred for elite athletes due to its reliable bone-to-bone healing.

  • Hamstring Tendon Autograft: A traditional, minimally invasive choice that provides a strong, flexible replacement.

  • Internal Brace Reinforcement: The use of high-strength fiber tape to protect the healing graft and allow for earlier rehabilitation.

  • Robotic-Assisted Placement: The use of digital mapping to ensure perfect graft alignment, reducing the risk of long-term failure.

  • Biologic Augmentation: The application of Platelet-Rich Plasma (PRP) during surgery to accelerate the graft’s integration into the bone.

  • Arthroscopic Visualization: Small cameras are used to inspect the joint and treat any associated meniscus or cartilage damage.

  • Graft Harvesting: A graft is harvested from the patient’s own tissue (autograft) or prepared from a donor (allograft).

  • Tunnel Drilling: Precision tunnels are drilled into the femur (thigh bone) and tibia (shin bone) using robotic navigation.

  • Graft Fixation: The new graft is pulled through the tunnels and secured with specialized screws or suspensory buttons.

  • Augmentation: An "Internal Brace" or Anterolateral Ligament (ALL) reinforcement may be added for extra stability.

  • Tensioning: Real-time tensioning ensures the graft perfectly mimics the natural ligament's function and tension.

  • "Pre-hab" Therapy: Engaging in physical therapy to reduce swelling and regain full extension before the operation.

  • Muscle Strengthening: Strengthening the quadriceps and hamstrings to provide better support for the joint post-operatively.

  • Recovery Logistics: Arrange for a recovery assistant, as you will likely be on crutches for the first 1 to 2 weeks.

  • Cold Therapy: Prepare a station at home with an ice machine to manage post-surgical inflammation and pain.

  • Anatomical Mapping: Complete all pre-operative imaging to allow the surgeon to map the exact anatomy of your knee.

  • High-Resolution MRI: To confirm the ACL tear and assess for associated meniscus or cartilage involvement.

  • Stress Radiographs: Specialized X-rays to measure the degree of laxity (looseness) in the knee joint.

  • Systemic Health Screening: Complete Blood Count (CBC) and Metabolic Panel to ensure safety for anesthesia.

  • Cardiac Clearance (EKG): A heart check to ensure the patient is fit for surgery, particularly for high-intensity athletes.

  • Laxity Testing: Clinical stability testing to compare the injured knee against the healthy knee.

  • Initial Phase: Focus on the "straightening" of the knee and activation of the quadriceps in the first 4 weeks.

  • Graft Maturation: Strict adherence to a phased 9-to-12-month rehabilitation protocol to allow the graft to fully integrate.

  • Endurance Building: Introduction of low-impact cycling and swimming between months 2 and 4 to build stamina.

  • Agility Training: Sport-specific agility training and "Return to Play" testing typically starting around the 6-month mark.

  • Functional Bracing: Use of a functional knee brace during the early stages of returning to high-impact activities.

  • High Success Rate: Boasts a 90% success rate for returning patients to their pre-injury levels of physical activity.

  • Anatomic Precision: Replicates the original ligament's rotational stability to provide a more "natural" feeling knee.

  • Reduced Re-tear Risk: Significantly lowers re-tear rates when combined with modern reinforcement or internal bracing.

  • Minimally Invasive: Advanced arthroscopic methods lead to less surgical trauma and smaller scars.

  • Joint Longevity: Provides a durable solution that helps protect the knee from early-onset osteoarthritis.

The cost of ACL Reconstruction Surgery in India is generally affordable compared with many other countries, making India a popular destination for international patients seeking quality medical care. The treatment cost depends on factors such as the hospital, doctor’s experience, treatment approach, medical condition, hospital stay, diagnostic tests, medicines, and any additional procedures required. For international patients, the starting cost of ACL Reconstruction Surgery in India is approximately $1000 USD, although the final price may vary based on individual treatment requirements. Patients are advised to obtain a personalized treatment estimate after medical evaluation.

PCL Reconstruction
PCL Reconstruction

Posterior Cruciate Ligament (PCL) Reconstruction is a surgical procedure to replace a torn PCL—the strongest ligament in the knee—with a graft. The PCL is the primary stabilizer that prevents the shinbone (tibia) from sliding too far backward. This surgery is essential for restoring joint stability, especially following high-impact injuries such as dashboard accidents or significant sports falls.

  • Grade III Tears: A complete tear of the ligament that results in significant knee instability.

  • Multi-Ligament Injuries: Cases where the PCL is torn alongside other structures like the ACL, MCL, or meniscus.

  • Persistent Instability: Feeling the knee "give way" during daily activities or sport, despite undergoing physical therapy.

  • Chronic Pain and Swelling: Persistent joint issues related to the tibia sagging backward (posterior sag).

  • High-Demand Lifestyle: For athletes or individuals in physically demanding jobs who require maximum joint stability.

  • Arthroscopic Reconstruction: A minimally invasive approach using a camera and small incisions to replace the ligament.

  • Single-Bundle Technique: Replacing the PCL with a single graft strand, focusing on the largest part of the original ligament.

  • Double-Bundle Technique: Using two separate graft strands to more closely mimic the natural, complex anatomy of the PCL.

  • Autograft Replacement: Utilizing the patient's own tissue, typically from the hamstring or quadriceps tendon.

  • Allograft Replacement: Utilizing donor tissue (cadaver), often preferred in PCL surgery to achieve a thicker, stronger graft.

  • Graft Preparation: The selected autograft or allograft is prepared and sized to match the patient's original ligament dimensions.

  • Portal Creation: Small arthroscopic incisions are made around the knee to allow for the camera and surgical instruments.

  • Tunnel Drilling: Precise tunnels are drilled through the femur (thigh bone) and tibia (shin bone) at the exact attachment points of the PCL.

  • Graft Passage: The new ligament graft is pulled through the bone tunnels and positioned across the knee joint.

  • Fixation: The graft is secured tightly under tension using interference screws, metal buttons, or specialized surgical staples.

  • Stability Check: The surgeon performs stability tests to ensure the tibia no longer slides backward before closing the incisions.

  • Diagnostic confirmation using the "Posterior Drawer Test" and MRI to assess the extent of the damage.

  • A "pre-habilitation" program lasting 3–4 weeks to strengthen the quadriceps muscles.

  • Fasting (NPO) and preoperative medical clearance for general anesthesia.

  • Coordination of a femoral nerve block to provide localized pain relief for the first 12–24 hours post-surgery.

  • MRI Scan: The gold standard for visualizing the PCL and checking for associated injuries to cartilage or other ligaments.

  • Posterior Drawer Test: A physical exam where the surgeon pushes the tibia backward to measure the degree of joint laxity.

  • Stress X-rays: Occasionally used to measure the exact amount of "posterior shift" in millimeters compared to the healthy knee.

  • Blood Panels: Routine testing to ensure the patient is fit for surgery and has no underlying signs of infection.

  • Recovery is often slower and more restrictive than ACL surgery, with most patients being outpatients or staying one night.

  • A specialized PCL Jack Brace is mandatory for 6 to 12 weeks to keep the tibia pushed forward while the graft heals.

  • Patients are typically non-weight-bearing on crutches for the first 4 to 6 weeks.

  • Bending the knee is usually limited to 90 degrees for the first month to avoid putting stress on the new graft.

  • Full return to competitive sports typically requires 9 to 12 months of intensive, quadriceps-focused rehabilitation.

  • Restores essential stability to the knee, preventing the "sagging" sensation and joint shifting.

  • Reduces the long-term risk of developing premature osteoarthritis caused by joint misalignment.

  • Allows approximately 80% of patients to return to their previous levels of daily activity and non-contact sports.

  • Effectively protects other structures in the knee, such as the meniscus and cartilage, from secondary damage.

Meniscus Repair
Meniscus Repair

Meniscus Repair is a minimally invasive surgical procedure used to stitch together a torn meniscus—the crescent-shaped cartilage that acts as a shock absorber in the knee. Unlike a meniscectomy, which trims the tear away, a repair aims to preserve the natural tissue to prevent long-term joint wear and premature arthritis.

  • Presence of a "red zone" tear located in the outer 25% of the meniscus, where blood supply is rich enough for healing.

  • Mechanical symptoms like knee locking, catching, or a painful clicking sensation.

  • Younger age or an active lifestyle where preserving the joint's natural shock absorbers is critical.

  • Tears occurring alongside an ACL injury, as repairing both simultaneously often improves healing outcomes.

  • Persistent joint line tenderness that has not improved with rest or physical therapy.

  • All-Inside Repair: Performed entirely within the knee joint using tiny anchors and sutures, typically for tears in the back of the meniscus.

  • Inside-Out Repair: The gold standard for large tears, involving flexible needles that pass sutures from the inside of the knee to be tied on the outside.

  • Outside-In Repair: Sutures are passed from the outside skin through the meniscus to fix tears located in the front (anterior horn).

  • Meniscal Root Repair: Re-anchoring the meniscus to the shinbone using small bone tunnels when it has detached from its primary attachment point.

  • Fibrin Clot or Stem Cell Augmentation: Specialized biological techniques sometimes used to enhance the healing environment of the repair.

  • Diagnostic Mapping: The surgeon uses an arthroscope to grade the severity and location of the tear.

  • Tissue Debridement: The frayed edges of the tear are "sanded" or smoothed to stimulate fresh blood flow to the area.

  • Suture Placement: Using specialized needles or anchors, the surgeon precisely stitches the torn edges of the cartilage back together.

  • Knot Security: The sutures are tied securely to ensure the meniscus remains stable under the natural pressure of the joint.

  • Final Inspection: The surgeon checks the tension of the repair throughout a range of motion before draining the saline and closing the portals.

  • Fasting (NPO) for at least 12 hours prior to the surgery.

  • Smoking cessation at least 6 weeks before the procedure to ensure adequate blood oxygenation for tissue healing.

  • Confirmation of the tear's grade and location via a specialized knee MRI.

  • Pre-operative coordination for crutches and a hinged knee brace to be used immediately following the surgery.

  • Knee MRI: The primary diagnostic tool used to determine if a tear is in the "red zone" (repairable) or "white zone" (non-repairable).

  • McMurray Test: A physical exam maneuver where the surgeon rotates the knee to identify the specific location of the tear.

  • Joint Line Palpation: Checking for pinpoint tenderness along the space where the femur and tibia meet.

  • Standard Blood Panels: To confirm the patient is a healthy candidate for general or regional anesthesia.

  • Recovery is slower than a simple trimming because the tissue must physically grow back together.

  • Patients are typically non-weight-bearing on crutches for 4 to 6 weeks to protect the delicate stitches.

  • A hinged knee brace, often locked in a straight position, is worn for approximately 6 weeks.

  • Bending the knee is usually restricted to 90 degrees for the first month to avoid putting shear force on the repair.

  • Full return to high-impact sports like basketball or soccer generally takes 6 to 9 months of rehabilitation.

  • Preserves the knee's natural shock-absorbing capacity, significantly reducing the risk of early-onset arthritis.

  • Maintains the long-term structural stability of the knee joint.

  • Offers a high success rate (85–90%), particularly when the repair is performed alongside an ACL reconstruction.

  • Provides a superior long-term outcome for younger patients compared to removing the damaged cartilage.

Shoulder Arthroscopy

Shoulder Arthroscopy is a minimally invasive surgical procedure used to diagnose and treat various joint problems, such as rotator cuff tears and labral injuries. Using a tiny camera called an arthroscope, surgeons can see inside the joint and perform high-precision repairs through small, buttonhole-sized incisions.

  • Persistent shoulder pain that has not improved with physical therapy, rest, or injections.

  • Loss of range of motion or weakness, often associated with a torn rotator cuff.

  • Recurrent shoulder dislocations or a feeling of "looseness" in the joint (instability).

  • Mechanical symptoms such as painful catching, clicking, or "locking" of the shoulder.

  • Presence of bone spurs that cause "impingement," where tendons are pinched during overhead movement.

  • Rotator Cuff Repair: Reattaching torn tendons to the humerus (arm bone) using specialized suture anchors.

  • Labral Repair (Bankart or SLAP Repair): Stitching the cartilage ring (labrum) back to the socket to restore stability.

  • Subacromial Decompression: Shaving down bone spurs and inflamed tissue to create more space for the tendons to move.

  • Biceps Tenodesis: Relocating a damaged biceps tendon to a new attachment point to relieve pain.

  • Capsular Release: Surgically stretching or cutting tight tissue to treat severe "frozen shoulder."

  • Fluid Insufflation: The surgeon injects sterile saline into the shoulder to inflate the joint capsule, providing a clear workspace and view.

  • Portal Placement: Two to three small incisions (0.5–1 cm) are made around the shoulder to serve as entry points for the camera and tools.

  • Joint Inspection: The arthroscope is inserted to project high-definition images of the tendons, ligaments, and cartilage onto a monitor.

  • Specialized Repair: Miniature tools, such as shavers or suture passers, are used to trim damaged tissue or anchor tendons back to the bone.

  • Portal Closure: Once the repair is complete, the saline is drained and the tiny incisions are closed with a single stitch or sterile tape.

  • Diagnostic confirmation through MRI or X-rays to map the internal damage and plan the surgical approach.

  • Fasting (NPO) for 6–12 hours prior to the procedure to ensure safety during anesthesia.

  • Coordination of a regional nerve block, which numbs the entire arm for up to 24 hours to assist with immediate pain control.

  • Pausing certain medications, such as blood thinners or anti-inflammatories, as directed by the surgical team.

  • Shoulder MRI: The gold standard for visualizing soft tissue injuries like rotator cuff tears and labral damage.

  • MRI Arthrogram: An MRI where dye is injected into the joint to highlight small tears that might be missed on a standard scan.

  • X-rays: Used to identify bone spurs, arthritis, or fractures that may contribute to shoulder pain.

  • Physical Strength Testing: Assessing the deltoid and rotator cuff muscles to determine the functional impact of the injury.

  • This is typically an outpatient procedure, allowing most patients to return home the same day.

  • A shoulder sling is mandatory for 1 to 6 weeks, depending on the complexity of the repair (e.g., longer for a rotator cuff repair).

  • Pendulum exercises, involving gently swinging the arm, are often started within days to prevent "frozen shoulder" stiffness.

  • Driving is generally restricted for at least 1 week, or until the patient has stopped taking narcotic pain medications.

  • Heavy lifting and overhead sports are avoided for 3 to 6 months while the repaired tendons fully bond to the bone.

  • Significantly less post-operative pain and swelling compared to traditional "open" shoulder surgery.

  • Smaller incisions result in minimal scarring and a lower risk of wound-related complications.

  • High success rate for restoring shoulder stability and relieving chronic pain.

  • Allows for a more precise diagnosis by giving the surgeon a dynamic, 360-degree view of the internal joint structures.

Rotator Cuff Repair
Rotator Cuff Repair

Rotator Cuff Repair is a surgical procedure to reattach torn tendons of the rotator cuff to the head of the humerus (upper arm bone). These tendons are essential for shoulder stability and lifting power; when they are partially or completely detached due to injury or wear, surgery is often required to restore function.

  • Persistent shoulder pain that disrupts sleep or daily activities and has not improved with 6–12 weeks of physical therapy.

  • Significant weakness or the inability to lift the arm to perform overhead tasks.

  • Acute injuries, such as a sudden fall or heavy lifting incident, resulting in an immediate loss of shoulder function.

  • Large or "massive" tears where the tendon has completely pulled away from the bone.

  • Failure of conservative treatments like cortisone injections or anti-inflammatory medications.

  • Arthroscopic Repair: The most common minimally invasive approach, using tiny incisions, a camera, and specialized instruments.

  • Open Repair: A traditional technique involving a larger incision, typically reserved for very large or complex tears.

  • Mini-Open Repair: A hybrid approach using arthroscopy to inspect the joint and a small incision to perform the actual tendon repair.

  • Single-Row Fixation: Attaching the tendon to the bone using one row of suture anchors.

  • Double-Row Fixation: Using two rows of anchors to create a broader "footprint" of contact between the tendon and bone for potentially stronger healing.

  • Subacromial Decompression: The surgeon shaves down bone spurs and removes inflamed tissue to prevent the tendon from being "pinched" during movement.

  • Bone Bed Preparation: The area of the humerus where the tendon will be reattached is scuffed to create a "bleeding bone" surface, which provides the biological nutrients necessary for healing.

  • Anchor Placement: Small screw-like devices (suture anchors) are inserted into the bone footprint.

  • Tendon Suturing: High-strength threads from the anchors are woven through the torn tendon.

  • Tensioning and Tying: The sutures are pulled tight and tied down, firmly pressing the tendon against the prepared bone surface to allow for biological reattachment.

  • Diagnostic confirmation via MRI to determine the exact size, shape, and retraction of the tear.

  • Smoking cessation for at least 4 weeks prior to surgery, as nicotine significantly impairs the tendon's ability to knit back to the bone.

  • Fasting (NPO) for 8–12 hours before the procedure.

  • Coordination of an Interscalene Nerve Block, which numbs the shoulder and arm for up to 24 hours to manage immediate post-operative pain.

  • Shoulder MRI: The essential imaging tool for grading the tear as small, medium, or massive and assessing muscle quality.

  • X-rays: Used to identify bone spurs or signs of "cuff tear arthropathy" (arthritis caused by long-standing tears).

  • Physical Strength Testing: To evaluate which specific tendons (supraspinatus, infraspinatus, or subscapularis) are affected.

  • Blood Panels: Routine screens to ensure the patient is fit for general anesthesia and outpatient surgery.

  • This is almost always an outpatient procedure, allowing patients to return home the same day.

  • A shoulder sling with an abduction pillow must be worn 24/7 (including during sleep) for 4 to 6 weeks.

  • For the first 6 weeks, only "passive" motion is allowed, where a therapist or a machine moves the arm to prevent stiffness without stressing the repair.

  • Active lifting of the arm typically begins at 6 to 8 weeks, with formal resistance training starting later.

  • Full recovery for heavy lifting, overhead sports, or manual labor generally takes 6 to 9 months.

  • Provides high success rates (85–95%) for permanent pain relief and improved quality of sleep.

  • Restores the strength and lifting power required for daily overhead activities.

  • Prevents the progression of the tear, which could otherwise lead to irreversible muscle atrophy or shoulder arthritis.

  • Improves overall joint stability, reducing the risk of secondary injuries to the shoulder.

Bankart Repair (Shoulder Instability)

Bankart Repair is a surgical procedure used to treat recurrent shoulder dislocation by reattaching the torn labrum—the cuff of cartilage that lines the shoulder socket—to the bone. This injury typically occurs during an anterior shoulder dislocation, where the humerus (ball) pops out of the glenoid (socket) and rips the labrum away from the front-bottom of the joint.

  • Chronic Instability: The shoulder feels "loose" or has dislocated multiple times, hindering daily activities.

  • Recurrent Subluxation: Frequent episodes where the joint partially slips out of place and snaps back.

  • Younger, Active Patients: Individuals who participate in sports or physically demanding jobs that require a stable shoulder.

  • Failure of Physical Therapy: Persistent instability despite 3–6 months of targeted strengthening of the rotator cuff.

  • Confirmed Bankart Lesion: A specific tear at the bottom-front of the socket identified via diagnostic imaging.

  • Arthroscopic Bankart Repair: The most common minimally invasive approach, using tiny incisions, a camera, and suture anchors.

  • Open Bankart Repair: A traditional surgical approach involving a larger incision, sometimes preferred for patients with very high-impact needs or specific bone defects.

  • Arthroscopic Capsular Shift: A technique performed alongside the repair to "tuck" or tighten a loose joint capsule.

  • Thermal Capsulorrhaphy: A historical technique using heat to shrink the capsule, though largely replaced by mechanical tightening (suturing).

  • Joint Debridement: The surgeon cleans the edge of the glenoid (socket) to create a "bleeding bone" surface, which is essential for the cartilage to knit back to the bone.

  • Anchor Placement: Small, screw-like suture anchors (made of biocomposite or fiber) are drilled into the rim of the bone socket.

  • Labral Reattachment: High-strength sutures from the anchors are looped through the torn labrum.

  • Cinching the Joint: The threads are tied down, pulling the labrum firmly against the bone to restore the deep "cup" shape of the socket.

  • Capsular Tightening: The surgeon may "pleat" the joint capsule (capsulorrhaphy) to reduce overall joint laxity and further stabilize the shoulder.

  • Diagnostic confirmation via an MRI Arthrogram, where dye is injected into the joint to highlight the Bankart lesion.

  • Assessment for bone loss; if the socket is significantly worn down, a different procedure (such as a Latarjet) may be recommended.

  • Fasting (NPO) for 8–12 hours prior to the procedure.

  • Coordination of an Interscalene Nerve Block to provide localized numbness and pain relief for the first day after surgery.

  • MRI Arthrogram: The primary imaging tool used to visualize the specific detachment of the labrum from the glenoid.

  • CT Scan: Used if the surgeon suspects "Bony Bankart" (where a piece of bone broke off with the labrum) or other socket defects.

  • Apprehension and Relocation Tests: Physical exams where the surgeon moves the arm to reproduce the sensation of instability.

  • Blood Panels: Routine testing to ensure the patient is fit for general anesthesia and outpatient surgery.

  • This is almost always an outpatient procedure, allowing patients to return home the same day.

  • A shoulder sling must be worn 24/7 for 4 to 6 weeks to protect the repair while the tissue knits to the bone.

  • Initial physical therapy (weeks 1–6) focuses on "passive" motion only; "external rotation" (turning the hand outward) is strictly forbidden to avoid tearing the new stitches.

  • Active strengthening of the rotator cuff and shoulder blade muscles begins around week 6 to 8.

  • Return to non-contact sports typically occurs at 3 to 4 months, while contact sports (football, rugby) require 6 to 9 months of rehabilitation.

  • Excellent success rates for preventing future dislocations and restoring confidence in the joint.

  • Restores the natural anatomy of the shoulder socket, providing a more stable "cradle" for the humerus.

  • Minimally invasive techniques lead to smaller scars and less post-operative pain than open surgery.

  • Significantly reduces the long-term risk of developing shoulder arthritis caused by repeated dislocations.

Ankle Arthroscopy
Ankle Arthroscopy

Ankle Arthroscopy (keyhole surgery) is a minimally invasive procedure used to diagnose and treat issues inside the ankle joint using a tiny camera and specialized tools. It is widely preferred over open surgery because it allows for high-precision joint repair with faster recovery times and a lower risk of wound-related complications.

  • Persistent Impingement: Pain or limited motion caused by inflamed soft tissue or bone spurs (osteophytes) that have not responded to physical therapy.

  • Mechanical Symptoms: Feeling the joint "lock," "catch," or "click," often due to free-floating fragments of bone or cartilage.

  • Cartilage Damage: Treatment of Osteochondral Lesions of the Talus (OLT) where the smooth surface of the joint has been chipped or worn down.

  • Chronic Synovitis: Recurring inflammation of the joint lining caused by trauma, overuse, or rheumatoid arthritis.

  • Joint Instability: Evaluation and repair of torn ligaments (such as the ATFL) when the ankle feels "loose" or gives way frequently.

  • Debridement: Trimming away inflamed tissue or smoothing out frayed cartilage to reduce pain and friction.

  • Microfracture: Making tiny holes in the bone to stimulate a healing response and the growth of new fibrocartilage.

  • Synovectomy: Removing the diseased or inflamed lining of the joint.

  • Ligament Stabilization: Using arthroscopic techniques to tighten or reattach torn ligaments to restore joint stability.

  • Bone Spur Removal: Shaving down bony growths that pinch the joint during movement (anterior or posterior impingement).

  • Portal Creation: The surgeon makes 2–3 tiny incisions (less than 1 cm each), typically at the front of the ankle (anteromedial and anterolateral portals).

  • Joint Distention: The ankle is expanded with sterile saline or a mechanical distraction device to create a clear workspace for the camera.

  • Visualization: A miniature high-definition camera (arthroscope) is inserted to project live images of the joint internal structures onto a monitor.

  • Surgical Intervention: Miniature shavers, burrs, and graspers are inserted through the other portals to repair or remove damaged tissue.

  • Closure: Once the repair is complete, the fluid is drained and the tiny portals are closed with a single stitch or sterile tape.

  • Diagnostic confirmation through physical exams and imaging to identify the specific source of joint pain.

  • Fasting (NPO) as directed by the surgical team prior to the procedure.

  • Evaluation for regional anesthesia, which numbs the leg and provides several hours of pain relief after the surgery.

  • Arrangement for a post-operative walking boot or splint, depending on the anticipated type of repair.

  • Ankle MRI: The primary tool for assessing soft tissue damage, ligament tears, and cartilage lesions.

  • X-rays: Used to identify bone spurs or loose bone fragments that may be contributing to mechanical joint issues.

  • CT Scan: Occasionally used to provide a detailed view of complex bone anatomy or "bony" impingement.

  • Blood Panels: Routine testing to ensure the patient is fit for general anesthesia and outpatient surgery.

  • Almost always an outpatient (daycare) procedure, with patients returning home the same day.

  • Strict elevation of the ankle above the heart for the first 2–3 days is critical to minimize swelling and pain.

  • Weight-bearing status varies: simple trimming allows immediate walking, while cartilage repairs may require crutches for 4–8 weeks.

  • Physical therapy typically begins around 2 weeks post-op to regain range of motion and ankle strength.

  • Return to desk work is often possible in 1–2 weeks, while high-impact sports usually take 3 to 6 months.

  • Minimally invasive nature results in significantly less post-operative pain and swelling than traditional open incisions.

  • Tiny incisions lead to a lower risk of infection and faster overall healing of the surgical site.

  • Provides a dynamic and comprehensive view of the joint, allowing the surgeon to address multiple issues in one session.

  • High success rates for resolving mechanical symptoms like locking or catching in the ankle.

Open Reduction Internal Fixation (ORIF)

ORIF (Open Reduction Internal Fixation) is a two-part surgical procedure used to fix severe bone fractures that cannot be treated with a simple cast or splint. It involves manually "reducing" (realigning) the bone through an incision and "fixing" it in place using permanent hardware like plates, screws, or rods to ensure proper healing.

  • Displaced Fractures: The bone fragments have moved out of their normal alignment and cannot be reset manually.

  • Comminuted Fractures: The bone has shattered into multiple pieces that require mechanical stabilization.

  • Intra-articular Fractures: The break extends into a joint surface (such as the ankle, wrist, or hip), where perfect alignment is critical to prevent future arthritis.

  • Open Fractures: Cases where the bone has broken through the skin, requiring surgical cleaning and immediate stabilization.

  • Failed Conservative Treatment: When a fracture fails to heal correctly or shifts while in a traditional cast.

  • Plates and Screws: A metal plate is contoured to the bone and secured with screws to bridge the fracture site.

  • Intramedullary (IM) Nailing: Inserting a long metal rod into the hollow center of long bones, such as the femur or tibia, for internal support.

  • K-Wires and Pins: Utilizing thin wires to hold smaller bone fragments in place, often used in the hand, foot, or wrist.

  • Cerclage Wiring: Wrapping high-strength wire around bone fragments to hold them together, frequently used in complex hip or kneecap fractures.

  • Lag Screws: Using individual screws to compress two bone fragments together for maximum stability.

  • Surgical Exposure: An incision is made over the fracture site to allow the surgeon to directly visualize the broken bone.

  • Open Reduction: Using specialized clamps and levers, the surgeon manually pulls and maneuvers the bone fragments back into their anatomically correct position.

  • Hardware Application: Once aligned, the appropriate fixation (plate, rod, or screws) is applied to "lock" the bones in place.

  • Fluoroscopy (X-ray) Verification: Real-time X-rays are taken during the surgery to ensure the hardware is positioned perfectly and the bone alignment is correct.

  • Wound Closure: The soft tissues and skin are stitched back together, sometimes with a temporary drain to prevent fluid buildup.

  • Mandatory high-resolution X-rays; CT scans are often required for complex joint fractures to map fragments in 3D.

  • Potential delay of 5–7 days if the skin is severely swollen or blistered, which reduces the risk of wound complications.

  • Fasting (NPO) and preoperative medical clearance for general anesthesia or regional blocks.

  • Discussion of long-term hardware expectations, as these implants are typically intended to remain in the body permanently.

  • High-Resolution X-rays: The primary tool for identifying the fracture pattern and planning the surgical approach.

  • CT Scan: Provides a 3D view of the bone, which is essential for fractures involving joint surfaces or multiple fragments.

  • Vascular Assessment: Checking pulses and blood flow distal to the fracture to ensure no major arteries are compromised.

  • Blood Panels: Routine screens to check for anemia (blood loss) and ensure the patient is fit for surgery.

  • Hospital stays vary by injury: wrist repairs may be same-day, while hip or femur fractures often require 3–5 days of monitoring.

  • Strict weight-bearing restrictions are common; patients may be Non-Weight-Bearing (NWB) for 6 to 12 weeks to protect the hardware.

  • Physical therapy usually begins within days to prevent joint stiffness, though heavy strengthening is delayed until bone healing is visible on X-ray.

  • Hardware is only removed in a secondary surgery if it causes localized pain, irritation, or becomes infected.

  • Total biological healing of the bone typically takes several months, during which time smoking should be avoided to prevent "non-union."

  • Provides immediate internal stability, often allowing for earlier joint movement compared to a full-leg or arm cast.

  • Ensures the highest level of anatomical accuracy, which is vital for maintaining joint function and preventing long-term disability.

  • Significantly reduces the risk of "malunion," where a bone heals in a crooked or shortened position.

  • Allows for the successful repair of complex fractures that would otherwise result in permanent loss of limb function.

Interlocking Nailing

Interlocking Nailing, also known as Intramedullary (IM) Nailing, is a surgical procedure used to fix fractures of "long bones"—specifically the femur, tibia, or humerus. It involves inserting a specially designed metal rod into the hollow central cavity (medullary canal) of the bone to provide internal stability and load-sharing during the healing process.

  • Shaft Fractures: Breaks located in the middle section of the thigh bone (femur), shin bone (tibia), or upper arm bone (humerus).

  • Comminuted Shaft Fractures: Severe breaks where the bone has splintered into several pieces along the canal.

  • Pathological Fractures: Breaks caused by weakened bone (such as from tumors or cysts) that require internal reinforcement.

  • Non-unions: Cases where a previous fracture failed to heal and requires a stable rod to stimulate new bone growth.

  • Gold Standard Treatment: Most orthopedic surgeons consider this the primary treatment for femur and tibia shaft fractures because it allows for early mobility.

  • Antegrade Nailing: The nail is inserted from the top of the bone (e.g., entering the femur at the hip).

  • Retrograde Nailing: The nail is inserted from the bottom of the bone (e.g., entering the femur through the knee joint).

  • Reamed Nailing: Slightly widening the internal bone canal with a power tool to allow for a thicker, stronger nail.

  • Unreamed Nailing: Inserting a thinner nail without widening the canal, often used to preserve blood flow in specific types of open fractures.

  • Static Interlocking: Locking screws are placed at both ends of the nail to prevent any movement or rotation.

  • Traction and Alignment: The patient is placed on a specialized "traction table" to pull the bone fragments back into alignment before the surgery begins.

  • Entry Point Creation: A small incision is made at the end of the bone, and a guide wire is passed through the medullary canal across the fracture site.

  • Canal Preparation: If reaming is required, flexible rods widen the hollow center of the bone to accommodate the selected nail diameter.

  • Nail Insertion: The titanium or stainless steel rod is hammered down the center of the bone, guided by real-time X-ray (C-arm) imaging.

  • Interlocking Screw Placement: The surgeon inserts crosswise screws through the bone and the nail at both the top and bottom to "lock" the assembly and prevent bone shortening or twisting.

  • Closure: The small incisions at the entry and screw sites are closed with sutures or staples.

  • Precise X-rays of the entire bone to measure the length and diameter of the canal for custom nail sizing.

  • Fasting (NPO) and preoperative medical clearance for general or spinal anesthesia.

  • Discussion of the entry site location (hip vs. knee), as this can affect post-operative joint sensations.

  • Screening for systemic health markers to ensure the patient can tolerate the "reaming" process.

  • Full-Length Bone X-rays: To assess the fracture pattern and measure the required length of the intramedullary nail.

  • Template Mapping: Using X-rays of the uninjured limb to determine the "normal" anatomy and diameter of the bone canal.

  • Blood Panels: Routine screens to check for blood loss and ensure stable inflammatory markers.

  • Cardiac and Pulmonary Evaluation: Essential for older patients or those with trauma to ensure they can tolerate the risk of fat embolization during the procedure.

  • Hospital stays typically range from 2 to 4 days, depending on the patient's overall mobility.

  • Early weight-bearing is a primary benefit; patients with femur or tibia nails are often encouraged to walk with assistance within 24–48 hours.

  • Physical therapy focuses on the joints near the entry site (e.g., hip and knee) to prevent stiffness.

  • Biological healing of the bone is usually visible on X-rays by 6 to 12 weeks.

  • The nail is intended to stay in permanently and is only removed if it causes persistent irritation or becomes infected.

  • Acts as a "load-sharing" device, allowing the bone to experience natural stresses that promote faster healing.

  • Smaller incisions compared to plate-and-screw surgery lead to less soft tissue damage and a lower risk of infection.

  • Significantly faster return to walking and weight-bearing activities compared to other fracture fixation methods.

  • Provides superior rotational stability for long bone fractures, ensuring the limb heals in the correct anatomical position.

External Fixator Application

External Fixator (ExFix) Application is a surgical treatment used to stabilize severe bone fractures by using a metal frame located outside the body. The frame is connected to the bone via high-strength pins or wires that pass through the skin, providing stable alignment while allowing doctors to treat surrounding soft tissue injuries.

  • Open Fractures: Cases where the bone has broken through the skin, requiring the wound to remain accessible for cleaning and dressing.

  • Polytrauma (Damage Control): Used as a rapid, temporary stabilizer for patients with multiple life-threatening injuries until they are stable enough for permanent surgery.

  • Comminuted Fractures: Severe breaks where the bone is shattered into many small pieces that are difficult to fix with internal plates.

  • Infected Fractures: When an internal implant cannot be used because of an active infection in the bone or tissue.

  • Bone Lengthening or Deformity Correction: Specialized circular frames used to slowly pull bone apart or straighten a limb over several months.

  • Uniplanar Fixation: A simple arrangement where rods are placed along one side of the limb, commonly used for rapid stabilization of the femur or tibia.

  • Bilateral Fixation: Rods are placed on both sides of the limb for increased stability in high-stress areas.

  • Circular Fixation (Ilizarov): Rings that completely surround the limb, connected by wires and rods; these are the gold standard for complex limb reconstructions.

  • Multiplanar Fixation: Using multiple rods in different directions to stabilize complex fractures near joints like the wrist or ankle.

  • Hybrid Fixation: A combination of a circular frame near a joint and a uniplanar rod along the bone shaft.

  • Site Selection: The surgeon identifies "safe zones" in the limb where pins can be inserted without hitting major nerves or blood vessels.

  • Pin Insertion: Small incisions are made, and threaded steel or titanium pins (Schanz screws) are drilled through the skin and into the healthy bone above and below the fracture.

  • Fracture Reduction: Under real-time X-ray (C-arm) guidance, the surgeon manually pulls and aligns the bone fragments into the correct position.

  • Frame Assembly: External rods and clamps are attached to the protruding pins, creating a rigid bridge across the break.

  • Tightening and Locking: Once alignment is confirmed, the clamps are tightened to "lock" the bone in place, and the surgical wounds are dressed.

  • Standard X-rays to map the fracture; the surgeon must also perform a detailed neurovascular exam to ensure pins avoid critical structures.

  • Thorough "debridement" (surgical cleaning) of any open wounds to remove dirt, debris, and dead tissue.

  • Fasting (NPO) and medical clearance for general anesthesia or a regional nerve block.

  • Discussion of the "temporary vs. definitive" plan—determining if the frame will stay on for weeks or months.

  • High-Resolution X-rays: The primary tool for assessing the fracture pattern and selecting the correct frame size.

  • CT Scan: Often used for complex fractures involving joints to understand the three-dimensional layout of the bone fragments.

  • Doppler Ultrasound: Occasionally used to verify the location of major arteries if the injury involves significant soft tissue swelling.

  • Blood Panels: Routine screens to check for inflammatory markers and ensure the patient is fit for anesthesia.

  • Hospital stays vary from 2 days to a week, depending on the severity of associated soft tissue wounds.

  • Daily pin-site cleaning with saline or Chlorhexidine is mandatory to prevent "crust" buildup and infection.

  • Most patients remain Non-Weight-Bearing or "Touch-Down" only, as the frame is a bridge and does not replace the bone's strength.

  • Modified clothing, such as tear-away pants or wide-leg shorts, is necessary to fit over the bulky external hardware.

  • Removal is typically performed in a clinic setting using local anesthesia or light sedation; the pins are unscrewed once X-rays show the bone is stable.

  • Provides immediate, rigid stabilization with minimal additional trauma to the injured soft tissues.

  • Allows for constant monitoring and specialized care of open wounds or skin grafts during the bone-healing process.

  • Offers a "damage control" solution that saves lives and limbs in complex trauma cases.

  • Highly adjustable; the surgeon can fine-tune the bone alignment even after the surgery is finished by adjusting the external clamps.

Pelvic Fracture Fixation

Pelvic Fracture Fixation is a critical surgical procedure used to stabilize the pelvic ring, typically following high-impact trauma such as motor vehicle accidents or significant falls. Because the pelvis protects major internal organs and a complex network of blood vessels, stabilizing these fractures is often a life-saving measure to control internal bleeding and restore structural integrity.

  • Unstable Pelvic Ring: Injuries where the structural "circle" of the pelvis is broken in two or more places, making it unable to support the weight of the body.

  • Open Book Fractures: A severe injury where the front of the pelvis (pubic symphysis) is pulled apart, leading to a significant risk of internal hemorrhage.

  • Vertical Shear Fractures: When one side of the pelvis is pushed upward, often after a fall from a height, requiring mechanical realignment.

  • Persistent Pain and Malalignment: Fractures that have not healed correctly (malunion) or cause chronic instability and gait issues.

  • Emergency Hemorrhage Control: Use of an external frame as a rapid intervention to decrease pelvic volume and stop life-threatening bleeding.

  • External Fixation: A rapid "damage control" method using metal pins drilled into the hip bones and connected to an external carbon fiber frame.

  • Anterior ORIF: Placing surgical plates and screws across the front of the pelvis, such as the pubic symphysis.

  • Posterior ORIF: Internal stabilization of the back of the pelvic ring using heavy-duty plates for sacroiliac (SI) joint injuries.

  • Percutaneous Cannulated Screws: A minimally invasive technique where long screws are inserted through tiny "stab" incisions into the sacrum under real-time X-ray guidance.

  • Pelvic C-Clamp: An emergency external device used specifically to compress the back of the pelvis in cases of severe posterior instability and bleeding.

  • Resuscitation and Alignment: In emergencies, the patient is stabilized with a pelvic binder or sheet to control bleeding before entering the operating room.

  • Reduction: For internal surgery, the surgeon makes an incision to manually pull and maneuver the pelvic bones back into their anatomically correct "ring" shape.

  • Plate and Screw Fixation: High-strength titanium or stainless steel plates are contoured to the curve of the pelvic bone and secured with multiple screws.

  • Iliosacral Screw Insertion: For posterior injuries, long screws are driven from the side of the hip bone directly into the sacrum to lock the back of the pelvis.

  • Fluoroscopic Verification: Throughout the procedure, the surgeon uses a C-arm (mobile X-ray) to ensure hardware is not impinging on nerves or blood vessels.

  • Wound Closure: Given the complexity of pelvic anatomy, deep sutures and sometimes surgical drains are used to prevent fluid or blood buildup.

  • Emergency stabilization using a pelvic binder to minimize internal volume and promote blood clotting.

  • Diagnostic imaging including AP, inlet, and outlet X-rays, alongside CT scans with 3D reconstruction to map the fracture.

  • Aggressive resuscitation with IV fluids and blood transfusions to achieve hemodynamic stability.

  • Detailed neurological and urological exams to document any nerve or bladder damage existing prior to surgery.

  • CT Scan with 3D Reconstruction: The gold standard for understanding complex pelvic displacement and planning hardware placement.

  • Retrograde Cystourethrogram: A specialized imaging test to check for injuries to the bladder or urethra, which are common with pelvic breaks.

  • Angiography: Occasionally performed if there is persistent bleeding to identify and "plug" (embolize) damaged arteries.

  • Blood Panels: Frequent monitoring of hemoglobin and hematocrit levels due to the high risk of blood loss associated with pelvic trauma.

  • Hospital stays are often extended, ranging from several days to several weeks depending on other trauma.

  • This is the most restrictive recovery phase; patients are typically Non-Weight-Bearing or "toe-touch" only for 6 to 12 weeks to protect the hardware.

  • Mandatory use of blood thinners (anticoagulants) for 2–6 weeks is required to prevent life-threatening blood clots (DVT).

  • Many patients require a transition to a specialized rehabilitation facility to regain the ability to sit, stand, and eventually walk.

  • Full biological union of the bone typically occurs within 3 to 4 months, but full strength recovery can take up to a year.

  • Provides immediate mechanical stability to the core of the body, allowing for earlier mobilization and seated upright positions.

  • Dramatically reduces the risk of death from internal hemorrhage by "closing" the pelvic space.

  • Restores the anatomical symmetry of the hips, preventing long-term leg-length discrepancies and chronic back pain.

  • Protects the long-term function of the pelvic organs by providing a stable "house" for the bladder, rectum, and reproductive systems.

Wrist/Ankle Fracture Surgery

Wrist and ankle fractures that require surgery are almost always treated using ORIF. This involves making an incision to manually realign the bones (reduction) and securing them with metal hardware (fixation) to ensure they heal in the correct anatomical position.

  • Displaced Fractures: The bone fragments have moved so far out of place that they cannot be held together by a cast alone.

  • Intra-articular Involvement: The break extends into the joint surface (the wrist or the ankle mortise), where even minor misalignment can cause permanent loss of motion.

  • Unstable Twisting Injuries: Ankle fractures involving multiple "malleoli" (the bony bumps on the sides) or torn ligaments (syndesmosis).

  • Open Fractures: Injuries where the bone has pierced the skin, requiring immediate surgical cleaning and stabilization.

  • Falling on an Outstretched Hand (FOOSH): A common cause of Colles' fractures in the wrist that often require a volar locking plate.

  • Volar Locking Plate: A titanium plate contoured specifically for the palm side of the wrist, providing rigid support for distal radius fractures.

  • Lateral Malleolar Plating: A narrow plate used to bridge and stabilize a fracture of the fibula (outer ankle).

  • Medial Malleolar Screws: Two long, parallel screws typically used to fix the inner ankle bone (tibia).

  • Syndesmotic "Tight-Rope": A high-strength cord used instead of a screw to stabilize the connection between the tibia and fibula while allowing for natural micro-movements.

  • Fragment-Specific Fixation: Using tiny, individual plates or pins for complex breaks involving multiple small bone pieces.

  • Incision and Exposure: The surgeon makes a 3–5 cm incision (on the palm side for the wrist or the sides for the ankle) to access the broken bone.

  • Manual Reduction: Using specialized tools, the surgeon maneuvers the bone fragments back into their anatomically correct position, restoring "radial tilt" in the wrist or the "ankle mortise" hinge.

  • Hardware Application: A metal plate is laid across the break and secured with specialized screws that "lock" into the plate for maximum stability.

  • Fluoroscopic Guidance: Real-time X-rays are used during the surgery to verify that the screws are the correct length and the joint surfaces are perfectly smooth.

  • Wound Closure: The skin is closed with stitches or staples. Because ankle skin is thin, surgeons take extra care to ensure a tension-free closure to prevent wound breakdown.

  • Diagnostic confirmation through high-resolution X-rays and occasionally a CT scan to map complex fragment patterns.

  • Fasting (NPO) for at least 8 hours prior to the surgery.

  • For ankle surgery, a delay of 7–10 days may be necessary if the skin is too swollen or blistered to close safely.

  • Coordination of a regional nerve block (at the collarbone for the wrist or behind the knee for the ankle) to manage pain for the first 24 hours.

  • X-ray Series: AP, lateral, and oblique views to determine the "length" and "tilt" of the fracture.

  • CT Scan: Often used for "pilon" ankle fractures or complex wrist breaks to see exactly how much of the joint surface is involved.

  • Physical Exam: Checking for "tenting" of the skin (where bone pushes against skin) and assessing nerve function in the fingers or toes.

  • Blood Panels: Routine testing to ensure the patient is a healthy candidate for anesthesia.

  • These are typically outpatient procedures, though complex ankle repairs may require an overnight stay for elevation.

  • Wrist Recovery: A heavy splint is worn for 10–14 days. Early finger wiggling is encouraged within 24 hours, but lifting is restricted to "coffee cup" weight for 6–8 weeks.

  • Ankle Recovery: Strict Non-Weight-Bearing (NWB) is required for 6 to 8 weeks. Patients must keep the foot "toes above nose" for the first week to manage extreme swelling.

  • Physical therapy is essential to regain forearm rotation (wrist) or the "hinge" movement (ankle) once the initial splint is removed.

  • In the ankle, about 20–30% of patients choose to have hardware removed a year later if the plates "catch" on boots or feel uncomfortable under the skin.

  • Restores the perfect alignment of the joint surface, which is the most effective way to prevent rapid-onset arthritis.

  • Allows for much earlier movement of the fingers and toes compared to a traditional long-arm or long-leg cast.

  • Provides the internal stability needed to ensure the bone heals at its original length, preventing permanent deformity.

  • Significantly improves the chances of regaining full range of motion and returning to previous activity levels.

Flow Diverter Placement

Flow Diverter Placement is a highly specialized endovascular procedure used to treat complex, large, or wide-necked brain aneurysms. Unlike coiling, which fills the "bulge" itself, a flow diverter is a high-density mesh stent placed in the main artery. It redirects blood flow away from the aneurysm, causing the blood inside the bulge to stagnate, clot, and eventually be absorbed by the body.

  • Giant Aneurysms: Bulges larger than 25mm that are difficult or dangerous to treat with traditional coils.

  • Fusiform Aneurysms: Cases where the entire circumference of the artery is bulging rather than just a single "berry" shape.

  • Wide-Necked Aneurysms: When the opening of the aneurysm is so broad that coils would not remain securely inside.

  • Recurrent Aneurysms: Aneurysms that have failed previous coiling treatments or have started to regrow.

  • Complex Locations: When an aneurysm is located at a segment of the artery where surgical clipping or standard coiling carries a high risk of complication.

  • Single-Device Placement: Deploying a single high-density mesh tube across the neck of the aneurysm to disrupt blood flow.

  • Telescoping Technique: Using two or more flow diverters overlapped to increase the density of the mesh in specific areas or to cover a longer segment of the artery.

  • Surface-Modified Diverters: Newer devices with specialized coatings (like phosphorylcholine) designed to reduce the risk of blood clots and the need for heavy blood thinners.

  • Distal Access Navigation: Using highly flexible microcatheters to reach aneurysms in the smaller, more distant branches of the brain's vascular tree.

  • Vascular Access: A catheter is inserted through the femoral artery (groin) or radial artery (wrist) and navigated up to the brain.

  • Precise Positioning: Under high-definition fluoroscopy (X-ray), the surgeon positions a microcatheter across the segment of the artery where the aneurysm is located.

  • Device Deployment: The flow diverter, a tightly woven tube made of cobalt-chromium or nickel-titanium, is slowly unsheathed and expanded against the artery walls.

  • Wall Apposition: The surgeon meticulously ensures the device is snug (apposed) against the artery wall so that blood cannot leak behind the mesh.

  • Stasis Verification: Contrast dye is injected to confirm that the blood flow into the aneurysm has slowed significantly, a sign that the "diversion" is working.

  • Access Closure: The microcatheter is removed, and the initial puncture site in the groin or wrist is sealed.

[Image showing the "stasis effect" of blood clotting inside an aneurysm after flow diversion]

  • Dual Antiplatelet Therapy (DAPT): Patients must take Aspirin and Clopidogrel (Plavix) for at least 5–7 days prior to prevent clots from forming on the dense mesh.

  • P2Y12 Blood Test: A mandatory test to ensure the body is properly responding to the blood-thinning medication.

  • 3D Rotational Angiography: A detailed mapping of the artery to determine the exact diameter and length needed for the flow diverter.

  • Fasting (NPO): No food or drink for 8–12 hours prior to the procedure, which is performed under general anesthesia.

  • Digital Subtraction Angiography (DSA): The gold standard imaging used to map the precise architecture of the aneurysm and nearby side branches.

  • CT or MRI Scan: To assess the brain for any existing damage or conditions that may influence the surgical plan.

  • Kidney Function Screen: Checking the patient's ability to process the contrast dye used during the imaging phases.

  • Neurological Baseline Exam: A comprehensive assessment of speech, vision, and motor skills to monitor during and after recovery.

  • The Healing Process: Unlike coiling, which works instantly, a flow diverter takes 6 to 12 months to completely cure the aneurysm as the natural artery lining grows over the mesh.

  • Hospital Stay: Usually 24 to 48 hours in a Neuro-ICU for close monitoring of neurological status.

  • Strict Medication Adherence: This is the most critical part of the treatment; patients cannot miss even one dose of blood thinners for the first 6–12 months without risking a major stroke.

  • Activity Restrictions: Most patients can return to normal desk work within 1 week, though heavy lifting is restricted for the first few days while the incision site heals.

  • Long-Term Follow-up: Mandatory Angiography or MRA at 6 and 12 months to verify the aneurysm has shrunk and the artery has healed.

  • Higher Success Rates: Provides a complete "occlusion" (closure) rate of 75–90% at one year for complex aneurysms that were previously untreatable.

  • Artery Remodeling: Promotes the growth of a new, healthy artery lining (endothelium) across the neck of the aneurysm, permanently sealing it.

  • Minimally Invasive: Avoids the risks associated with open brain surgery and large craniotomy incisions.

  • Protects Side Branches: The mesh is designed to allow enough blood to reach small "side-branch" arteries while still blocking flow into the aneurysm.

Arthrocentesis (Joint Aspiration)

Arthrocentesis, commonly known as joint aspiration, is a medical procedure used to collect synovial fluid from a joint capsule for diagnostic or therapeutic purposes. It is an essential tool in orthopedics and rheumatology for evaluating joint health. The use of ultrasound-guided techniques has become a clinical benchmark for increasing accuracy, particularly in smaller or medium-sized joints like the wrist, ankle, or elbow, significantly improving success rates compared to traditional landmark-guided methods.

  • Diagnostic Investigation: Identifying the root cause of joint swelling (effusion) by analyzing the synovial fluid's chemistry and cell count.

  • Septic Arthritis Detection: Serving as the "gold standard" to rule out or confirm joint infections, which are considered medical emergencies.

  • Crystal-Induced Arthritis: Confirming the presence of uric acid or calcium crystals to diagnose gout or pseudogout.

  • Therapeutic Relief: Providing immediate pain relief by removing excess fluid that causes internal pressure and restricts mobility.

  • Intra-articular Injection: Using the aspiration site to deliver therapeutic medications, such as corticosteroids or hyaluronic acid, directly into the joint space.

  • Preparation: The skin over the joint is thoroughly sterilized with medical-grade antiseptic to maintain a sterile field and prevent the introduction of bacteria.

  • Ultrasound Mapping: Providers use real-time ultrasound imaging to visualize the joint space, identify the largest pocket of fluid, and map a safe needle path that avoids nerves and blood vessels.

  • Anesthesia: A local anesthetic is injected to numb the skin and the deeper soft tissues, ensuring the patient feels only pressure during the aspiration.

  • Aspiration: A hollow needle is carefully inserted into the joint space. The provider may gently "milk" the joint or apply external pressure to help drain the maximum volume of fluid.

  • Analysis: The collected fluid is placed in sterile tubes and sent to a laboratory for microscopic examination of cell counts, crystal analysis, and bacterial cultures.

  • Completion: Once the needle is removed, a small bandage is applied. If a therapeutic injection was performed, the joint may be moved through its range of motion to distribute the medication.

  • Real-Time Ultrasound GuidanceProviding a "live" view of the needle tip to ensure 100% accuracy in fluid removal and medication placement, even in deep or complex joints.

  • Point-of-Care Synovial AnalysisPortable diagnostic devices that can detect signs of infection or gout crystals in the office within minutes, allowing for immediate treatment.

  • Automated Aspiration DevicesAdvanced syringes that maintain consistent pressure, making fluid collection faster and less traumatic for the surrounding tissue.

  • Bio-Inductive InjectionsUtilizing the arthrocentesis site to deliver platelet-rich plasma (PRP) or stem cell therapies designed to promote the natural healing of joint cartilage.

  • Micro-Needle TechnologyThe use of ultra-fine, specialized needles that reduce the sensation of the procedure, making it more tolerable for patients with needle anxiety.

  • Infection Prevention: While rare, clinicians take extreme care to avoid passing a needle through infected skin (cellulitis) to prevent spreading bacteria into the joint.

  • Bleeding (Hemarthrosis): Minor bleeding into the joint can occur, particularly in patients taking blood-thinning medications; this is typically managed with rest and ice.

  • Post-Injection Flare: A temporary increase in localized pain or swelling may occur following a steroid injection, usually subsiding within 24–48 hours.

  • Recovery Timeline: Patients are generally advised to rest the joint for 24 to 48 hours to allow the puncture site to heal and the medication to settle.

  • Warning Signs: Patients should monitor for fever, chills, or severe worsening of pain, which may indicate a rare post-procedure complication.

  • Definitive Diagnostics: It is the only way to distinguish between an infection, an autoimmune flare, and a crystal-induced injury with absolute certainty.

  • Instant Mechanical Relief: Removing even a few milliliters of fluid can significantly restore the joint's range of motion and reduce pain.

  • High Precision: Ultrasound guidance ensures that medications are delivered exactly where they are needed, maximizing the drug's effectiveness.

  • Minimally Invasive: Offers a fast, office-based alternative to more invasive surgical explorations of the joint.

  • A rapid reduction in joint swelling and a return to improved mobility and comfort.

  • A clear diagnostic roadmap, allowing your specialist to prescribe the correct medication for your specific type of arthritis.

  • The ability to return to daily activities within a short period, supported by a personalized joint-health maintenance plan.

  • Long-term protection of joint surfaces by removing inflammatory fluids that can cause cartilage breakdown over time.

Intra-articular Steroid Injection

Intra-articular steroid injections involve the delivery of powerful anti-inflammatory medications (corticosteroids) directly into a joint space. This targeted approach allows for high concentrations of medicine to treat localized inflammation and pain while minimizing systemic side effects. They remain a primary tool for managing acute flares and chronic pain associated with degenerative and inflammatory joint conditions.

  • Osteoarthritis (OA): Providing relief for weight-bearing joints like the knee, hip, and shoulder when physical therapy or oral medications are no longer sufficient.

  • Inflammatory Arthritis: Managing localized "flares" in patients with Rheumatoid or Psoriatic arthritis.

  • Crystal-Induced Arthritis: Rapidly resolving the intense inflammation and pain caused by Gout or Pseudogout.

  • Bursitis and Tendonitis: Delivering targeted relief to the bursa sacs or tendons surrounding the joint structures.

  • Improving Mobility: Reducing swelling to allow patients to participate more effectively in physical rehabilitation and exercise.

Clinicians typically utilize long-acting crystalline steroids, often combined with a local anesthetic (such as lidocaine or bupivacaine) to provide both immediate diagnostic feedback and long-term relief.

  • Triamcinolone & Methylprednisolone: The most common long-acting agents used to suppress the immune response within the joint.

  • Microsphere Technology: Specialized extended-release formulations designed to provide consistent pain relief for up to 12 weeks.

  • Local Anesthetics: Often mixed with the steroid to provide instant, temporary numbing, which helps confirm the needle reached the exact source of pain.

  • Imaging Guidance: For deep or complex joints—such as the hip, spine, or the small joints of the hand—the use of ultrasound or fluoroscopy is the clinical standard to ensure the medication reaches the intra-articular space rather than surrounding soft tissue.

  • Sterile Preparation: The skin is thoroughly cleaned with antiseptic to prevent the introduction of bacteria into the joint.

  • Numbing: A local anesthetic is applied to the skin and needle track to maximize patient comfort.

  • Aspiration: If excess fluid (effusion) is present, the clinician will often remove it (arthrocentesis) before injecting the steroid to improve the medication's effectiveness.

  • Injection & Distribution: The steroid is injected, and the joint may be gently moved to help distribute the medication throughout the capsule.

  • Biologic "Bridge" TherapiesThe integration of steroids with biologics or platelet-rich plasma (PRP) to combine immediate inflammation control with long-term tissue support.

  • AI-Assisted Needle TrackingAdvanced imaging software that highlights the optimal entry point and real-time needle trajectory, reducing the risk of hitting nerves or vessels.

  • Smart-Relief MicrospheresBiodegradable spheres that release the steroid slowly over several months, preventing the "peak and trough" effect of traditional injections.

  • Non-Crystalline FormulationsNewer steroid types that reduce the risk of "steroid flare" (post-injection irritation) by dissolving more smoothly in the synovial fluid.

  • Digital Patient MonitoringUsing wearable sensors to track a patient’s range of motion and activity levels before and after the injection to objectively measure success.

  • Frequency Limits: Injections are typically limited to 3–4 times per year in a single joint to prevent potential damage to the joint cartilage.

  • The "Steroid Flare": A temporary increase in pain for 24–48 hours as the medicine settles; this is usually managed with ice and rest.

  • Septic Arthritis Risk: While extremely rare, any joint entry carries a minor risk of infection, requiring strict sterile protocols.

  • Metabolic Impact: Diabetics should monitor their blood glucose, as localized steroids can cause a temporary systemic spike in sugar levels.

  • Skin Changes: Potential for localized thinning of the skin (atrophy) or loss of pigment at the injection site.

  • Targeted Potency: Delivers a high dose of anti-inflammatory power directly to the source of pain without the stomach or kidney risks of oral pills.

  • Rapid Onset: Most patients experience significant relief within 3 to 7 days, with the anesthetic providing a "preview" of relief within minutes.

  • Delays Surgery: Can successfully manage symptoms for years, allowing patients to postpone or avoid invasive joint replacement surgeries.

  • Facilitates Rehab: By "quieting" a painful joint, it creates a window of opportunity for physical therapy to strengthen the surrounding muscles.

  • A significant reduction in daily pain levels and a noticeable increase in joint flexibility and function.

  • Resumption of low-impact activities, such as walking, swimming, or cycling, with less discomfort.

  • A clear follow-up plan with your specialist to determine if further injections or alternative therapies are needed.

  • The peace of mind that comes from a minimally invasive, office-based solution for chronic joint inflammation.

Scoliosis Correction Surgery

Scoliosis Correction Surgery is a major reconstructive procedure used to treat an abnormal sideways curvature of the spine. The latest 2026 surgical standards focus on maximizing the degree of correction while utilizing motion-preserving technologies and advanced safety monitoring to ensure optimal patient outcomes.

Surgery is typically recommended when the spinal curve is progressive or has reached a severity that impacts physical health. Indications include:

  • Significant Curvature: Sideways curves generally exceeding 45 to 50 degrees.

  • Respiratory/Cardiac Impact: Severe curves that compress the lungs or heart, affecting breathing and stamina.

  • Visible Deformity: Significant rib humps, uneven shoulders, or a tilted pelvis that affects balance and gait.

  • Failed Conservative Treatment: When bracing or physical therapy has failed to stop the progression of the curve.

  • Spinal Fusion: The most established method, using bone grafts, metal rods, and pedicle screws to hold the spine straight while the vertebrae grow together.

  • Vertebral Body Tethering (VBT): A modern, motion-preserving option for growing patients that uses a flexible cord to guide the spine's growth into alignment.

  • Magnetically Controlled Growing Rods (MAGEC): Designed for young children, these rods are lengthened periodically using an external magnet, eliminating the need for repeat surgeries.

  • Posterior Spinal Instrumentation: A technique focused on the back of the spine to provide maximum stabilization and rotational correction.

  • Surgical Access: The surgeon makes an incision along the midline of the back (or side for VBT) to reach the affected vertebral segments.

  • Curve Realignment: Using rods and screws, the surgeon carefully maneuvers the vertebrae to reduce the sideways curve and correct any rotation.

  • Bone Grafting: For fusion cases, the surface of the vertebrae is prepared and bone graft material is added to facilitate the permanent joining of the bones.

  • Safety Monitoring: Throughout the procedure, real-time neuromonitoring tracks nerve signals to ensure the spinal cord is protected during the straightening process.

  • Fasting: Patients are required to fast for 8–12 hours before the surgery.

  • Medical Clearances: Extensive blood work, ECG, and pulmonary function tests are performed to ensure the heart and lungs are healthy for anesthesia.

  • Blood Preparation: Use of "cell saver" technology is planned to collect and recycle the patient's own blood during the procedure.

  • Medication Review: Discussing all supplements and medications with the surgical team to minimize bleeding risks.

  • Full-Spine X-rays: Taken while standing and bending to measure the "Cobb angle" and determine the flexibility of the curve.

  • MRI Scan: Used to rule out any underlying spinal cord abnormalities or syrinx before the correction.

  • CT Scan (3D): Provides a high-resolution map of the vertebrae for use with intraoperative "GPS" navigation systems.

  • Pulmonary Function Test (PFT): Measures lung capacity to assess the impact of the scoliosis on the respiratory system.

  • Hospital Stay: Typically involves a stay of 3 to 5 days, with mobilization (walking) starting as early as the first day post-op.

  • Short-Term Recovery: Most patients return to school or sedentary work within 3 to 4 weeks.

  • Activity Timeline: Light exercise like walking is encouraged at 6 weeks; swimming and jogging are typically permitted between 3 to 6 months.

  • Long-Term Outlook: Full bone fusion is usually achieved at the 1-year mark, allowing a return to most non-contact sports and normal activities.

  • Curvature Reduction: Significantly flattens the sideways curve and corrects the rotational "rib hump."

  • Prevention of Progression: Stops the spine from curving further, protecting long-term heart and lung function.

  • Restored Body Balance: Realigns the head and shoulders over the pelvis, improving posture and reducing muscle strain.

  • Improved Quality of Life: Provides a long-term solution that allows patients to lead active, healthy lives without the limitations of a severe spinal deformity.

Top Doctors at Belle Vue Clinic Hospital in India

Dr Santosh Kumar
Dr Santosh Kumar
Orthopedic Surgeon
Belle Vue Clinic Hospital, Kolkata
18+years experience

May we help you?

Enter digits only (6-15 digits). We'll add your country code.