+91 83682 47758
info@medivisorhealth.com
Medivisor India Treatment Logo
  • Home
    • About Us
    • Our Services
    • Our Team
    • Our Safety Measures
    • Loading treatments...
    • Loading hospitals...
    • Loading doctors...
    • Loading tests & diagnoses...
    • Treatment Cost
    • Treatment Process
    • Visa Process
    • Travel Guide
    • FAQs
    • Why Medivisor
    • Success Stories
    • Patient Activities
    • Social Activities
    • News Coverage
    • Blog
  • Become a Partner

Medivisor India Treatment is a trusted New Delhi-based medical travel company assisting international patients with advanced, affordable, and seamless treatment in India.

  • Medivisor House 359, Sector 1, Vaishali, Ghaziabad, (Delhi/NCR) India
  • +91 8368 247 758
  • info@medivisorhealth.com

About Us

  • About Us
  • Our Services
  • Our Team
  • Our Medical Advisors
  • Our Safety Measures
  • Join Our Network
  • Contact Us

India Treatment

  • Hospitals
  • Treatments
  • Treatment Cost
  • Treatment Process
  • Visa Process
  • Travel Guide
  • FAQs
  • Why Medivisor

Gallery

  • Patient Testimonials
  • Patient Activities
  • News Coverage
  • Blog

Get in Touch

© 2026 Medivisor India Treatment. All rights reserved.

Continental Hospital, Hyderabad

Continental Hospital, Hyderabad

Plot No 3, Road No. 2, Financial District, Gachibowli, Nanakaramguda Hyderabad TS- 500032.

  1. Home
  2. Hospitals
  3. Continental Hospital, Hyderabad

Quick Overview

2013

Established

Multi-Super

Speciality

750

Beds

155

Doctors

Continental Hospitals - Best Multispecialty Hospital in Hyderabad, India

Continental Hospitals, located in the IT and Financial District of Nanakramguda, Gachibowli, Hyderabad, is a premier 585-bed multi-specialty and quaternary care facility. As a flagship institution within the IHH Healthcare network—one of the world's largest integrated healthcare providers—Continental Hospitals is designed to meet international standards of clinical execution and patient safety. The facility holds dual international and national accreditations from JCI (Joint Commission International, USA) and NABH (India), alongside NABL diagnostic laboratory accreditation. It is also recognized as India's first LEED-qualified super-specialty hospital campus, integrating eco-friendly architectural design with high-acuity medical care.

Why Patients Trust Continental Hospitals, Hyderabad

Patients choose Continental Hospitals for its blend of global expertise, healing architecture, and transparent, evidence-based medical practices.

  • Global IHH Healthcare Network Standards: Backed by international clinical governance, safety benchmarks, and collaborative research frameworks.

  • Triple Quality Accreditations (JCI, NABH & NABL): Validated globally and nationally for rigorous patient safety protocols, surgical outcomes, and laboratory precision.

  • Pioneer in Sustainable Healing Architecture: India’s first LEED-certified green hospital building, featuring healing-centric design, maximum natural light, and advanced indoor air handling systems.

  • Prime Financial District Location: Situated in Gachibowli/Nanakramguda, offering direct access for domestic patients and international visitors via Rajiv Gandhi International Airport.

  • Integrated Multidisciplinary Tumor & Transplant Boards: Super-specialized medical panels collaborate across disciplines to construct individualized treatment pathways for complex cases.

Centres of Clinical Excellence (Specialities)

The hospital is structured around specialized institutes that provide comprehensive, research-driven care for high-acuity conditions:

  • Continental Institute of Cardiovascular Sciences: Offers a complete spectrum of heart care, from adult and pediatric interventional cardiology (PTCA, TAVI/TAVR) to complex CABG bypass surgeries, electrophysiology, and advanced heart failure management.

  • Continental Institute of Neurosciences & Rehabilitation: Expert diagnostic and neurosurgical care for brain tumors, stroke intervention, epilepsy surgeries, cerebral aneurysms, and complex spinal disorders supported by intraoperative neuro-navigation.

  • Continental Institute of Oncology: Comprehensive cancer center integrating surgical oncology, targeted chemotherapy, immunotherapy, and high-precision linear accelerator radiation therapy.

  • Continental Institute of Orthopaedics: Specialized in conventional and robotic-assisted joint replacements (knee and hip), complex spine surgery, total joint reconstructions, and sports medicine.

  • Continental Institute of Gastroenterology & Liver Care: Focused on therapeutic endoscopy (EUS, ERCP), complex hepatobiliary surgeries, and advanced medical management of chronic liver and digestive disorders.

  • Organ Transplant Institute: Active living donor and cadaveric transplant programs for liver, kidney, heart, and multi-organ transplants supported by isolated post-transplant care suites.

World-Class Facilities and Technology

Continental Hospitals is defined by its investment in cutting-edge infrastructure designed for surgical precision and diagnostic accuracy:

  • 16 Green Operation Theatres: Ultra-modern modular surgical suites designed to maintain absolute sterility with HEPA-filtered laminar airflow while adhering to eco-friendly energy benchmarks.

  • Advanced Diagnostic Imaging Suite: High-resolution 3 Tesla MRI, multi-slice CT scanners, digital mammography, color Doppler ultrasound, and PET-CT for early-stage disease mapping.

  • Specialized Critical Care Units: 90+ single-room ICU beds including Medical ICUs, Surgical ICUs, Cardiac Care Units (CCU), Level 3 Neonatal ICUs (NICU), and Pediatric ICUs (PICU).

  • Dedicated Health Check Lounge: A modern, streamlined facility optimized for comprehensive preventive health screenings and rapid patient turnaround.

  • Flat-Panel Cath Labs & Endovascular Suites: High-definition interventional suites for complex cardiac, endovascular, and neuro-interventional procedures.

24/7 Critical Care and Emergency Services

  • 24/7 Emergency & Level 1 Trauma Center: Round-the-clock emergency department staffed by physicians trained in Advanced Trauma Life Support (ATLS) for acute medical and polytrauma crises.

  • Fast-Track Cardiac & Stroke Protocols: Specialized triage and rapid intervention pathways ensuring immediate primary PCI for heart attacks and thrombolysis/thrombectomy for stroke cases.

  • Advanced Life Support (ALS) Ambulances: Mobile ICU transport units equipped with continuous hemodynamic monitoring, transport ventilators, and trained emergency medical technicians.

  • International Patient Services Desk: Facilitated in direct coordination with Medivisor India Treatment, offering pre-arrival specialist evaluations, transparent treatment cost estimations, medical visa invitation letters, foreign language translation, and local travel/hotel stay arrangements.

Frequently Asked Questions (FAQs)

Q1: What major accreditations does Continental Hospitals, Hyderabad hold?

A1: Continental Hospitals is accredited by JCI (Joint Commission International, USA), NABH (National Accreditation Board for Hospitals & Healthcare Providers), and NABL for its diagnostic laboratories. It is also LEED-certified for eco-friendly building infrastructure.

Q2: What specialized organ transplant and critical care facilities are available at Continental Hospitals?

A2: The hospital operates living-donor and cadaveric transplant programs for liver, kidney, and heart transplants, supported by 90+ single-room ICUs, including specialized post-transplant isolation suites and Level 3 NICU/PICU facilities.

Q3: How can outstation and international patients coordinate care at Continental Hospitals, Gachibowli?

A3: Patients can securely send their diagnostic summaries and medical history to Medivisor India Treatment. The coordination team will facilitate direct evaluations with Continental specialists, issue medical visa invitation letters, provide transparent treatment cost estimates, and manage local travel and accommodation logistics.

May we help you?

Enter digits only (6-15 digits). We'll add your country code.

Treatments Offered at Continental Hospital, Hyderabad

Bone Marrow Transplant

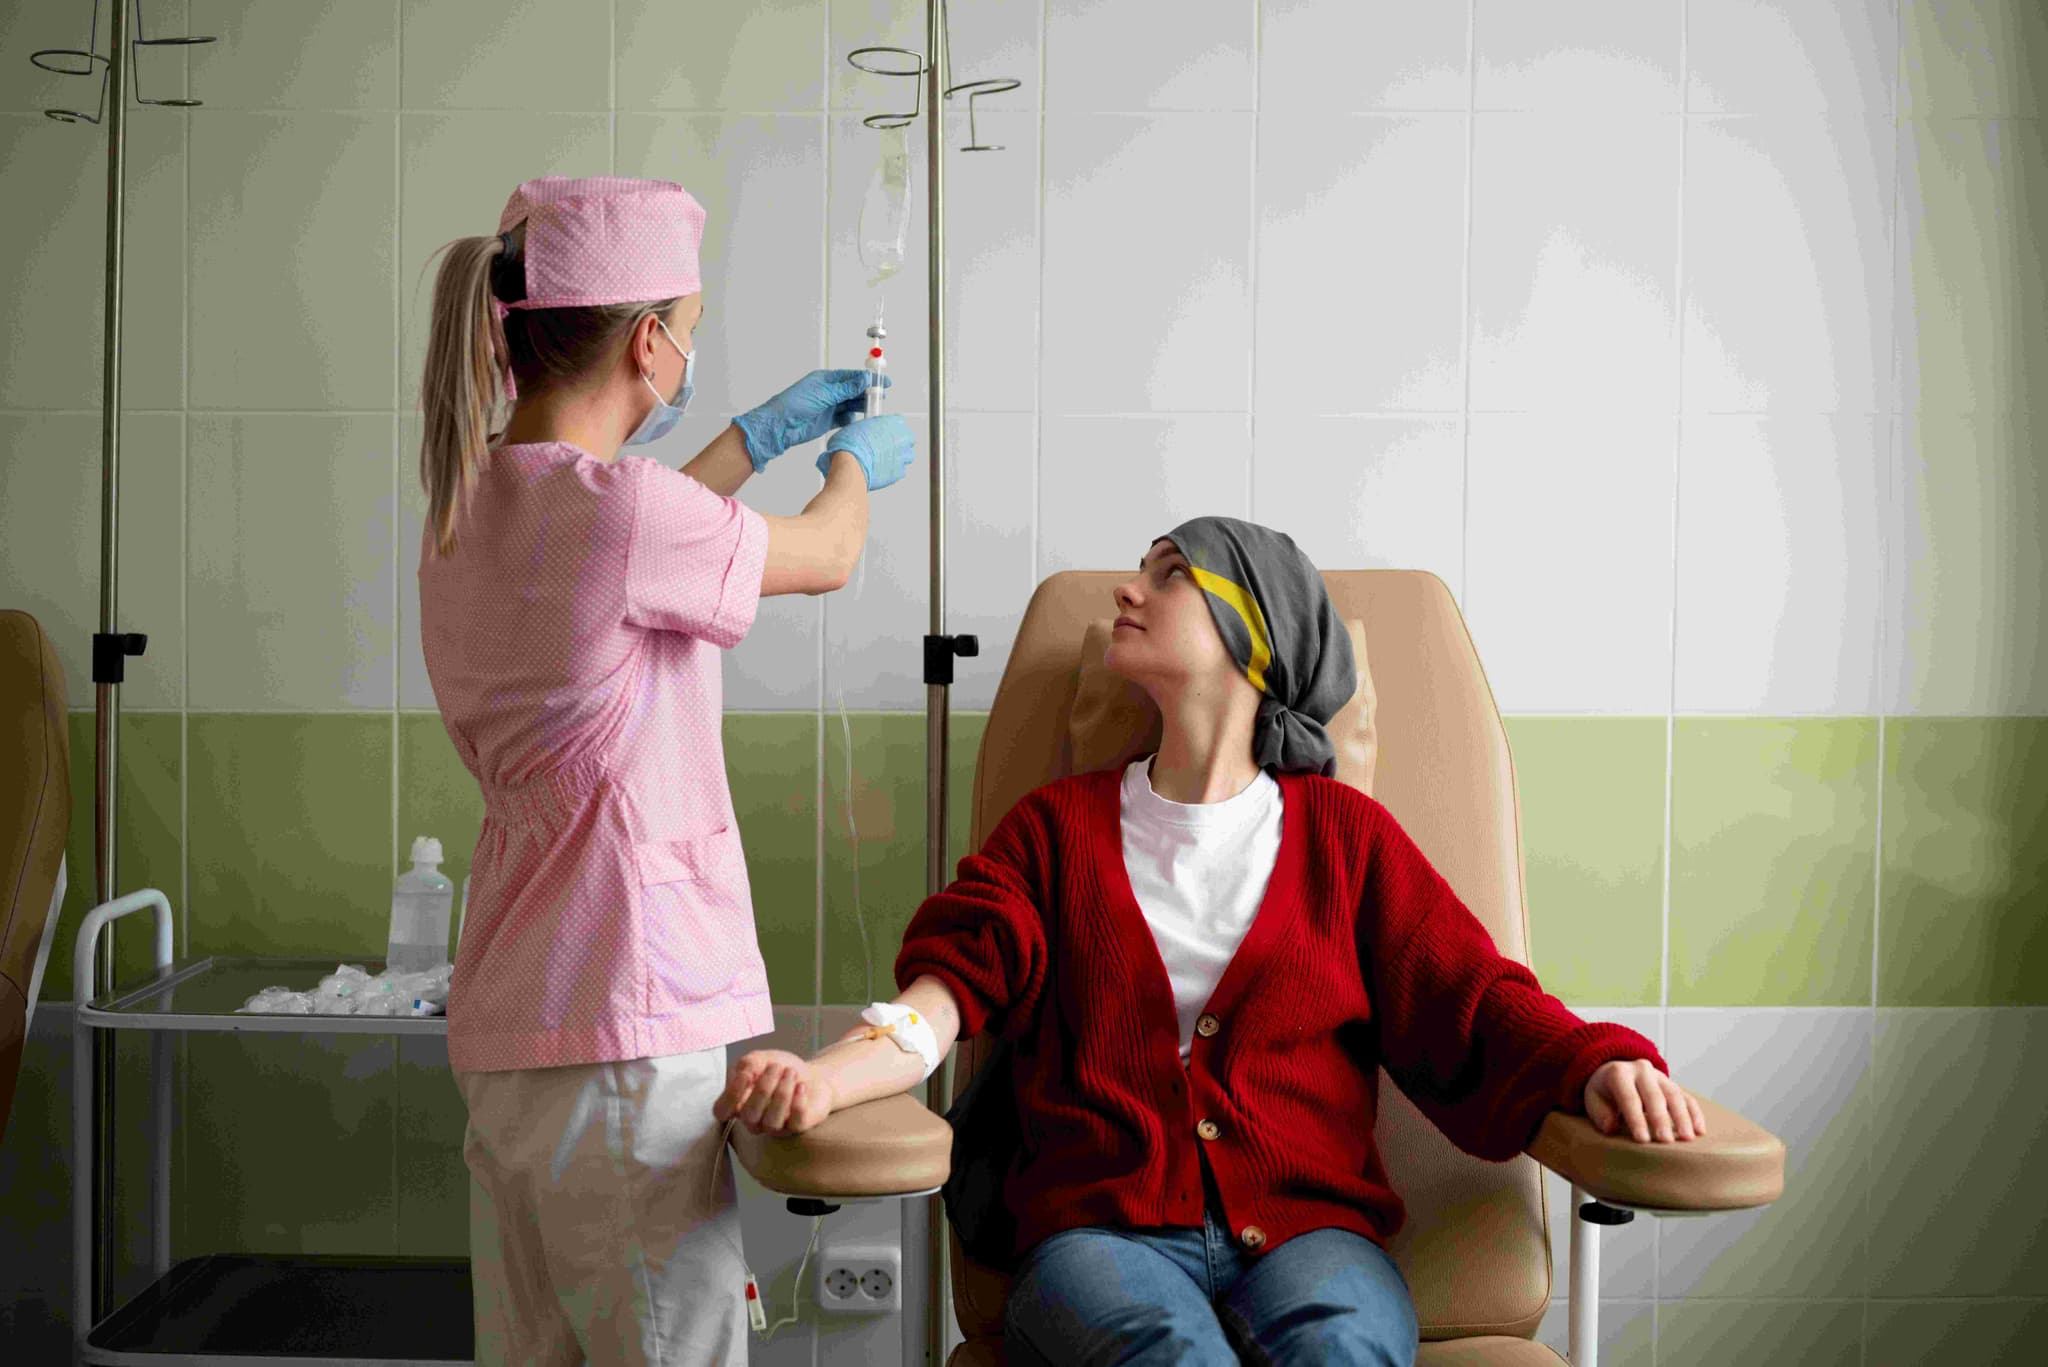
A bone marrow transplant (BMT), also called a Hematopoietic Stem Cell Transplant, is a procedure that replaces diseased or damaged bone marrow with healthy stem cells. These stem cells are the "factories" that produce your red blood cells, white blood cells, and platelets.
  • To replace non-functioning marrow in conditions such as Aplastic Anemia.

  • To "rescue" the marrow after high-dose chemotherapy for Leukemia, Lymphoma, or Multiple Myeloma.

  • To replace "broken" or genetically abnormal cells in disorders like Sickle Cell Disease or Thalassemia.

  • When other primary treatments have failed and a transplant offers the only curative option.

  • Following the identification of a matched donor or the successful collection of own healthy stem cells.

  • Autologous Transplant: A procedure using the patient's own stem cells, which are collected and frozen before intensive treatment.

  • Allogeneic Transplant: A transplant using stem cells from a matched relative or an unrelated volunteer donor.

  • Matched Sibling Donor: Using a brother or sister who has the same human leukocyte antigen (HLA) type.

  • Haploidentical Transplant: A type of allogeneic transplant using a donor who is a "half-match," such as a parent or child.

  • Umbilical Cord Blood Transplant: Using stem cells harvested from the umbilical cord and placenta after a baby is born.

  • Conditioning: Administration of high-dose chemotherapy or radiation over 5–7 days to clear out old marrow.

  • Stem Cell Infusion: Healthy cells are infused through a central venous catheter (PICC or Hickman line), similar to a blood transfusion.

  • Engraftment: A 2–4 week period where the new cells travel to the bones and begin producing new blood cells.

  • Immune Reset: The process of the new immune system gradually maturing and learning to protect the body.

  • Continuous Monitoring: Intensive observation in the hospital to manage the high risk of infection during the recovery phase.

  • Extensive work-up testing of the heart, lungs, and kidneys to ensure the body can handle the procedure.

  • Placement of a central venous catheter for the infusion of cells and administration of medications.

  • Coordination of stem cell collection (apheresis) for autologous patients or donor matching for allogeneic patients.

  • Understanding the "Point of No Return" during the conditioning phase where the old marrow is destroyed.

  • HLA Typing: A specialized blood test used to match patients with the most compatible donors.

  • Bone Marrow Biopsy: To assess the current state of the marrow and the presence of any remaining cancer cells.

  • Organ Function Screens: Detailed evaluations including ECGs, lung function tests, and kidney filtration checks.

  • Infectious Disease Screening: Comprehensive testing for viruses or bacteria that could become dangerous during recovery.

  • Most patients remain hospitalized for 3–5 weeks following the infusion.

  • Long-term recovery is a gradual process requiring close medical supervision for up to a year.

  • Patients must follow strict infection-prevention protocols while their immune system is "reset" to zero.

  • Ongoing management may include anti-rejection medications to prevent Graft-vs-Host Disease (GVHD).

  • Provides a curative pathway for many blood cancers that are resistant to standard chemotherapy.

  • Restores the body's ability to produce healthy, functional red blood cells, white blood cells, and platelets.

  • Corrects the underlying genetic "blueprints" in patients with hereditary blood disorders.

  • Offers a chance for long-term remission and the restoration of a healthy immune system.

Neck Lift
Neck Lift

A neck lift, or lower rhytidectomy, is a surgical procedure designed to enhance the appearance of the neck and jawline by addressing the visible signs of aging. In 2026, it remains a primary solution for those seeking to correct skin laxity, muscle banding, and fat accumulation that does not respond to non-invasive treatments.

  • To address loose skin, often referred to as a "turkey wattle," where the skin has lost elasticity and hangs below the jaw.

  • If you have vertical cords or muscle banding caused by the weakening or protrusion of the platysma muscle.

  • To remove submental fat or excess fat deposits under the chin (double chin) and along the jowls.

  • When looking for long-lasting results that typically maintain a youthful profile for 10 to 15 years.

  • If non-invasive treatments have failed to provide the desired contour for the neck and jawline.

  • Platysmaplasty: A technique where the surgeon accesses neck muscles via small incisions to tighten and "sew" them together like a corset.

  • Cervicoplasty: A process focusing on the removal of excess skin, which is then re-draped and trimmed to create a sharper jaw angle.

  • Liposuction: Often performed alongside a lift to remove localized fat and refine the overall neck contour.

  • Combined Procedures: The surgery may be performed alone or in conjunction with a facelift or brow lift for comprehensive rejuvenation.

  • Anesthesia: The procedure is usually performed under general anesthesia or intravenous sedation.

  • Incisions: Standard incisions begin in front of the earlobe, wrap behind the ear, and end in the posterior scalp to hide scars in natural creases.

  • Surgical Access: Small incisions may also be made under the chin to access the platysma muscles directly.

  • Tissue Adjustment: Muscles are tightened, fat is removed or repositioned, and excess skin is trimmed away.

  • Duration: The surgical process typically takes between 2 to 4 hours depending on the complexity of the case.

  • Consult with a surgeon to determine if the anatomy requires platysmaplasty, cervicoplasty, or liposuction.

  • Discuss medical history and potential risks such as hematoma or nerve injury.

  • Arrange for a recovery period, as patients usually need 10 to 14 days off from sedentary work.

  • Follow specific instructions regarding fasting and medication adjustments before anesthesia.

  • Plan for post-operative support and a support person to assist during the first few days of recovery.

  • Physical Evaluation: To assess skin elasticity, muscle banding, and the degree of fat accumulation.

  • Medical Clearance: Standard pre-surgical tests to ensure the patient is fit for general anesthesia or sedation.

  • Anatomical Mapping: Determining incision placement based on the patient's hairline and natural skin creases.

  • Wear a compression bandage around the head and neck for several days to support new contours and minimize swelling.

  • Manage initial swelling and bruising, which typically peak around the third day post-operation.

  • Resume sedentary work and normal daily activities within 10 to 14 days.

  • Avoid strenuous physical activity and heavy lifting for at least 4 to 6 weeks to ensure proper healing.

  • Monitor for rare complications such as temporary numbness or weakness in the lower lip during the recovery process.

  • Provides a firmer, smoother foundation by tightening the underlying neck muscles.

  • Creates a sharper, more defined angle between the neck and the jawline.

  • Delivers significant improvement in appearance that can last between 10 to 15 years.

  • Corrects structural issues like muscle banding that non-surgical methods cannot reach.

  • Offers well-hidden scarring by utilizing natural creases and the hairline for incision placement.

Injectable Filler / Lip Augmentation

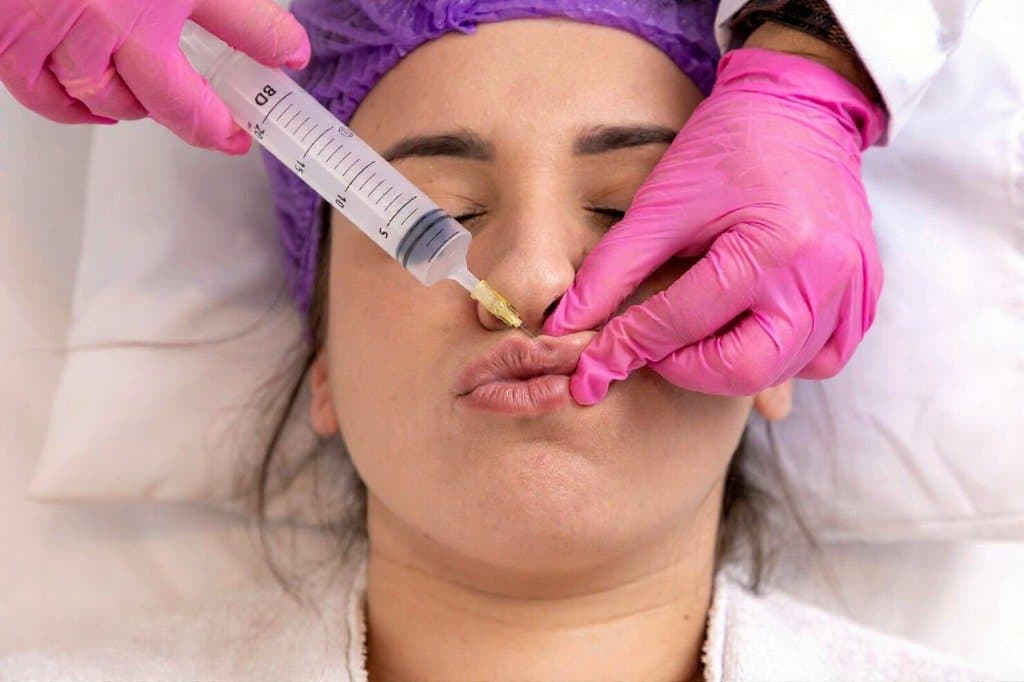
Injectable Fillers are the primary non-surgical method in 2026 for restoring volume, smoothing deep wrinkles, and enhancing facial features. Lip Augmentation remains the most requested filler procedure, focusing on achieving natural "pillowy" textures rather than overfilled results.

  • To add volume to naturally thin or thinning lips.

  • To define the lip borders, also known as the vermillion border.

  • To smooth "marionette lines" around the mouth.

  • To restore volume in the cheeks or under-eye hollows, referred to as tear troughs.

  • When seeking immediate results for volume loss with minimal downtime.

  • Hyaluronic Acid (HA): The gold standard material (e.g., Juvederm, Restylane) that holds moisture and is reversible using hyaluronidase.

  • Biostimulators: Products like Radiesse or Sculptra that encourage the body to produce its own collagen over time.

  • The "Lip Flip": Using a small amount of Botox to relax the upper lip muscle, making more of the lip visible without adding volume.

  • Russian Lips Technique: A method focusing on vertical height and a pronounced "Cupid's bow" instead of outward projection.

  • Cannula Injection: The use of a blunt-tipped cannula to reduce bruising and the risk of vascular complications compared to a needle.

  • Pain Management: Topical numbing cream is applied beforehand to ensure minimal discomfort.

  • Integrated Anesthesia: Most modern fillers are pre-mixed with Lidocaine, a numbing agent, to manage pain during injection.

  • Injection Process: The actual injections are precise and typically take between 15 to 30 minutes to complete.

  • Technique Selection: The injector uses either a needle or a blunt-tipped cannula depending on the target area and desired outcome.

  • Immediate Assessment: Results for HA fillers are visible immediately, allowing for real-time adjustments.

  • Avoid alcohol and blood thinners like Vitamin E or Fish Oil for 3 days prior to minimize bruising.

  • Ensure no dental cleanings or procedures are scheduled for 2 weeks before the appointment.

  • Discuss medical history and any previous filler experiences with the professional.

  • Confirm the practitioner is a licensed medical professional (Dermatologist or Plastic Surgeon).

  • Check that the clinic stocks Hyaluronidase in case of emergencies.

  • Immediate Assessment: HA fillers show instant volume changes during the session.

  • Day 1–2 Milestone: Swelling and bruising are most prominent; intermittent ice pack application is critical.

  • Day 3–5 Milestone: Swelling typically subsides and any small internal lumps begin to soften.

  • Week 2 Milestone: The filler fully integrates into the tissue, and the final result is judged for any "touch-ups".

  • Longevity Check: Lip fillers typically last 6 to 12 months, while cheek or jawline fillers can last 12 to 24 months.

  • Avoid massaging the treated area or sleeping on your face for the first 48 hours to prevent migration.

  • Refrain from intense heat, such as saunas or steam rooms, for 24 to 48 hours.

  • Avoid intense exercise for at least 24 to 48 hours to prevent increased swelling.

  • Do not schedule dental work for 2 weeks after injections to reduce infection risk.

  • Monitor for any signs of vascular occlusion, which requires immediate medical intervention.

  • Provides immediate restoration of facial volume and smoothing of wrinkles.

  • Offers a non-surgical alternative for enhancing features like lips, cheeks, and jawlines.

  • Allows for natural-looking results through specialized techniques like the "Russian Lip".

  • Features a quick procedure time with minimal recovery compared to surgical options.

  • Hyaluronic Acid options are reversible, providing an added layer of safety and flexibility.

Vaginoplasty (Vaginal Tightening)

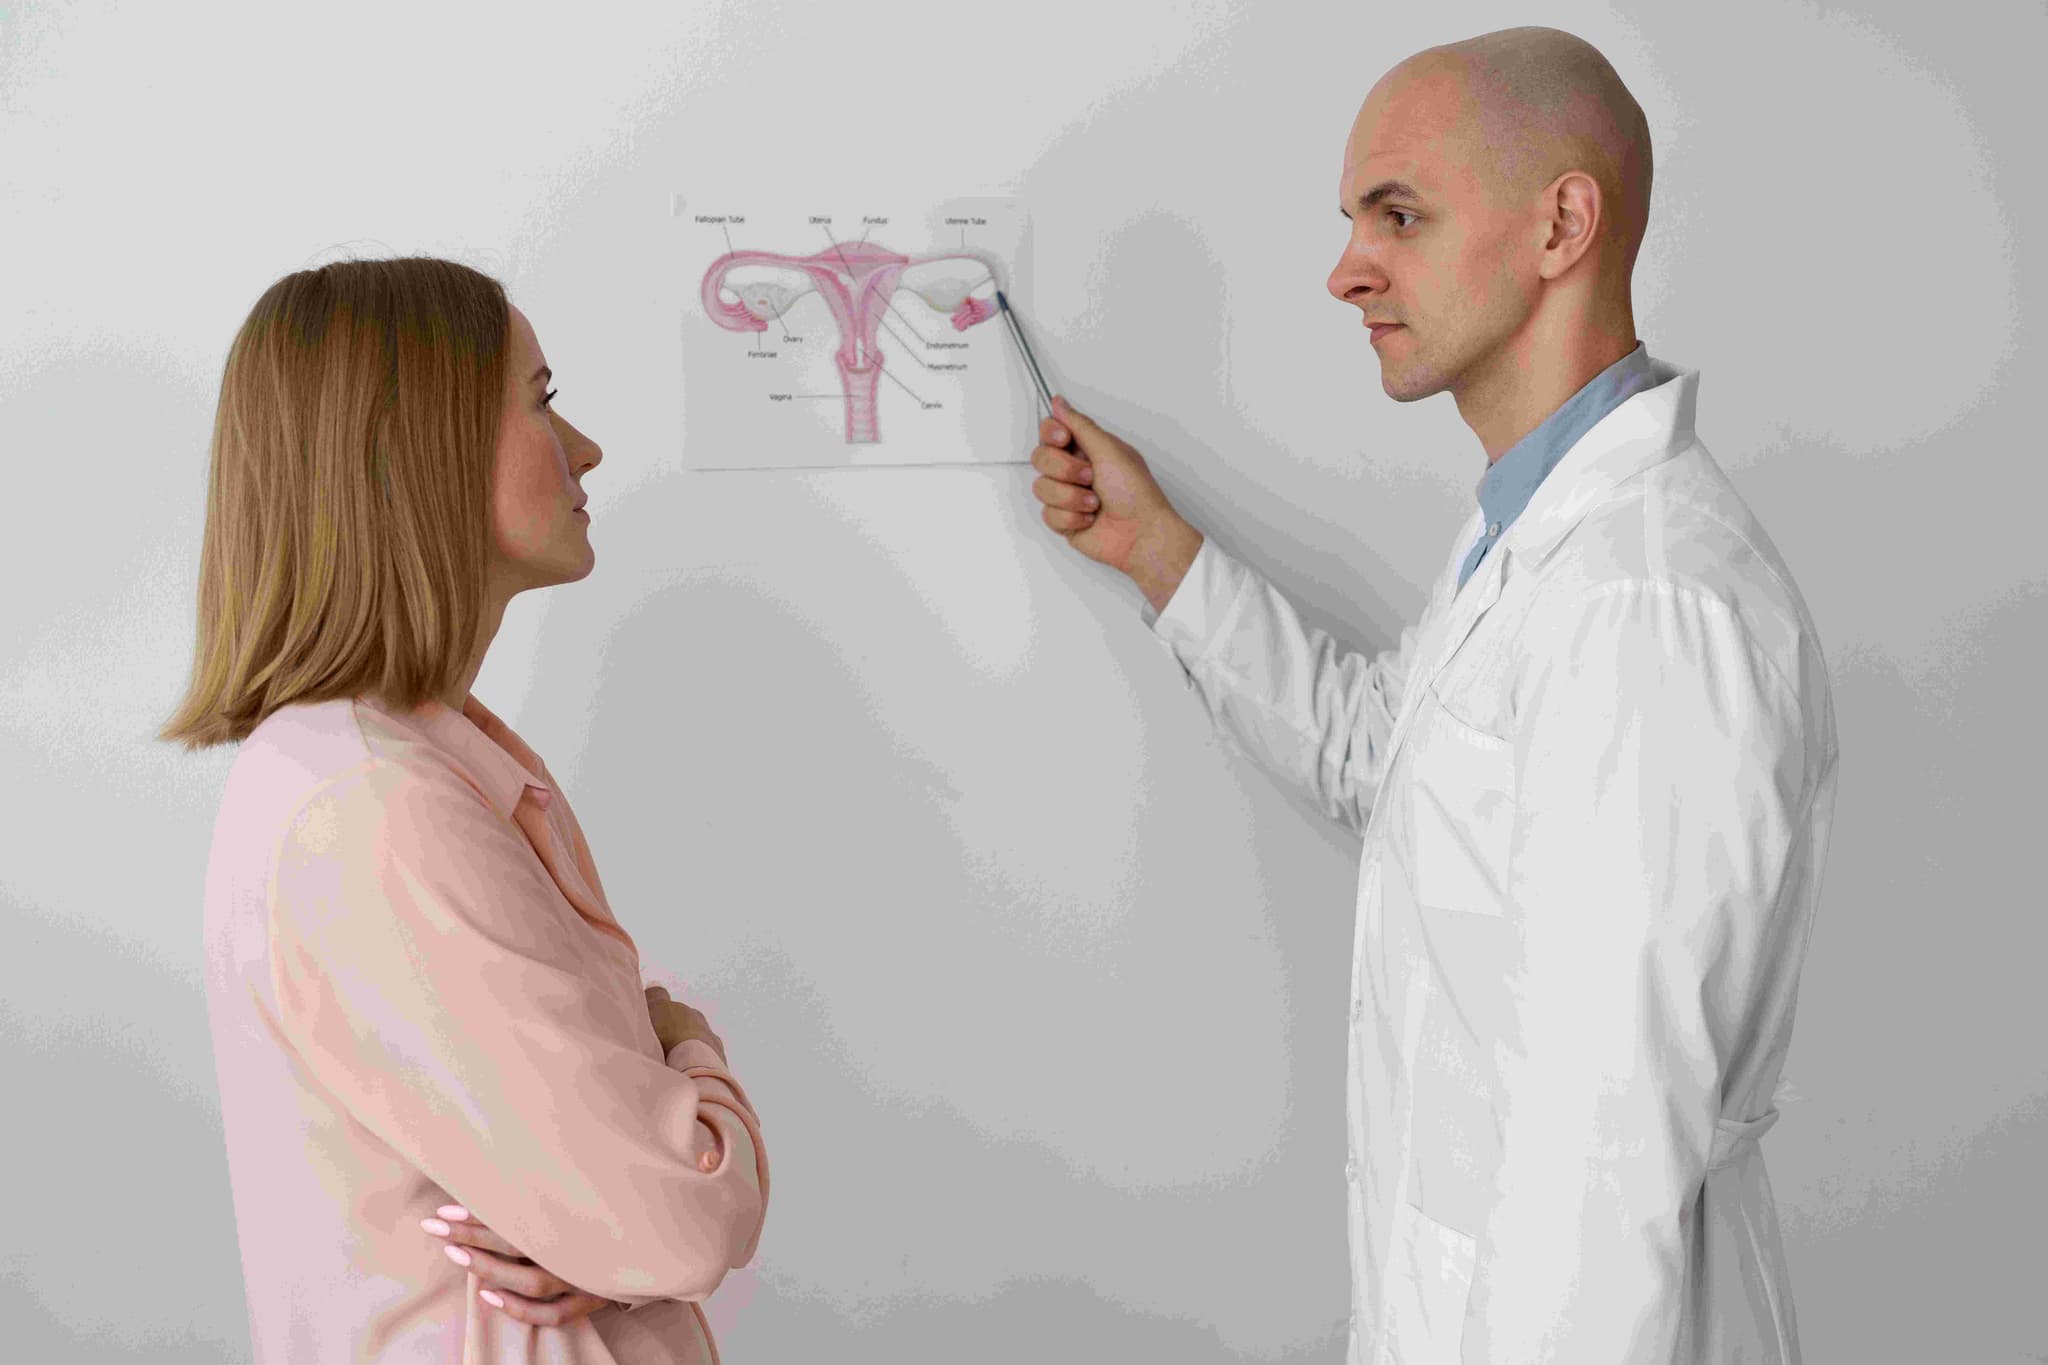
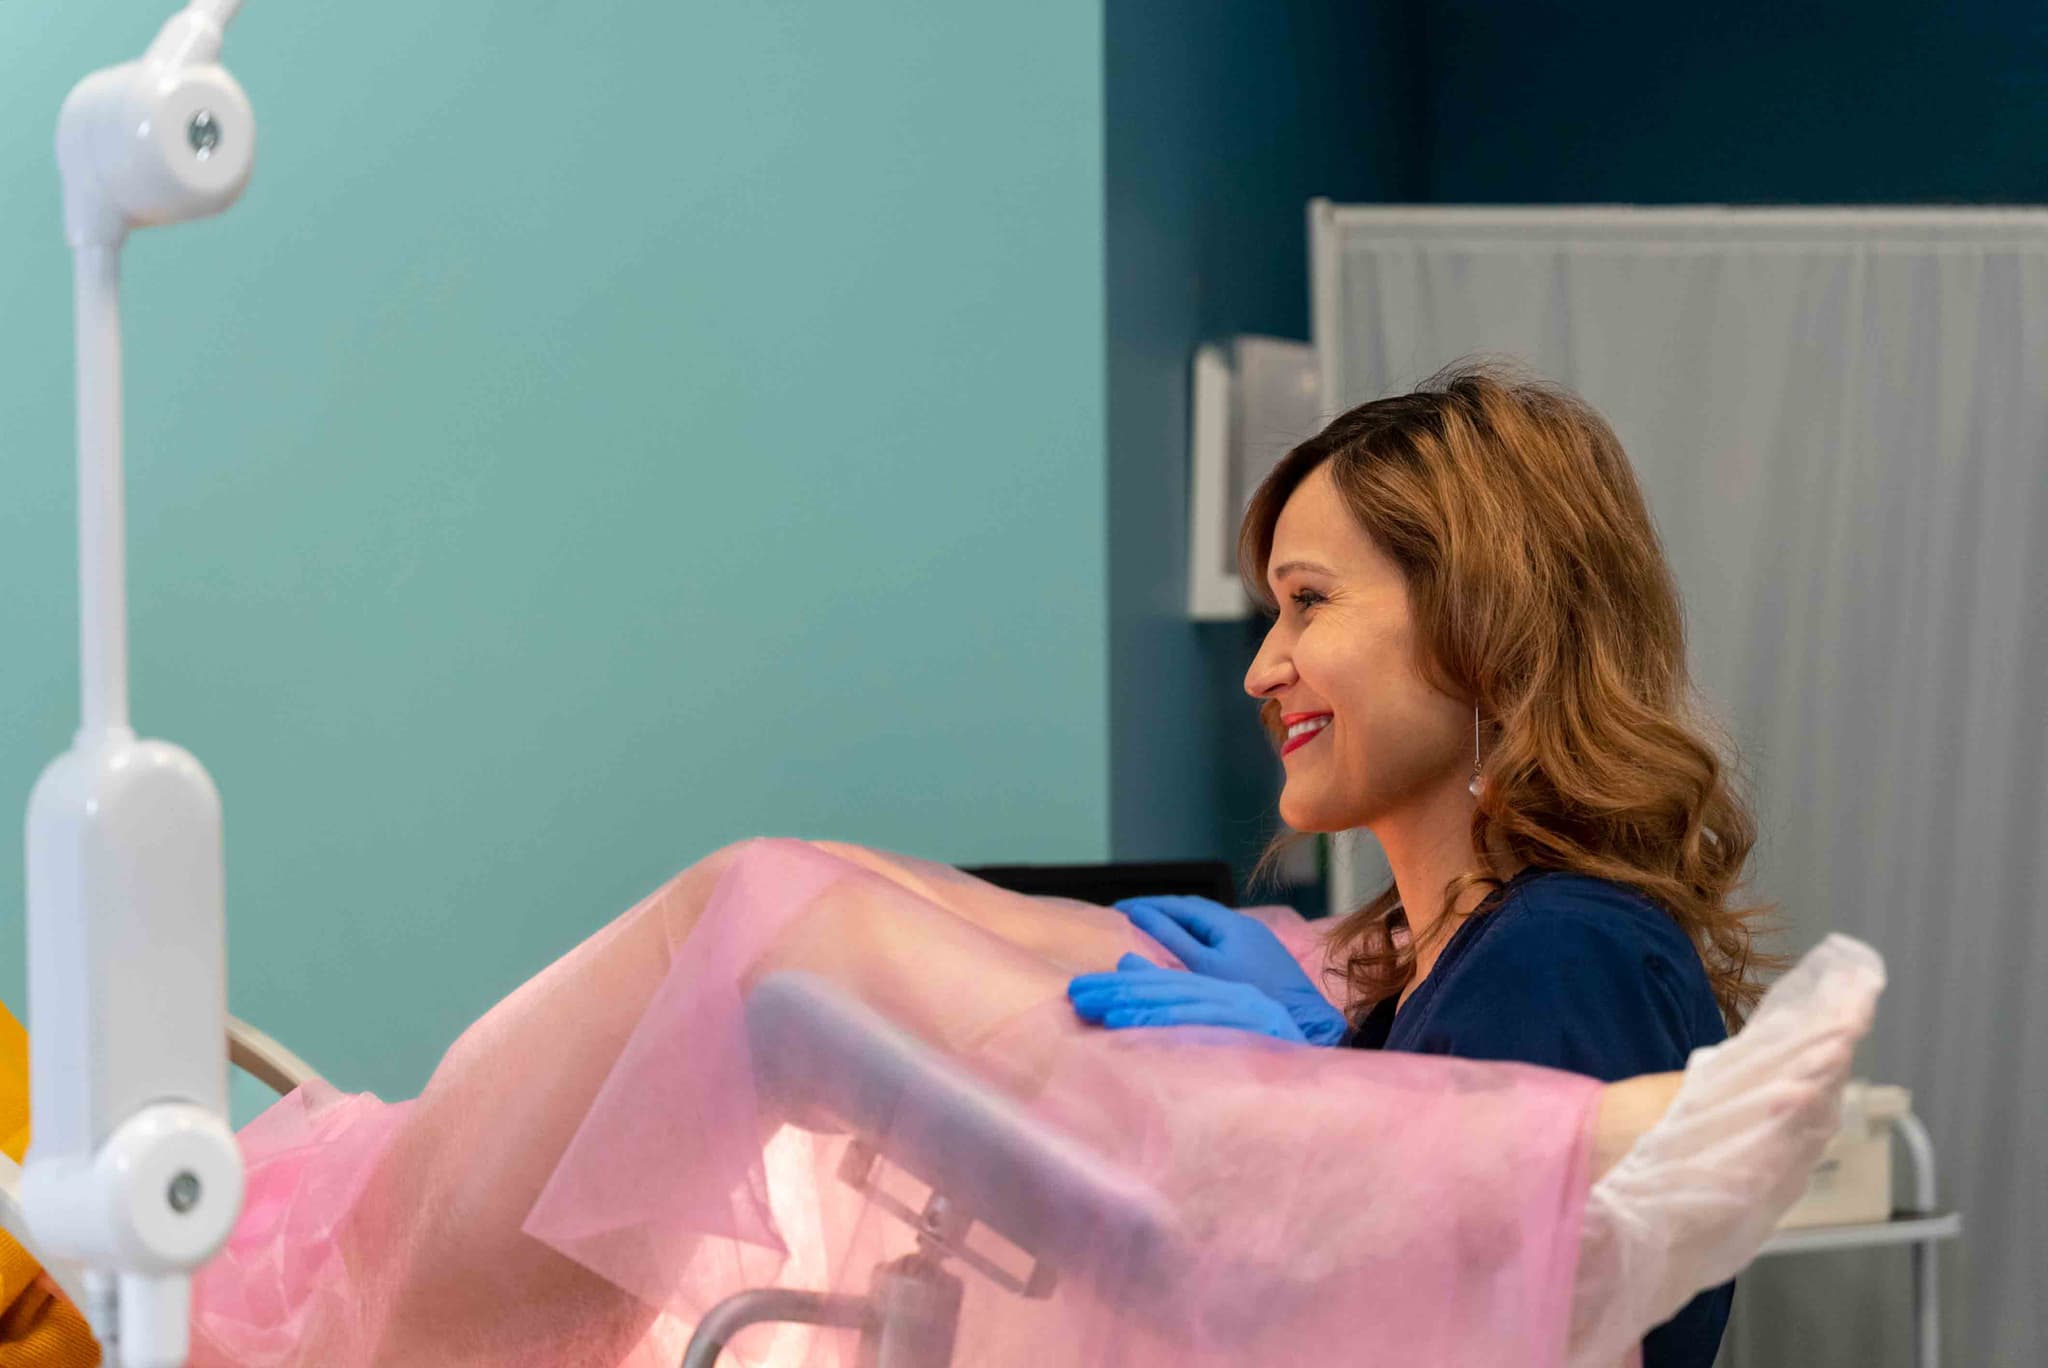
Vaginoplasty, commonly referred to as vaginal tightening, is a surgical procedure in 2026 designed to tighten the vaginal canal and the surrounding pelvic floor muscles. It is most frequently sought by individuals who have experienced vaginal relaxation or laxity due to childbirth, aging, or significant weight loss.

This procedure is ideal for those looking to restore the structural integrity of the pelvic region. Key indications include:

  • Vaginal Laxity: A feeling of "looseness" or relaxation in the vaginal vault.

  • Muscle Separation: Weakened pelvic floor muscles that no longer provide adequate support.

  • Childbirth-Related Changes: Stretching or tearing of the vaginal tissues following one or more vaginal deliveries.

  • Pelvic Heaviness: A sensation of pressure or heaviness in the pelvic area due to tissue laxity.

  • Perineal Scarring: Visible or uncomfortable scarring from previous episiotomies or tears that require repair.

  • Traditional Surgical Vaginoplasty: The gold standard for significant laxity; involves the permanent structural repair and tightening of the pelvic muscles.

  • Perineoplasty: Often performed in conjunction with vaginoplasty to repair the perineum (the area between the vagina and anus) and restore its aesthetic and functional integrity.

  • Energy-Based Treatments: Utilizing laser or radiofrequency technology in 2026 for very mild cases of laxity or to improve tissue hydration.

  • Pelvic Floor Reconstruction: A more extensive approach for cases involving pelvic organ prolapse alongside vaginal relaxation.

  • Labiaplasty Integration: Frequently combined with other feminine rejuvenation procedures to address both internal and external concerns simultaneously.

  • Surgical Access: The surgeon works through the vaginal opening, meaning there are typically no external scars.

  • Tissue Removal: Excess vaginal lining (mucosa) is carefully measured and removed from the back of the vaginal canal.

  • Muscle Tightening: Strong, dissolvable sutures are used to pull the separated or weakened pelvic muscles closer together, narrowing the canal.

  • Perineal Repair: If needed, the perineal body is reconstructed to provide better support and a more youthful appearance to the vaginal opening.

  • Closure: The internal incisions are closed with fine, absorbable sutures that do not require manual removal.

  • Medical Clearances: A standard blood panel and physical exam are required to ensure the patient is fit for anesthesia.

  • Fasting: Patients must fast for 8–12 hours before the 1 to 2-hour procedure.

  • Gynecological Review: A recent clear Pap smear and an exam to rule out active infections are typically mandatory.

  • Nicotine Cessation: Stopping smoking several weeks before and after surgery is vital for the healing of delicate mucosal tissues.

  • Pelvic Floor Assessment: To determine the degree of muscle separation and ensure a surgical tightening is the appropriate solution.

  • Basic Blood Panel: To evaluate hemoglobin levels and clotting function.

  • ECG: Performed for patients over a certain age or with specific health histories to monitor heart health during anesthesia.

  • Urinalysis: To ensure there are no underlying urinary tract infections (UTIs) prior to the procedure.

  • Initial Days: Expect localized swelling, soreness, and minor spotting. Prolonged sitting should be avoided for the first few days.

  • Hygiene Protocol: Strict hygiene, including gentle rinsing or sitz baths, is required for the first 10 days to prevent infection.

  • Activity Timeline: Most patients return to light desk work within 2 weeks. Heavy lifting, squatting, and strenuous exercise are prohibited for 6 weeks.

  • Healing Window: Sexual intercourse and the use of tampons are strictly prohibited until the 6-to-8-week mark, following a clearance exam by the surgeon.

  • Restored Muscle Tone: Improves the strength and control of the pelvic floor muscles.

  • Enhanced Structural Integrity: Corrects the "gaping" or loose sensation associated with vaginal relaxation.

  • Long-Lasting Results: Provides a permanent structural repair that remains effective for many years, provided no subsequent vaginal births occur.

  • Improved Quality of Life: Resolves physical discomfort and the feeling of pelvic heaviness, contributing to better overall wellbeing.

Pectoral Implant Surgery

Pectoral implant surgery is a surgical procedure in 2026 designed to enhance the size and definition of the chest in men. It is primarily used by individuals who cannot achieve desired chest muscle development through exercise alone, or to correct structural asymmetries and congenital defects such as Poland Syndrome.

This procedure is ideal for men seeking a more contoured or athletic chest profile. Key indications include:

  • Inadequate Muscle Projection: Difficulty building chest mass despite consistent strength training.

  • Chest Asymmetry: Significant differences in the size or shape of the pectoral muscles.

  • Poland Syndrome: A congenital condition characterized by the underdevelopment or absence of the chest muscle on one side.

  • Post-Traumatic Reconstruction: Correcting chest wall defects resulting from previous injuries or surgeries.

  • Desire for Permanent Definition: Seeking a "chiseled" appearance that remains stable regardless of changes in exercise frequency.

  • Submuscular Placement: The 2026 standard, where the implant is placed beneath the pectoralis major muscle to ensure it is well-covered and moves naturally.

  • Solid Silicone Implants: Unlike breast implants, these are made of firm, cohesive silicone that mimics the feel of muscle and cannot leak or rupture.

  • Endoscopic-Assisted Surgery: Utilizing small cameras to create the implant pocket with high precision and minimal muscle trauma.

  • Transaxillary Approach: Placing the incision in the armpit to ensure there are no visible scars on the chest.

  • Hybrid Sculpting: Combining implants with liposuction of the abdomen or flanks to enhance the "V-taper" of the torso.

  • Surgical Access: A small incision is typically made in the natural fold of the armpit (axilla).

  • Pocket Creation: The surgeon carefully creates a space underneath the pectoralis major muscle, often using endoscopic tools for better visualization.

  • Implant Insertion: The solid silicone implant is inserted and positioned to provide optimal projection and lateral definition.

  • Symmetry Check: The surgeon verifies the balance between both sides of the chest to ensure a natural, athletic look.

  • Closure: Incisions are closed with dissolvable sutures, and a medical-grade compression vest is applied to stabilize the implants.

  • Fasting: Patients must fast for 8–12 hours prior to the procedure.

  • Medical Clearances: Standard blood tests and an ECG are required to assess fitness for general anesthesia.

  • Activity Planning: Arrange for 1–2 weeks off from work and ensure help is available for tasks involving arm movement.

  • Medication Review: Avoid blood-thinning medications and certain herbal supplements for 2 weeks prior to reduce bruising.

  • Basic Blood Panel: To evaluate hemoglobin levels, clotting function, and overall health.

  • ECG: Performed to monitor heart health during the 1.5 to 2.5-hour procedure.

  • Physical Assessment: To measure existing muscle mass and skin laxity, ensuring the correct implant size is selected.

  • Imaging (Optional): In complex cases or for Poland Syndrome, a CT or MRI may be used to map the chest wall.

  • Initial Days: Significant tightness and soreness are expected. Arm movement should be kept below shoulder height for the first 2–3 weeks.

  • Compression Therapy: A surgical vest must be worn 24/7 for approximately 4–6 weeks to prevent implant shifting or "flipping."

  • Activity Timeline: Light desk work can usually be resumed after 1 week. Most patients return to full-intensity gym training and chest exercises by the 3-month mark.

  • Long-Term Results: The implants are permanent and do not interfere with the ability to build natural muscle over the top once the area is fully healed.

  • Enhanced Athletic Profile: Provides immediate bulk and projection to the chest that may be difficult to achieve through weightlifting alone.

  • Correction of Defects: Effectively treats the visible signs of Poland Syndrome and other chest wall depressions.

  • Hidden Scarring: The transaxillary incision ensures that the surgical marks are concealed within the armpit.

  • Permanent Definition: Offers a lifelong structural change that does not require the maintenance of injectable fillers.

Chin Augmentation Surgery

In 2026, facial implants are a primary method for structural facial rejuvenation. Chin Augmentation (Genioplasty) focuses on strengthening a "weak" profile and defining the jawline, while Cheek Augmentation restores volume to the mid-face to create higher, more defined cheekbones and a more youthful contour.

Implants are ideal for individuals seeking permanent structural changes rather than temporary volume. Key indications include:

  • Receding Chin: A "weak" chin that makes the nose appear larger or the neck look less defined.

  • Mid-face Flatness: Lack of definition in the cheekbones due to genetics or age-related volume loss.

  • Facial Asymmetry: Significant differences in bone structure between the two sides of the face.

  • Desire for a Sharper Jawline: Seeking a more masculine or feminine "chiseled" look that fillers cannot achieve.

  • Permanent Solution: When a patient is tired of the maintenance and recurring costs associated with injectable fillers.

  • Silicone Implants: Smooth, flexible implants that are easy to place and remove if necessary.

  • Medpor (Porous Polyethylene): A material that allows your own tissue to grow into the implant, providing exceptional long-term stability.

  • Custom 3D-Printed Implants: Utilizing CT scans to create patient-specific implants tailored to your unique bone anatomy.

  • Sliding Genioplasty: A surgical alternative where the chin bone itself is cut and moved forward rather than using a synthetic implant.

  • Hybrid Contouring: Combining an implant with fat grafting to soften the transition between the implant and natural tissue.

  • Surgical Access: Incisions are made in discrete locations—either inside the mouth (lip area) or in the natural crease under the chin—to ensure no visible scarring.

  • Pocket Creation: The surgeon creates a precise space directly over the facial bone to house the implant.

  • Placement & Fixation: The implant is carefully inserted and, in some cases, secured with tiny titanium screws to prevent shifting.

  • Refinement: The surgeon assesses facial symmetry from multiple angles to ensure the new structure complements the nose and jaw.

  • Closure: Incisions are closed with dissolvable sutures, and a supportive bandage or "strap" may be applied to minimize initial swelling.

  • Dental Check-up: Because many incisions are made inside the mouth, your oral health must be excellent to prevent infection.

  • Fasting: Patients must fast for 8–12 hours before the procedure if general anesthesia or deep sedation is used.

  • Imaging: High-resolution CT scans or 3D photos are often taken to map the bone structure and select the correct implant size.

  • Medication Review: Avoiding blood thinners and specific supplements for 2 weeks prior to reduce the risk of hematoma.

  • 3D Facial Mapping: To simulate the aesthetic outcome and ensure the implant size provides a balanced look.

  • Basic Blood Panel: To evaluate overall health and clotting function.

  • ECG: Performed for patients over 40 or those with health conditions to ensure safety under anesthesia.

  • CT Scan: Often used for custom-made implants to provide an exact "blueprint" of the facial skeleton.

  • Initial Days: Expect significant swelling and a "tight" or "heavy" sensation. A soft-food diet is mandatory if internal mouth incisions were used.

  • Oral Care: Frequent use of antiseptic mouthwash is required for 7–10 days to keep internal incisions clean.

  • Activity Restrictions: Contact sports must be avoided for 6–8 weeks to prevent the implant from shifting before it is fully anchored.

  • Settling Period: While the new structure is visible immediately, it takes 3–6 months for the implant to fully "settle" and for residual swelling to vanish.

  • Permanent Enhancement: Provides a lifelong solution for facial structure without the need for touch-ups.

  • Improved Facial Harmony: Balances the proportions of the nose, chin, and forehead for a more attractive profile.

  • No Visible Scars: Using internal mouth incisions ensures that the surgical path is completely hidden.

  • Versatile Results: Implants can be customized in size and shape to achieve everything from subtle rejuvenation to dramatic sculpting.

Body Contouring (Post Bariatric)

Body Contouring after bariatric surgery is a sequence of reconstructive procedures in 2026 designed to remove massive amounts of redundant skin and residual fat. It is the definitive final step for patients who have lost significant weight (50–100+ lbs), as excess skin can cause persistent hygiene issues, chronic infections, and physical discomfort that exercise alone cannot resolve.

This reconstructive journey is recommended for those who have completed their weight-loss phase and are seeking to improve their quality of life. Key indications include:

  • Redundant Skin Folds: Excessive skin on the abdomen, arms, or thighs that interferes with movement or clothing.

  • Chronic Skin Irritation: Recurring rashes or infections (intertrigo) within the skin folds.

  • Functional Limitations: Heavy skin that causes back pain, postural issues, or prevents a return to active fitness.

  • Stabilized Weight: Successful maintenance of a stable weight for at least 6 to 12 months.

  • Psychological Closure: A desire to have one's physical appearance reflect their health and weight-loss achievements.

  • Phase 1 (The Core): Typically involves a Lower Body Lift or a Fleur-de-lis Abdominoplasty to stabilize the midsection.

  • Phase 2 (The Upper Body): Focuses on a Breast Lift (Mastopexy) and an Arm Lift (Brachioplasty).

  • Phase 3 (The Lower Extremities & Face): Includes a Thigh Lift or a Face and Neck Lift to address remaining laxity.

  • Auto-Augmentation: A 2026 standard where redundant tissue is used to rebuild volume in the breasts or buttocks, avoiding the need for synthetic implants.

  • Fleur-de-lis Technique: A specialized approach using both vertical and horizontal incisions to address massive skin redundancy in both directions.

  • Staged Planning: Due to the extensive nature of these surgeries, procedures are spaced 4–6 months apart to allow the body to recover and ensure patient safety.

  • Incision & Removal: The surgeon makes precise incisions to remove wide sections of skin and fat, carefully repositioning the remaining tissue for a natural look.

  • Muscle & Tissue Repair: Weakened muscles (especially in the abdomen) are tightened to provide structural support for the new body shape.

  • Refined Contouring: Targeted liposuction is used to smooth the transitions between the areas where skin was removed.

  • Closure: Complex, multi-layered suturing is used to manage tension on the long incisions, and surgical drains are placed to prevent fluid buildup.

  • Nutritional Optimization: Surgeons require comprehensive blood panels to ensure protein, iron, and B12 levels are optimized, as post-bariatric patients often have deficiencies.

  • Weight Maintenance: Patients must demonstrate a stable "plateau" weight for at least 6 months prior to the first stage.

  • Mental Health Assessment: In 2026, professional support is often encouraged to help patients adjust to their changing body image.

  • Smoking/Vaping Cessation: Strict abstinence is mandatory for several weeks before and after to ensure tissue survival and wound healing.

  • Comprehensive Metabolic Panel: To check electrolyte balance, kidney function, and liver health.

  • Protein & Micronutrient Testing: To confirm the patient has the nutritional reserves (especially albumin) needed for massive tissue healing.

  • ECG & Cardiac Clearance: Essential due to the multiple, lengthy surgical sessions required.

  • Standard Blood Panel: To evaluate hemoglobin and clotting factors to minimize the risk of post-operative anemia.

  • High-Intensity Healing: The first week of each stage requires around-the-clock assistance and careful drain management.

  • Compression Support: Heavy-duty medical compression garments are worn for 6–8 weeks to support the tissues and minimize swelling.

  • Total Timeline: A full body transformation typically takes 12 to 18 months to complete all stages and see the final settled results.

  • Scar Management: While scars are extensive and permanent, 2026 protocols include advanced topical treatments and laser therapies to help them fade over time.

  • Elimination of Skin Issues: Directly resolves chronic rashes, infections, and hygiene struggles associated with skin folds.

  • Restored Mobility: Dramatically improves the ability to exercise, run, and move without the hindrance of heavy skin.

  • Permanent Tissue Correction: Once the redundant skin is surgically removed, it does not return if weight remains stable.

  • Complete Transformation: Provides the physical and emotional "finish line" to a significant weight-loss journey.

Lower Body Lift Surgery

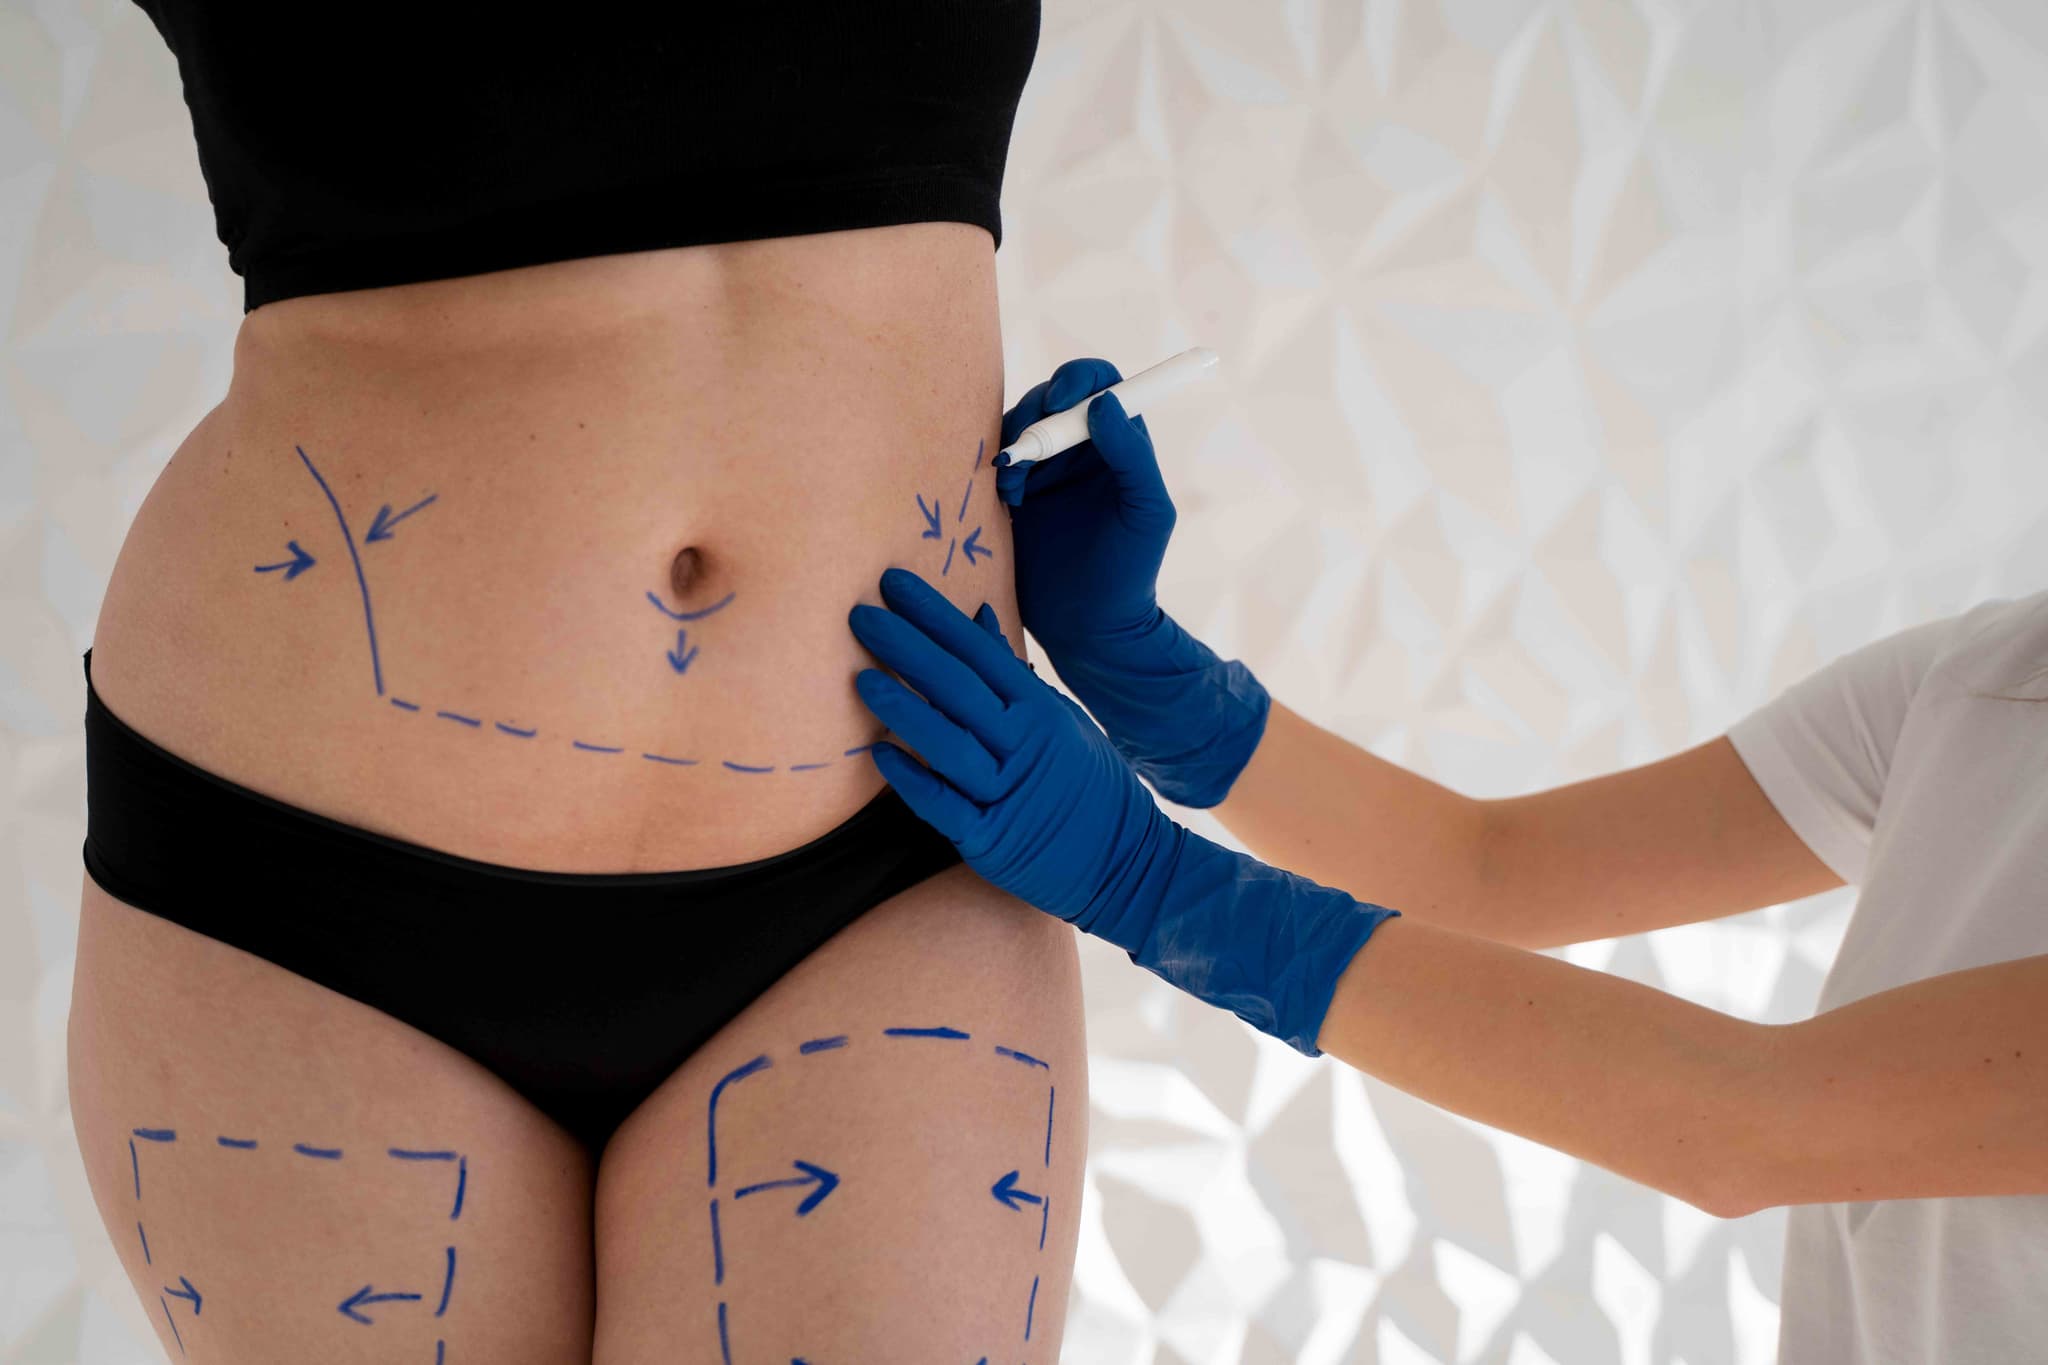
A Lower Body Lift, or belt lipectomy, is a comprehensive 360-degree surgical procedure in 2026 designed to remove a "belt" of excess skin and fat from the entire midsection. It is considered the gold standard for body contouring following massive weight loss (typically 50–100+ lbs) via bariatric surgery or lifestyle changes, where the skin lacks the elasticity to retract on its own.

This procedure is ideal for patients who have achieved significant weight loss and are left with redundant, sagging skin around their entire circumference. Key indications include:

  • Circumferential Skin Laxity: Excess skin that hangs around the abdomen, hips, and back.

  • Abdominal "Pannus": An apron of skin that hangs over the pubic area, often causing hygiene issues or discomfort.

  • Significant Buttock and Thigh Ptosis: Sagging of the gluteal tissue and outer thighs that interferes with movement.

  • Post-Bariatric Stabilization: When a patient has maintained a stable weight for 6–12 months after major weight loss.

  • Desire for Total Midsection Rejuvenation: When a standard tummy tuck is insufficient to address sagging at the hips and lower back.

  • Abdomen: Removes the excess skin apron and tightens the underlying abdominal muscles.

  • Buttocks: Lifts sagging gluteal tissue; can include "auto-augmentation" using the patient's own tissue to restore volume.

  • Hips and Flanks: Eliminates "love handles" and redundant skin along the sides of the torso.

  • Outer Thighs: Provides a significant lift to the lateral thighs, smoothing the transition from the hip to the leg.

  • Surgical Access: A continuous incision is made around the circumference of the torso, positioned where it can be hidden by a belt or underwear line.

  • Tissue Removal: The surgeon removes a large "belt" of skin and underlying fat from the entire midsection.

  • Muscle Repair: The abdominal muscles (rectus diastasis) are tightened to restore core strength and a flat stomach profile.

  • Lifting and Securing: The skin of the lower body is pulled upward, and the skin of the upper body is pulled downward, then secured to deep supportive tissues.

  • Closure: The 360-degree incision is closed in multiple layers to manage tension, and several surgical drains are placed.

  • Medical Clearances: Extensive blood work, an ECG, and a nutritional assessment are mandatory for this 5 to 8-hour surgery.

  • Weight Stability: Patients must provide evidence of a stable weight for at least 6 to 12 months.

  • Nutrition Optimization: In 2026, a high-protein diet is prescribed weeks before surgery to ensure the body has the resources for massive tissue healing.

  • Smoking Cessation: Strict abstinence from smoking and vapes is required for at least 6 weeks before and after to prevent incision failure.

  • Comprehensive Blood Panel: To check hemoglobin, protein levels, and clotting factors.

  • ECG and Cardiac Clearance: Essential due to the length of time the patient will be under general anesthesia.

  • Nutritional Screening: To ensure the patient does not have vitamin deficiencies common after bariatric surgery.

  • Physical Mapping: Detailed measurements of skin laxity to plan the precise location of the 360-degree incision.

  • Hospital Stay: Typically requires an overnight stay (1–2 nights) for monitoring and pain management.

  • Initial Milestones: Patients walk with a slight "stoop" for the first 1–2 weeks to protect the incisions. Drains are usually removed within 14 days.

  • Compression Therapy: Specialized garments (Fajas) are worn 24/7 for 6–8 weeks to reduce swelling and support the new contours.

  • Long-Term Healing: Swelling can take 6–12 months to fully resolve. Scars are permanent but fade significantly over the first year.

  • Total Body Transformation: Addresses the entire midsection in a single surgery, providing a more proportional and toned appearance.

  • Improved Mobility: Removes heavy, hanging skin that can cause physical discomfort or limit exercise.

  • Enhanced Hygiene: Eliminates skin folds that are prone to rashes, infections, and irritation.

  • Psychological Restoration: Provides a "final step" in the weight loss journey, helping patients feel their body truly reflects their hard work.

Thigh Lift Surgery
Thigh Lift Surgery

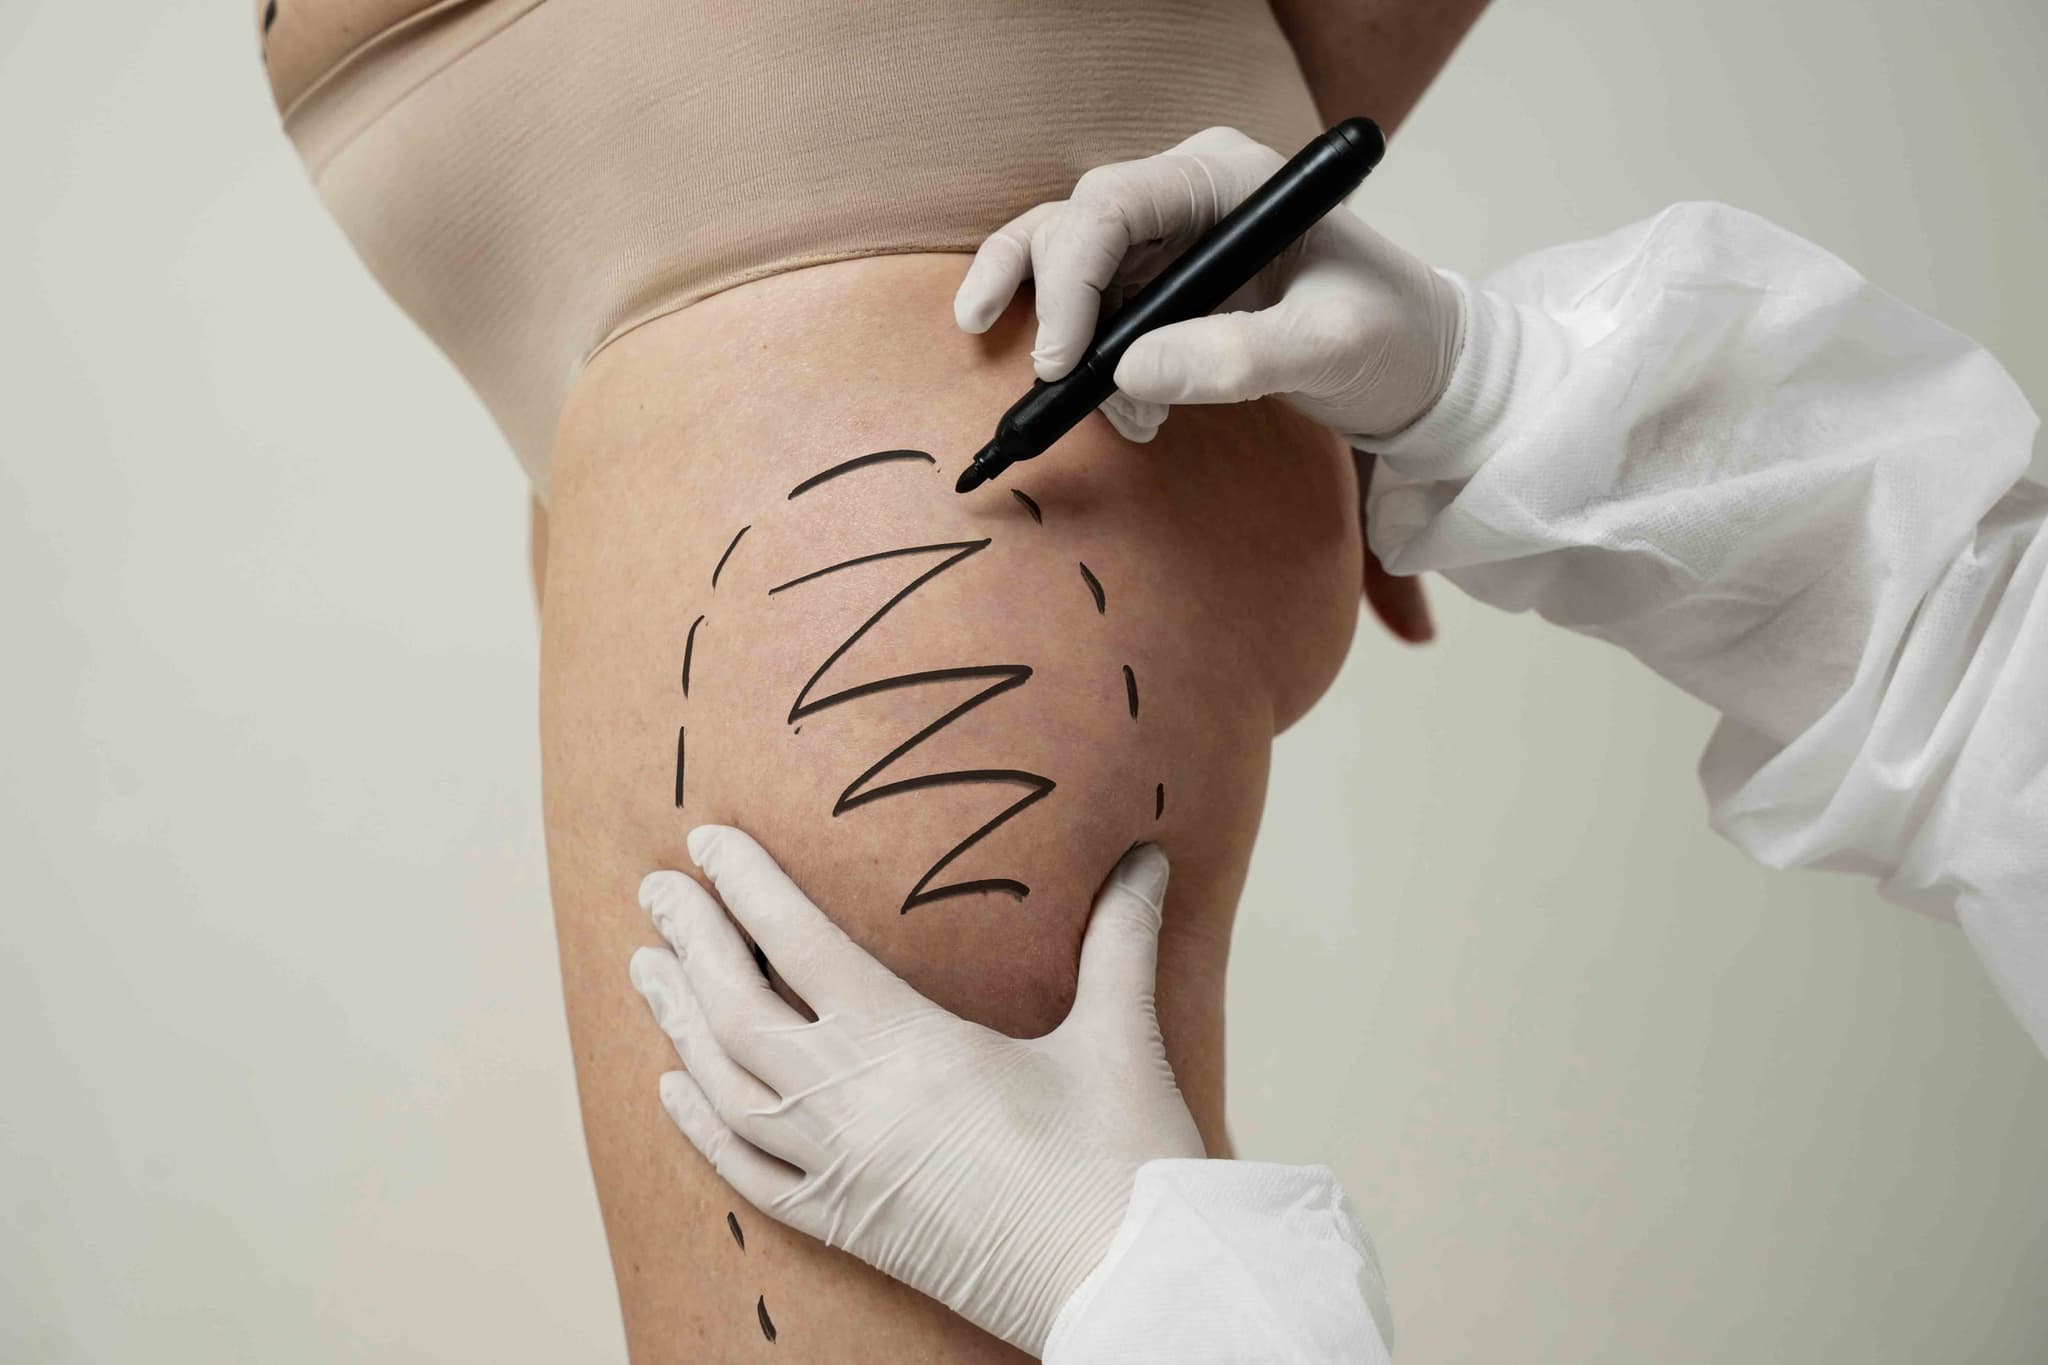
A Thigh Lift, or thighplasty, is a surgical procedure in 2026 designed to remove excess skin and fat from the thigh area. It is a highly effective solution for individuals dealing with skin laxity following significant weight loss or natural aging, where the skin has lost the elasticity required to respond to exercise alone.

This procedure is ideal for patients seeking a smoother, firmer lower body contour. Key indications include:

  • Significant Skin Sagging: "Crepey" or loose skin that hangs from the inner or outer thighs.

  • Post-Weight Loss: Redundant tissue remaining after major weight reduction that causes physical discomfort or chafing.

  • Lower Body Disproportion: Thighs that appear out of proportion with the rest of the toned lower body.

  • Persistent Fat & Skin: Localized fat deposits combined with loose skin that create "ripples" or folds.

  • Limited Mobility: Excess skin that interferes with walking, exercise, or finding comfortable clothing.

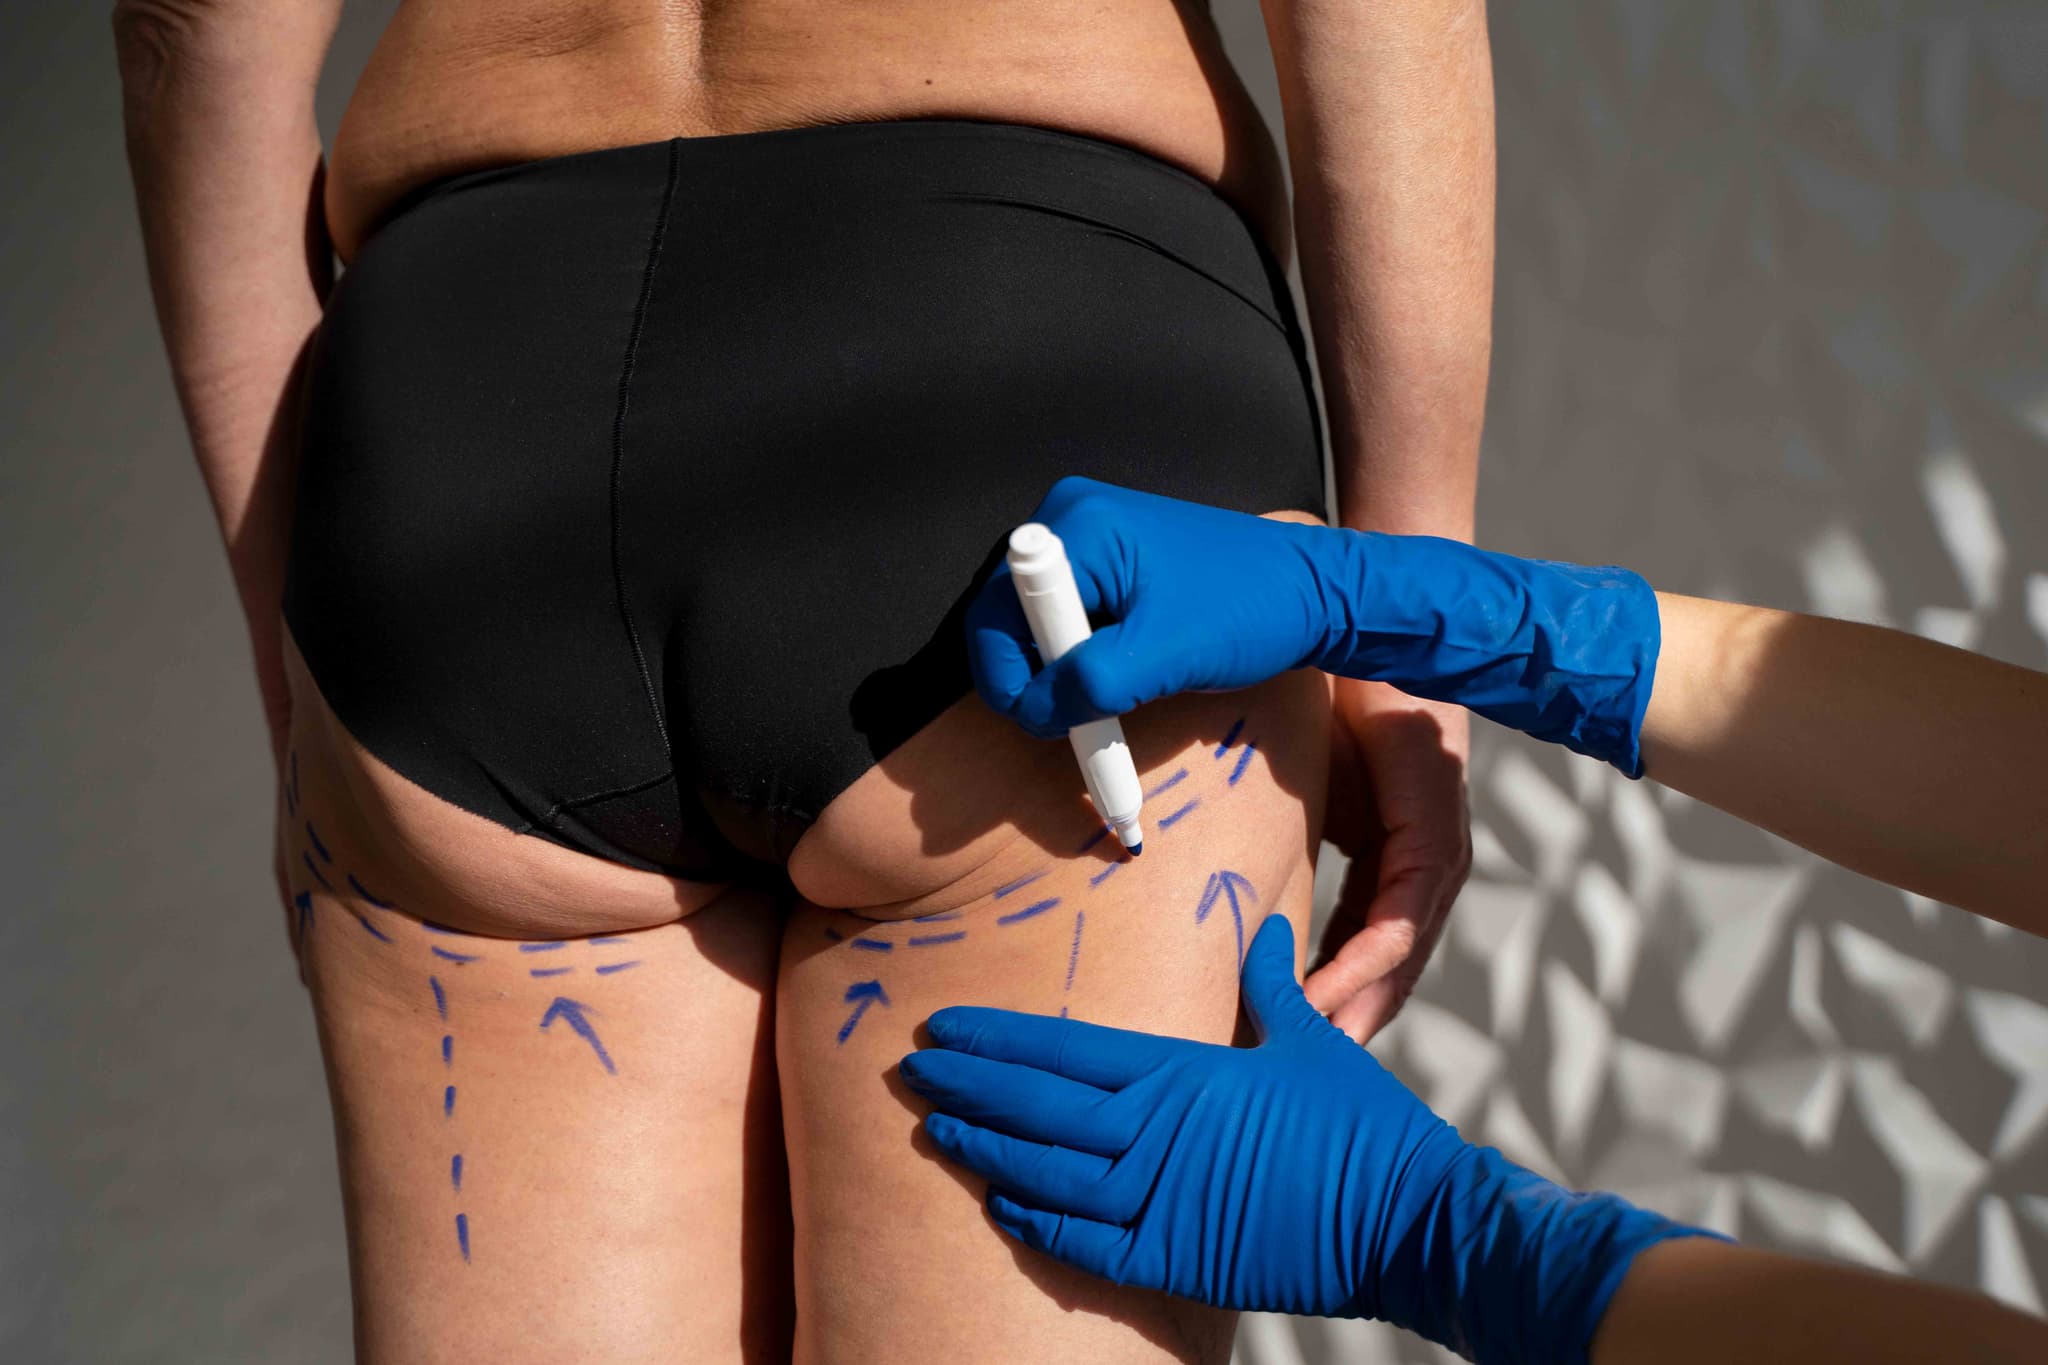
  • Inner (Medial) Thigh Lift: The most common technique, focusing on the upper-inner thigh with incisions hidden in the groin crease.

  • Vertical Thigh Lift: Addresses significant skin laxity extending toward the knee; requires a vertical incision along the inner thigh.

  • Outer (Lateral) Thigh Lift: Targets the outside of the thighs and "saddlebag" areas, often extending the incision toward the hip.

  • Spiral Thigh Lift: A comprehensive 360-degree approach for patients with massive weight loss, addressing the front, back, inner, and outer thigh.

  • Lipo-Thighplasty: A 2026 standard combining thorough liposuction with skin excision to ensure a more sculpted and defined result.

  • Surgical Access: Incisions are strategically placed in the groin fold or along the inner thigh, depending on the volume of tissue to be removed.

  • Fat Contouring: Liposuction is utilized to thin the fatty layer and shape the underlying contours of the leg.

  • Tissue Tightening: A wedge of skin and fat is removed, and the remaining tissue is pulled upward and secured to deep supportive structures.

  • Skin Smoothing: The skin is redraped over the new contour to eliminate sagging and dimples.

  • Closure: The surgeon uses multi-layered suturing to minimize tension on the skin, and compression bandages are applied immediately.

  • Fasting: Patients must fast for 8–12 hours before the 2 to 4-hour surgery.

  • Medical Clearances: Standard blood tests and an ECG are required to ensure the patient is fit for general anesthesia.

  • Weight Stability: Candidates should be at a stable weight for at least 6 months to ensure long-lasting results.

  • Hygiene Protocol: Patients may be prescribed an antibacterial wash to use for several days prior, especially around the groin area.

  • Basic Blood Panel: To evaluate hemoglobin levels and ensure optimal clotting function.

  • ECG: Performed to monitor heart health during the procedure.

  • Physical Assessment: To determine the degree of skin laxity and calculate the necessary incision length for effective correction.

  • Nicotine Screening: Because blood flow is critical for healing in the thigh area, many 2026 surgeons require a nicotine-free test.

  • Hospital Stay: Usually performed as an outpatient procedure, though a 1-night stay may be recommended for more extensive "Spiral" lifts.

  • Initial Milestones: Mobility is limited for the first week; patients must walk slightly hunched to avoid tension on groin incisions.

  • Compression Therapy: Medical-grade compression garments must be worn 24/7 for the first 3 to 6 weeks to support the tissue.

  • Activity Timeline: Most return to light desk work by week 3; full physical activity and high-impact leg workouts are typically resumed by week 8.

  • Smoother Silhouette: Effectively eliminates the "rippled" appearance of loose skin for a firmer look.

  • Reduced Chafing: Removing excess inner-thigh skin significantly reduces skin irritation and discomfort during movement.

  • Better Clothing Fit: Allows for a more comfortable and confident fit in swimwear, shorts, and fitted trousers.

  • Permanent Tissue Removal: Once the excess skin is surgically removed, the results are permanent as long as the patient maintains a stable weight.

Arm Lift (Brachioplasty)

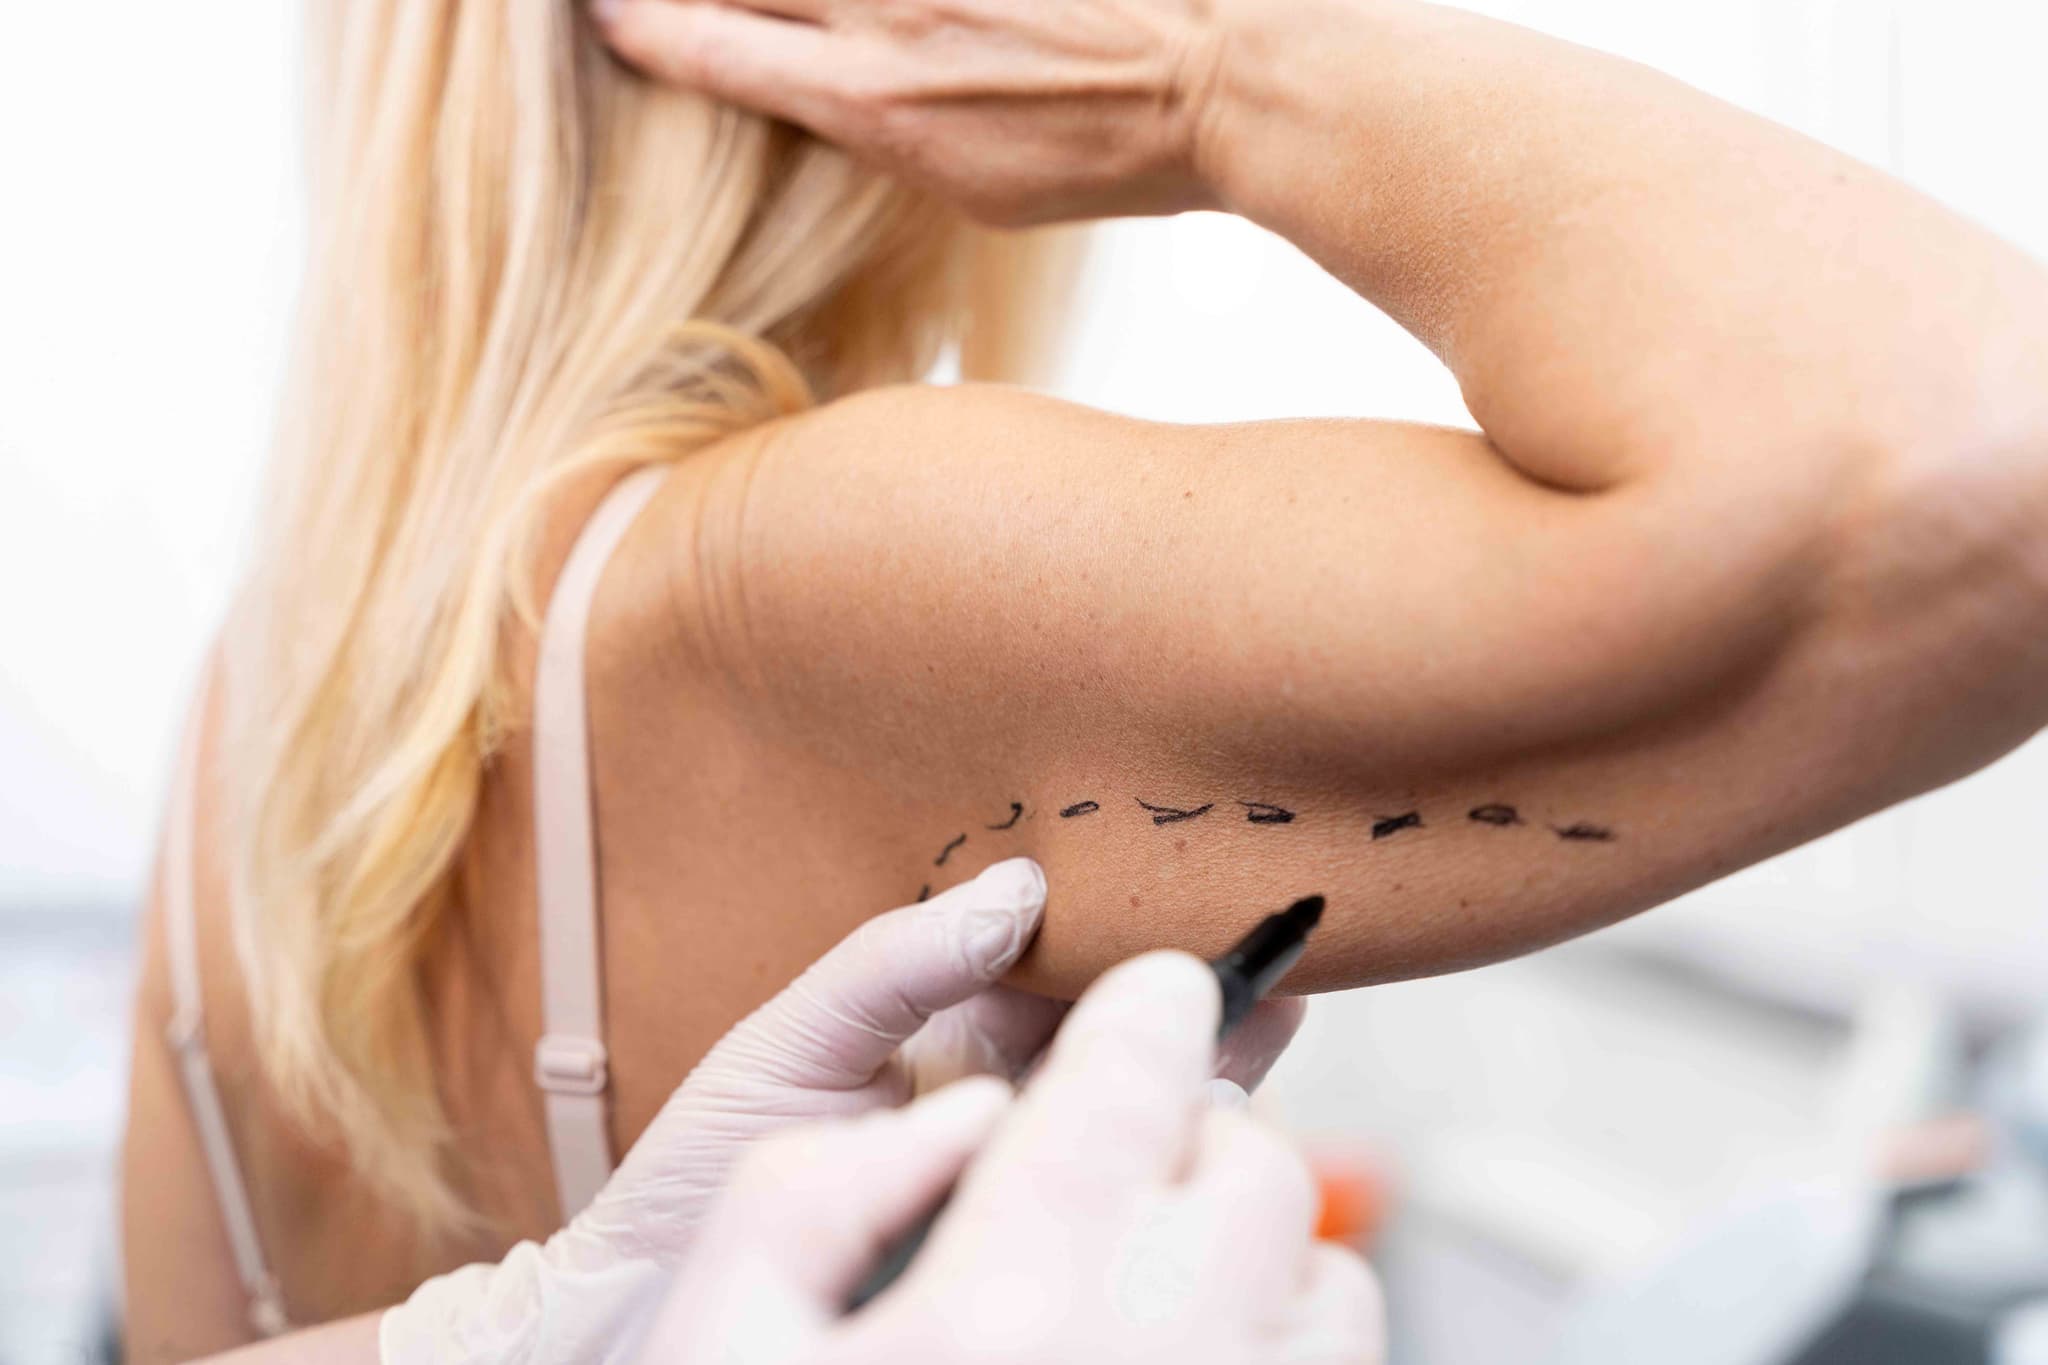
An Arm Lift, or brachioplasty, is a surgical procedure used in 2026 to remove excess, sagging skin and fat from the upper arms. Often referred to as correcting "bat wings," this procedure is most common among individuals who have experienced significant weight loss or natural aging where the skin has lost its ability to retract.

This procedure is ideal for those who have achieved a stable weight but are left with redundant skin that does not respond to exercise. Key indications include:

  • Significant Skin Laxity: Loose, "crepey" skin that hangs from the underside of the upper arm.

  • Post-Weight Loss: Excess tissue remaining after losing a significant amount of weight.

  • Stubborn Arm Fat: Localized fat deposits combined with loose skin that create a heavy arm appearance.

  • Ineffective Toning: When strength training has built muscle, but it remains hidden under sagging tissue.

  • Personal Comfort: Difficulty finding clothing that fits or feeling self-conscious in short-sleeved or sleeveless attire.

  • Traditional Brachioplasty: The most common method, involving an incision from the armpit to the elbow to remove significant amounts of skin.

  • Mini Arm Lift: Utilizes a smaller, crescent-shaped incision hidden in the armpit for patients with minimal sagging.

  • Extended Brachioplasty: The incision continues from the arm onto the side of the chest to address sagging lateral chest tissue.

  • Lipo-Brachioplasty: A 2026 hybrid approach using aggressive liposuction first to protect nerves and lymphatics, followed by skin removal.

  • Non-Surgical Skin Tightening: Radiofrequency or ultrasound treatments for very mild cases (not a substitute for surgery).

  • Surgical Access: The surgeon makes an incision along the underside or back of the arm, strategically placed to be as discrete as possible.

  • Fat Removal: Liposuction is often used first to thin the fat layer and contour the arm.

  • Tissue Tightening: The underlying supportive tissues are reshaped and tightened with internal sutures.

  • Skin Excision: The excess skin is trimmed away, and the remaining skin is smoothed over the new, toned contour.

  • Closure: The incisions are closed with multi-layered sutures, and the arms are wrapped in sterile dressings and compression sleeves.

  • Fasting: Patients must fast for 8–12 hours before the procedure.

  • Medical Clearances: Standard blood tests and an ECG are required to ensure the patient is fit for anesthesia.

  • Weight Stability: Ideal candidates should have maintained a stable weight for at least 6 months.

  • Medication Review: Patients must avoid medications that increase bleeding, such as aspirin or certain herbal supplements, for 2 weeks prior.

  • Basic Blood Panel: To evaluate hemoglobin levels, white blood cell count, and clotting ability.

  • ECG: Performed to monitor heart health during the 2 to 3-hour procedure under general anesthesia.

  • Physical Assessment: To measure the amount of excess skin versus fat and determine the most effective incision pattern.

  • Nicotine Test: In 2026, many surgeons require a nicotine-free test to ensure optimal wound healing and minimize scar widening.

  • Hospital Stay: Usually performed as an outpatient procedure; patients return home the same day.

  • Initial Milestones: Most patients return to light desk work and basic self-care within 1 week.

  • Compression Therapy: Specialized compression sleeves must be worn 24/7 for the first 3 to 4 weeks to manage swelling.

  • Activity Restrictions: No heavy lifting (over 5–10 lbs) or reaching over the head for 6 weeks to protect the incisions.

  • Toned Appearance: Creates a slender, more defined arm profile that reflects the patient’s actual fitness level.

  • Improved Mobility: Removes heavy, excess skin that can cause discomfort or chafing during physical activity.

  • Clothing Confidence: Allows for a wider range of clothing options, including sleeveless tops and well-fitted jackets.

  • Permanent Skin Removal: Once the excess skin is surgically removed, it does not return, provided a stable weight is maintained.

Mommy Makeover
Mommy Makeover

A Mommy Makeover is a customized combination of cosmetic procedures in 2026 designed to restore a woman’s body to its pre-pregnancy shape. Rather than a single surgery, it is a tailored surgical plan that typically addresses the "core" areas most affected by childbearing—the breasts and the abdomen—in a single operative session.

This procedure is ideal for women who have finished having children and wish to address multiple physical changes simultaneously. Key indications include:

  • Abdominal Laxity: Loose skin and weakened muscles (diastasis recti) following pregnancy.

  • Breast Changes: Deflated volume or sagging (ptosis) after breastfeeding or weight fluctuations.

  • Stubborn Fat Deposits: Localized fat in the hips, flanks, or thighs that resists diet and exercise.

  • Post-Pregnancy Body Changes: A desire to restore pre-pregnancy contours and improve body confidence.

  • Desire for Efficiency: Wishing to undergo anesthesia once and navigate a single recovery period for multiple concerns.

  • Abdominoplasty (Tummy Tuck): To tighten the abdominal wall and remove excess skin.

  • Breast Augmentation or Lift: To restore volume and/or reposition the breasts to a more youthful height.

  • Liposuction: Often used to contour the "love handles" and waistline for a more defined silhouette.

  • Hybrid Breast Rejuvenation: Utilizing fat grafting (from liposuction) alongside or instead of implants for a natural finish.

  • Labiaplasty: An optional procedure to address discomfort or aesthetic changes in the vaginal area.

  • Surgical Access: The surgeon performs the planned procedures sequentially, starting with breast surgery and concluding with the abdomen.

  • Targeted Repair: Muscles are tightened, excess skin is removed, and volume is restored according to the patient’s specific goals.

  • Pain Management: In 2026, long-acting "nerve blocks" (like Exparel) are often used to provide significant pain relief for the first 72 hours.

  • Advanced Sculpting: The surgeon uses liposuction to ensure a smooth, harmonious transition between the newly contoured breasts and abdomen.

  • Closure and Drains: Incisions are closed with multi-layered sutures, and surgical drains may be placed to manage fluid during the initial healing phase.

  • Timing: It is recommended to wait at least 6 to 12 months after your last pregnancy or finishing breastfeeding.

  • Childcare Planning: Dedicated help for children is essential, as you cannot lift a toddler for 4 to 6 weeks.

  • Fasting: Patients must fast for 8–12 hours before the 4 to 7-hour surgery.

  • Medical Clearances: Comprehensive blood work, an ECG, and a physical exam are required to ensure safety for a longer surgical session.

  • Basic Blood Panel: To evaluate hemoglobin levels and clotting function for a multi-procedure surgery.

  • ECG: Required to monitor heart health during extended general anesthesia.

  • Mammogram: Standard for any patient undergoing breast surgery to ensure baseline breast health.

  • BMI Assessment: To confirm the patient is at a stable "goal weight," as the makeover is a contouring procedure rather than a weight-loss tool.

  • Hospital Stay: Depending on the complexity, patients may go home the same day or stay for 1 night for observation.

  • Initial Challenges: The first week is the most demanding; mobility is limited, and standing fully upright may take 1 to 2 weeks.

  • Activity Restrictions: No heavy lifting (over 5–10 lbs) for 4 to 6 weeks. Most patients return to light desk work in 2 to 3 weeks.

  • Long-Term Results: Final body contours typically emerge within 6 months as swelling fully resolves and tissues settle.

  • Comprehensive Transformation: Addresses multiple areas of concern in a single surgical event.

  • Single Recovery Period: Streamlines the healing process, requiring only one period of downtime and one round of anesthesia.

  • Restored Core Stability: Repairing abdominal muscle separation improves posture and reduces back pain.

  • Enhanced Self-Confidence: Helps women feel more comfortable and "like themselves" again in their post-pregnancy bodies.

Brazilian Butt Lift (BBL)

A Brazilian Butt Lift (BBL) is a specialized fat transfer procedure that uses a patient's own fat to enhance the size, shape, and contour of the buttocks. This "two-in-one" procedure utilizes liposuction to harvest fat from donor sites—such as the abdomen, hips, or thighs—and re-injects it into the gluteal region to improve overall body proportions.

A BBL is ideal for individuals looking for a natural-feeling enhancement and improved body symmetry. Key indications include:

  • Flat or Sagging Buttocks: Lack of volume or definition in the gluteal area.

  • Asymmetrical Contour: Significant differences in shape or size between the two sides.

  • Body Proportionality: A desire for a "snatched" waist and a more rounded, hourglass silhouette.

  • Post-Weight Loss: Restoring fullness and shape lost after significant weight reduction.

  • Avoidance of Implants: Preference for using natural tissue (autologous fat) rather than synthetic foreign objects.

  • Subcutaneous Injection: Modern safety protocols strictly require fat to be injected into the space above the muscle to prevent serious complications.

  • Ultrasound-Guided BBL: The use of real-time ultrasound imaging to guide the cannula, ensuring precise fat placement and avoiding deep blood vessels.

  • Puregraft/Purification Systems: Advanced filtering technologies used to isolate the healthiest fat cells for a higher "take" or survival rate.

  • "Skinny BBL": A specialized technique for leaner patients that focuses on high-definition harvesting and targeted, smaller-volume transfer.

  • Hybrid BBL: Combining fat transfer with specialized skin-tightening technologies at the donor sites for a more sculpted result.

  • Fat Harvesting: The surgeon performs liposuction on pre-determined donor areas (like the "love handles" or stomach) to collect fat.

  • Purification: The harvested fat is processed to remove impurities, oils, and excess fluids, leaving only viable fat cells.

  • Fat Injection: The purified fat is injected into the buttocks through tiny incisions at various depths within the subcutaneous layer.

  • Sculpting: The surgeon carefully shapes the buttocks and the transition to the waist/thighs to create a harmonious, natural look.

  • Closure: Liposuction and injection sites are closed (often with a single stitch), and a medical-grade compression garment (Faja) is applied.

  • Fasting: Patients are required to fast for 8–12 hours before the surgery.

  • Medical Clearances: Comprehensive blood work, an ECG, and a physical exam are necessary to ensure surgical safety.

  • Nutrition & Health: Patients should be at a stable weight and maintain a healthy, nutrient-rich diet to ensure high fat-cell viability.

  • Nicotine Cessation: Stopping all nicotine products several weeks before and after is mandatory, as smoking significantly reduces fat survival.

  • Basic Blood Panel: To evaluate hemoglobin levels, kidney function, and blood clotting factors.

  • ECG: Performed to monitor heart health during the 2 to 4-hour procedure under general anesthesia.

  • BMI Assessment: To ensure the patient has sufficient donor fat and falls within a safe weight range for elective surgery.

  • Skin Elasticity Check: To assess how well the skin will retract at the liposuction donor sites.

  • The "No-Sit" Phase: For the first 2–3 weeks, patients must avoid sitting or lying directly on the buttocks to ensure fat survival.

  • Support Tools: Specialized BBL pillows are used when sitting is absolutely necessary to shift pressure to the thighs.

  • Compression Therapy: Fajas (compression garments) must be worn for 6–8 weeks to support the donor sites and minimize swelling.

  • Activity Timeline: Light walking is encouraged immediately; desk work can typically be resumed after 2 weeks, and exercise after 6–8 weeks.

  • Natural Results: Uses the patient’s own tissue, providing a more natural look and feel than silicone implants.

  • Dual Transformation: Simultaneously contours problem areas (via liposuction) while enhancing the buttocks.

  • Permanent Enhancement: While some fat is absorbed, the 60–80% that survives is permanent as long as weight remains stable.

  • Improved Silhouette: Creates a more defined waist-to-hip ratio, enhancing both the front and side profiles.

Liposuction Surgery
Liposuction Surgery

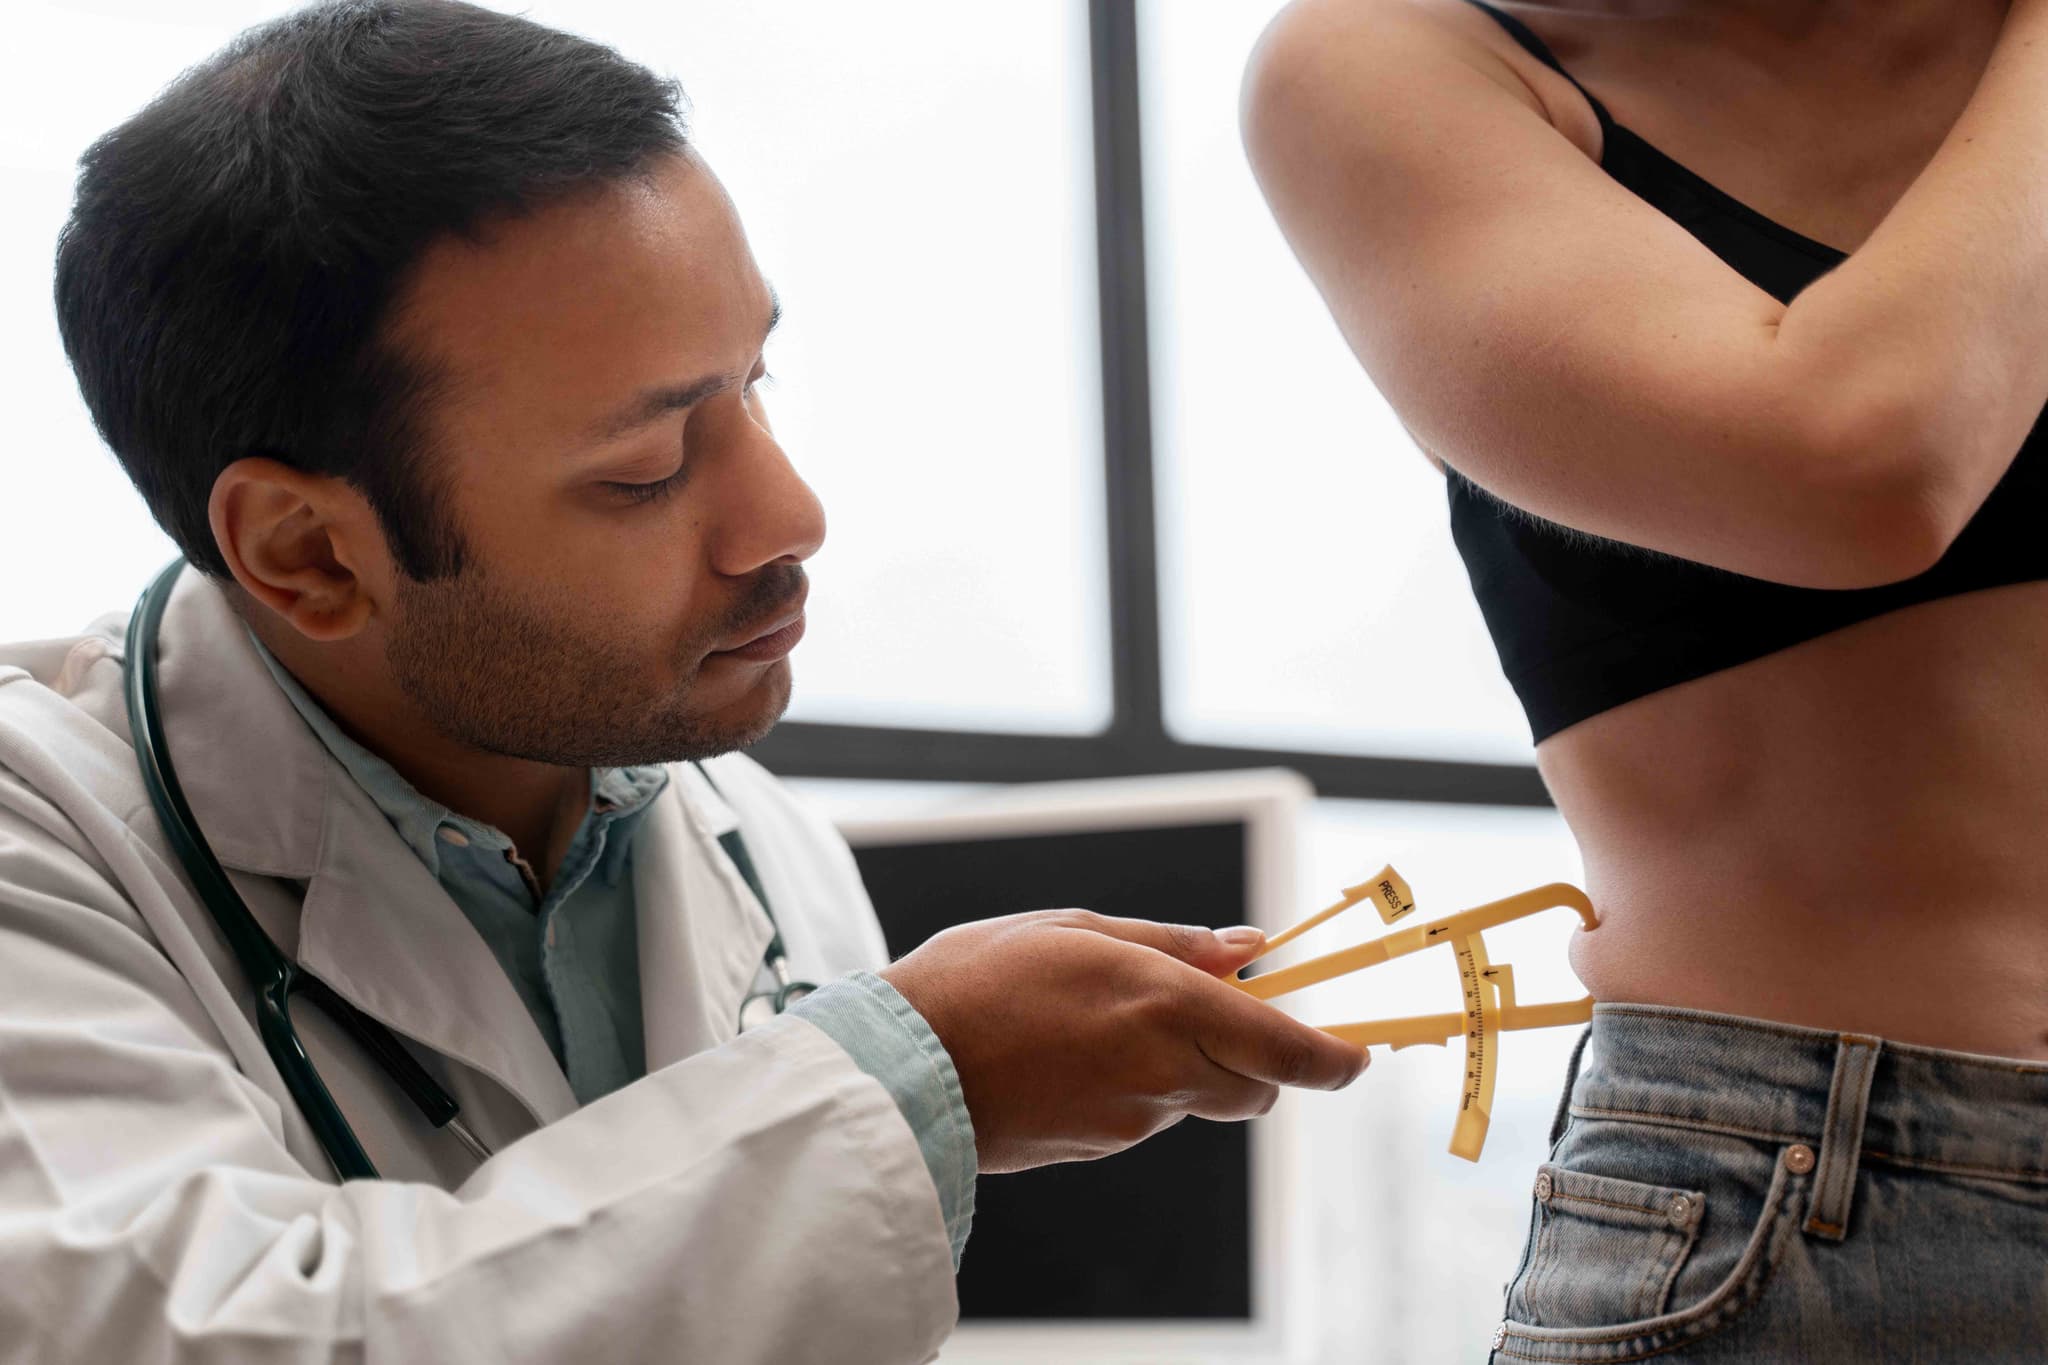
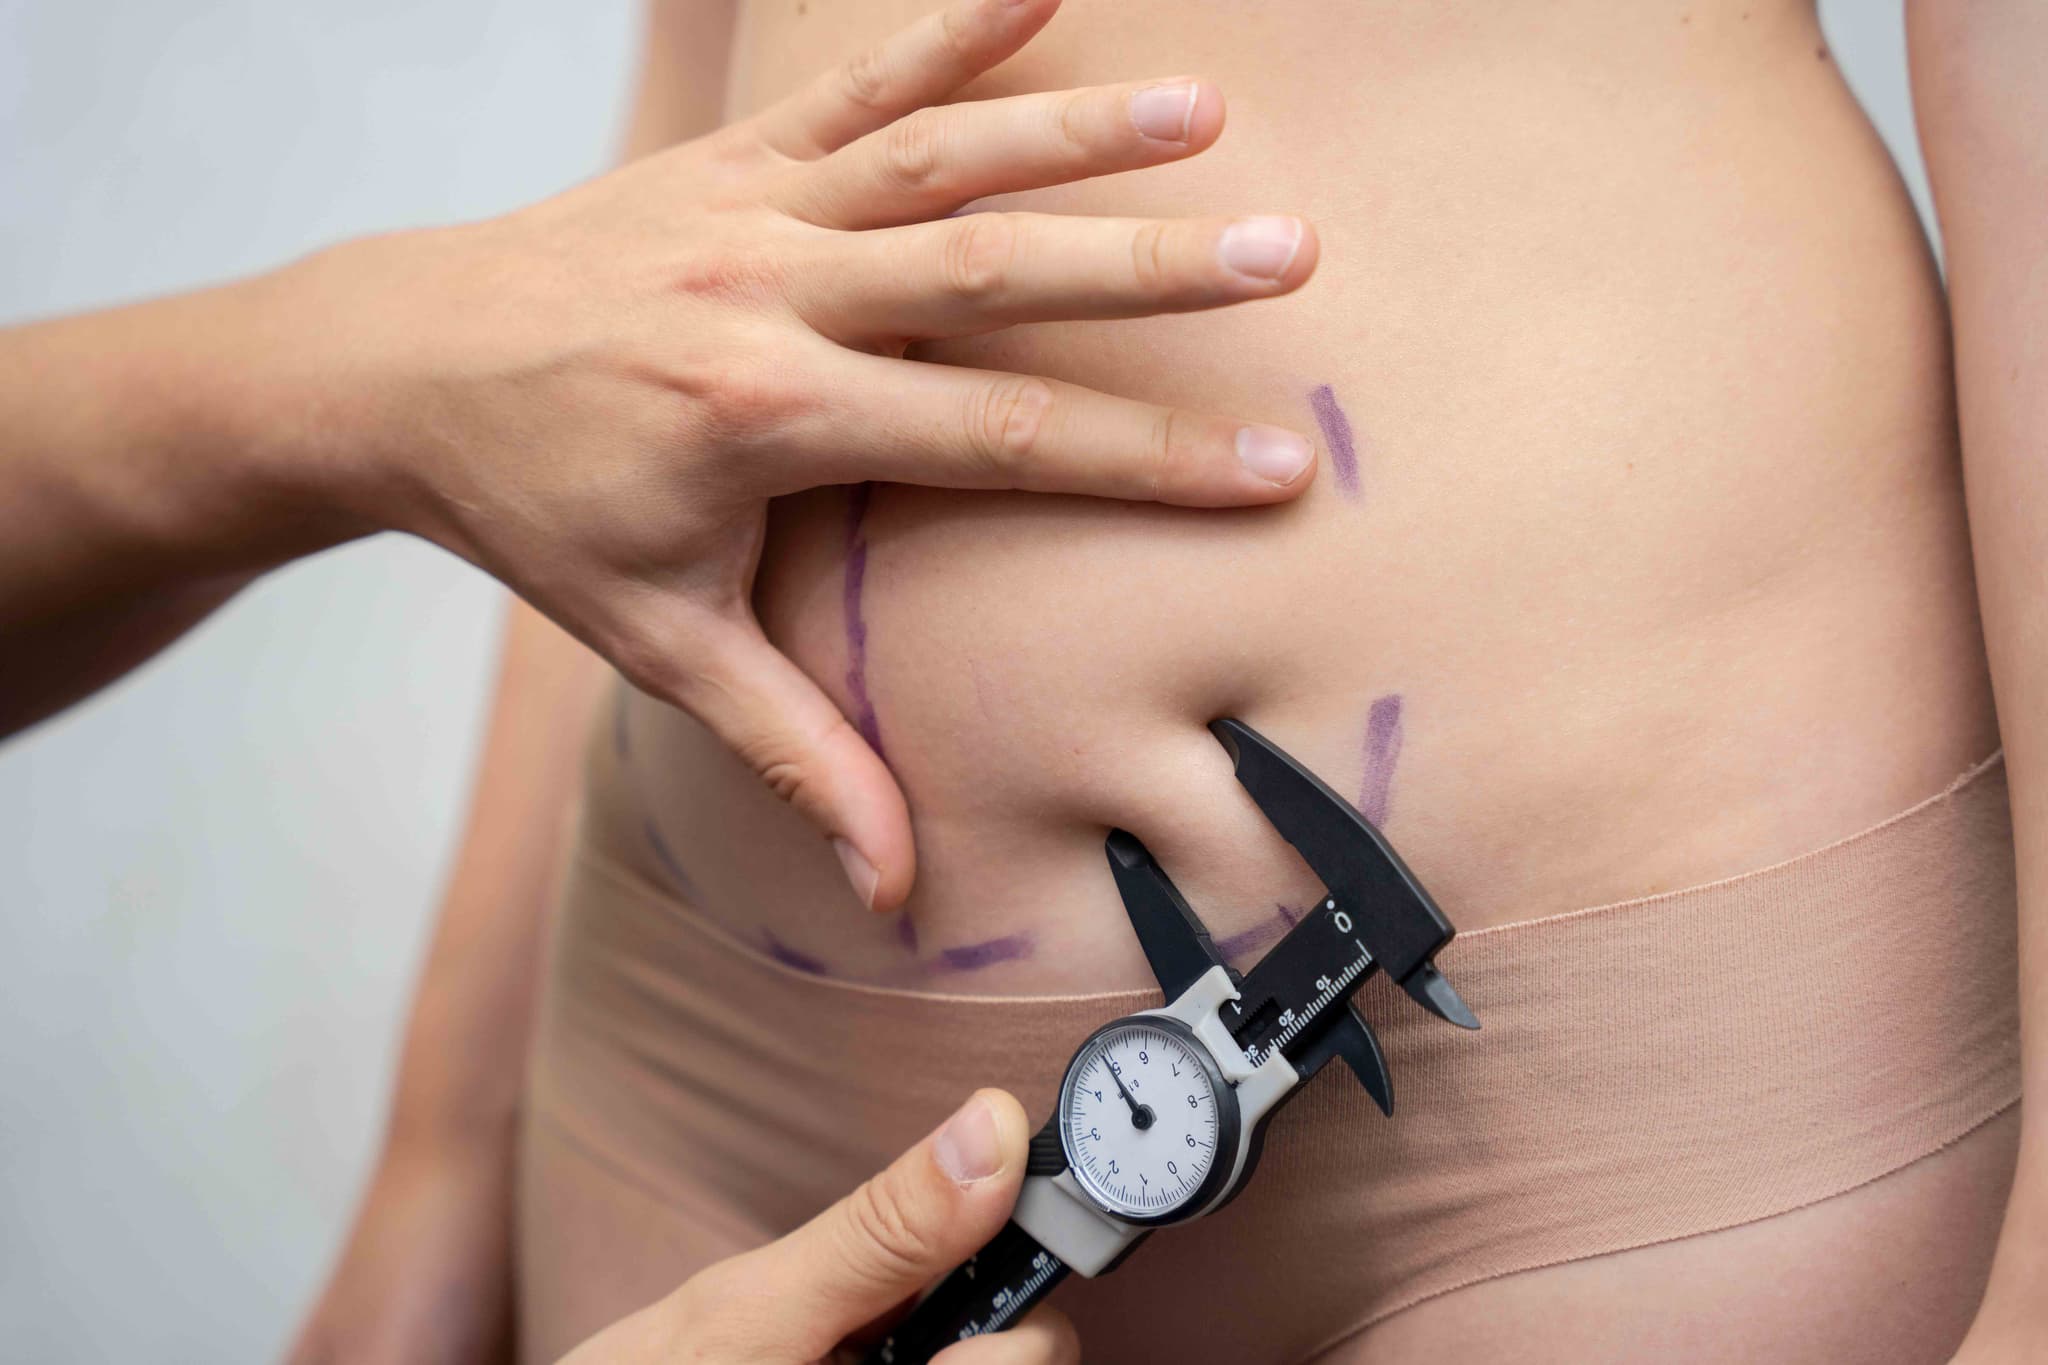
Liposuction is a surgical fat-removal procedure used in 2026 to contour and reshape specific areas of the body. It is designed as a treatment for "stubborn" fat deposits that do not respond to traditional fitness or health-focused efforts, rather than as a primary tool for weight reduction.

This procedure is best suited for individuals near their stable goal weight who wish to address localized areas of concern. Key indications include:

  • Stubborn Fat Deposits: Pockets of fat in the abdomen, hips, thighs, or arms that persist despite a healthy lifestyle.

  • Body Contouring: A desire to improve the silhouette or "sculpt" certain areas for better proportion.

  • Submental Fat: Excess fat under the chin or along the jawline (double chin).

  • Lipomas: Benign fatty tumors that may require removal for comfort or appearance.

  • Gynecomastia: Excess fatty tissue in the male chest area.

  • Tumescent Liposuction: The standard technique utilizing a sterile saline solution to firm the fat, making it easier to remove while minimizing bruising.

  • Vaser (Ultrasound-Assisted): Uses ultrasound energy to "liquefy" fat cells, offering a gentler extraction for surrounding tissues.

  • Laser-Assisted (SmartLipo): Utilizes laser energy to melt fat and can provide a minor collagen-stimulating effect for the skin.

  • High-Definition (HD) Lipo: A specialized sculpting technique used to define the edges of muscle groups for an athletic appearance.

  • Power-Assisted Liposuction (PAL): Uses a vibrating cannula to allow the surgeon to remove fat more efficiently with less manual force.

  • Surgical Access: Tiny incisions (usually a few millimeters) are made in discrete locations near the target area.

  • Fluid Injection: The tumescent solution is injected to numb the area and constrict blood vessels.

  • Fat Removal: A thin tube called a cannula is inserted. The surgeon moves it to loosen the fat, which is then vacuumed out.

  • Sculpting: The surgeon carefully monitors the symmetry and contour of the area to ensure a smooth, balanced result.

  • Closure: Incisions are often left open slightly to allow for drainage or closed with a single stitch, and a compression garment is applied.

  • Fasting: Patients must fast for 8–12 hours before the procedure if receiving sedation or general anesthesia.

  • Medical Clearances: Standard blood tests and an ECG are required to ensure the patient is fit for the procedure.

  • Health Stability: Ideal candidates have maintained a stable weight for at least 6 months prior to surgery.

  • Medication Review: Patients should avoid aspirin, anti-inflammatory drugs, and specific herbal supplements that can increase the risk of bleeding.

  • Basic Blood Panel: To assess hemoglobin levels, kidney function, and blood clotting capability.

  • ECG: Required to monitor heart health, especially for larger volume procedures.

  • Skin Elasticity Assessment: To determine if the skin has enough snap-back to retract smoothly after fat removal.

  • Pregnancy Test: To ensure the patient is not currently pregnant before undergoing anesthesia.

  • Hospital Stay: Usually an outpatient procedure; patients return home the same day.

  • Compression Therapy: A specialized garment must be worn 24/7 for the first 2 weeks to prevent fluid buildup (seroma) and ensure smooth results.

  • Activity Timeline: Most patients return to light work within 1 week; strenuous exercise is typically resumed at the 4-week mark.

  • Long-Term Maintenance: While removed fat cells do not grow back, maintaining a balanced, healthy lifestyle is essential to prevent the expansion of remaining fat cells.

  • Permanent Fat Cell Removal: The fat cells extracted during the procedure are gone forever.

  • Precision Contouring: Allows for targeted reshaping of areas that are difficult to change through other means.

  • Immediate Silhouette Improvement: Provides a visible change in body proportions once initial swelling subsides.

  • Enhanced Confidence: Helps many patients feel more comfortable in their clothing and more satisfied with their physical profile.

Gynecomastia Treatment (Male Breast Reduction)

Gynecomastia surgery, or male breast reduction, is a procedure used in 2026 to reduce enlarged breast tissue in men. It addresses the appearance of "man boobs" caused by genetics, hormonal imbalances, certain medications, or weight fluctuations that do not respond to traditional diet or exercise.

This procedure is recommended for men who have completed puberty and are looking to achieve a more contoured chest. Key indications include:

  • Excess Glandular Tissue: Firm, rubbery tissue beneath the nipple that cannot be lost through exercise.

  • Stubborn Chest Fat: Localized fat deposits that create a feminine chest appearance despite a healthy lifestyle.

  • Sagging Skin: Loose skin on the chest following significant weight loss.

  • Asymmetry: One side of the chest appearing significantly larger or differently shaped than the other.

  • Psychological Impact: Feeling self-conscious or avoiding certain clothing and social activities due to chest appearance.

  • Liposuction: Utilizes a small cannula to vacuum out excess fatty tissue; often the primary method for "pseudo-gynecomastia."

  • Surgical Excision: The direct removal of firm glandular tissue or excess skin, typically performed through an incision around the nipple.

  • Vaser or Laser-Assisted Liposuction: 2026 standards often use these technologies to liquefy fat and stimulate skin tightening simultaneously.

  • High-Definition Sculpting: A technique used to etch the borders of the pectoral muscles for a more "athletic" and defined look.

  • Combination Approach: Using both liposuction for smooth contouring and excision for firm tissue removal to achieve the best result.

  • Surgical Access: Small incisions are made either in the armpit for liposuction or along the edge of the areola (periareolar) for excision.

  • Fat and Tissue Removal: The surgeon removes excess fat via liposuction and meticulously trims away the firm glandular tissue.

  • Chest Contouring: The remaining tissue is sculpted to ensure a smooth transition between the chest wall and the surrounding areas.

  • Nipple Repositioning: If necessary, the nipple and areola are shifted to a more natural position on the flattened chest mound.

  • Closure: The small incisions are closed with fine sutures, and a medical-grade compression vest is applied immediately to manage swelling.

  • Fasting: Patients are typically required to fast for 8–12 hours before the surgery.

  • Hormonal Evaluation: In 2026, blood tests are standard to rule out treatable hormonal imbalances or underlying medical causes.

  • Medical Clearances: Basic blood work and an ECG are performed to ensure the patient is fit for anesthesia.

  • Substance Review: Patients must avoid anabolic steroids, certain supplements, and nicotine for several weeks to ensure safe healing and permanent results.

  • Testosterone & Estrogen Panel: To check for hormonal fluctuations that may be contributing to tissue growth.

  • Chest Ultrasound: Sometimes used to differentiate between fatty tissue (adipose) and glandular breast tissue.

  • Basic Blood Panel: To evaluate hemoglobin levels, kidney function, and blood clotting ability.

  • ECG: Performed to monitor heart health during the 1.5 to 3-hour procedure.

  • Hospital Stay: Usually performed as an outpatient procedure; patients return home the same day.

  • Compression Therapy: A compression vest must be worn 24/7 for the first 3–4 weeks to ensure the skin adheres properly to the muscle.

  • Activity Timeline: Most patients return to desk work within 1 week. Light lower-body exercise is permitted by week 3.

  • Full Gym Access: Heavy lifting and chest-specific exercises (like bench presses) are typically restricted until the 6-week mark.

  • Masculine Chest Contour: Creates a flatter, firmer, and more traditionally masculine appearance.

  • Permanent Results: Provided the patient maintains a stable weight and avoids triggering substances, the removed tissue does not return.

  • Enhanced Confidence: Significantly improves self-esteem and comfort in tight-fitting clothing or at the beach/gym.

  • Minimal Scarring: Incisions placed along the border of the areola become nearly invisible once fully healed.

Breast Reduction Surgery

Breast Reduction, or reduction mammoplasty, is a surgical procedure in 2026 designed to remove excess breast fat, glandular tissue, and skin. Unlike many other cosmetic surgeries, it is frequently performed for functional and medical reasons to alleviate physical discomfort and improve a patient's overall quality of life.

This procedure is primarily recommended for individuals whose breast size causes physical pain or limits daily activities. Key indications include:

  • Chronic Pain: Persistent back, neck, and shoulder pain caused by the weight of large breasts.

  • Shoulder Grooving: Deep indentations in the shoulders caused by bra straps.

  • Skin Irritation: Chronic rashes or infections in the fold beneath the breasts (intertrigo).

  • Restricted Activity: Difficulty participating in sports or physical exercise due to breast size.

  • Postural Issues: Noticeable slumping or spinal discomfort caused by a heavy chest.

  • Vertical (Lollipop) Incision: An incision around the areola and a vertical line down to the breast crease; used for moderate reductions.

  • Inverted-T (Anchor) Incision: The most common technique for significant reductions, involving an incision around the areola, a vertical line, and a horizontal line along the breast fold.

  • Liposuction-Assisted Reduction: Sometimes used in 2026 as a standalone for fatty breast tissue or in combination with traditional methods to refine the lateral contours.

  • Nipple-Areola Repositioning: Shifting the nipple to a higher, more youthful position while maintaining its blood and nerve supply.

  • Areola Reduction: Reducing the diameter of the areola to ensure it is in proportion with the new breast size.

  • Surgical Access: Incisions are made following the chosen pattern (Lollipop or Anchor) to allow the surgeon to reach the underlying tissue.

  • Tissue Removal: The surgeon removes excess glandular tissue, fat, and skin to achieve the target weight and volume.

  • Reshaping and Lifting: The remaining breast tissue is reshaped and lifted into a higher, firmer position on the chest wall.

  • Nipple Relocation: The nipple-areola complex is moved upward to the center of the new breast mound.

  • Closure: The incisions are closed with multi-layered sutures, and surgical drains may be placed to prevent fluid accumulation during the initial 48 hours.

  • Fasting: Patients are typically required to fast for 8–12 hours before the surgery.

  • Medical Clearances: Standard blood tests, an ECG, and a baseline mammogram are mandatory for surgical safety.

  • Documentation of Symptoms: In 2026, many insurance providers require documented proof of chronic pain or rashes to approve coverage.

  • Nicotine Cessation: Patients must stop all nicotine use several weeks before and after surgery to ensure proper blood flow and wound healing.

  • Mammogram: Essential to confirm breast health and identify any abnormalities before the tissue is modified.

  • Basic Blood Panel: To assess overall health markers, including hemoglobin and clotting function.

  • ECG: Performed to monitor the heart's rhythm during the 2 to 4-hour procedure under general anesthesia.

  • Tissue Weight Calculation: Surgeons often estimate the weight of tissue to be removed (in grams) to meet insurance requirements for medical necessity.

  • Hospital Stay: Often performed as an outpatient procedure, though some patients may stay 1 day for observation.

  • Initial Milestones: Most patients return to light daily activities and desk work within 1 week.

  • Activity Restrictions: No lifting heavier than 5–10 lbs (including groceries or children) for the first 3 to 4 weeks.

  • Long-Term Healing: Breasts settle into their permanent shape over 6 to 12 months, and scars continue to fade and flatten over the first year.

  • Physical Pain Relief: Significant and often immediate reduction in back, neck, and shoulder pain.

  • Improved Posture: Relieves the strain on the spine, allowing for a more upright and comfortable stance.

  • Increased Mobility: Makes physical exercise and sports significantly more comfortable and accessible.

  • Enhanced Body Proportion: Creates a balanced silhouette that better fits the patient's frame and clothing.

Breast Implants (Augmentation)

Breast Augmentation, or "augmentation mammoplasty," is a surgical procedure to increase breast size, change shape, or improve symmetry. In 2026, the focus has shifted toward "Natural Look" results, utilizing highly cohesive silicone gels and "hybrid" techniques that combine implants with the patient's own fat for a seamless finish.

This procedure is ideal for individuals looking to enhance their silhouette or restore volume. Key indications include:

  • Volume Loss: Restoring fullness lost due to pregnancy, breastfeeding, or significant weight loss.

  • Micromastia: Addressing naturally small breast size to achieve desired body proportions.

  • Asymmetry: Correcting significant differences in size or shape between the two breasts.

  • Cosmetic Refinement: Enhancing the "cleavage" area or improving the overall contour of the breast mound.

  • Reconstructive Needs: Following previous surgeries or injuries to restore a balanced appearance.

  • Silicone Gel Implants: The 2026 standard "gummy bear" implants that maintain their shape and provide a natural feel.

  • Saline Implants: Filled with sterile salt water; these allow for smaller incisions as they are filled after placement.

  • Hybrid Breast Augmentation: A modern technique combining a smaller implant with fat grafting (liposuction) to create softer edges.

  • Submuscular Placement: Placing the implant under the chest muscle for better coverage and a more natural look.

  • Subglandular Placement: Placing the implant over the muscle, typically offering a shorter initial recovery time.

  • Surgical Access: Incisions are made in discrete locations, such as the breast crease (inframammary), around the nipple (periareolar), or the armpit (transaxillary).

  • Pocket Creation: The surgeon creates a space either above or below the pectoral muscle to house the implant.

  • Implant Insertion: The selected implant is carefully placed and positioned to ensure optimal symmetry and contour.

  • "Internal Bra" Support: In some 2026 cases, surgical mesh (ADMs) is used to provide extra internal support and prevent the implant from shifting.

  • Closure: The incisions are closed with multi-layered sutures, and a surgical support bra is applied to stabilize the new volume.

  • Fasting: Patients are typically required to fast for 8–12 hours before the surgery.

  • Medical Clearances: Standard blood tests, an ECG, and a baseline mammogram are required to ensure patient safety.

  • Nicotine Cessation: Stopping all nicotine products several weeks before and after surgery is essential to prevent healing complications.

  • Medication Review: Avoiding medications like aspirin or ibuprofen that can increase the risk of post-operative bruising.

  • Mammogram: Essential for documenting breast health and ensuring no underlying masses are present before surgery.

  • Basic Blood Panel: To evaluate overall health, hemoglobin levels, and clotting function.

  • ECG: Performed to monitor heart health during the 1 to 2-hour procedure under general anesthesia.

  • Pregnancy Test: To ensure the patient is not currently pregnant before undergoing anesthesia and surgery.

  • Hospital Stay: Usually performed as an outpatient procedure; patients return home the same day.

  • Initial Milestones: Most patients return to non-strenuous desk work within 1 week.

  • Activity Restrictions: Upper-body workouts and heavy lifting are restricted for 4 to 6 weeks.

  • Long-Term Settling: Implants typically "drop and fluff" (settle into their natural position) over a period of 3 to 6 months.

  • Enhanced Body Proportion: Creates a balanced silhouette and improves the fit of clothing and swimwear.

  • Restored Fullness: Effectively addresses "deflated" breast tissue following life events like pregnancy or weight loss.

  • High Safety Standards: Modern 2026 cohesive gel implants and smooth surfaces offer high durability and lower complication rates.

  • Boosted Self-Confidence: Resolves long-standing concerns regarding breast size or symmetry with immediate, visible results.

Breast Lift Surgery (Mastopexy)

A Breast Lift, or mastopexy, is a surgical procedure designed to raise and firm the breasts by removing excess skin and tightening the surrounding tissue. It is primarily used to correct "ptosis" (sagging) caused by pregnancy, breastfeeding, weight fluctuations, or the natural aging process.

This procedure is ideal for individuals who are satisfied with their breast size but unhappy with the position or shape. Key indications include:

  • Breast Ptosis: Breasts that have lost their youthful shape and begun to sag.

  • Nipple Position: Nipples that point downward or fall below the breast crease.

  • Stretched Skin: Loss of skin elasticity leading to a "heavy" or pendulous appearance.

  • Large Areolas: Enlarged areolas that have stretched over time and are out of proportion with the breast.

  • Post-Weight Loss/Pregnancy: Changes in breast volume and skin tightness following significant life events.

  • Crescent Lift: A minor lift involving a small incision along the top half of the areola.

  • Peri-Areolar (Donut) Lift: A circular incision around the entire areola, ideal for mild sagging.

  • Vertical (Lollipop) Lift: An incision around the areola and a vertical line down to the breast crease, used for moderate sagging.

  • Inverted-T (Anchor) Lift: The most comprehensive technique for major sagging, involving incisions around the areola, vertically down, and along the breast crease.

  • Internal Bra Technique: A 2026 trend using specialized mesh or sutures to provide extra internal support and long-term stability.

  • Surgical Access: Incisions are made based on the chosen technique (Crescent, Lollipop, or Anchor) to access the underlying tissue.

  • Reshaping: The surgeon lifts and reshapes the breast tissue to create a firmer, more youthful contour.

  • Nipple Repositioning: The nipple and areola are moved to a higher, more centered position on the breast mound.

  • Skin Removal: Excess, stretched skin is carefully trimmed away to tighten the remaining envelope.

  • Closure: Incisions are closed with fine sutures, and a specialized surgical support bra is typically applied immediately.

  • Fasting: Patients are typically required to fast for 8–12 hours before the surgery.

  • Medical Clearances: Standard blood tests, an ECG, and often a baseline mammogram are required for patients over a certain age.

  • Medication Review: Avoiding aspirin, anti-inflammatory drugs, and certain supplements that can increase bleeding risks.

  • Nicotine Cessation: Stopping all nicotine products several weeks before and after surgery is mandatory to ensure proper wound healing.

  • Mammogram: To ensure breast health and establish a baseline before changing the breast architecture.

  • Basic Blood Panel: To evaluate overall health, hemoglobin levels, and clotting function.

  • ECG: Performed to monitor heart health during the 2 to 3-hour procedure under general anesthesia.

  • Physical Assessment: To determine the grade of ptosis and select the appropriate incision technique.

  • Hospital Stay: Usually performed as an outpatient procedure, with patients returning home the same day.

  • Initial Milestones: Most patients return to desk work and light daily activities within 1 week.

  • Activity Restrictions: No heavy lifting or high-impact exercise (like running) for 4 to 6 weeks.

  • Support Garments: A surgical bra must be worn initially, followed by a supportive sports bra; underwire bras must be avoided for at least 6 to 8 weeks.

  • Youthful Contour: Restores a firmer, higher, and more aesthetically pleasing breast shape.

  • Improved Body Proportion: Repositions the nipples and reshapes the breast mound to better suit the patient's frame.

  • Clothing Fit: Allows for a wider range of clothing and swimwear styles to fit more comfortably and attractively.

  • Long-Term Transformation: Provides a durable correction that can be further enhanced when combined with implants (Mastopexy-Augmentation).

Brow Lift Surgery (Browplasty)

A Brow Lift, or forehead lift, is a surgical procedure designed to reposition a sagging or "hooded" brow, reduce forehead wrinkles, and open up the appearance of the eyes. It is frequently combined with blepharoplasty (eyelid surgery) for a complete and harmonious upper-face rejuvenation.

A brow lift is ideal for patients who look "tired," "sad," or "angry" even when well-rested. Key indications include:

  • Sagging Brows: Eyebrows that have dropped into a low position, creating a heavy appearance.

  • Hooded Eyes: Excess skin from the brow area weighing down the upper eyelids.

  • Forehead Furrows: Deep horizontal wrinkles across the forehead that do not respond to non-surgical treatments.

  • Frown Lines: Vertical creases between the eyebrows (glabellar lines).

  • Asymmetrical Brows: When one eyebrow is significantly lower than the other.

  • Endoscopic Brow Lift: The most common modern technique, utilizing a tiny camera and specialized tools through small incisions hidden within the hair.

  • Temporal (Lateral) Brow Lift: Focuses specifically on lifting the outer corners or "tails" of the eyebrows.

  • Trichophytic Brow Lift: An incision is made at the hairline, specifically designed for patients who wish to lift the brow while lowering a high hairline.

  • Coronal Brow Lift: The traditional method involving an ear-to-ear incision; reserved for severe sagging cases.

  • Non-Surgical Brow Lift: Using neurotoxins or thread lifts for temporary elevation without surgery.

  • Surgical Access: Depending on the technique, small incisions are made within the hair or along the hairline to ensure scars remain hidden.

  • Tissue Repositioning: The surgeon lifts the skin and underlying tissues of the forehead to a more youthful, elevated position.

  • Muscle Modification: The muscles that cause deep frown lines are weakened or released to smooth the forehead surface.

  • Securing the Lift: Specialized sutures, screws, or absorbable devices are used to hold the brow in its new position during the healing process.

  • Closure: The incisions are closed with sutures or surgical staples, and the head is typically wrapped in a supportive bandage.

  • Fasting: Patients are typically required to fast for 8–12 hours before the surgery.

  • Medical Clearances: Comprehensive blood tests and a physical exam are conducted to ensure fitness for anesthesia.

  • Hair Care: Patients may be asked to wash their hair with antimicrobial soap but avoid any chemical treatments (dyes/perms) several days prior.

  • Medication Review: Avoiding aspirin and anti-inflammatory drugs for 2 weeks to minimize the risk of bruising and bleeding.

  • Basic Blood Panel: To evaluate overall health and ensure proper blood clotting.

  • ECG: Performed for older patients to monitor heart rhythm during the 1 to 2-hour procedure.

  • Physical Assessment: To evaluate the degree of brow ptosis (sagging) and forehead skin elasticity.

  • 3D Facial Mapping: Often used to plan the desired height and arch of the brow for a natural result.

  • Hospital Stay: Usually performed as an outpatient procedure; patients return home the same day.

  • Initial Milestones: Bandages are removed within 1–3 days; sutures or staples are typically removed by the end of the first week.

  • Scalp Management: Temporary numbness or itching on the scalp is common and usually resolves within a few months.

  • Activity Timeline: Most patients return to work within 2 weeks; strenuous exercise can typically be resumed after 1 month.

  • Refreshed Appearance: Eliminates the "tired" or "angry" look by opening up the eye area.

  • Smoother Forehead: Significantly reduces deep horizontal furrows and frown lines for a more youthful look.

  • Long-Lasting Results: Provides a durable correction that typically remains effective for 10 to 12 years.

  • Natural-Looking Scars: Advanced endoscopic techniques ensure that surgical marks are completely concealed within the hairline.

Asymmetrical Face (Facial Implant Surgery)

A Facelift, or rhytidectomy, is a major surgical procedure in 2026 designed to rejuvenate the face by repositioning skin and tightening the underlying muscles. It is the most comprehensive solution for addressing sagging tissues caused by aging, gravity, and the loss of facial volume.

This procedure is ideal for individuals looking to reverse significant signs of facial aging. Key indications include:

  • Formation of Jowls: Loose skin and fat deposits along the jawline.

  • Sagging Cheeks: Loss of mid-face volume and downward displacement of cheek tissues.

  • Loose Neck Skin: Often referred to as "turkey neck" or prominent vertical bands in the neck.

  • Deep Nasolabial Folds: Deepening creases running from the nose to the corners of the mouth.

  • Facial Tissue Laxity: General sagging that does not respond to non-surgical fillers or skin tightening treatments.

  • Full Facelift: The standard approach for significant aging, addressing the lower face, jawline, and neck.

  • Mini Facelift: A less invasive option focusing on the jawline and jowls, ideal for moderate sagging with shorter recovery times.

  • Deep Plane Facelift: An advanced technique that lifts the muscle and skin as one unit for superior mid-face rejuvenation.

  • SMAS (Superficial Musculoaponeurotic System) Lift: Focuses on tightening the muscular layer beneath the skin to ensure a natural, long-lasting look.

  • Neck Lift: Specifically targets the area under the chin and the neck muscles, often performed in conjunction with a facelift.

  • Surgical Access: Incisions are strategically placed in the hairline at the temples and continue around the ear to ensure scars are hidden in natural folds.

  • Muscle Repositioning: The surgeon lifts and tightens the SMAS layer (the underlying muscle) to provide a structural foundation for the face.

  • Skin Redraping: The skin is carefully draped over the newly contoured facial structures, and excess skin is trimmed away.

  • Closing the Incisions: Fine sutures are used to close the incisions, and the head is typically wrapped in a compression bandage to manage swelling.

  • Verification: The surgeon ensures facial symmetry and a natural "un-pulled" appearance before concluding the procedure.

  • Fasting: Patients are typically required to fast for 8–12 hours before the surgery.

  • Medical Clearances: Comprehensive blood tests and a physical exam are conducted to ensure fitness for general anesthesia.

  • Smoking Cessation: Patients must quit smoking and vaping several weeks before and after surgery to prevent tissue necrosis and ensure healthy blood flow.

  • Medication Review: Avoiding aspirin and blood-thinning supplements to minimize the risk of hematoma or excessive bruising.

  • Basic Blood Panel: To evaluate health markers and clotting ability.

  • ECG: To monitor heart rhythm and ensure safety during a 3 to 6-hour procedure.

  • Physical Assessment: To evaluate skin elasticity, bone structure, and the degree of tissue laxity.

  • 3D Facial Imaging: Often used to simulate potential outcomes and plan the surgical trajectory.

  • Hospital Stay: Usually performed as an outpatient procedure, though some patients may stay 1 day for observation.

  • Initial Milestones: Compression bandages are typically removed within 48 hours; sutures are removed by the end of the first week.

  • Activity Timeline: Most patients return to work or social settings within 2 to 3 weeks; light exercise is generally permitted after 1 month.

  • Long-Term Care: Scars must be protected from sun exposure for 6 to 12 months, and results typically remain effective for 10 to 15 years.

  • Natural Rejuvenation: Modern techniques avoid the "wind-tunnel" look by focusing on muscle tightening rather than just skin stretching.

  • Long-Lasting Results: Provides a decade or more of improved facial contour compared to temporary non-surgical options.

  • Comprehensive Correction: Addresses the face and neck simultaneously for a harmonious and youthful appearance.

  • Enhanced Jawline Definition: Effectively eliminates jowls and tightens the neck for a sharper, more defined profile.

Rhinoplasty Nose Surgery

Rhinoplasty, or nose reshaping, is a highly individualized surgical procedure designed to enhance facial harmony or improve nasal function. In 2026, modern techniques like preservation rhinoplasty—which maintains the nose's natural framework rather than removing it—are the standard for achieving authentic, long-lasting results.

This procedure is recommended for both aesthetic refinement and the correction of functional breathing issues. Key indications include:

  • Facial Imbalance: A nose that is disproportionately large, small, or wide in relation to other facial features.

  • Nasal Humps or Depressions: Visible bumps or "scoops" on the bridge of the nose.

  • Deviated Septum: Internal structural issues that cause chronic nasal congestion or difficulty breathing.

  • Tip Deformity: A nasal tip that is bulbous, drooping, or upturned.

  • Post-Traumatic Repair: Correcting nasal deformities or fractures caused by previous injuries.

  • Open Rhinoplasty: Involves a small incision across the columella for maximum visibility during complex structural changes.

  • Closed Rhinoplasty: All incisions are made inside the nostrils, leaving no visible external scars.

  • Functional Rhinoplasty (Septorhinoplasty): Focuses on repairing internal structures to improve breathing while simultaneously refining the shape.

  • Preservation Rhinoplasty: A modern approach that reshapes the nose by adjusting existing tissue rather than removing significant amounts of bone and cartilage.

  • Non-Surgical Rhinoplasty: A temporary option using dermal fillers to smooth bumps or improve symmetry without surgery.

  • Surgical Access: Depending on the method, incisions are placed either inside the nostrils or across the narrow strip of skin between them.

  • Reshaping: The surgeon carefully adjusts the underlying bone and cartilage to achieve the desired shape or to clear obstructed airways.

  • Structural Support: In 2026 practice, cartilage grafts (often from the septum) may be used to reinforce the nasal tip or bridge for long-term stability.

  • Closure: The skin is redraped over the new framework, and incisions are closed with fine sutures.

  • Splinting: An external splint is typically applied to protect and support the new nasal structure during the first week of healing.

  • Fasting: Patients are required to fast for 8–12 hours before the surgery.

  • Medical Clearances: Comprehensive blood tests and a physical exam are conducted to ensure the patient is fit for general anesthesia.

  • Smoking Cessation: Patients must quit smoking and vaping several weeks before and after surgery to prevent tissue necrosis and ensure proper blood flow.

  • Medication Review: Avoiding aspirin, ibuprofen, and certain herbal supplements that can increase bleeding risks.

  • Nasal Endoscopy: A detailed internal examination to check for a deviated septum, polyps, or other obstructions.

  • 3D Facial Mapping: High-resolution digital imaging used to plan the surgery and simulate potential aesthetic outcomes.

  • Standard Blood Panel: To confirm healthy hemoglobin levels and clotting function.

  • ECG: To monitor heart health and ensure safety during the procedure.

  • Hospital Stay: Usually performed as an outpatient procedure, allowing the patient to return home the same day.

  • Initial Milestones: The external splint is removed after 1 week. Most patients return to work or light activities by the end of week 2.

  • Activity Restrictions: No nose blowing for 2–3 weeks and no heavy eyewear resting on the bridge for 4–6 weeks.

  • Long-Term Evolution: While 80% of swelling subsides within 3 months, the final refined shape of the nasal tip may take up to a year to fully emerge.

  • Enhanced Facial Symmetry: Provides a balanced appearance by aligning the nose with the forehead, chin, and cheeks.

  • Improved Respiratory Function: Corrects internal blockages, leading to better sleep and easier breathing during physical activity.

  • Boosted Self-Confidence: Resolves long-standing insecurities regarding nasal shape or size.

  • Permanent Results: Surgical rhinoplasty provides a lifelong correction of both aesthetic and structural concerns.

Abdominoplasty (Tummy Tuck)

Abdominoplasty, or a tummy tuck, is a major surgical procedure designed to remove excess abdominal skin and fat while tightening weakened or separated muscles. It is most commonly sought after pregnancy or significant weight loss when the skin lacks the natural elasticity to retract on its own.

This procedure is ideal for individuals who have stabilized their weight but struggle with abdominal concerns that do not respond to diet or exercise. Key indications include:

  • Skin Laxity: Loose, sagging skin on the abdomen following pregnancy or massive weight loss.

  • Diastasis Recti: Separation of the abdominal muscles, which often causes a persistent protrusion or "bulge."

  • Excess Stubborn Fat: Localized fat deposits in the midsection that resist traditional weight loss methods.

  • Poor Core Stability: Weakened abdominal walls that contribute to back pain or poor posture.

  • Significant Contouring Needs: When a patient is at their goal weight but desires a firmer, flatter midsection.

  • Full (Standard) Abdominoplasty: Addresses both the upper and lower abdomen, involving a hip-to-hip incision and repositioning of the navel.

  • Mini Tummy Tuck: Focuses specifically on the area below the belly button with a smaller incision and no navel repositioning.

  • Extended Tummy Tuck: Targets the abdomen and the flanks (love handles) for a more comprehensive body contour.

  • Fleur-de-lis Abdominoplasty: Utilizes both vertical and horizontal incisions for patients with significant skin redundancy following massive weight loss.

  • Lipo-Abdominoplasty: Combines the skin tightening of a tummy tuck with liposuction for superior contouring and definition.

  • Surgical Access: A horizontal incision is made low on the abdomen, strategically placed to be hidden by swimwear or undergarments.

  • Muscle Repair: The surgeon pulls the weakened or separated abdominal muscles together and stitches them into a tighter, firmer position.

  • Tissue Removal: Excess skin and fat are carefully trimmed away to create a smooth abdominal profile.

  • Navel Repositioning: In full procedures, the belly button is brought through a new opening to maintain a natural appearance.

  • Closure and Drains: The incisions are closed with sutures, and surgical drains may be placed to prevent fluid accumulation during early healing.

  • Fasting: Patients are typically required to fast for 8–12 hours before the surgery.

  • Medical Clearances: Comprehensive blood tests and an ECG are conducted to ensure the patient is fit for general anesthesia.

  • Smoking Cessation: Patients must quit smoking several weeks before and after surgery to prevent tissue necrosis and healing complications.

  • Medication Review: Adjusting medications, specifically blood thinners or certain supplements, as directed by the surgical team.

  • Basic Blood Panel: To check hemoglobin levels and ensure there are no underlying infections.

  • ECG: To monitor the heart's rhythm and ensure safety during a procedure that lasts 2 to 5 hours.

  • Physical Assessment: To measure skin elasticity and the degree of muscle separation (diastasis recti).

  • Pregnancy Test: To ensure the patient is not currently pregnant, as the procedure is not recommended during or immediately before pregnancy.

  • Hospital Stay: Depending on the complexity, patients may go home the same day or stay for 1–2 days for observation.

  • Support Garments: A compression garment or abdominal binder must be worn 24/7 for approximately 6 weeks to reduce swelling.

  • Activity Restrictions: Light walking is encouraged immediately; however, heavy lifting (over 5–10 lbs) and strenuous exercise must be avoided for 6–8 weeks.

  • Long-Term Results: Final contours typically emerge within 3 to 6 months, while scars continue to fade over 12 to 18 months.

  • Improved Core Strength: Tightening the abdominal muscles provides better support for the spine and reduces back pain.

  • Enhanced Body Contour: Removes "overhanging" skin and stubborn fat for a flatter, firmer appearance.

  • Clothing Fit: Patients often find that clothing fits more comfortably and look more tailored to their frame.

  • Long-Term Solution: Provides permanent removal of excess skin and fat, assuming the patient maintains a stable weight.

Conditioning Regimen

The Conditioning Regimen is a critical preparatory phase performed immediately before a bone marrow or stem cell transplant. It involves the administration of high-dose chemotherapy, immunotherapy, or Total Body Irradiation (TBI) to prepare the patient’s body for the incoming donor cells. By neutralizing the existing diseased marrow and suppressing the immune system, the conditioning phase creates the necessary biological environment for the new stem cells to thrive and rebuild the patient’s hematopoietic system.

  • Marrow Ablation: It destroys the patient's existing, diseased bone marrow to "clear space" for the new healthy stem cells to grow.

  • Disease Eradication: It aims to eliminate any remaining cancer cells (leukemia, lymphoma, etc.) that may have survived previous rounds of standard treatment.

  • Immunosuppression: It suppresses the patient’s immune system so it does not attack or reject the donor's cells, which is vital for the success of allogeneic transplants.

  • Niche Preparation: It optimizes the bone marrow microenvironment to support the successful "homing" of infused stem cells.

  • Myeloablative Conditioning (MAC): Uses maximum doses of chemotherapy or radiation to completely destroy the marrow. It offers the lowest risk of relapse but is physically demanding, typically reserved for younger or highly fit patients.

  • Reduced-Intensity Conditioning (RIC): Uses lower doses of chemotherapy. It does not completely destroy the marrow but provides enough immunosuppression for donor cells to take hold, making transplants accessible to older patients.

  • Non-Myeloablative Regimens: The mildest form of conditioning, relying primarily on the "Graft-versus-Tumor" effect where the new donor cells eventually kill the remaining cancer cells over time.

  • Sequential Conditioning: A modern approach that combines a cytoreductive phase with a traditional conditioning phase for patients with high disease burden.

  • The regimen typically takes place over a period of 5 to 10 days leading up to "Day 0" (the day of transplant).

  • Medications such as Busulfan, Fludarabine, or Cyclophosphamide are administered via a central venous catheter.

  • Total Body Irradiation (TBI) may be performed in specialized radiology suites to ensure systemic coverage.

  • Pharmacokinetic monitoring is utilized to measure blood levels of chemotherapy in real-time, allowing for precision dosing.

  • Targeted therapies and monoclonal antibodies are often integrated to focus treatment on cancer cells while sparing healthy tissue.

  • Supportive medications are given simultaneously to protect the kidneys, liver, and bladder from high-dose therapy.

  • Precision PharmacokineticsReal-time blood analysis that allows doctors to adjust chemotherapy doses based on an individual's unique metabolism, reducing toxicity.

  • Targeted RadiotherapyAdvances in radiation delivery that focus on the bone marrow and lymph nodes while shielding sensitive organs like the lungs and heart.

  • Immunotherapy IntegrationThe use of specialized antibodies that tag cancer cells, making the chemotherapy phase more efficient and targeted.

  • Toxicity Mitigation ToolsNewer supportive agents that prevent common side effects like severe mouth sores (mucositis) or liver complications.

  • Bio-Marker Guided DosingUsing genetic markers to predict how a patient will respond to specific conditioning agents, allowing for a personalized regimen.

  • Cryotherapy ProtocolsThe use of controlled cooling during certain chemotherapy infusions to protect the oral mucosa and hair follicles.

  • Comprehensive organ function testing to ensure the heart, lungs, and liver can tolerate high-dose medications.

  • Placement of a multi-lumen central venous catheter (Hickman or PICC line) for safe administration of the regimen.

  • Nutritional counseling to prepare the body for the metabolic demands of the conditioning phase.

  • Dental check-ups to treat any potential sources of infection that could become dangerous during the period of low immunity.

  • Psychological preparation for the isolation period required once the immune system begins to decline.

  • Echocardiogram or MUGA scan to verify cardiac output and heart health.

  • Pulmonary Function Tests (PFTs) to ensure the respiratory system is strong enough for systemic therapy.

  • Baseline blood panels for kidney and liver function (BUN, Creatinine, Bilirubin).

  • PET/CT imaging to document the current extent of the disease before the regimen begins.

  • Pregnancy testing for female patients of reproductive age due to the intensive nature of the drugs.

  • Dramatically reduces the risk of relapse by reaching cancer cells that standard-dose chemotherapy cannot.

  • Ensures the "Graft-versus-Host" effect can initiate by preventing the body from immediately rejecting donor cells.

  • Modern "Reduced Intensity" protocols allow older patients to receive curative treatment with significantly improved safety.

  • Precision dosing techniques have lowered the incidence of long-term organ damage compared to traditional methods.

  • Provides a "clean slate" for the new immune system to build a disease-free hematopoietic environment.

  • Intensive monitoring for side effects like nausea, hair loss, or fatigue begins during the regimen.

  • Prophylactic antibiotics and anti-virals are started to protect the patient as their white blood cell counts drop.

  • Specialized mouth rinses and laser therapies are used to manage and prevent oral mucositis.

  • Intravenous fluids and electrolytes are carefully balanced to maintain hydration and organ health.

  • The transition to the transplant phase (Day 0) occurs immediately following the final dose of the conditioning regimen.

  • Reconstitution of a healthy, cancer-free blood system through the successful engraftment of donor cells.

  • Potential for long-term remission from aggressive blood disorders that were previously resistant to treatment.

  • Gradual recovery of physical strength and immune function over the months following the procedure.

  • Ongoing monitoring to manage any "late effects" of the conditioning agents.

  • The satisfaction of knowing every scientific measure was taken to prepare the body for a successful cure.

Donor Search and Matching (HLA Typing)

Donor Search and Matching is the critical first step for any allogeneic bone marrow or stem cell transplant. It involves identifying specific genetic markers called Human Leukocyte Antigens (HLA) to ensure the donor's immune system is compatible with the recipient's body. Through high-resolution DNA sequencing and global registry integration, this process minimizes the risk of transplant rejection and Graft-versus-Host Disease (GVHD), providing the foundation for a successful and durable recovery.

  • Immediately upon diagnosis of high-risk Leukemia or Aplastic Anemia where a transplant is likely.

  • When a sibling or close relative is available to test for a potential 10/10 genetic match.

  • If a patient requires a life-saving transplant but does not have a matched family member.

  • Before initiating a search in national or international bone marrow registries.

  • For couples with inherited blood disorders (like Thalassemia) to screen for a compatible "Savior Sibling."

  • To determine the feasibility of a Haploidentical (half-match) transplant from a parent or child.

  • Acute Myeloid Leukemia (AML) requiring a precise match to balance the Graft-versus-Tumor effect.

  • Severe Combined Immunodeficiency (SCID) where an identical immune match is vital.

  • High-risk Myelodysplastic Syndrome (MDS) where the age of the donor also becomes a critical factor.

  • Patients from ethnic minority backgrounds who may require a wider search across global databases.

  • Cases where a previous transplant was unsuccessful due to donor-specific antibodies.

  • A blood or cheek swab sample is collected from the patient to establish their HLA profile.

  • Next-Generation Sequencing (NGS) is used to analyze five primary HLA loci (A, B, C, DRB1, and DQB1).

  • Sibling testing is conducted first, as there is a 25% biological probability of a perfect match.

  • If no family match exists, a preliminary search is launched in global and national donor registries.

  • Potential unrelated donors are identified and contacted for "confirmatory typing."

  • AI-driven search algorithms predict which donors are most likely to be available and healthy for donation.

  • Next-Generation Sequencing (NGS)High-resolution DNA typing that eliminates genetic "ambiguities" and provides 100% accuracy in a single test.

  • AI-Powered Search AlgorithmsPredictive tools that analyze global registry data to find the best possible donor in a fraction of the traditional time.

  • Donor-Specific Antibody (DSA) ScreeningAdvanced testing to see if the recipient's body has pre-existing "attacks" planned against a specific donor’s cells.

  • Virtual Cross-MatchingA digital simulation of the transplant to predict compatibility before the physical cells are even requested.

  • Non-Inherited Maternal Antigen (NIMA) TestingSpecialized screening for cord blood units that allows for better outcomes even in "mismatched" cases.

  • Rapid-Turnaround Lab ProtocolsModern laboratory workflows that can provide high-resolution matching results in 14 days or less.

  • Early identification of all biological siblings to begin the "Related Donor" screening process.

  • Counseling for family members to explain the non-invasive nature of HLA testing (swab or blood draw).

  • Registration with national and international bone marrow donor databases (such as DATRI or NMDP).

  • Financial planning for potential international donor procurement fees if no local match is found.

  • Discussion with a transplant coordinator to understand the "Search Hierarchy" (Sibling > Unrelated > Haploidentical).

  • High-Resolution HLA Typing (6-Loci or 11-Loci) for the most detailed genetic map.

  • Confirmatory HLA Typing to verify the match before the donor's cells are collected.

  • Blood Group (ABO) and Rh factor matching, although this is secondary to HLA compatibility.

  • Viral marker screening (CMV, EBV, HIV, Hepatitis) for both the patient and the potential donor.

  • Mixed Lymphocyte Reaction (MLR) tests in complex cases to observe cellular compatibility in a lab setting.

  • Achieves the "Gold Standard" 10/10 match, which dramatically reduces the risk of Graft-versus-Host Disease.

  • AI-assisted searches significantly shorten the "time to transplant," which is vital for aggressive diseases.

  • High-resolution NGS ensures that hidden genetic differences are identified before the transplant begins.

  • Opens the door to Haploidentical (half-match) transplants, ensuring nearly every patient has a donor.

  • Minimizes the risk of primary graft failure by selecting donors with the highest "engraftment potential."

  • The transplant coordinator manages communication with donor registries and courier services.

  • Regular updates are provided to the patient as donors move from "preliminary match" to "confirmed."

  • If a donor is found abroad, the team coordinates the cold-chain transport of the cells.

  • The matching process concludes when a donor is medically cleared and a collection date is set.

  • For cord blood searches, units are reserved and tested for cell count and viability.

  • Increased confidence and peace of mind as the patient enters the conditioning phase.

  • Higher probability of long-term survival and a cure due to the selection of the optimal genetic match.

  • Reduction in the need for long-term, high-dose immunosuppressant medications after transplant.

  • Successful "rebuilding" of the immune system using a compatible genetic blueprint.

  • Potential to save a life through the altruistic participation of a matched stranger or family member.

Umbilical Cord Blood Transplant (UCBT)

Umbilical Cord Blood Transplant (UCBT) is a specialized form of allogeneic stem cell transplantation that utilizes hematopoietic stem cells harvested from the umbilical cord and placenta following a healthy birth. This treatment is a vital alternative for patients who lack a perfectly matched adult donor. Because cord blood cells are immunologically "naïve," they do not require the same stringent HLA (Human Leukocyte Antigen) matching as bone marrow, making this a life-saving option for a diverse range of patients.

  • Diagnosis of high-risk Leukemia or Lymphoma requiring an urgent transplant where no adult match is available.

  • Patients from diverse ethnic backgrounds who face statistical challenges finding a 10/10 match in adult registries.

  • Presence of inherited metabolic disorders or bone marrow failure syndromes in pediatric patients.

  • Need for a rapid transplant for an aggressive disease, as frozen cord units are available for immediate shipment.

  • History of failed adult donor searches or cases where a "mismatched" transplant is the only remaining option.

  • Pediatric cases of Thalassemia or Sickle Cell Anemia where a sibling donor is not available.

  • Acute Myeloid Leukemia (AML) and Acute Lymphoblastic Leukemia (ALL) in both children and adults.

  • Inborn errors of metabolism, such as Hurler Syndrome or Adrenoleukodystrophy.

  • Primary immunodeficiency disorders where a new immune system must be established.

  • Aplastic Anemia and other conditions where the marrow fails to produce blood cells.

  • Cases requiring "Double Cord" transplants to provide an adequate cell dose for adult recipients.

  • A search is conducted through public cord blood banks to find units with the best HLA match and highest cell count.

  • The patient undergoes intensive "Conditioning" (chemotherapy or radiation) to clear the existing marrow.

  • The selected cord blood unit is thawed at the bedside using specialized automated systems to preserve cell viability.

  • The stem cells are infused into the patient’s bloodstream via a central venous catheter in a non-surgical procedure.

  • The patient is monitored in a sterile, HEPA-filtered environment while the "naïve" cells begin to mature.

  • Engraftment occurs as the new cells migrate to the bone marrow and begin producing healthy red cells, white cells, and platelets.

  • Ex-Vivo Cell ExpansionAdvanced laboratory techniques that "grow" the number of stem cells in a unit before infusion, significantly speeding up recovery.

  • Double Cord Blood TransplantationThe simultaneous use of two cord blood units to ensure a sufficient cell dose for larger adult patients.

  • Automated Thawing TechnologyPrecision devices that use dry-heat or controlled water baths to ensure maximum cell recovery from a frozen state.

  • Enhanced Homing AgentsThe use of specialized proteins that help cord blood cells find and "home" to the bone marrow faster after infusion.

  • Selective T-Cell ModulationLaboratory methods designed to reduce the risk of rejection while maintaining the body's ability to fight infection.

  • Real-Time Genetic ProfilingUsing high-resolution sequencing to ensure the donor unit has the highest possible genetic compatibility with the recipient.

  • Comprehensive search of international cord blood registries to identify units with optimal Total Nucleated Cell (TNC) counts.

  • Pre-transplant conditioning to suppress the recipient's immune system, ensuring it does not reject the "new" cord cells.

  • Placement of a multi-lumen central venous catheter for infusions, medications, and frequent blood sampling.

  • Nutritional optimization and protective isolation to prepare for the 3-to-4-week engraftment period.

  • Coordination with an expert transplant team specializing in the unique kinetics of cord blood recovery.

  • HLA typing (Class I and II) to determine the degree of compatibility between the patient and the cord unit.

  • Total Nucleated Cell (TNC) and CD34+ count verification to ensure the unit is "dose-heavy" enough for the patient's weight.

  • Comprehensive viral screening of the cord unit (CMV, HIV, Hepatitis) by the supplying blood bank.

  • Organ function assessments, including Echocardiograms and Pulmonary Function Tests (PFTs).

  • Cross-matching to identify any donor-specific antibodies that could interfere with the graft.

  • Flexible Matching: UCBT allows for successful outcomes even with a 4/6 or 5/6 match, which is critical for ethnic minorities.

  • Lower GVHD Risk: Cord blood is associated with a significantly lower risk of severe, chronic Graft-versus-Host Disease.

  • Immediate Availability: Units are pre-screened and frozen, meaning they can be delivered to the clinic within days.

  • Non-Invasive: There is zero risk to the donor (mother or baby), as the blood is collected after the cord is cut.

  • Potency: Cord blood cells are more proliferative and have a higher "rebuilding" potential than older adult cells.

  • The "Engraftment" phase for cord blood typically takes 18 to 25 days, slightly longer than traditional bone marrow.

  • Patients are monitored 24/7 for signs of "Engraftment Syndrome" or early infections.

  • Supportive care, including growth factor injections, is used to stimulate the new cells.

  • Regular blood counts track the gradual rise of the new immune system.

  • Long-term follow-up ensures the new marrow is producing a stable and healthy blood supply.

  • Potential for a complete cure from aggressive leukemias and inherited genetic disorders.

  • A personalized re-vaccination schedule to establish immunity as the new system matures.

  • Return to an active lifestyle with a significantly lower risk of long-term "chronic" transplant complications.

  • Ongoing monitoring of hematopoietic health through the transplant center’s wellness program.

  • Peace of mind knowing a life-saving match was found despite the absence of an adult donor.

Vaginal Hysterectomy (Open/Laparoscopic/Robotic)

A vaginal hysterectomy is a surgical procedure to remove the uterus through the vaginal canal. Unlike an abdominal hysterectomy, this approach requires no external incisions on the abdomen, which typically results in a shorter hospital stay, lower costs, and a significantly faster recovery. It is a preferred method for treating various non-cancerous gynecological conditions.

  • Uterine Fibroids: Benign growths in the uterine wall that cause heavy menstrual bleeding, pelvic pressure, or persistent pain.

  • Uterine Prolapse: When the pelvic floor muscles and ligaments weaken, causing the uterus to slip down into or even out of the vaginal canal.

  • Adenomyosis: A condition where the uterine lining grows into the muscular wall of the uterus, causing severe cramping and heavy periods.

  • Endometriosis: When tissue similar to the uterine lining grows outside the uterus, leading to chronic pain and scarring.

  • Abnormal Uterine Bleeding: When heavy or irregular bleeding cannot be managed with medication or less invasive procedures.

  • Traditional Vaginal Hysterectomy: The entire procedure is performed through an incision inside the vagina. This is the least invasive method and leaves no visible scars.

  • Laparoscopically Assisted Vaginal Hysterectomy (LAVH): A thin camera (laparoscope) and micro-instruments are inserted through 3–4 tiny "keyhole" incisions in the belly to detach the upper uterus. The uterus is then removed through the vagina.

  • Robotic-Assisted Hysterectomy: Similar to the laparoscopic approach, but the surgeon uses a robotic console for superior 3D visualization and enhanced precision, which is ideal for complex cases like extensive endometriosis.

  • Vaginal Vault Creation: After the uterus is removed, the surgeon sews the top of the vagina closed, creating what is known as a "vaginal cuff."

  • Anesthesia: The surgery is performed under general anesthesia or regional anesthesia (spinal/epidural) and typically takes 1 to 2 hours.

  • Access: The surgeon makes an incision inside the vagina to reach the uterus.

  • Detachment: Using specialized tools, the surgeon clamps and cuts the blood vessels and ligaments that support the uterus.

  • Removal: The uterus (and sometimes the fallopian tubes or ovaries) is withdrawn through the vaginal opening.

  • Closure: The internal incisions are closed with dissolvable stitches. Because there are no abdominal cuts in the traditional approach, there is no external scarring.

  • Pelvic Examination: To assess the size of the uterus and ensure it can be safely removed through the vaginal canal.

  • Fasting: Adhering to strict "nothing by mouth" instructions for at least 8 hours prior to your general anesthesia.

  • Medication Audit: You may need to stop taking blood thinners, aspirin, or certain herbal supplements 7–10 days before the procedure.

  • Bowel Prep: In some cases, your surgeon may recommend a mild laxative or a specific diet the day before surgery.

  • Smoking Cessation: Stopping smoking at least 4 weeks before surgery is vital to promote healthy tissue healing and reduce the risk of infection.

  • Pelvic Ultrasound: To map the size and location of fibroids and check the health of the ovaries.

  • Endometrial Biopsy: To rule out any cancerous or precancerous cells within the uterine lining.

  • Pap Smear: To ensure there are no cervical abnormalities before the uterus and cervix are removed.

  • Blood Panels: Checking hemoglobin levels and blood type to prepare for the rare possibility of a transfusion.

  • ECG: A standard heart check to ensure you are healthy enough for the administration of anesthesia.

  • Hospital Stay: Most patients are discharged the same day or after one night of observation.

  • Physical Activity: Walking is encouraged immediately to prevent blood clots, but you must avoid heavy lifting (over 5 kg) and strenuous exercise for 4 to 6 weeks.

  • Vaginal Health: You must not use tampons or have sexual intercourse for 6 to 8 weeks to allow the vaginal cuff to heal completely.

  • Hormonal Changes: If the ovaries are left intact, you will not enter menopause prematurely, though you will no longer have periods. If ovaries are removed, menopause begins immediately.

  • Follow-up Care: A post-operative checkup is typically scheduled for 2 to 6 weeks after surgery to ensure the internal stitches are dissolving correctly.

  • Faster Recovery: Patients generally return to normal activities much sooner than those undergoing traditional abdominal surgery.

  • No Visible Scarring: Because the entry point is internal, there are no cosmetic changes to the abdomen.

  • Reduced Complication Rates: Vaginal approaches are associated with lower risks of wound infection and less post-operative pain.

  • Cost-Efficient: Shorter hospital stays and quicker operating times often result in lower overall medical costs.

  • High Patient Satisfaction: Most women report a significant improvement in quality of life once the symptoms of fibroids or prolapse are resolved.

Myomectomy (Open/Laparoscopic/Robotic)

A myomectomy is a surgical procedure to remove uterine fibroids (benign growths) while keeping the uterus intact. Unlike a hysterectomy, it preserves fertility and is the preferred option for women who wish to become pregnant or maintain their uterine health. This procedure specifically targets the fibroids while surgically repairing the uterine wall.

  • Fertility Preservation: For women who plan to have children in the future and need to keep the uterus functional.

  • Heavy Menstrual Bleeding: When fibroids cause anemia, flooding, or prolonged periods that disrupt daily life.

  • Pelvic Pain or Pressure: Large fibroids pressing on the bladder (causing frequent urination) or the rectum.

  • Infertility or Miscarriage: When fibroids distort the uterine cavity and interfere with embryo implantation or maintenance of pregnancy.

  • Rapid Growth: If ultrasound monitoring shows fibroids are growing quickly, even if they are currently asymptomatic.

  • Abdominal Myomectomy (Open): A traditional "bikini cut" horizontal incision is made in the lower abdomen. This is used for very large fibroids (typically over 10 cm), numerous growths, or those buried deep in the uterine wall.

  • Laparoscopic Myomectomy: Performed through 3–4 tiny "keyhole" incisions. The surgeon uses a camera and specialized tools to cut the fibroids into smaller pieces (morcellation) for removal through the small ports.

  • Robotic-Assisted Myomectomy: Similar to the laparoscopic approach, but the surgeon operates via a robotic console. This provides superior 3D visualization and greater precision, which is helpful for complex or hard-to-reach fibroids.

  • Hysteroscopic Myomectomy: No abdominal incisions are made. A specialized scope is inserted through the cervix to remove fibroids that are bulging into the uterine cavity (submucosal fibroids).

  • Anesthesia: The surgery is performed under general anesthesia and typically takes between 1 to 3 hours depending on the number of fibroids.

  • Incision and Access: Depending on the approach, the surgeon accesses the uterus either through the abdomen or the vaginal canal/cervix.

  • Fibroid Removal: Each fibroid is carefully "shelled out" from the surrounding healthy uterine muscle.

  • Uterine Reconstruction: The surgeon meticulously sutures the layers of the uterine muscle back together to ensure the wall is strong enough to support a future pregnancy.

  • Closure: Abdominal incisions are closed with stitches or surgical glue. For hysteroscopic cases, there are no external wounds to close.

  • Pelvic Imaging: An MRI or detailed ultrasound is mandatory to map the exact size, number, and depth of all fibroids.

  • Hormonal Therapy (Optional): In some cases, medication (like GnRH agonists) may be prescribed for 2–3 months before surgery to shrink the fibroids and reduce blood loss.

  • Iron Supplementation: If you are anemic due to heavy bleeding, you may need to take iron to build up your blood count before surgery.

  • Fasting: Adhering to strict "nothing by mouth" instructions for at least 8 hours prior to your general anesthesia.

  • Medication Audit: Stopping blood thinners, aspirin, or anti-inflammatory drugs 7–10 days before the procedure.

  • Saline Infusion Sonogram (SIS): Injecting sterile water into the uterus during an ultrasound to get a clear view of the uterine lining.

  • Hysteroscopy (Diagnostic): A quick office procedure to look inside the uterus and confirm if fibroids are affecting the cavity.

  • Blood Panels: Checking hemoglobin and hematocrit levels to assess for anemia.

  • ECG: A standard heart check to ensure you are healthy enough for the administration of anesthesia.

  • Hospital Stay: Usually 1–2 nights for open surgery; often same-day discharge or one night for laparoscopic and robotic approaches.

  • Physical Activity: Walking is encouraged immediately to prevent blood clots. Avoid heavy lifting and strenuous exercise for 4 weeks (laparoscopic) to 6 weeks (open).

  • Pregnancy Timing: Surgeons usually recommend waiting 3 to 6 months before trying to conceive to allow the uterine wall to heal completely.

  • Delivery Method: If the surgery involved deep incisions into the uterine wall, a C-section is often required for future deliveries to prevent uterine rupture during labor.

  • Follow-up Imaging: A repeat ultrasound is often done 3–6 months post-op to ensure the uterus has healed well and no small fibroids were left behind.

  • Preserves Reproductive Potential: Unlike a hysterectomy, this procedure keeps the option of biological motherhood open.

  • Targeted Symptom Relief: Successfully removing fibroids eliminates the source of heavy bleeding and pelvic pressure while keeping the organ intact.

  • High Success Rates: Modern robotic and laparoscopic techniques allow for the removal of complex fibroids with minimal blood loss and faster recovery.

  • Improved Fertility Outcomes: For many women, removing cavity-distorting fibroids significantly increases the chances of successful natural conception or IVF.

  • Maintains Pelvic Integrity: Keeping the uterus helps maintain the natural support of the pelvic floor and avoids the early onset of surgical menopause.

Endometrial Ablation

Endometrial ablation is a minimally invasive medical procedure used to treat heavy menstrual bleeding (menorrhagia). It works by destroying or removing the endometrium (the lining of the uterus) using various energy-based methods. Unlike a hysterectomy, this procedure leaves the uterus intact, providing a less invasive alternative for women seeking relief from debilitating cycles.

  • Heavy Menstrual Flow: If you find yourself soaking through a pad or tampon every hour for several consecutive hours.

  • Prolonged Bleeding: When your menstrual period consistently lasts longer than eight days.

  • Anemia: If chronic blood loss has led to iron deficiency or low hemoglobin levels, causing persistent fatigue.

  • Failed Medical Therapy: For premenopausal women who have not found relief from hormonal contraceptives or other medications.

  • Lifestyle Disruption: When your menstrual cycle significantly interferes with your ability to work, exercise, or maintain daily activities.

  • Radiofrequency Ablation: A flexible, specialized mesh device is used to deliver controlled electrical energy to the lining.

  • Cryoablation: A thin probe uses extreme cold to freeze and destroy the endometrial tissue.

  • Thermal Balloon: A small balloon is inserted into the uterus and filled with heated fluid to treat the lining.

  • Hydrothermal Ablation: Heated saline fluid is circulated directly within the uterine cavity to reach all areas of the lining.

  • Microwave Ablation: Precise microwave energy is applied through a specialized wand to treat the uterine wall.

  • Electrosurgery: A wire loop or rollerball uses an electric current to remove the lining, typically performed under general anesthesia.

  • Access: The procedure is performed entirely through the vagina and cervix, meaning there are no surgical incisions or external scars.

  • Anesthesia: Depending on the method, it can be performed under local, regional, or general anesthesia and typically takes 15 to 45 minutes.

  • Dilation: The cervix is gently and precisely opened (dilated) to allow the insertion of the ablation instruments.

  • Ablation: The chosen energy-based method is applied to the uterine lining to carefully remove or destroy the tissue.

  • Completion: Once the lining is treated, the instruments are removed, and the patient is moved to a recovery area for short-term observation.

  • Endometrial Biopsy: A mandatory sample of the lining is taken before the procedure to rule out any cancerous or precancerous cells.

  • Hysteroscopy: A quick visualization of the inside of the uterus to ensure there are no large fibroids or polyps that might interfere with the ablation.

  • Pregnancy Test: To confirm you are not pregnant, as the procedure is strictly contraindicated during pregnancy.

  • Hormonal Thinning (Optional): You may be prescribed medication for a few weeks prior to the procedure to thin the uterine lining, which can improve results.

  • Fasting: Following standard "nothing by mouth" instructions if your procedure involves sedation or general anesthesia.

  • Pelvic Ultrasound: To measure the thickness of the uterine lining and check the overall size and shape of the uterus.

  • Hemoglobin/Ferritin Levels: To assess the severity of anemia caused by heavy bleeding.

  • Cervical Screening (Pap Smear): To ensure there are no cervical abnormalities prior to instrument insertion.

  • ECG: A routine heart check to ensure you are healthy enough for the chosen level of anesthesia.

  • Hospital Stay: Most patients are discharged the same day and can return to their normal daily activities within a few days.

  • Short-term Side Effects: You may experience minor cramping (1–3 days), mild nausea, or frequent urination during the first 24 hours.

  • Vaginal Discharge: A watery discharge mixed with a small amount of blood is normal and may last for 2 to 4 weeks as the uterus heals.

  • Menstrual Changes: Periods usually become significantly lighter, and in many cases, stop entirely (amenorrhea) within a few months.

  • Birth Control Necessity: While the procedure makes pregnancy unlikely and dangerous, it is not a sterilization method; birth control is required until you reach menopause.

  • Incision-Free Recovery: Because no cuts are made to the body, the recovery time is exceptionally fast compared to traditional surgery.

  • Targeted Relief: Successfully destroys only the tissue responsible for heavy bleeding while preserving the rest of the reproductive anatomy.

  • High Success Rates: The majority of women report a dramatic reduction in menstrual flow and a significant improvement in their quality of life.

  • Versatile Options: With multiple energy-based methods available, the treatment can be tailored to the specific size and shape of your uterus.

  • Avoids Hysterectomy: Provides a effective, low-risk alternative for women who wish to avoid major organ removal and longer hospital stays.

Ovarian Cyst Removal (Laparoscopic Cystectomy)

Laparoscopic ovarian cystectomy is a minimally invasive surgery to remove an ovarian cyst while preserving the healthy part of the ovary and the fallopian tube. It is the preferred method for treating benign (non-cancerous) cysts that are causing pain, growing rapidly, or at risk of twisting (torsion). This technique allows for precise removal of the cyst wall with minimal impact on future fertility.

  • Persistent Cysts: Functional cysts that do not disappear naturally after several menstrual cycles.

  • Endometriomas: Also known as "chocolate cysts," these are caused by endometriosis and can significantly affect fertility if left untreated.

  • Dermoid Cysts: Complex cysts containing different types of tissue (such as skin or hair) that will not resolve on their own and carry a risk of rupture.

  • Chronic Pelvic Pain: Large cysts that create constant pressure on the bladder or rectum, or cause sharp pain during physical activity.

  • Rapid Growth: If ultrasound monitoring shows a cyst is increasing in size, even if it is currently asymptomatic.

  • Anesthesia: The surgery is performed under general anesthesia and typically takes between 45 to 90 minutes.

  • Incision: The surgeon makes 3–4 tiny "keyhole" incisions (5–10 mm) in the abdomen, including one inside the belly button for the camera (laparoscope).

  • Visualization: Carbon dioxide gas is used to gently inflate the abdomen, providing the surgical team with a clear, magnified view of the pelvic organs.

  • Cyst Removal: Using specialized micro-instruments, the surgeon carefully peels the cyst wall away from the healthy ovarian tissue, ensuring the ovary remains functional.

  • Extraction: The cyst is placed in a small surgical bag and removed through one of the incisions. Large cysts may be drained first to fit through the small opening.

  • Closure: The small incisions are closed with dissolvable stitches or surgical glue, resulting in minimal scarring.

  • Pelvic Ultrasound or MRI: To determine the exact size, location, and internal structure of the cyst before surgery.

  • Blood Testing: Checking "tumor markers" (such as CA-125) to confirm the cyst appears benign and to assess overall health.

  • Fasting: Adhering to strict "nothing by mouth" instructions for at least 8 hours prior to your general anesthesia.

  • Medication Audit: Stopping blood thinners, aspirin, or certain supplements 7–10 days before the procedure as directed.

  • Bowel Prep (Optional): In some cases, a mild laxative may be recommended the day before to clear the pelvic area for better visualization.

  • Transvaginal Ultrasound: The primary tool used to distinguish between fluid-filled simple cysts and complex solid masses.

  • Pregnancy Test: To rule out ectopic pregnancy or ensure the safety of the developing fetus if pregnancy is known.

  • Coagulation Profile: To ensure your blood's ability to clot is optimal for a safe, minimally invasive recovery.

  • ECG: A standard heart check to confirm you are healthy enough for the administration of anesthesia.

  • Hospital Stay: Most patients are discharged the same day or stay for one night of observation.

  • Shoulder Pain: It is common to feel temporary pain in the shoulders for 24–48 hours; this is caused by the gas used during surgery irritating the diaphragm.

  • Activity Restrictions: You can usually return to light daily activities within 3 to 5 days. However, avoid heavy lifting and strenuous exercise for 2 to 3 weeks.

  • Wound Care: Keep the small incisions clean and dry. Most stitches are internal and will dissolve on their own within 10–14 days.

  • Sexual Activity: Most doctors recommend waiting at least 2 weeks before resuming sexual intercourse to allow internal healing.

  • Preserves Fertility: By removing only the cyst wall and saving the healthy ovarian tissue, the "ovarian reserve" and hormone production are protected.

  • Minimal Scarring: The use of tiny incisions results in superior cosmetic outcomes compared to traditional open surgery.

  • Rapid Recovery: The minimally invasive approach allows patients to return to their jobs and families much faster than with a laparotomy.

  • High Precision: The magnified view provided by the laparoscope allows surgeons to identify and protect the delicate fallopian tubes and surrounding nerves.

  • Lower Complication Rates: Laparoscopy is associated with less post-operative pain, lower risk of infection, and a reduced chance of developing internal scar tissue (adhesions).

Oophorectomy (Ovary Removal)

An oophorectomy is the surgical removal of one or both ovaries. It is often performed in conjunction with other procedures, such as a hysterectomy or salpingectomy (removal of the fallopian tubes). This procedure is a critical intervention for managing ovarian diseases, reducing cancer risk, or addressing severe pelvic conditions.

  • Ovarian Cancer: As a primary treatment for a confirmed cancerous mass or a highly suspicious complex cyst.

  • Prophylactic (Risk-Reducing): For women with high-risk genetic mutations, such as BRCA1 or BRCA2, to prevent future cancer development.

  • Severe Endometriosis: When the ovaries are extensively damaged or causing chronic, debilitating pelvic pain that does not respond to medication.

  • Ovarian Torsion: An emergency situation where the ovary twists on its supporting ligaments, cutting off its own blood supply.

  • Chronic Pelvic Inflammatory Disease (PID): Persistent and severe infection that has caused irreversible damage to the ovarian tissue.

  • Unilateral Oophorectomy: Removal of only one ovary. In most cases, menstruation continues and natural pregnancy remains possible.

  • Bilateral Oophorectomy: Removal of both ovaries. This results in immediate "surgical menopause" if the patient has not yet reached natural menopause.

  • Salpingo-Oophorectomy: The surgical removal of an ovary along with its attached fallopian tube, often performed to reduce the risk of future tubal issues.

  • Prophylactic Bilateral Salpingo-Oophorectomy (RRBSO): A specific preventive surgery for high-risk patients to remove both sets of ovaries and tubes simultaneously.

  • Anesthesia: The procedure is performed under general anesthesia and typically takes between 45 to 90 minutes.

  • Laparoscopic/Robotic Approach: The most common method, involving 3–4 tiny "keyhole" incisions. The surgeon uses a camera to detach and remove the ovaries through these small openings.

  • Laparotomy (Open Surgery): A single, larger abdominal incision is used if the ovaries are very large, if there is extensive scar tissue, or if cancer is suspected.

  • Vaginal Approach: If performed alongside a vaginal hysterectomy, the ovaries may be detached and removed through the vaginal canal.

  • Closure: Small laparoscopic incisions are closed with dissolvable stitches or surgical glue, while open incisions may require staples or standard sutures.

  • Genetic Counseling: For patients undergoing prophylactic surgery, a review of genetic markers (BRCA) is essential.

  • Pelvic Imaging: A detailed ultrasound or MRI to map the size, location, and blood supply of the ovaries.

  • Fasting: Adhering to strict "nothing by mouth" instructions for at least 8 hours prior to your general anesthesia.

  • Hormone Consultation: Discussing a plan for Hormone Replacement Therapy (HRT) if a bilateral procedure is planned for a premenopausal patient.

  • Medication Audit: Stopping blood thinners or aspirin 7–10 days before the procedure to minimize the risk of internal bleeding.

  • Tumor Marker Tests (CA-125): Blood tests used to help evaluate the likelihood of malignancy in ovarian masses.

  • Transvaginal Ultrasound: To provide high-resolution images of the ovarian follicles and any abnormal growths.

  • CT Scan of the Abdomen/Pelvis: Often used if cancer is suspected to check for involvement of nearby lymph nodes or organs.

  • ECG: A standard heart check to ensure you are healthy enough for the duration of the surgical procedure.

  • Hospital Stay: Usually a same-day discharge for laparoscopic procedures; 1–2 nights of observation are typical for open surgery.

  • Surgical Menopause: If both ovaries are removed, the sudden drop in estrogen can lead to immediate hot flashes, night sweats, and vaginal dryness.

  • Long-term Health: Without estrogen, there is an increased risk of osteoporosis (bone thinning) and heart disease; HRT is often started immediately to mitigate these risks.

  • Activity Restrictions: Light walking is encouraged within 24 hours. Avoid heavy lifting and strenuous exercise for 2–4 weeks (laparoscopic) or 6 weeks (open).

  • Fertility Impact: If both ovaries are removed, natural conception is no longer possible. Patients wishing to preserve fertility should discuss egg freezing prior to surgery.

  • Prevents Life-Threatening Cancer: For high-risk genetic carriers, this surgery reduces the risk of ovarian cancer by up to 90%.

  • Immediate Pain Resolution: Provides definitive relief for patients suffering from chronic pain due to torsion or severe endometriosis.

  • Minimally Invasive Options: Modern laparoscopic and robotic techniques allow for precise removal with very short recovery times and minimal scarring.

  • Comprehensive Hormonal Care: Integrated treatment plans ensure that surgical menopause symptoms are managed effectively with modern HRT.

  • High Technical Success: When performed by specialists, the risks of injury to the bladder or ureters are exceptionally low, ensuring a safe return to health.

Salpingectomy (Fallopian Tube Removal)

Salpingectomy is the surgical removal of one or both fallopian tubes. Unlike a tubal ligation (where tubes are tied), a salpingectomy involves the complete physical removal of the tube. It is a highly effective permanent procedure often performed to treat medical emergencies or as a proactive measure against cancer while maintaining hormonal balance.

  • Ectopic Pregnancy: An emergency situation where a fertilized egg implants in the tube; removal is necessary if the tube has ruptured or is severely damaged.

  • Hydrosalpinx: When a tube becomes blocked and fills with fluid, causing chronic pain or interfering with the success of IVF treatments.

  • Permanent Birth Control: A preferred alternative to "tying tubes" for women seeking the most effective form of permanent sterilization.

  • Cancer Prevention: For women with high-risk genetic mutations (like BRCA1/2), as research suggests many "ovarian" cancers actually originate in the fallopian tubes.

  • Pelvic Inflammatory Disease (PID): When severe, chronic infection has caused irreversible damage or abscesses within the tubal structures.

  • Unilateral Salpingectomy: Removal of only one fallopian tube. If the other tube and both ovaries remain, natural pregnancy is still possible.

  • Bilateral Salpingectomy: Removal of both tubes. This results in permanent sterilization; future pregnancy would require In Vitro Fertilization (IVF).

  • Salpingo-oophorectomy: The surgical removal of the fallopian tube along with its attached ovary, often performed for localized disease or cancer risk reduction.

  • Anesthesia: The procedure is typically performed under general anesthesia and takes approximately 30 to 60 minutes.

  • Laparoscopic (Keyhole) Approach: The most common method, involving 2–3 tiny incisions (5–10 mm) in the abdomen for a camera and specialized micro-instruments.

  • Laparotomy (Open) Approach: A larger abdominal incision used in emergencies, such as a ruptured ectopic pregnancy with significant internal bleeding.

  • Detachment: The surgeon carefully seals the blood vessels and detaches the tube from the uterus and the ovary.

  • Extraction: The tube is removed through one of the small incisions, and the surgical sites are inspected for any signs of bleeding.

  • Closure: Small incisions are closed with dissolvable stitches or surgical glue, leaving minimal scarring.

  • Pelvic Ultrasound: To confirm the location of an ectopic pregnancy or to visualize the extent of tubal disease like hydrosalpinx.

  • Pregnancy Test: A mandatory check to confirm pregnancy status and determine the appropriate surgical urgency.

  • Fasting: Adhering to strict "nothing by mouth" instructions for at least 8 hours prior to your general anesthesia.

  • Medication Audit: You may be asked to stop taking aspirin or blood thinners 7–10 days before the procedure to minimize surgical risks.

  • Emergency Stabilization: In cases of rupture, intravenous fluids and blood type cross-matching are performed immediately.

  • Transvaginal Ultrasound: The primary imaging tool used to evaluate the health of the tubes and ovaries.

  • Beta-hCG Blood Test: Specifically used to monitor hormone levels in suspected ectopic pregnancies.

  • Complete Blood Count (CBC): To check for signs of infection or anemia caused by internal bleeding.

  • ECG: A standard heart check to ensure you are healthy enough for the administration of anesthesia.

  • Hospital Stay: Most patients are discharged the same day as the surgery following a laparoscopic procedure.

  • Shoulder Pain: It is common to feel referred pain in the shoulders for 24–48 hours; this is caused by the gas used to inflate the abdomen during surgery.

  • Activity Restrictions: You can usually return to work and light daily activities within 3 to 7 days. Avoid heavy lifting (over 5 kg) for 2 to 3 weeks.

  • Sexual Activity: Most doctors recommend waiting at least 2 weeks before resuming sexual intercourse to allow for proper internal healing.

  • Hormonal Balance: Because the ovaries are typically left intact, you will not enter menopause prematurely and your hormonal cycle will remain unchanged.

  • Definitive Cancer Protection: Removing the tubes significantly lowers the long-term risk of developing high-grade serous ovarian cancer.

  • Life-Saving in Emergencies: Provides immediate resolution for ruptured ectopic pregnancies, preventing life-threatening internal hemorrhage.

  • Improved IVF Success: Removing a fluid-filled tube (hydrosalpinx) increases the chances of a successful embryo implantation during fertility treatments.

  • Minimal Recovery Time: The laparoscopic approach ensures that patients can return to their normal lives within a week with very little post-operative pain.

  • Superior Birth Control: Offers a higher degree of protection against unintended pregnancy than traditional tubal ligation methods.

Ectopic Pregnancy Surgery

Surgery for an ectopic pregnancy is an emergency procedure performed when a fertilized egg implants outside the uterus, most commonly in a fallopian tube. Because an ectopic pregnancy cannot survive and poses a life-threatening risk of internal hemorrhage, surgical intervention is often necessary to protect the mother’s health and future fertility.

  • Confirmed Ectopic Pregnancy: When ultrasound and blood tests confirm the embryo has implanted outside the uterine cavity.

  • Severe Abdominal Pain: Sharp, stabbing pelvic pain, often on one side, that may come and go or vary in intensity.

  • Signs of Rupture: If you experience extreme lightheadedness, fainting, or shoulder tip pain, which indicates internal bleeding.

  • Failed Medical Management: When medication (such as methotrexate) has not successfully dissolved the pregnancy tissue.

  • High hCG Levels: If pregnancy hormone levels are too high for medical treatment to be effective or safe.

  • Unstable Vital Signs: An emergency situation where low blood pressure or a rapid heart rate suggests an active tubal rupture.

  • Laparoscopic Surgery (Keyhole): The most common and preferred approach. The surgeon makes 2–3 tiny incisions in the abdomen to insert a high-definition camera and specialized micro-instruments.

  • Salpingectomy: The complete removal of the fallopian tube containing the pregnancy. This is often the safest choice if the tube is severely damaged or if the other tube is healthy.

  • Salpingostomy: A small, precise slit is made in the fallopian tube to remove the pregnancy tissue while leaving the tube intact. This is typically considered if the other tube is already damaged or missing.

  • Laparotomy (Open Surgery): A larger abdominal incision used in critical emergencies where a tube has ruptured and severe internal bleeding requires immediate, direct control.

  • Anesthesia: The procedure is performed under general anesthesia and typically takes between 30 to 60 minutes, though emergency cases may require more time.

  • Access: Depending on the stability of the patient, the surgeon accesses the pelvic area through small laparoscopic ports or a traditional abdominal incision.

  • Tissue Removal: All pregnancy tissue is meticulously removed to prevent it from continuing to grow or causing further internal damage.

  • Hemostasis: The surgeon carefully seals all blood vessels to stop internal bleeding and ensure the pelvic cavity is clear of blood and debris.

  • Closure: Small laparoscopic incisions are closed with dissolvable stitches or surgical glue, while open incisions are secured with standard sutures or staples.

  • Emergency Ultrasound: A final scan to locate the pregnancy and assess whether the fallopian tube has already ruptured.

  • Serial hCG Testing: Monitoring the levels of the pregnancy hormone to determine the urgency and type of surgical approach needed.

  • Blood Type and Cross-match: Immediate testing to ensure compatible blood is available in the event a transfusion is necessary due to blood loss.

  • Intravenous Access: Starting IV fluids and potentially medications to stabilize blood pressure before entering the operating room.

  • Fasting: In non-emergency cases, following "nothing by mouth" instructions; however, in emergencies, the surgical team proceeds immediately for patient safety.

  • Transvaginal Ultrasound: The primary diagnostic tool used to visualize the empty uterus and the mass in the fallopian tube.

  • Quantitative Beta-hCG: A precise blood test to measure the exact amount of pregnancy hormone in the system.

  • Complete Blood Count (CBC): To check for signs of anemia or internal blood loss through hemoglobin and hematocrit levels.

  • Coagulation Profile: Ensuring the blood’s ability to clot is normal prior to making surgical incisions.

  • Hospital Stay: Most laparoscopic patients are discharged the same day or after one night. Laparotomy patients typically stay for 2–3 days for observation.

  • Immediate Recovery: It is normal to experience temporary shoulder pain (from the gas used in laparoscopy), abdominal soreness, and light vaginal bleeding for 1–2 weeks.

  • Activity Restrictions: Avoid heavy lifting and strenuous exercise for 2 to 4 weeks (laparoscopic) or 6 weeks (open surgery) to allow internal healing.

  • Hormone Monitoring: Weekly blood tests to monitor hCG levels are often required until they reach zero to ensure no pregnancy tissue remains.

  • Future Pregnancy: If one healthy tube remains, the chances of a successful future pregnancy remain high. Most doctors recommend waiting at least two menstrual cycles before trying to conceive again.

  • Life-Saving Intervention: Rapidly stops internal bleeding and removes the risk of a life-threatening tubal rupture.

  • Preserves Future Fertility: Specialized techniques like salpingostomy or careful laparoscopic salpingectomy protect the remaining reproductive anatomy.

  • Minimally Invasive Success: Laparoscopic methods result in less post-operative pain, smaller scars, and a much faster return to normal life.

  • Definitive Resolution: Unlike medical management, surgery provides an immediate solution for cases where the pregnancy tissue is large or the tube is compromised.

  • Comprehensive Emergency Care: Operating in a specialized surgical environment ensures that advanced monitoring and blood replacement are available if complications arise.

Tubal Recanalization

Tubal recanalization is a medical procedure used to reopen or reconnect the fallopian tubes to restore fertility. It is most commonly performed to reverse a previous tubal ligation (sterilization) or to clear blockages caused by infection, scarring, or debris. This procedure offers a path to natural conception by restoring the continuous pathway required for an egg to meet sperm.

  • Reversal of Tubal Ligation: If you previously had your "tubes tied" and now wish to restore natural fertility.

  • Proximal Tubal Occlusion: When the portion of the tube closest to the uterus is blocked by mucus plugs or minor scarring.

  • Secondary Infertility: If you have successfully conceived in the past but now face blockages due to pelvic inflammatory disease (PID) or endometriosis.

  • Desire for Natural Conception: For patients who prefer natural pregnancy over assisted reproductive technologies like IVF.

  • Post-Infection Blockage: When a previous pelvic infection has left debris or light adhesions within the tubal canal.

  • Non-Surgical (Fluoroscopic) Recanalization: An interventional radiologist uses X-ray guidance to pass a fine catheter through the cervix into the tubes to clear "plugs" without incisions.

  • Laparoscopic Tubal Anastomosis: A minimally invasive "keyhole" surgery where a surgeon uses micro-instruments to reconnect the severed ends of the tubes.

  • Hysteroscopic Cannulation: A small camera is inserted through the vagina and cervix to clear blockages specifically located at the opening of the tubes.

  • Open Microsurgical Repair: Performed through a traditional "bikini cut" incision, typically reserved for complex cases where laparoscopy is not feasible.

  • Anesthesia: Depending on the method, the procedure can be performed under local anesthesia (non-surgical), regional, or general anesthesia (surgical).

  • Duration: Non-surgical methods typically take about 30 minutes, while surgical reconnection can take between 1 to 3 hours.

  • Access: The surgeon or radiologist accesses the tubes either through the natural opening of the cervix or via small abdominal incisions.

  • Clearing or Joining: The blockage is either physically cleared with a catheter or the scarred ends of the tube are trimmed and precisely sutured together.

  • Dye Test (Chromotubation): A colored dye is often injected through the tubes during the procedure to confirm they are completely open and functional.

  • Closure: For surgical cases, small incisions are closed with dissolvable stitches or surgical glue.

  • Hysterosalpingogram (HSG): A specialized X-ray used to map the exact location of the blockage and assess the health of the remaining tubal segments.

  • Semen Analysis: It is often mandatory for the partner to undergo testing to ensure there are no male fertility factors before proceeding with surgery.

  • Laparoscopic Review: In some cases, a diagnostic laparoscopy is done first to ensure there is enough healthy tube (at least 4–5 cm) for a successful repair.

  • Fasting: Following "nothing by mouth" instructions for 8 hours if the procedure involves sedation or general anesthesia.

  • Medication Audit: Stopping blood thinners or aspirin 7–10 days prior to the procedure to minimize surgical risks.

  • Pelvic Ultrasound: To check for other fertility-related issues such as fibroids or ovarian cysts.

  • Ovarian Reserve Testing: Blood tests (such as AMH) to ensure the patient has a healthy egg supply, particularly for those over age 35.

  • Infection Screening: Testing for Chlamydia or Gonorrhea to ensure no active infection is present that could cause immediate re-scarring.

  • ECG: A standard heart check to confirm safety for the chosen level of anesthesia.

  • Hospital Stay: Most procedures are performed on an outpatient basis, allowing you to return home the same day.

  • Immediate Recovery: Most women can resume light daily activities within a few days to two weeks, depending on the surgical approach.

  • Conception Timeline: It may take several months to a year to conceive naturally; doctors often recommend waiting one to two menstrual cycles before trying.

  • Monitoring for Ectopic Pregnancy: Because there is a higher risk (5% to 15%) of a tubal pregnancy after repair, any positive pregnancy test must be followed by an early ultrasound.

  • Follow-up Imaging: A repeat HSG may be performed 3–6 months later to confirm the tubes remain open (patent).

  • Restores Natural Fertility: Allows for multiple future pregnancies without the need for repeated medical interventions or hormonal stimulation.

  • Technically Advanced Microsurgery: The use of high-magnification laparoscopy or robotic platforms ensures the most precise reconnection of delicate tissues.

  • Non-Invasive Options: Fluoroscopic techniques offer a highly effective way to clear blockages without the need for surgery or general anesthesia.

  • High Success Rates: For ideal candidates (under 35 with sufficient tubal length), the chances of successful pregnancy are significantly improved.

  • Cost-Effective Long Term: For many couples, a one-time successful recanalization is more affordable than multiple rounds of IVF.

Diagnostic Hysteroscopy

Diagnostic hysteroscopy is a minimally invasive procedure used to look inside the uterus to diagnose the cause of abnormal bleeding, infertility, or repeated miscarriages. It involves inserting a thin, lighted tube with a camera (hysteroscope) through the vagina and cervix, requiring no surgical incisions. This procedure allows for direct visualization of the uterine cavity, providing more accuracy than an ultrasound alone for certain conditions.

  • Abnormal Uterine Bleeding: To investigate heavy, prolonged, or unexpected post-menopausal bleeding.

  • Infertility Evaluation: To check for structural abnormalities, such as polyps or a uterine septum, that might prevent an embryo from implanting.

  • Recurrent Miscarriage: Looking for internal scarring (Asherman’s Syndrome) or congenital uterine defects that could affect a pregnancy.

  • Displaced IUD: To locate and potentially retrieve an intrauterine device that has moved out of its proper position.

  • Abnormal Imaging Results: If a prior ultrasound or saline sonogram showed a suspicious shadow or growth within the uterine lining.

  • Anesthesia: Depending on your comfort level and the doctor's preference, it can be done with no anesthesia, local anesthesia (numbing the cervix), or light sedation.

  • Duration: The procedure is typically performed in an outpatient setting or doctor’s office and takes only 5 to 15 minutes.

  • Preparation: You are positioned similarly to a routine pelvic exam. No abdominal cuts are required as the hysteroscope uses the natural opening of the cervix.

  • Expansion: A saline liquid or carbon dioxide gas is gently introduced to expand the uterus, providing the doctor with a clear, panoramic view of the uterine walls and the openings of the fallopian tubes.

  • Inspection: The doctor moves the camera to examine the lining for fibroids, polyps, or structural defects.

  • Biopsy/Sampling: If a suspicious area is identified, a small tissue sample (biopsy) can be taken at the same time for laboratory testing.

  • Timing Your Cycle: The procedure is best performed during the first week after your period ends, when the uterine lining is at its thinnest.

  • Pregnancy Test: A mandatory check to ensure you are not pregnant, as the procedure cannot be performed during pregnancy.

  • Medication Audit: You may be advised to take an over-the-counter pain reliever, like ibuprofen, about an hour before the procedure to minimize cramping.

  • Cervical Ripening (Optional): In some cases, medication may be inserted vaginally a few hours prior to help soften and slightly open the cervix.

  • Fasting: If you are receiving light sedation, you must follow "nothing by mouth" instructions for 6–8 hours before the appointment.

  • Pelvic Ultrasound: To provide a baseline view of the uterus and ovaries and to identify the location of any known fibroids.

  • Infection Screening: Testing for active pelvic infections or STIs to ensure it is safe to pass instruments into the uterus.

  • Blood Panels: A routine check of your blood count, especially if you have been experiencing heavy bleeding and anemia.

  • Hysterogram (HSG): Sometimes performed prior to hysteroscopy to check the patency of the fallopian tubes.

  • Recovery Time: Most patients can return to work and normal daily activities the same day or the following morning.

  • Short-term Symptoms: It is normal to experience mild cramping and light vaginal spotting for 1 to 2 days.

  • Gas/Shoulder Pain: If carbon dioxide was used for expansion, you may feel temporary referred pain in your shoulder for 24 hours.

  • Activity Restrictions: Most doctors recommend avoiding sexual intercourse and the use of tampons for a few days to allow the cervix to close and reduce the risk of infection.

  • Follow-up: Your doctor will discuss the visual findings immediately, though biopsy results typically take 5–7 days.

  • Direct Visualization: Provides a "real-time" view that is often more definitive than X-rays or ultrasounds for identifying small polyps or adhesions.

  • Incision-Free: The lack of surgical cuts means there is no external scarring and a near-instantaneous recovery period.

  • Immediate Transition: If a problem is found, it can often be treated during the same session by switching to an operative hysteroscopy to remove the growth.

  • High Safety Profile: Complications like uterine perforation or infection are extremely rare when performed by experienced specialists.

  • Fertility Friendly: It is the "gold standard" for evaluating the uterine environment before proceeding with expensive fertility treatments like IVF.

Polypectomy (Uterine Polyp Removal)

A uterine polypectomy is a minimally invasive surgical procedure to remove polyps—small, usually benign (non-cancerous) growths—from the lining of the uterus (endometrium). It is the most effective way to stop abnormal bleeding and improve fertility related to polyps. This procedure targets the growths directly, providing immediate diagnostic and therapeutic results.

  • Abnormal Uterine Bleeding: If you experience heavy periods, bleeding between your cycles, or any bleeding after menopause.

  • Infertility: Polyps can interfere with the uterine environment, sometimes acting like a natural "IUD" and preventing an embryo from implanting.

  • Recurrent Miscarriage: When polyps distort the uterine cavity or interfere with the blood supply to a developing fetus.

  • Irregular Cycles: Persistent spotting or unpredictable cycles that are not resolved by hormonal medications.

  • Post-Menopausal Spotting: Any amount of bleeding after menopause should be investigated, as polyps are a common cause.

  • Access: This is a "scarless" surgery. The surgeon inserts a hysteroscope (a thin telescope with a camera) through the vagina and cervix into the uterus. No abdominal incisions are made.

  • Anesthesia: The procedure is typically performed in an outpatient setting under local anesthesia, light sedation, or general anesthesia, taking 15 to 45 minutes.

  • Expansion: The uterus is filled with a saline solution or gas to expand the cavity, providing the surgeon with a high-definition, panoramic view of the polyps.

  • Removal: The surgeon uses specialized micro-instruments—such as a small wire loop (resectoscope), tiny scissors, or a mechanical morcellator—to snip or shave the polyp off at its base.

  • Biopsy: The removed polyps are almost always sent to a laboratory for pathology testing to confirm they are benign and rule out any cellular abnormalities.

  • Timing Your Procedure: Ideally performed during the first week after your period ends, when the uterine lining is at its thinnest and polyps are easiest to see.

  • Pregnancy Test: A mandatory check to ensure you are not pregnant before any instruments are introduced into the uterus.

  • Pelvic Imaging: A recent ultrasound or saline sonogram is required to map the location and size of the polyps.

  • Fasting: Following "nothing by mouth" instructions for 6–8 hours if your procedure involves sedation or general anesthesia.

  • Medication Audit: You may be advised to take an anti-inflammatory pain reliever an hour before the procedure to minimize post-operative cramping.

  • Saline Infusion Sonogram (SIS): A specialized ultrasound that uses fluid to outline the uterine cavity and highlight the polyps.

  • Diagnostic Hysteroscopy: Often performed just prior to the removal to confirm the surgical plan.

  • Cervical Screening: To ensure there are no active infections or cervical issues that could complicate the entry of the hysteroscope.

  • ECG: A routine heart check for patients undergoing sedation or general anesthesia.

  • Recovery Time: Most patients are able to return to their normal daily routine within 1 to 2 days.

  • Immediate Symptoms: It is normal to experience mild cramping and light vaginal spotting or a "watery" discharge for 3 to 7 days.

  • Pain Management: Over-the-counter pain relief (like ibuprofen) is usually sufficient to manage any temporary discomfort.

  • Activity Restrictions: You should avoid sexual intercourse, tampons, and douching for 1 to 2 weeks to prevent infection and allow the uterine lining to heal.

  • Cycle Regulation: Most women see an immediate improvement in their menstrual regularity and a significant reduction in heavy bleeding.

  • Incision-Free Procedure: The lack of external cuts means no visible scarring and a near-instantaneous recovery compared to traditional surgery.

  • Fertility Boost: Removing polyps significantly increases the success rates of both natural conception and assisted reproductive treatments like IVF.

  • Definitive Results: Provides both a cure for the bleeding and a tissue sample for biopsy in a single, short session.

  • High Precision: Specialized mechanical morcellators allow for the rapid removal of multiple polyps with minimal trauma to the surrounding healthy endometrium.

  • Immediate Symptom Relief: Most patients notice a dramatic difference in their very next menstrual cycle following the procedure.

Hysteroscopic Adhesiolysis (Asherman Syndrome)

Hysteroscopic Adhesiolysis is a specialized surgical procedure used to treat Asherman Syndrome, a condition where scar tissue (adhesions) forms inside the uterus. This scar tissue can cause the uterine walls to stick together, distorting the cavity. The goal of the surgery is to precisely remove these "bands" of scar tissue to restore the shape of the uterine cavity, allowing for normal menstruation and the restoration of fertility.

  • Asherman Syndrome: When intrauterine scarring is confirmed via imaging or a prior diagnostic procedure.

  • Amenorrhea or Hypomenorrhea: If your periods have stopped entirely or become extremely light following a uterine procedure (like a D&C).

  • Infertility: When scar tissue physically blocks the fallopian tubes or creates an environment where an embryo cannot implant.

  • Recurrent Miscarriage: If a distorted or constricted uterine cavity prevents a pregnancy from growing safely.

  • Cyclical Pelvic Pain: Monthly pain that occurs without visible bleeding, often caused by menstrual blood being trapped behind scar tissue.

  • Access: This is a "scarless" surgery performed entirely through the vagina and cervix using a hysteroscope (a thin camera). No abdominal incisions are required.

  • Anesthesia: The procedure is typically performed in an outpatient setting under general or spinal anesthesia and takes about 30 to 60 minutes.

  • Visualization: The uterus is expanded with a saline solution to provide the surgeon with a clear, high-definition view of the internal scarring.

  • Adhesiolysis: The surgeon uses micro-scissors, a laser, or a specialized electrosurgical loop to precisely cut through the adhesions. In severe cases, heat-based tools are often avoided to prevent further scarring of the delicate lining.

  • Guided Navigation: In complex cases where the cavity is completely closed, a second surgeon may use abdominal ultrasound or a laparoscope to guide the hysteroscopic surgeon and prevent puncturing the uterine wall.

  • Saline Infusion Sonogram (SIS): A specialized ultrasound used to map the extent of the adhesions before surgery.

  • Hysterosalpingogram (HSG): An X-ray that uses dye to identify the exact locations where the uterine walls are stuck together.

  • Pregnancy Test: A mandatory check to ensure the procedure is safe to perform.

  • Cervical Ripening: You may be given medication to take a few hours before surgery to help soften the cervix for easier instrument entry.

  • Fasting: Adhering to "nothing by mouth" instructions for 6–8 hours prior to your anesthesia.

  • Diagnostic Hysteroscopy: Often the final step to confirm the severity of Asherman Syndrome before the surgical repair begins.

  • Pelvic MRI: Occasionally used in very severe cases to determine if there is any healthy endometrial tissue remaining behind the scars.

  • Blood Panels: A routine check of your blood count and coagulation profile to ensure a safe surgical experience.

  • ECG: A standard heart check to confirm you are healthy enough for the administration of anesthesia.

  • Immediate Recovery: Most patients return home the same day and experience only mild cramping and light spotting for 2 to 5 days.

  • Adhesion Prevention (Crucial): Because the uterus "wants" to scar again, a specialized balloon or stent is often placed inside the uterus for 3 to 7 days to keep the walls apart.

  • Hormone Therapy: High-dose estrogen is typically prescribed for 30 to 60 days to stimulate the rapid growth of a healthy uterine lining over the surgical areas.

  • Follow-up Imaging: A "second-look" diagnostic hysteroscopy is usually performed 4 to 6 weeks later to ensure the cavity has remained open and healthy.

  • Success Rates: While restoration is highly successful in mild cases, severe Asherman’s may require multiple surgeries to fully restore the uterine lining.

  • Restores Reproductive Health: This is the primary treatment for returning a scarred uterus to a functional state for pregnancy and menstruation.

  • Incision-Free Technology: Using the natural opening of the cervix means no external scarring and a rapid return to daily activities.

  • Micro-Precision Tools: The use of cold-blade micro-scissors prevents thermal damage to the remaining healthy uterine lining (endometrium).

  • Comprehensive Post-Op Protocol: The combination of stents and hormone therapy significantly reduces the risk of the scar tissue growing back.

  • Advanced Guidance: The use of simultaneous ultrasound or laparoscopy provides an extra layer of safety when navigating a distorted uterine cavity.

Septum Resection
Septum Resection

Hysteroscopic Septum Resection, or Septoplasty, is a specialized surgical procedure used to correct a uterine septum—a congenital condition where a wedge-shaped longitudinal wall of tissue divides the uterine cavity. This tissue is typically fibrous and has a poor blood supply, which can interfere with the healthy development of a pregnancy. The procedure aims to unify the cavity into a single, functional space.

  • Recurrent Miscarriage: A uterine septum is one of the most common correctable causes of repeated pregnancy loss, as an embryo may implant on the septum where there is insufficient blood flow to support growth.

  • Infertility: While a septum does not always prevent conception, it can interfere with the proper implantation of a fertilized egg into a healthy part of the uterine lining.

  • Risk of Preterm Labor: A divided cavity limits the physical space available for a growing fetus, significantly increasing the risk of early delivery or malpresentation (such as a breech position).

  • Congenital Abnormality: When a 3D ultrasound or MRI confirms the presence of a partial or complete septum that distorts the internal triangular shape of the uterus.

  • Access: This is a "scarless" outpatient procedure performed entirely through the vagina and cervix using a hysteroscope (a thin camera). No abdominal incisions are required.

  • Anesthesia: The surgery is typically performed under general or spinal anesthesia and takes approximately 20 to 45 minutes.

  • Distension: The uterus is expanded with a saline solution to provide the surgeon with a clear, magnified view of the dividing septum and the surrounding cavity walls.

  • Resection: The surgeon uses micro-scissors, a laser, or a specialized electrosurgical loop (resectoscope) to precisely cut through the midline of the fibrous tissue. Because the septum lacks major blood vessels, there is usually very little bleeding during the procedure.

  • Completion: The resection continues until the uterine cavity reaches a normal, unified triangular shape, ensuring there is no obstruction between the two sides of the uterus.

  • Advanced Imaging: A 3D ultrasound or pelvic MRI is essential to differentiate a septate uterus from a bicornuate (heart-shaped) uterus, which requires a different surgical approach.

  • Timing Your Procedure: Ideally scheduled during the first week after your period ends, when the uterine lining is at its thinnest for the best surgical visualization.

  • Pregnancy Test: A mandatory check to ensure the procedure is safe to perform.

  • Cervical Ripening: You may be given medication to take a few hours before surgery to help soften the cervix, allowing the hysteroscope to pass more easily.

  • Fasting: Following "nothing by mouth" instructions for 6–8 hours prior to your scheduled anesthesia.

  • 3D Pelvic Ultrasound: The gold standard for measuring the depth and thickness of the septum and the outer contour of the uterus.

  • Hysterosalpingogram (HSG): An X-ray that uses dye to show the internal "V" or "Y" shape of the divided cavity.

  • Diagnostic Hysteroscopy: Often performed just before the resection to confirm the surgical plan and check the health of the fallopian tube openings.

  • ECG: A standard heart check to ensure you are healthy enough for the administration of anesthesia.

  • Recovery Time: Most patients return to their normal daily routine within 1 to 2 days.

  • Immediate Symptoms: Mild cramping and light vaginal spotting or a "watery" discharge are normal for 2 to 5 days as the uterus heals.

  • Hormonal Support: Some surgeons prescribe estrogen therapy for a few weeks post-op to encourage the healthy uterine lining to grow over the area where the septum was removed.

  • Follow-up Imaging: A "second-look" diagnostic hysteroscopy or a follow-up 3D ultrasound is often performed 4 to 8 weeks later to confirm the cavity is fully open.

  • Pregnancy Timing: Most doctors recommend waiting 2 to 3 menstrual cycles before attempting to conceive to ensure the uterine lining has completely regenerated and is ready for implantation.

  • Significant Improvement in Outcomes: Successful resection can reduce miscarriage rates from as high as 80–90% down to 10–15% in women with this condition.

  • Incision-Free Recovery: Using the natural opening of the cervix means no external scars and a much faster return to work and family life.

  • Micro-Precision Tools: The use of specialized micro-scissors or lasers allows for the removal of the septum without damaging the sensitive, vascular parts of the uterine wall.

  • Unified Uterine Space: Restoring the natural triangular shape of the cavity provides the maximum possible space for a baby to grow to full term.

  • Definitive Correction: Unlike many other fertility issues, a uterine septum is a structural problem that can be permanently corrected with a single, short surgical procedure.

Prolapse Surgery (Uterine / Vaginal Prolapse)

Prolapse surgery is performed to restore the pelvic organs—such as the bladder, uterus, or rectum—to their original positions when the muscles and ligaments supporting them have weakened. The goal is to relieve the sensation of a "bulge" and restore normal bowel, bladder, and sexual function by reinforcing the pelvic floor.

  • Sensation of a "Bulge": Feeling or seeing a protrusion of tissue coming out of the vaginal opening.

  • Pelvic Pressure: A constant heavy or "dragging" sensation in the pelvis that worsens after standing for long periods.

  • Urinary Issues: Difficulty starting urination, a feeling of incomplete emptying, or the need to "push" the bulge back in to urinate.

  • Bowel Dysfunction: Difficulty passing stool or chronic constipation specifically related to a bulging rectum (rectocele).

  • Pain During Intercourse: Discomfort or a lack of sensation caused by the shifting of the vaginal walls and pelvic organs.

  • Anterior Repair (Cystocele): Fixes a prolapsed bladder by tightening and reinforcing the front wall of the vagina.

  • Posterior Repair (Rectocele): Fixes a prolapsed rectum by tightening and reinforcing the back wall of the vagina.

  • Uterine Suspension (Hysteropexy): If the uterus is falling, it is "lifted" and anchored to pelvic ligaments or bone using stitches or mesh, allowing the uterus to be preserved.

  • Vaginal Hysterectomy: In many cases of uterine prolapse, the uterus is removed entirely through the vagina to provide a permanent solution for the descent.

  • Sacrocolpopexy: An advanced "keyhole" (laparoscopic or robotic) surgery where the top of the vagina is attached to the sacrum (base of the spine) using a synthetic mesh strip for maximum support.

  • Vaginal Approach: The most common method. All incisions are made inside the vagina, leaving no external scars and requiring a shorter recovery time.

  • Laparoscopic/Robotic Approach: Performed through 4–5 tiny "keyhole" incisions in the abdomen. This is often used for complex "suspension" surgeries to provide superior visualization and precision.

  • Colpocleisis: A specialized "obliterative" surgery for older patients who are no longer sexually active. The vaginal canal is shortened and sewn shut to provide a permanent "shelf" of support for the organs.

  • Anesthesia: Depending on the approach, the procedure is performed under general or spinal anesthesia and typically takes 1 to 3 hours.

  • Urodynamic Testing: Specialized bladder tests to see if repositioning the organs will cause or fix urinary leaking (incontinence).

  • Pelvic Floor Assessment: A detailed examination to identify which "compartments" (front, back, or top) of the vagina need the most support.

  • Weight Management: Patients are often encouraged to reach a healthy weight before surgery to reduce pressure on the new surgical repairs.

  • Smoking Cessation: Stopping smoking 6 weeks before surgery is critical, as chronic coughing and poor tissue healing significantly increase the risk of the prolapse returning.

  • Fasting: Adhering to "nothing by mouth" instructions for 8 hours prior to your anesthesia.

  • Pelvic Ultrasound: To check the size of the uterus and ensure there are no hidden fibroids or ovarian cysts.

  • Cystoscopy: A quick look inside the bladder with a tiny camera to ensure there are no other causes for urinary symptoms.

  • Post-Void Residual (PVR): A simple ultrasound scan after you urinate to see how much fluid remains in the bladder.

  • ECG: A standard heart check to ensure you are healthy enough for the duration of the procedure.

  • Hospital Stay: Typically involves 1 to 2 nights for monitoring and ensuring you can urinate comfortably before going home.

  • The "6-Week Rules": To prevent the repair from failing or stitches from tearing, you must strictly avoid:
    Heavy Lifting: Nothing heavier than 2kg (roughly the weight of a full kettle).
    Straining: Stool softeners are usually prescribed to prevent constipation and straining during bowel movements.
    High-Impact Exercise: No running, jumping, or heavy core workouts.
    Sexual Activity: Avoid intercourse and the use of tampons to allow the vaginal incisions to heal.

  • Immediate Symptoms: Expect mild vaginal bleeding and a "watery" discharge for 2 to 4 weeks as the internal stitches dissolve.

  • Definitive Symptom Relief: Successfully removes the physical bulge and the associated dragging sensation, often after years of discomfort.

  • Restores Organ Function: Many patients find that their bladder and bowel movements become significantly easier and more predictable after surgery.

  • Advanced "Keyhole" Options: Laparoscopic and robotic platforms offer the most durable repairs with the smallest incisions and fastest recovery.

  • No Visible Scarring: Traditional vaginal repairs leave no external marks, providing a discreet and effective solution.

  • Tailored Anatomy Repair: Every surgery is customized to the patient’s specific anatomy, ensuring the correct balance of support for all pelvic organs.

Vaginal Repair Surgery

Vaginal repair surgery, clinically known as Colporrhaphy, is a procedure used to reinforce and strengthen the vaginal walls when they have become weakened or stretched. This is most commonly performed to treat pelvic organ prolapse, such as a Cystocele (bladder bulging into the vagina) or a Rectocele (rectum bulging into the vagina), restoring the pelvic organs to their correct anatomical positions.

  • Physical Bulge: Feeling or seeing a lump at or poking out of the vaginal opening, especially after long periods of standing or straining.

  • Pelvic Pressure: A constant "heavy" or dragging sensation in the lower pelvis that may improve when lying down.

  • Bladder Dysfunction: Difficulty emptying the bladder completely, a frequent urge to urinate, or recurrent urinary tract infections (UTIs).

  • Bowel Issues: Difficulty having a bowel movement or the need to "splint" (pressing on the vaginal wall with a finger) to assist a bowel movement.

  • Childbirth Injury: If the perineum (the area between the vagina and anus) was severely torn or stretched during delivery, causing functional or cosmetic concerns.

  • Anterior Repair: Focuses on the front wall of the vagina to support and lift a prolapsed bladder.

  • Posterior Repair: Focuses on the back wall of the vagina to support a prolapsed rectum.

  • Perineorrhaphy: Often performed alongside a posterior repair to strengthen the perineum and the muscles around the vaginal opening.

  • Enterocele Repair: A specialized repair for the top of the vaginal wall if the small intestine is bulging into the vaginal space.

  • Access: This is a "scarless" surgery performed entirely through the vaginal opening. There are no abdominal incisions or external scars.

  • Anesthesia: The surgery is typically performed under general or spinal anesthesia and takes about 30 to 60 minutes.

  • The Procedure: The surgeon makes a precise incision in the vaginal lining to reach the underlying supportive tissue (fascia).

  • Reinforcement: The shifted organ (bladder or rectum) is moved back into its proper place, and the surgeon uses permanent or long-lasting dissolvable stitches to tighten and "pleat" the weakened fascia.

  • Trimming: Any excess or overstretched vaginal skin is trimmed away to ensure a firm, supportive wall before the incision is closed with dissolvable sutures.

  • Pelvic Floor Exam: A detailed assessment to determine which compartments of the vagina require reinforcement.

  • Urodynamic Studies: To check how well the bladder is functioning and ensure the repair won't cause new urinary leakage.

  • Bowel Management: Starting a high-fiber diet or mild stool softeners a few days before surgery to ensure a "soft" first bowel movement post-op.

  • Smoking Cessation: Stopping smoking at least 6 weeks prior is vital, as chronic coughing puts immense pressure on the new stitches and can cause the repair to fail.

  • Fasting: Following "nothing by mouth" instructions for 8 hours prior to your scheduled anesthesia.

  • Post-Void Residual (PVR) Scan: A simple ultrasound to measure how much urine stays in the bladder after you try to empty it.

  • Pelvic Ultrasound: To rule out other issues like uterine fibroids or ovarian cysts that might be contributing to pelvic pressure.

  • Cystoscopy: A quick look inside the bladder to ensure the lining is healthy before the anterior wall is repaired.

  • ECG: A routine heart check to confirm you are healthy enough for the duration of the surgery.

  • Hospital Stay: Most patients stay in the hospital for one night to ensure they can urinate comfortably and that pain is well-controlled.

  • Immediate Symptoms: It is normal to experience mild vaginal bleeding and a "watery" discharge for 2 to 4 weeks as the internal stitches dissolve.

  • The "6-Week Rules": To prevent the stitches from tearing and ensure the repair holds for the long term, you must strictly avoid:
    Heavy Lifting: Nothing heavier than 2kg (roughly a bag of sugar).
    Straining: Stool softeners are essential to prevent constipation and abdominal pressure.
    Sexual Activity: No intercourse or use of tampons while the vaginal lining heals.
    High-Impact Exercise: No running, jumping, or heavy core training.

  • Pelvic Floor Physiotherapy: Many patients are referred to a specialist therapist after 6 weeks to learn how to properly strengthen the muscles that support the new repair.

  • Restores Quality of Life: Eliminates the physical discomfort and the "bulge" sensation, allowing for a more active and comfortable lifestyle.

  • Incision-Free Technology: Performing the surgery through the vagina avoids the risks and recovery time associated with abdominal surgery.

  • Functional Restoration: Significantly improves bladder and bowel control by returning the organs to their natural anatomical positions.

  • Long-Lasting Support: The use of specialized, high-strength sutures ensures the internal "scaffolding" of the vagina is rebuilt to last.

  • Combined Approaches: Surgeons can often address multiple types of prolapse (bladder, rectum, and perineum) in a single, short surgical session.

Sling Surgery (Urinary Incontinence)

Sling surgery is the most common surgical treatment for Stress Urinary Incontinence (SUI)—the leaking of urine during physical activities like coughing, sneezing, laughing, or exercising. The procedure involves placing a narrow strip of material under the urethra (the tube that carries urine out of the body) to act like a hammock, providing the necessary support to prevent accidental leaks.

  • Stress Urinary Incontinence: If you experience frequent leaking when you cough, sneeze, laugh, or lift heavy objects.

  • Activity-Induced Leaks: When physical exercise or sudden movements result in the involuntary loss of urine.

  • Failed Conservative Therapy: If pelvic floor exercises (Kegels) or lifestyle changes have not sufficiently controlled your symptoms.

  • Impact on Quality of Life: When you find yourself avoiding social situations, exercise, or specific clothing due to the fear of a leak.

  • Post-Prolapse Repair: Sometimes performed alongside prolapse surgery to ensure the bladder remains supported once it is repositioned.

  • Mid-Urethral Slings (MUS): The most common "tension-free" method. A thin strip of synthetic mesh is placed under the middle of the urethra through small, discreet incisions.

  • Retropubic (TVT): The sling is passed behind the pubic bone and exits through two tiny incisions in the lower abdomen.

  • Transobturator (TOT): The sling is passed through the groin muscles and exits through small incisions in the creases of the thigh.

  • Traditional Autologous Sling: Instead of synthetic mesh, the surgeon uses a strip of the patient's own tissue (fascia), harvested from the abdominal wall or thigh. This is often preferred for complex cases or those wishing to avoid synthetic materials.

  • Access: A small incision (about 1–2 cm) is made inside the vagina, directly under the urethra. No large abdominal cuts are required for most types.

  • Anesthesia: The surgery is typically an outpatient procedure performed under general or spinal anesthesia and takes about 30 to 45 minutes.

  • Placement: The sling material is threaded through the vaginal incision and carefully positioned to provide a "backstop" for the urethra.

  • Tensioning: The surgeon ensures the sling is "tension-free," meaning it only supports the urethra when there is downward pressure (like a cough), without blocking normal urination.

  • Closure: The vaginal and small skin incisions are closed with dissolvable stitches, leaving no permanent external marks.

  • Urodynamic Testing: Specialized bladder function tests to confirm that your leakage is caused by stress incontinence and not an overactive bladder.

  • Cystoscopy: A quick look inside the bladder to ensure the anatomy is healthy before the sling is positioned.

  • Urinalysis: To rule out a urinary tract infection (UTI), as any active infection must be treated before surgery.

  • Fasting: Following "nothing by mouth" instructions for 8 hours prior to your scheduled anesthesia.

  • Medication Audit: You may be asked to stop taking blood thinners or aspirin 7–10 days before the procedure.

  • Stress Test: Your doctor may ask you to cough with a full bladder to observe the nature of the leakage.

  • Post-Void Residual (PVR) Scan: An ultrasound to measure how well your bladder empties before the sling is added.

  • Pelvic Exam: To check for any co-existing pelvic organ prolapse that might need to be addressed at the same time.

  • ECG: A standard heart check to ensure you are healthy enough for the duration of the procedure.

  • Hospital Stay: Most patients go home the same day once they are able to empty their bladder normally after the anesthesia wears off.

  • Immediate Symptoms: Mild vaginal spotting and soreness in the groin or lower abdomen are normal for 1 to 2 weeks.

  • The "6-Week Rules": To ensure the sling "grows" into the tissue and stays perfectly in place, you must strictly avoid:
    Heavy Lifting: Nothing heavier than 4–5 kg (about the weight of a heavy grocery bag).
    Sexual Activity: No intercourse or use of tampons while the vaginal incision heals.
    High-Impact Exercise: No running, jumping, or heavy core workouts.

  • Voiding Changes: It is normal for the stream of urine to be slightly slower than before surgery; this usually settles as the initial swelling goes down.

  • Immediate Results: Most women report significant improvement or complete dryness immediately following the procedure.

  • High Success Rates: Between 80% to 90% of patients experience long-term relief from stress urinary incontinence.

  • Minimally Invasive Technology: Small incisions and short operating times mean a rapid return to daily life and very little post-operative pain.

  • Proven Durability: Modern sling materials and techniques are designed to provide a permanent solution for bladder support.

  • Tailored Material Choice: Whether using advanced synthetic mesh or your own natural tissue, the procedure is customized to your specific medical history and goals.

Intrauterine Insemination (IUI)

Intrauterine Insemination (IUI) is a widely used, non-invasive first-line fertility treatment designed to bridge the gap between natural conception and more complex assisted reproductive technologies. This procedure involves placing specially washed and concentrated sperm directly into the uterus around the time of ovulation. By bypassing the cervix and reducing the distance sperm must travel to reach the egg, IUI significantly increases the chances of fertilization for many couples.

  • Unexplained infertility where no clear biological barrier has been identified.

  • Mild male factor infertility, including slightly lower sperm count or motility.

  • Cervical mucus issues that may prevent sperm from entering the uterus naturally.

  • Use of donor sperm for single women or same-sex couples.

  • Semen allergy (rare cases) where proteins in the seminal fluid cause a reaction.

  • Ejaculatory dysfunction or physical barriers to natural intercourse.

  • Polycystic Ovary Syndrome (PCOS) requiring carefully monitored ovulation induction.

  • Endometriosis (Stage I or II) where pelvic anatomy remains relatively undisturbed.

  • Minor hormonal imbalances that interfere with regular ovulation cycles.

  • Vaginismus or other conditions that make traditional intercourse difficult.

  • Cases requiring "washed" sperm to remove prostaglandins that cause uterine cramping.

  • Ovulation is tracked through at-home monitoring kits or clinical ultrasound scans.

  • Ovarian stimulation may be used to encourage the development of one to three mature follicles.

  • A sperm sample is collected and "washed" in a specialized lab to isolate highly motile sperm.

  • The concentrated sperm sample is loaded into a thin, flexible, high-precision catheter.

  • The physician gently inserts the catheter through the cervix and into the uterine cavity.

  • The sperm is injected directly into the uterus, a process that takes only a few minutes and requires no anesthesia.

  • Advanced Sperm Washing (Density Gradient)A refined laboratory technique that separates the healthiest, most motile sperm from debris and immotile cells.

  • AI-Powered Follicle TrackingAutomated ultrasound software that precisely predicts the peak window of ovulation for optimal timing.

  • Microfluidic Sperm SelectionA gentle, chemical-free sorting method that selects sperm with the highest DNA integrity.

  • High-Definition Insemination CathetersUltra-thin, soft-tip catheters designed to minimize uterine irritation and maximize patient comfort.

  • Hormonal Trigger OptimizationThe use of precision medications to ensure the egg is released exactly when the sperm is introduced.

  • Digital Cycle MonitoringIntegrated health apps that allow patients to sync their monitoring data directly with the clinic’s laboratory.

  • Comprehensive fertility screening to ensure the fallopian tubes are open and functional.

  • Lifestyle adjustments, including a balanced diet and moderate exercise, to support egg and sperm quality.

  • Coordination of a monitoring schedule to identify the exact 24-48 hour window of ovulation.

  • Abstinence for 2-5 days for the male partner prior to the procedure to optimize the sperm sample.

  • Discussion of the potential for multiple pregnancies if using ovulation-stimulating medications.

  • Hysterosalpingogram (HSG) to confirm that at least one fallopian tube is clear.

  • Semen analysis to ensure the processed sample will meet the minimum motile sperm count.

  • Anti-Müllerian Hormone (AMH) and FSH testing to assess ovarian reserve.

  • Transvaginal Ultrasound to measure the thickness of the endometrial lining.

  • Standard infectious disease screening for both partners as required by medical protocols.

  • Acts as a successful, low-cost entry point for couples with mild fertility hurdles.

  • Bypasses "cervical factor" infertility, where the cervix may be hostile to sperm.

  • Delivers a high concentration of motile sperm directly to the site of fertilization.

  • Allows for a more natural conception process compared to IVF, as fertilization still occurs within the body.

  • Provides high cumulative success rates, with many couples achieving pregnancy within three to six cycles.

  • Patients can return to all normal daily activities immediately following the procedure.

  • Minor spotting or light cramping may occur but typically resolves within a few hours.

  • A "Two-Week Wait" (2WW) period begins, during which the patient monitors for early signs of pregnancy.

  • A follow-up pregnancy test (urine or blood-based Beta-hCG) is performed 14 days post-IUI.

  • If successful, a confirmatory ultrasound is scheduled to monitor early fetal development.

  • Transition to routine obstetric care for a healthy, natural-term pregnancy.

  • Resolution of infertility through a less invasive and more affordable medical pathway.

  • Opportunity to move toward more advanced treatments (like IVF) if IUI does not result in pregnancy after several attempts.

  • Ongoing reproductive health monitoring to prepare for future family-building goals.

  • Peace of mind from having utilized a scientifically proven, time-tested fertility method.

Cervical Cerclage
Cervical Cerclage

Cervical Cerclage—often called a "cervical stitch"—is a critical preventative procedure used during pregnancy to treat cervical insufficiency (an incompetent cervix). This condition occurs when the cervical tissue weakens and begins to open (dilate) too early, which can lead to late-term miscarriage or premature birth.

  • Prophylactic (History-Based): For women with a history of previous second-trimester losses or preterm births, usually performed between 12 and 14 weeks.

  • Therapeutic (Ultrasound-Based): When an ultrasound identifies a significantly shortening cervix (typically less than 25mm) in high-risk patients.

  • Emergency (Rescue): When the cervix has already begun to dilate and fetal membranes are visible, serving as a high-stakes intervention to save the pregnancy.

  • Cervical Insufficiency: Diagnosed weakness in the cervical tissue that cannot support the weight of a growing pregnancy.

  • Failed Progesterone Therapy: When hormonal treatments are insufficient to prevent cervical shortening.

  • McDonald Technique: The most common vaginal approach where a permanent stitch is placed around the mid-portion of the cervix.

  • Shirodkar Technique: A slightly more complex vaginal method where the stitch is placed higher up, closer to the internal opening of the cervix.

  • Transabdominal Cerclage (TAC): Performed via laparoscopy or robotic surgery at the very top of the cervix; usually reserved for cases where vaginal stitches have failed.

  • Robot-Assisted Cerclage: Utilizing advanced robotic systems for high-precision placement in complex anatomical cases.

  • Emergency Stitching: Specialized "rescue" techniques used to carefully reposition membranes before sealing the cervix.

  • Anesthesia: The procedure is typically performed under regional anesthesia (spinal or epidural) to ensure the patient is pain-free.

  • Positioning: The surgeon accesses the cervix through the vaginal canal while the patient is in a relaxed state.

  • Drawstring Suture: A strong, synthetic thread is woven around the cervical tissue and pulled tight, similar to a drawstring bag.

  • Monitoring: The surgical team monitors for uterine contractions or signs of preterm labor immediately following the stitch placement.

  • Duration: The vaginal procedure is relatively quick, often taking between 20 to 45 minutes to complete.

  • Fasting: Patients must fast for 8–12 hours before the surgery to ensure safety during anesthesia.

  • Fetal Assessment: An ultrasound is performed immediately before the procedure to confirm the baby's health and position.

  • Infection Screening: Swabs and blood tests are taken to rule out any active vaginal or pelvic infections.

  • Medication Review: Discussing any history of uterine contractions or sensitivity to anesthesia.

  • Recovery Planning: Arranging for a support person to assist with transport and initial home monitoring.

  • Transvaginal Ultrasound: To measure the length and shape (funneling) of the cervix.

  • Blood Tests (CBC): To check for signs of infection or inflammation that could complicate the surgery.

  • Urinalysis: To ensure there is no urinary tract infection (UTI) present.

  • Fetal Heart Rate Monitoring: To establish a baseline of the baby's well-being.

  • Amniotic Fluid Assessment: In emergency cases, checking for the presence of the amniotic sac in the vaginal canal.

  • Hospital Stay: Most patients go home the same day or after one night of observation for contractions.

  • Immediate Symptoms: Mild cramping and light spotting are considered normal for 48–72 hours post-op.

  • Pelvic Rest: Strict avoidance of intercourse, tampons, and douching for the remainder of the pregnancy.

  • Stitch Removal: The suture is typically removed in-office at 36 or 37 weeks to allow for a normal vaginal delivery.

  • Activity Management: While strict bed rest is rarely mandated in 2026, patients are advised to avoid heavy lifting and high-impact exercise.

  • Pregnancy Prolongation: Highly effective at extending gestation, with success rates between 70% and 90%.

  • Reduced Prematurity Risk: Lowers the likelihood of extremely early preterm birth (before 28 weeks).

  • Life-Saving Intervention: Acts as a critical "rescue" for pregnancies where the cervix begins to open prematurely.

  • Future Planning: Transabdominal options provide a long-term solution for women with recurring cervical issues.

  • Minimally Invasive: Most techniques involve no external incisions and allow for a quick physical recovery.

Colposcopy and Biopsy

A colposcopy is a standard diagnostic procedure used to closely examine the cervix, vagina, and vulva for signs of disease. It is most commonly performed as a follow-up after an abnormal Pap smear or a positive HPV test to provide a more detailed assessment of cellular health.

  • Abnormal Pap Smear: Following results that indicate atypical or precancerous cells.

  • Positive HPV Test: When high-risk strains of Human Papillomavirus are detected.

  • Unexplained Bleeding: To investigate bleeding after intercourse or between periods.

  • Visible Abnormalities: When a physician notices unusual growths or lesions during a pelvic exam.

  • Monitoring CIN: To follow up on previously diagnosed low-grade cervical changes (CIN 1).

  • Visual Examination: Using a colposcope—a magnifying instrument that remains outside the body—to view the tissue in high detail.

  • Acetic Acid Swabbing: Applying a mild vinegar solution to highlight abnormal areas by turning them white.

  • Iodine Solution (Schiller’s Test): An alternative staining method used to further identify suspicious cell clusters.

  • Targeted Biopsy: The removal of a tiny tissue sample from suspicious areas for laboratory analysis.

  • Cervical Mapping: A systematic check of the cervix, vagina, and vulva to identify the extent of any abnormalities.

  • Positioning: The patient lies on an exam table with feet in stirrups, similar to a standard pelvic exam.

  • Magnification: The doctor positions the colposcope at the opening of the vagina to light and magnify the view.

  • Solution Application: A mild solution is swabbed onto the cervix, which may cause a slight stinging or burning sensation.

  • Tissue Sampling: If needed, a biopsy is taken, during which the patient may feel a sharp pinch or mild cramping.

  • Duration: The entire procedure is relatively quick, typically taking between 10 to 20 minutes in a clinical setting.

  • Timing: Schedule the exam for a time when you are not having your period for the clearest view.

  • Pelvic Rest: Avoid sexual intercourse, tampons, and vaginal medications for 24 to 48 hours before the test.

  • Pain Management: Discuss taking an over-the-counter pain reliever shortly before the appointment to minimize cramping.

  • Medical History: Inform the doctor if you are pregnant, as this may affect the decision to perform a biopsy.

  • Support: While the procedure is minor, some patients prefer to have a support person accompany them.

  • Pap Smear: The initial screening test that often leads to the recommendation of a colposcopy.

  • HPV Typing: To identify the specific strain of the virus present.

  • Biopsy Analysis: Laboratory testing of tissue samples to determine the grade of cellular changes.

  • Endocervical Curettage (ECC): A specialized sample taken from the cervical canal if the transformation zone is not fully visible.

  • Follow-up Imaging: In rare cases, further imaging may be required if abnormalities extend beyond the cervix.

  • Immediate Activity: Most women can return to work or normal routines immediately following the procedure.

  • Recovery Timeline: Light spotting or a dark, grainy discharge is normal for 2 to 5 days.

  • Exercise Restrictions: It is often recommended to avoid heavy or strenuous exercise for 24–48 hours.

  • Pelvic Rest: If a biopsy was taken, avoid tampons, douching, and sexual intercourse for at least one week to allow healing.

  • Results Waiting Period: Final biopsy results typically take 1 to 2 weeks to be finalized by the laboratory.

  • Early Detection: Identifies precancerous changes long before they develop into cervical cancer.

  • Accuracy: Provides a far more detailed view of the cervix than a standard pelvic exam.

  • Targeted Treatment: Allows the doctor to identify the exact location for a biopsy, ensuring more accurate results.

  • Minimally Invasive: Performed in-office without the need for general anesthesia or significant downtime.

  • Clear Guidance: Provides a definitive roadmap for whether further treatment (like a LEEP) or simple monitoring is required.

Dilation and Curettage (D&C)

Dilation and Curettage (D&C) is a minor surgical procedure used to diagnose or treat various uterine conditions by removing tissue from the lining of the uterus. This procedure remains a fundamental intervention for managing endometrial health and addressing reproductive complications.

  • Abnormal Uterine Bleeding: Investigation of heavy periods, bleeding between cycles, or post-menopausal bleeding.

  • Retained Tissue Management: Clearing the uterus of tissue following a miscarriage or abortion to prevent infection.

  • Postpartum Complications: Removing fragments of the placenta that remain in the uterus after childbirth.

  • Detection of Anomalies: Identifying uterine polyps, endometrial hyperplasia, or potential uterine cancer.

  • Pregnancy Complications: Treatment of molar pregnancies where abnormal tissue growth occurs.

  • Diagnostic Investigation: Collecting tissue samples to determine the cause of unexplained pelvic symptoms.

  • Dilation: The process of widening the cervix using specialized rods called dilators or medication to soften the cervical canal.

  • Curettage: Use of a spoon-shaped instrument known as a curette to gently scrape tissue from the uterine lining.

  • Suction Curettage: A minimally invasive vacuum method used to remove uterine contents efficiently.

  • Diagnostic Sampling: Extraction of endometrial tissue for laboratory analysis and histopathology.

  • Specialized Access: The healthcare provider widens the cervix to allow instruments to enter the uterine cavity safely.

  • Tissue Removal: A curette or suction device is inserted to clear or sample the endometrium.

  • Anesthesia Integration: Patients receive general, regional, or local anesthesia with sedation to ensure complete comfort.

  • Real-Time Precision: The procedure typically takes 10 to 15 minutes and is conducted in a controlled clinical environment.

  • Outpatient Protocol: Performed as a day-care surgery, allowing for same-day discharge.

  • Softening Agents: Advanced pharmacological options to dilate the cervix more naturally and with less trauma.

  • Precision Curettes: Modern, low-profile instruments designed for high-accuracy tissue collection.

  • Suction Technology: Specialized vacuum devices that provide a gentler alternative to traditional scraping.

  • Enhanced Imaging: Integration of real-time monitoring to ensure the total removal of targeted tissue.

  • Pelvic Ultrasound: To visualize the uterine lining and identify areas of thickening or retained tissue.

  • Blood Tests: Assessment of overall health and screening for pregnancy or infection markers.

  • Physical Examination: A comprehensive pelvic exam to evaluate the cervix and uterine position.

  • ECG and Chest X-ray: Standard pre-operative checks to ensure safety under anesthesia.

  • Accurate Diagnosis: Provides clear evidence for treating conditions like polyps or precancerous thickening.

  • Infection Prevention: Eliminates retained tissue that could lead to severe pelvic inflammatory issues.

  • Hemorrhage Control: Effectively stops excessive bleeding caused by incomplete miscarriages or thick linings.

  • Rapid Results: Offers immediate therapeutic relief for many patients suffering from acute uterine issues.

  • High Success Rates: A well-established procedure with high technical success and low complication rates.

  • Rapid Recovery: Most individuals can return to their home within a few hours of the procedure.

  • Short Downtime: Regular activities can typically be resumed within one to two days.

  • Post-Operative Monitoring: Mild cramping and light spotting are monitored for up to two weeks as part of normal healing.

  • Restored Health: Immediate improvement in symptoms such as heavy bleeding or pelvic discomfort.

Hormone Replacement Therapy (HRT)

Hormone Replacement Therapy (HRT) is a medical treatment used to augment or replace the body’s natural hormones when levels decline or become imbalanced. In 2026, HRT remains a cornerstone of care for managing menopausal symptoms in women, age-related androgen decline in men, and gender-affirming transitions.

  • To relieve menopausal symptoms such as hot flashes, night sweats, and vaginal dryness.

  • If you are experiencing bone density loss (osteoporosis) related to hormonal decline.

  • For men with clinical hypogonadism seeking to improve energy, libido, muscle mass, and mood.

  • When seeking gender-affirming care to align physical characteristics with gender identity.

  • If started within the "window of opportunity"—typically within 10 years of menopause onset or before age 60.

  • Systemic Therapy: Hormones that circulate through the entire bloodstream via oral tablets, transdermal patches, or topical gels.

  • Localized Therapy: Targeted relief for vaginal symptoms using creams or rings with minimal systemic absorption.

  • Injections: Long-acting delivery where hormones are injected directly into the muscle.

  • Pellet Implantation: Small pellets implanted under the skin that release a steady dose over several months.

  • Bioidentical Hormones: Use of substances chemically identical to those naturally produced by the human body.

  • Individualized Dosing: Protocols are tailored based on the specific hormone deficiencies and patient goals.

  • Application: Depending on the method, patients may take a daily pill, apply a gel, or change a patch every few days.

  • Combination Therapy: For women with a uterus, progesterone is administered alongside estrogen to protect the uterine lining.

  • Estrogen-Only Therapy: Reserved typically for patients who have undergone a hysterectomy.

  • Surgical Implantation: For pellets, a small incision is made (usually in the hip area) to place the hormone pellets under the skin.

  • Undergo a comprehensive "risk-benefit" analysis based on age and health history.

  • Discuss family history of blood clots, stroke, or hormone-sensitive cancers.

  • Identify the most suitable delivery method (oral vs. transdermal) to minimize specific risks like thrombosis.

  • Establish baseline symptom tracking to measure the effectiveness of the treatment.

  • Ensure no undiagnosed vaginal bleeding or active liver disease is present.

  • Blood Hormone Panels: To measure current levels of estrogen, progesterone, or testosterone.

  • Bone Density Scan (DEXA): To assess the baseline health of the skeletal system.

  • Mammogram/Pelvic Exam: To rule out pre-existing hormone-sensitive conditions.

  • Liver Function Tests: To ensure the body can safely process systemic hormones.

  • Blood Pressure and Lipid Profile: To evaluate cardiovascular baseline before starting therapy.

  • Experience a significant reduction in vasomotor symptoms and improved sleep quality.

  • Attend regular clinical follow-ups and blood tests to ensure dosage remains effective and safe.

  • Monitor for common adjustment effects such as breast tenderness, bloating, or headaches.

  • Maintain regular screenings for breast and endometrial health as recommended by your provider.

  • Benefit from long-term protective effects against bone fractures.

  • Effectively manages the physical and emotional transitions associated with hormonal shifts.

  • Reduces the long-term risk of osteoporosis and associated bone fractures.

  • Enhances quality of life by restoring libido, energy levels, and mood stability.

  • Offers protective cardiovascular and cognitive benefits for specific patient populations.

  • Provides highly customizable delivery options to fit different lifestyles and risk profiles.

Normal Delivery
Normal Delivery

Revisional bariatric surgery is a specialized procedure performed on patients who have already undergone a primary weight-loss surgery but require a second operation. This may be due to medical complications, insufficient weight loss, or significant weight regain. Because of existing scar tissue and altered anatomy, these procedures are more complex and carry higher risks than initial weight-loss surgeries.

  • Inadequate Weight Loss or Regain: If the initial stomach pouch has stretched over time or the body has adapted to the metabolic changes of the first surgery.

  • Severe Acid Reflux (GERD): Persistent or worsening reflux that does not respond to medication, frequently occurring after a gastric sleeve procedure.

  • Mechanical Complications: Issues such as a "slipped" gastric band, a staple line leak, or a narrowing (stricture) of a previous surgical connection.

  • Chronic Ulcers or "Dumping Syndrome": Persistent digestive issues following a bypass that cannot be managed through dietary changes alone.

  • Nutritional Malabsorption: Severe deficiencies in vitamins or protein that remain uncontrolled despite high-dose supplementation.

  • Sleeve to Bypass Conversion: Converting a gastric sleeve into a Roux-en-Y gastric bypass. This is highly effective for treating severe reflux and triggering further weight loss.

  • Gastric Band Conversion: Removing a "Lap-Band" and converting the anatomy into either a sleeve or a bypass, often performed in a single or two-stage process.

  • Bypass Revision (Stoma Tightening): For a stretched gastric bypass, a surgeon may "re-tighten" the connection (stoma) to restore the feeling of fullness.

  • Intestinal Lengthening: Adjusting the "Roux" limb to increase the bypassed section of the intestine, thereby increasing calorie malabsorption.

  • Sleeve Re-Sleeving: Trimming a previously stretched gastric sleeve to restore its original narrow, restrictive shape.

  • Anesthesia: The surgery is performed under general anesthesia and typically takes between 2 to 4 hours due to the precision required.

  • Surgical Approach: Almost always performed laparoscopically or robotically to navigate through previous scar tissue with high-definition visualization and accuracy.

  • Managing Adhesions: The surgeon must carefully separate internal scarring (adhesions) from previous operations before the new revision can begin.

  • Stapling and Joins: New surgical joins are created using specialized stapling instruments designed for thicker or scarred tissue.

  • Leak Testing: Extensive intra-operative testing is performed to ensure all new connections are watertight and airtight before finishing.

  • Anatomy Mapping: Extensive imaging is required to visualize the current state of the stomach and intestines before entering the operating room.

  • Nutritional Optimization: Correcting any existing vitamin deficiencies through intensive supplementation prior to surgery.

  • Psychological Assessment: A thorough review to ensure the patient is prepared for the "reset" in dietary habits and lifestyle expectations.

  • Smoking Cessation: Patients must stop smoking at least 6 to 8 weeks before surgery, as nicotine significantly increases the risk of staple line leaks in scarred tissue.

  • Weight Management: Following a specific pre-operative diet to reduce liver size and improve surgical access.

  • Upper Endoscopy (EGD): Inserting a camera into the stomach to inspect the pouch and check for ulcers, inflammation, or stretching.

  • Barium Swallow (UGI Series): A specialized X-ray where the patient swallows contrast liquid to show the exact size and flow of the current anatomy.

  • Abdominal CT Scan: To provide a 3D view of the internal organs and identify any hidden hernias or mechanical issues.

  • Comprehensive Blood Panels: Detailed analysis of iron, B12, Vitamin D, and protein levels to establish a baseline.

  • Hospital Stay: Usually involves 2 to 3 nights of close monitoring to ensure the new surgical joins are healing correctly.

  • Dietary Reset: Patients must return to a "Phase 1" clear liquid diet and progress slowly through pureed and soft foods over a 4–6 week period.

  • Slower Weight Loss: It is important to note that weight loss after a revision is typically slower and less dramatic than after the first surgery.

  • Lifelong Monitoring: Regular follow-up appointments and blood tests are essential to monitor for malabsorption and nutritional health.

  • Activity Restrictions: Light walking is encouraged immediately, but heavy lifting and core-straining exercises are restricted for 6 weeks.

  • Resolves Chronic Pain and Reflux: Provides immediate relief for patients suffering from the mechanical failures or side effects of a primary surgery.

  • Second Chance for Health: Allows patients who did not reach their goals to restart their weight-loss journey with a more powerful metabolic tool.

  • Precision Technology: The use of robotic platforms allows surgeons to operate safely in "hostile" abdomens filled with previous scar tissue.

  • Customized Anatomy: Every revision is tailored specifically to the patient’s existing anatomy, ensuring the most effective solution for their unique situation.

  • Prevents Long-Term Damage: Addressing issues like chronic ulcers or severe reflux prevents permanent damage to the esophagus and digestive tract.

Surgical Delivery
Surgical Delivery

A surgical delivery, commonly known as a C-section (Caesarean Section), is the delivery of a baby through surgical incisions made in the mother's abdomen and uterus. This procedure is performed when a vaginal delivery is considered unsafe or impossible for the mother or the baby, ensuring a controlled and secure birth environment.

  • Labor Dystocia: When labor fails to progress because the cervix stops dilating or the baby stops moving down the birth canal.

  • Fetal Distress: If the baby’s heart rate indicates they are not tolerating the stress of labor contractions well.

  • Abnormal Positioning: When the baby is in a breech (feet or bottom first) or transverse (sideways) position.

  • Placental Issues: Conditions such as Placenta Previa (where the placenta covers the cervix) or placental abruption.

  • Multiple Gestation: In the case of twins or triplets, particularly if the first baby is not in a head-down position.

  • Previous C-section: While many are candidates for a VBAC (Vaginal Birth After Caesarean), a repeat surgical delivery is often planned for safety.

  • Anesthesia: The procedure is typically performed under regional anesthesia (spinal or epidural), which numbs the mother from the waist down while allowing her to remain awake.

  • Duration: The total surgery usually takes 45 to 60 minutes, though the baby is typically delivered within the first 10–15 minutes.

  • Abdominal Incision: The surgeon makes a horizontal incision (often called a "bikini cut") just above the pubic hairline to minimize visible scarring.

  • Uterine Opening: A second incision is made in the lower segment of the uterus to reach the baby.

  • Delivery and Placenta: The surgeon manually eases the baby out, suctions the nose and mouth, and cuts the umbilical cord. The placenta is then removed and the uterus is inspected.

  • Closure: The uterus is closed with dissolvable stitches, while the abdominal layers and skin are secured with stitches, staples, or surgical glue.

  • Blood Testing: To determine blood type and hemoglobin levels in case a transfusion is required during the procedure.

  • Fasting: If the C-section is planned, you must follow strict "nothing by mouth" instructions for 8 hours prior to surgery.

  • Fetal Monitoring: Continuous monitoring of the baby's heart rate leading up to the start of the procedure.

  • Abdominal Prep: The surgical site is cleaned and sometimes clipped of hair to reduce the risk of infection.

  • IV Fluids and Catheterization: An intravenous line is started for fluids and medication, and a bladder catheter is inserted to keep the bladder empty and protected during surgery.

  • Ultrasound: To confirm the baby's position, placental location, and estimated fetal weight.

  • Biophysical Profile (BPP): A test that combines fetal heart rate monitoring and ultrasound to check the baby's well-being.

  • Coagulation Profile: To ensure the mother’s blood clots normally before making surgical incisions.

  • Non-Stress Test (NST): To measure the baby's heart rate in response to its own movements.

  • Hospital Stay: The typical stay is 2 to 4 days for monitoring and initial recovery.

  • Pain Management: Incision site pain is managed with prescribed oral medications. Early walking (within 24 hours) is highly encouraged to prevent blood clots.

  • Incision Care: The wound must be kept clean and dry. Any staples or non-dissolvable stitches are usually removed by a healthcare provider after one week.

  • Physical Restrictions: You must avoid heavy lifting (nothing heavier than the baby) and strenuous exercise for at least 6 weeks.

  • Vaginal Bleeding: It is normal to experience vaginal discharge (lochia) for 4–6 weeks as the uterus heals and returns to its original size.

  • Life-Saving Intervention: Provides a rapid and safe alternative when vaginal delivery poses a risk to the life of the mother or child.

  • Controlled Environment: Allows for a scheduled, calm delivery in cases where medical complications are known in advance.

  • Advanced Surgical Techniques: Modern horizontal incisions and suturing methods result in stronger uterine healing and more discreet cosmetic outcomes.

  • Immediate Pediatric Access: Being in an operating room ensures that specialized pediatric teams are immediately available to care for the newborn if needed.

  • Predictable Outcomes: For high-risk pregnancies involving placental issues or multiples, a surgical delivery offers the most predictable path to a healthy birth.

Top Doctors at Continental Hospital, Hyderabad in India

Dr T Rajeshwari Reddy
Gynecologist, Obstetrician
Continental Hospital, Hyderabad
26+years experience

May we help you?

Enter digits only (6-15 digits). We'll add your country code.